September 10, 2009 AsktheBuilder News And Tips

What’s in This Issue?

PEX Tubing vs. Copper Tubing
Rusty Gas Piping
News About Stain Solver
Window Leak
Pocket Door Update
Time is Running Out
Latest Columns and Video

FOLLOW ME ON TWITTER

Friendly Question Reminder!

If you have a question for me, don't hit the Reply button just yet. Go immediately to my web site and type in the keywords about your problem into my Search engine. The search box is at the top of every page of my web site. You could have your answer in seconds if you do this! Please pay attention to all links you see at my web site. The exact products and services you often need are right in front of you, and you might be ignoring them.

I'm in New Hampshire writing this today, but tomorrow I'll be driving towards Cincinnati, OH to do some exterior work on our house there to get it ready to sell. I'll also be monitoring the roofers who will be putting on the new GAF Slateline shingles. Wait until you see the eBooks and videos that I'll be producing about different aspects of the roofing job. Wow!!!

I'll also be shooting a video or two in the newly remodeled master bathroom. I have some cool things to show you in that room. If you live in or around Cincinnati and want to get together one evening at a local establishment, send me an email with "Cincy Visit" in the subject line. I'll then email you with a time and place where we can all have a drink and visit with one another.

If you work for a company that makes or promotes home-improvement products, remember that I actively test as many tools and products as possible sharing the results here in the newsletter.

PEX Tubing vs. Copper Tubing

Jenee Bobbora, a subscriber to this newsletter asked me an interesting question overnight:

"Do you have an opinion on PEX vs. Copper plumbing?  I have to decide ASAP, and my builder tells me that right now they are priced about the same. The PEX carries some extra cost due to the special tools that are needed.

I live in Houston, TX, and it is hot here. I am a bit concerned about my water sitting in plastic pipes but most people I ask say it is better than copper now for a number of reasons. I would love to know your thoughts."

Jenee, I'm a licensed master plumber, and have been one for many years. Installing copper is what I did for over 30 years. It takes lots of time to cut copper tubing, clean the ends, clean the fittings and solder all of that. None of that effort is required for PEX tubing. You run one continuous piece of tubing from a central manifold to the fixture. It takes seconds to crimp on a brass fitting to the PEX tubing.

The PEX should not cost more because of the crimping tool, it should cost less! There's an enormous time savings in labor. What's more, the tools are used on job after job, so the cost of the crimping tool is amortized over many jobs. Add up the cost of an acetylene torch, the B-tank, tubing cutters, etc. and I'll bet a plumber can spend as much for copper tools as he might for the cutter and crimper for PEX.

I have PEX tubing in my New Hampshire home. It's used for both my water lines and my radiant heating system. I love it. Even though I used copper for years in all the jobs I did as a plumber and builder over the years, I'll be using PEX in the new home Kathy and I will build soon. Copper is a wonderful time-tested material, but there have been issues with it and aggressive water. There were also issues with early PEX systems, but I feel those have been solved and that the connections between the PEX and the fittings are now reliable.

Read this about aggressive water.

Rusty Gas Piping

Last year here in New Hampshire, I had a standby generator installed. Next week, I should have a video loaded for you to watch about it. Part of the install included running a new propane gas line to the generator. It was cold at the time and impossible to paint the black iron piping that was used in two locations where the gas-pipe risers come up out of the ground.

The pipes developed a thin coating of rust in the past nine months. It's important to paint exposed black iron pipe because if left alone, the rust will eventually cause a gas leak. All you have to do is look at the exposed threads on some of the pipe. You can clearly see that metal has been cut away at the threads making the pipe thinner at the threads. The rust weakens the piping and if subjected to stress, the pipe can snap at a thin thread where it connects to a fitting.

I used a special Rustoleum primer that's formulated to bond to metal that has lightly rusted. The printing on the small can is so tiny I can't read to see if the paint contains zinc chromate. If it does, that's a very good thing as this material bonds well to rusty metal and prevents rust once you apply the finish coat of paint. I'll be applying the finish paint just before lunch today as soon as it warms up. Be sure you paint any rusty gas piping inside or outside your home.

News About Stain Solver!

If you're a new subscriber, you may not know about Stain Solver. It's a fantastic oxygen-bleach cleaner Kathy and I developed about 13 years ago. In the past year, I decided to really pay attention to the business and make it grow.

I got an email yesterday telling me that the Stain Solver business was nominated for a special grant to help market the business. If I was lucky enough to win, the grant could help me do things that I've always wanted to do.

But I need your help now, meaning right now. To proceed to the judging phase, I have to get as many endorsements as possible. Some companies in this competition have over 1,000. Would you consider voting for me? You have to do a simple registration at this website to vote, but it takes less than a minute or so.

Please go here and read the story. In the left column, you'll see a blue button that says: Endorse this Story Now. But up at the top you'll see a small text link that says Login or Register. You have to register in order to endorse me.  Thanks so much for doing this for me, and wish me good luck!

Window Leak

A friend of mine just discovered a chronic leak beneath a window at his home. The cause of the leak was traced to Tyvek that had been improperly installed. On top of that the window was not flashed properly.

If you're doing a room addition or building a new home, it's mandatory that you invest the time at the website of the window and door manufacturer whose products will be used on your job. Take the time to review the printed installation instructions or any videos they may have posted. You then need to make sure your windows are installed correctly. This means you must inspect the work or pay a professional to do it for you. It's not easy, I know that. But unfortunately you must take some responsibility to ensure the job gets done right.

Pocket Door Update

Recently, I've been telling you about a pocket door I installed in Kathy's new bathroom. These doors are space savers and they can be trouble-free if you use the right hardware and frame. One thing I discovered years ago is the advantage of pre-painting the door before it's installed. As with all doors, it's very important that you paint all surfaces, especially the top and bottom of the door. You can't allow pocket doors to warp. Not painting the top and bottom of the door increases the likelihood of warping as water vapor can enter the end grain of the two vertical stiles of the door.

Time is Running Out

With winter just around the corner, remember that certain projects are temperature sensitive. Read the labels on paint, sealers, etc. and they have a minimum application temperature. Some products also need to cure several hours before the temperature can drop to a certain level. Failure to do this can lead to problems.

Get these projects done now before you bump up against these temperature restrictions. Okay, I don't want to hear from you if you're a gloater who lives in southern Florida or sunny southern California where the temps are nearly always above the limits year round. Blah blah blah...... :-> But if you do email me and get in my grill about your great weather, we'll talk about hurricanes and firestorms instead.

Latest Columns and Video

I took a cool hike to the top of Foss Mountain in New Hampshire on Labor Day.

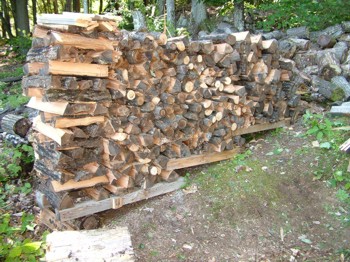
Do you really need a Firewood Rack?

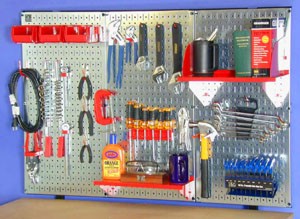
What kind of pegboard should you install?

Do wallpaper and tie dye clothing clash? Look at the photo in this column. Ignore bald spot.

There are different ways to paint a door. Here's one way I do it to get pro results.

AsktheBuilder.com

Roofing Contractors

DEAR TIM: I’m flummoxed trying to chose between all the roofing contractors in my town. I’ve heard nothing but horror stories about poor workmanship, leaks and rip offs. How can I make sure that I hire the best roofing contractor for the money? What are the top things I should look for when I meet with a residential roofing contractor? I feel so vulnerable and can’t afford to make a mistake hiring a slick salesperson. Rebekah H. Quaddick, CT

DEAR REBEKAH: Your anxiety is shared by tens, possibly hundreds, of thousands of other homeowners if my email Inbox is an accurate statistical sampling of the entire country. It’s my belief that this apprehension is rooted in the fact that a vast majority of homeowners don’t really know how roofing systems work, how shingles are installed, the purpose of flashings, etc. because many people have never even stood up on a roof. If you fit this description, you and countless other homeowners don’t know the right questions to ask or know if a roofing contractor is pulling the wool over your eyes in a sales presentation.

This is a fairly normal job site scene when you hire roofing contractors to install a new roof on your home. PHOTO CREDIT:  Tim Carter

This is a fairly normal job site scene when you hire roofing contractors to install a new roof on your home. PHOTO CREDIT: Tim Carter

It’s my belief you have to spend some time educating yourself about roofs before you contact roof contractors to come over and look at your house. In fact, you can really save lots of time if you go to the trouble to select the actual roofing material you intend to use. I would visit a business that sells the roofing materials to roofers that you plan to use. Do this mid-morning or mid-afternoon when they are usually not too busy. Ask to speak with the general manager or the owner. Talk to them about which shingle or roofing product they feel is the best value for the money and would work best on your home. Take photos of your house with you that show the roof.

Once you have zeroed in on the roofing material you intend to use, obtain from the manufacturer the written installation instructions for that exact product. In most cases, these are available in seconds by visiting the manufacturer’s web site. Print the instructions and read them. You’ll discover while reading them that certain accessory materials are required to install the roof correctly. Remember, whomever you hire must do all the things listed in the instructions to ensure you end up with a valid warranty.

This may seem like a boring task, but it’s absolutely necessary. You must understand the system so that you can ask the right questions when you interview the different roofing contractors and possibly any salesmen that may come to your home.

Here’s an example of what you might ask. Many asphalt shingles require felt paper or other approved underlayment be put over the wood sheathing. The instructions often say the type of underlayment. Ask the roofers to describe the layers of material they will install, but don’t mention the underlayment by name. See if they describe it perfectly. You can also ask questions about the nails or fasteners that will be used. The written instructions are very clear as to the type and length of the fasteners.

You may inquire about a roofing contractor license. Your state may require this formality. You can get the answer to this from your local building department or state web site that deals with contractor licensing.

As you start to obtain written estimates, make sure you have the contractors bidding on the same material and the same conditions. If you intend to strip off all the old shingles, be sure all contractors will do this. The same goes for any flashings, vents or other materials on the roof. Communicate to all contractors they all will install new flashings or reuse existing ones if in excellent shape. Each roofing contractor will give you an assessment about the flashings after they come down from the roof. Ask each roofer why they feel the way they do about your roof system. See if they will take photos for you of the existing roof if you can’t get up to look at it yourself.

You need to be sure you get copies of all insurance documentation with each bid. The roofers must have general liability and workman’s compensation insurance. Professional contractors will readily supply you with a certificate of insurance showing that the premiums have been paid in advance.

When you get ready to sign a contract with a roofer, be sure that all the things you discussed are in writing on the contract. Specify in the contract the exact materials and color with a line that says, “ .... all materials shall be installed in accordance with the written instructions as provided for by the manufacturer.”

Do not forward any money to the contractor unless the roofing materials you select are special order. The roofing contractor doesn’t pay his employees in advance, nor does he pay for materials in advance. Since this is the case, why should you forward money? Agree to a time table to make partial payments as the work progresses if necessary.

Even if the materials are custom ordered, most professional roofing contractors have credit accounts at the supply houses. It’s fair for the contractor to ask for the money for the custom materials in advance in the event you decide to not install your roof. You can always decide to buy the materials yourself and have them at the job site should you feel uneasy about advancing money.

It may be a great idea to hire a home inspector to look at the final roof job to ensure it was installed correctly. Put this item in the contract and state that the final payment for the work will not be made until the inspector certifies the roof has been installed correctly.

Column 796

Firewood Rack

DEAR TIM: My husband says we must have a firewood rack, but I say it’s not going to work. The only place available at our home for the firewood storage is a sloping hillside. All the storage racks I’ve seen are made for level ground. Do you have any suggestions for an outdoor firewood rack that might have adjustable legs? Money is really tight right now, and if there is another way to solve this firewood storage rack inexpensively, I’d be grateful. Melissa T., Stowe, VT

DEAR MELISSA: I have to agree with you, as I’ve done pretty exhaustive searches and the photos of each firewood log rack I’ve seen show the rack on level ground or a driveway. That’s not to say firewood racks can’t be modified, but that could take some work.

I’m also sensitive to your budget issue, as undoubtedly are many other homeowners in these challenging financial times. Just this past weekend, I solved my own firewood outdoor storage problem by building three outdoor firewood racks in one using the actual split firewood and salvaged oak 4x6’s that came in a shipping crate. This project only cost me my time, with no out-of-pocket expenses.

A firewood rack may not be necessary if you creatively stack your split firewood.  How NOT to stack firewood is shown in the upper right corner. Previous homeowner just scattered cut links on the ground. PHOTO CREDIT:  Tim Carter

A firewood rack may not be necessary if you creatively stack your split firewood. How NOT to stack firewood is shown in the upper right corner. Previous homeowner just scattered cut links on the ground. PHOTO CREDIT: Tim Carter

Salvaged wood beams for a project like this can often be found at trucking companies or businesses that ship and receive granite, stone or marble. You can also purchase these strong materials at a lumber yard. Be sure to get treated lumber if at all possible.

Frequently homeowners underestimate the weight of firewood, especially if it’s a dense hardwood like oak or locust. This is why you frequently see the firewood rack glamor shot with the rack resting on a concrete, brick or blacktop surface. If the rack was placed on soil, the weight of the wood very likely would drive the legs of the rack into wet or damp soil.

The ground surrounding my outdoor fire pit is also sloped like yours. I used 4-foot-long 4x6’s to make level, or nearly level, stacking platforms for my firewood. The advantage to using shorter lengths of the wood beams becomes clear when you see how little you have to lift the downhill end to make it level. Often a medium-sized piece of split wood that is placed perpendicular across the end of the first step of the wood beams is enough height to set the next step of the homemade firewood storage platform.

The primary purpose of the firewood racks I’ve seen is to create support at the ends of the pile and a level surface off the ground so the wood doesn’t contact the soil. The short wood beams in my homemade firewood rack provide plenty of space for air circulation at the base of the pile of wood. I use the actual split firewood at the ends of the pile to provide the necessary support so gravity doesn’t cause the wood to tumble off the pile as it gets higher.

My homemade firewood rack works best with split firewood. I’ve discovered over the years that fires seem to burn best when you throw on pieces of wood that are not too much larger than the diameter of the fat end of a baseball bat. Split wood also dries and cures faster, so you might as well split the wood before you stack it so it’s ready to use when you want to burn it.

I take similar-sized split pieces of firewood and use them at each end of the pile to create a stacked structure that retains the weight of the wood next to it. All you have to do is place the first row of the wood perpendicular across the large flat 4x6’s that are set parallel and spaced about 14 inches on center. This tight spacing allows the beams’ outer edges to be about 18 inches apart. This is typically the ideal length for pieces of firewood. This spacing of the wood beams provides the most amount of stability as you stack the wood.

The next layer of wood at each end of the pile is set perpendicular to the row beneath it. Use three or four pieces of wood at each row, not just two. You’ll discover quickly that this stacking method is very stable. Always stand at the end of the rack and look at the pile as you build it to make sure the wood is always centered over the wood beams. The firewood that is placed between these two end structures can be all stacked the same direction perpendicular to the run of the wood beams.

Once the firewood is stacked, you need to cover it. But you can make a big mistake if you cover it completely with the pile wrapped up like a Christmas present. If you drape a large waterproof cover over the wood pile, you’ll trap water vapor and liquid water in the pile. You just need to cover the top and the top 25 percent of the sides of the wood pile. This allows air to readily pass through the stacked wood to dry it rapidly when it does get slightly wet from a rainstorm.

If you do decide to purchase a firewood rack, be sure you can adequately support the legs. The weight of the firewood can bend the bottom supports of the factory-made firewood racks if they don’t have solid support. Keep in mind that soil strength changes significantly when soil becomes wet. You may think the soil is plenty strong when dry, but after a rainfall your firewood rack and all the wood in it may be scattered on the ground after it collapses.

Column 795

September 1, 2009 AsktheBuilder News And Tips

What’s in This Issue?

Chicago Trip Update
Repointing Mortar
Last Call for the Super Deck Sealer
I Need a Favor From You
Electrical Outlets on a New Tile Backsplash
The Pocket Door in Kathy’s Bath
Speech at Children’s Hospital
Ladies Only

FOLLOW ME ON TWITTER

Friendly Question Reminder!

If you have a question for me, don't hit the Reply button just yet. Go immediately to my web site and type in the keywords about your problem into my Search engine. The search box is at the top of every page of my web site. You could have your answer in seconds if you do this! Please pay attention to all links you see at my web site. The exact products and services you often need are right in front of you, and you might be ignoring them.

Never forget that all past issues of my Newsletters can be found at my website.

I'm back in New Hampshire. The drive back with my son was fantastic, but no matter how you slice it, 15 hours door to door is exhausting. It's 887 miles if you take the shortcut through Vermont on State Route 9 that cuts across the southern part of the state leading you into Keene, NH. Let me warn you now if you go across Vermont Route 9. The line painting on that road is unacceptable. It's very dangerous, and I can't believe the VT DOT has allowed the white shoulder and double yellow line paint to fade as badly as it has. Driving that road at night over Hogback Mountain is an accident waiting to happen. I can only imagine how hard it is to do in a rain at night.

If you're a new subscriber, you're unaware that I shot myself three weeks ago with one of my nail guns. That injury is getting better, although I'm beginning to wonder if I didn't shoot that finish nail into the larger arm bone where it connects to my wrist. Three nights ago, I bumped my wrist onto the wooden arm of a chair at dinner and almost passed out from the sharp pain.

Bottom Line: Be careful around any power tool.

Chicago Trip Update

A few weeks ago, I was in Chicago for just over 26 hours on business. I was able to squeeze in two meetings with three great subscribers. The first night I shared some liquid refreshment with Robert Tingler and Tim Haeussler as we sat outdoors at an Irish Pub next to the Chicago River. We talked about all sorts of things, not the least of which was a neat set of saw horses that Tom has designed. Tom just told me that he's taking my advice and producing great plans for these tools. I hope to have them available for you late September. Wait until you see these sawhorses! Tim talked about his encounter with a faulty step ladder. His advice is to stay off ladders that have worn or broken parts.

The next morning I had breakfast with Hans Perlich. It was fantastic to hear about how he's recreated himself with a cool job of installing LED lights in commercial applications. The bottom line is that I really enjoy meeting subscribers like you. When I travel, I try my best to carve out small slices of time to meet you. There were several other Chicago residents who wanted to meet, but we couldn't match up schedules.

Repointing Mortar

If you have to tuck point mortar joints in a wall, chimney, a horizontal patio, etc. before the snow blows, you may be interested in a very handy tool. It's called the Quickpoint mortar gun. If you've ever used a caulk gun, then you'll understand this tool. It applies brick mortar into cracks faster than you can caulk a crack with a caulk gun - I mean MUCH faster. Tuckpointing the traditional way with a plasterer's hawk and pointing trowel is tedious. This Quickpoint tool is simply amazing. I had this tool in my own hands about a week ago and have never seen anything like it.

You can get the tool with or without an electric drill that powers the auger at the bottom of the hopper. I wish I would have had this tool years ago when I built all my brick patios. I had to use the clumsy mortar bag that's similar to what bakers use to decorate cakes.  You absolutely have to go to this page to see the tool and watch the videos down near the bottom of the page showing a real-time use of the tool. There's no fancy smoke and mirrors editing. You see the real speed of the Quickpoint. This tool gets two hammers up from me!

Last Call for the Super Deck Sealer

In the last newsletter, I mentioned the synthetic-resin deck sealer that has the nanotechnology sunscreen. You wouldn't believe the interest I got from that. Perhaps you were one who emailed me with questions. John Meredith, the president of Saver Systems, agreed to continue the promotion another few weeks telling me in an email, "...we'll make as much sealer as necessary to satisfy your subscribers."

You can't ask for more than that from a company, especially since the general public can't buy this product until next spring! If you're a new subscriber, I saw the actual test panel that showed virtually no color fade from extreme UV testing. But at the same time, all the other national-brand deck sealers failed the test. You can see the actual test photographs here and buy some of this magic sealer now.

I Need a Favor From You

Each issue of this newsletter, I try to share some of the best products and tips in an effort to save you time and money. For example, here's another money-saving tip as we all need to save money now! I want you to call your insurance agent who handles your homeowner's insurance. Confirm with this person that your policy is really a catastrophic loss instrument, not a policy to cover this and that - EVEN THOUGH YOU CAN BUY THE POLICY WITH A LOW DEDUCTIBLE. My feeling is that the deductible limits are teasers that lull you into thinking you can make claims that might be several thousand dollars. They are also, in my opinion, high-profit centers for the insurance companies.

The truth is that there are unwritten rules the insurance companies use that if you make X number of claims in Y time frame, you get cancelled. If you get cancelled, you have to get an insurance policy in the secondary market at a much higher annual premium. My experience has been that they don't tell you up-front *not* to use your policy - except for catastrophic losses.

To SAVE money, raise your deductible limit to the highest amount so you lower your premium. You only want to use your policy in the event of a major catastrophic loss. Don't believe me? Then ask your agent to put in WRITING exactly how many claims, and what the dollar amounts can be, that you can have in each calendar year BEFORE you get cancelled.

Here's what I would love from you if possible. I know you very likely have a mailing list. I get put on many friend's list where I see an email going out to 10, 20 or even 50 friends or coworkers. Is it possible for you to forward this newsletter to your own friends list, tell them why you like the newsletter and ask that they consider subscribing?

I ask this for a simple reason: Since I don't actively sell ads in this newsletter, I need constant growth in the subscriber base. As you can imagine, I can't send this newsletter out for free. I try to recapture that expense by sending traffic to my web site. The occasional Stain Solver sale promotions also help cover the cost.

If you can help me add new subscribers, I would greatly appreciate it.

Electrical Outlets on a New Tile Backsplash

Joann Lewis of Jacksonville, NC wrote to me:

"I have installed a tile backsplash with six outlets that I need to tile around. I was told they need to be pulled out so they sit on top on the tile. Can I do this myself, and how do I do it?"

Joann, you bet the outlets need to be brought out to the same plane as the surface of the wall tile. When you remove the cover plate from an outlet or switch, you normally see little square or round ears that touch the electrical box or the wallboard or plaster. The tile needs to be cut so that it extends under these ears. You simply unscrew the screws that hold the outlets to the box just enough that you can get the tile under the ears. After the tile mastic dries, tighten the screws.

The Pocket Door in Kathy's Bath

One of the tasks in my recent bathroom remodeling project was to install a new pocket door for Kathy's closet. You may think this in no big deal, but what if I told you that on one side of the pocket was an existing wall in the bedroom that I absolutely didn't want to demolish. I had access to the other side of this wall as part of the bathroom remodeling.

Using my pocket-door frame of choice, I was able to remove the wall studs in this wall and install the pocket-door frame with no harm to the drywall. I did have two small drywall screws to spackle over where the thin pocket-door stud connects to the top frame.

I tell you this story simply to let you know in certain situations you can install a pocket door in an existing wall with minimum disruption. When I showed the photo of the completed door to Meghan, my oldest daughter, after arriving back here in New Hampshire, she couldn't believe the closet door was a pocket door. She was well aware the door would have to slide into the wall behind Kathy's nightstand.  In about a month, I'll show you this door and the completed bathroom in a special video. I didn't have time to tape the video before I came back to New Hampshire.

Speech at Children's Hospital

I've been hired to give a speech about how doctors can utilize the Internet to help build their practices and connect better with their patients. This speech will happen the last week of September. I mention this so that you're aware I do public speaking on Internet topics as well as general motivation. If your company or group is looking for a speaker, just contact me and I can tell you if I'm available. I guarantee you that you'll discover some things about the Internet and email marketing that you'll simply not believe.

Ladies ONLY

I have two things I want to share here. Every now and then I wish I could be a woman. Ninety-nine percent of the time that feeling overwhelms me when I see how much closer the women's tee is to the hole on the golf course. The other times it happens when I see beautiful things that women wear. Yesterday, I was strolling around the Meredith, NH Fine Arts and Craft Fair and ran into a gold and silversmith, Thomas Kuhner. The jewelry he makes himself blew me away. The pierced earrings and necklaces were to die for. Gentlemen, if you're reading this, you better visit his web site and select something for your main flame. If you're a woman reading this, wait until you see some of the pierced earrings that are exact copies of flowers.

This is a perfect segue to a very funny related video. Each time I watch this video, I laugh out loud. You may have to watch it twice to get all the lines. It's hilarious.

AsktheBuilder.com

Pegboard

DEAR TIM: Pegboard used to hang in my father’s garage. However, the pegboard hooks would always pull out of the board when you grabbed a tool. Are there different pegboards that eliminate this pesky problem? Do you use any handy pegboard accessories in your workshop? I’m getting ready to install pegboard and want to get one that lasts a long time and looks great at the same time. What else can you share about pegboard storage? Sam T., Vienna, VA

DEAR SAM: I have crisp memories of my own father’s wood pegboard that hung in his tiny storage room under our front porch. He had hooks for pegboard that also pulled away from the board just as you describe. I remember him installing new hooks that had tiny retention clips that helped hold each pegboard hook tightly to the surface. But even these hooks failed over time enlarging the holes in the wood material.

Metal pegboard will absolutely solve the problem of hooks that move if you purchase one that has pegboard hooks that lock into position. I have used this system in my old home and am about to install it in my new house because it’s performed so well. There are plenty of pegboard systems out there, and with little effort you’ll discover plastic pegboard and steel pegboard as well as the standard wood pegboard made from wood fibers and glue.

This pegboard is doing a good job of keeping tools organized and off the workbench. PHOTO CREDIT:  Tim Carter

This pegboard is doing a good job of keeping tools organized and off the workbench. PHOTO CREDIT: Tim Carter

What I like about metal pegboard is its ability to create a striking pegboard display. The brand I use comes in a variety of colors that have a glossy powder coating. The vibrant colors allow you to theme your workshop or garage. Every color in the rainbow is available, as well as white, black and galvanized metal for that industrial look. If you choose this pegboard system, your friends and neighbors will be insanely jealous. I can say this with confidence as every person who’s seen my metal pegboard has commented on it.

When it comes to accessories, there is nearly an endless variety. You can get pegboard bins, a pegboard shelf that has a built-in paper-towel holder, other pegboard shelving, and very cool pegboard-organization hooks made for special tools. Believe me, the manufacturers have thought of just about every hand tool that needs to be stored, including gardening tools, and have made hooks that fit the tools perfectly.

I’m a big fan of the special accessories made for groups of tools. For example, my metal pegboard system has special holders that work great for regular screwdrivers, phillips screwdrivers or nut drivers.

Special hooks are made for every imaginable hand tool and even some power tools like a corded or cordless drill. What’s very cool about the metal system I have is that you can convert your wood pegboard to the metal pegboard but still keep all your old pegboard hooks. You can get the metal pegboard that has the regular spacing with the traditional round holes as well as the newer sleek slots for the hooks that will not pull out of the board.

Not too long ago, I got some very interesting magnets made for metal pegboard. These magnets allowed you to place tools just about anywhere on the metal pegboard. If the tool you want to hang has steel or iron in it, it immediately is held to the wall by the magnet. This works only with steel pegboard that allows the magnet to bond to the board.

There’s not a doubt in my mind that my metal pegboard system can last several generations. My son and daughters can use it if they want, as you can remove the panels from the walls in my garage and workshop in minutes. The entire system can be moved to another house or location in minutes. Wood pegboard is probably more affordable, but I can tell you that my brightly colored metal pegboard really gets me in a good mood when I’m in my garage and workshop.

When you first install pegboard, it helps to lay out the tools you want to store on the floor in the manner you want them on the wall. This planning is helpful so that you know how much pegboard to buy.

I always try to sort tools by the type and especially for which ones I use most frequently. The high-use tools need to be placed on the wall in positions where they are easiest to reach. Try not to cram tools next to one another making it hard to grab them.

What I really like about the metal pegboard I use is that it will take both the sleek hooks that fit into the vertical slots as well as standard round hooks meant for wood pegboard. If you have an older hook accessory for your wood pegboard, it can be used right alongside the newer hooks.

Column 794

Home Wallpaper

Home Wallpaper - Tim brushing wallpaper
DEAR TIM: Does home wallpaper that I see differ much from the products I see at paint stores and specialty wallpaper stores? The wallpaper for my home needs to be fairly durable and washable because my kids will surely get their hands on it.

What can you tell me about home wallpaper borders? Is there a special technique one employs to install these? If you can share any mission-critical wallpaper installation tips, I would sincerely appreciate it. Sheila V., Clearwater, FL

DEAR SHEILA: Wallpaper for the home is probably one of the smartest decorating things you can do to add flare to a room. The colors and patterns in wallpaper can really go a long way to create a mood that’s hard to achieve using just paint and other decorating accessories.

You may find it hard to believe, but there can be a vast difference in quality with home wallpapers. Low-quality wallpapers are difficult to handle and hang once the glue has been activated on them.

Looking at a roll of wallpaper and trying to determine if it’s a quality product is very hard. When in doubt, always visit a store that just sells wallpaper. Make it a point to talk with the manager or owner.

CLICK HERE to get FREE & FAST BIDS from local wallpaper hangers who can install your Home Wallpaper in case you're getting cold feet.

If they have been in business for years, they’ll be able to show you high-quality paper as well as some economy lines. There are many things that affect the price of wallpaper besides the actual paper.

My wife selected a high-quality wallpaper for our dining room about eight years ago. I’ve hung countless rolls of wallpaper in my life, as it’s a job I love to do.

As soon as I began to hang the second sheet, I could see why it was a great paper. The matching of the pattern was superb, and the wallpaper was very stable on the wall. Once dry, the seams were invisible.

Just about every wallpaper for homes that you’ll look at will be vinyl coated. This crystal-clear coating is very forgiving when it comes to washing off dirt and smudges.

Be sure to talk to the wallpaper store manager about clear vinyl coatings. The gloss on these coatings is very slight, so imperfections beneath the wallpaper don’t stand out like beacons.

Home wallpaper borders are a very interesting wallpaper accessory. Some borders are made to match papers that have a simple and subtle pattern. You can use borders only in a room that has painted walls if you choose.

Just A Few Tools

Let's get started with the tools. Fortunately, you don't need many tools to wallpaper.

Here's a list that will get you going on this job:

  • retractable razor knife with snap-off blades
  • 4.5 or 6-inch drywall taping knife
  • smoothing brush or plastic smoother
  • 4-foot level
  • grout sponge
  • measuring tape
  • paint roller & pan
  • paint brush

Click the Image Below to get all, or some, of the tools now:

Wallpaper Tools List

CLICK HERE to get all the tools I recommend in one place. It's easy and fast.

For the most part, wallpaper borders are fairly easy to install. Most of them are trimmed along the top edge, so you just butt them up against the ceiling.

Your only challenge is wrapping a border around an inside corner. Professionals will create a cut seam in corners to prevent the unsightly shrinkage issue where the paper pulls out from the corner.

As you approach an inside corner, wrap the border around the corner pushing it tightly into the corner. Use the razor knife to cut a vertical line one-quarter inch away from the corner.

Make sure the border is still tight in the corner. Slide the cut border piece over the small tab of border making the cut edge dive into the corner. It should look perfect.

CLICK HERE to get FREE & FAST BIDS from local wallpaper hangers who can install your Home Wallpaper in case you're getting cold feet.

If you’re installing a home wallpaper border on top of a wallpaper that’s vinyl coated, you must use a special vinyl-to-vinyl adhesive. These are special glues that will bond the border to the coated wallpaper. These are not required if you apply a border to a painted wall.

Any wall that’s to receive a wallpaper border or wallpaper should be primed with a special paint. This paint prevents the wallpaper glue from penetrating through to the drywall paper.

An added benefit to using these special wallpaper primers is the added work time you get as you hang the paper. The glue doesn’t set as fast allowing you plenty of time to position the paper as you trim it. I always use these magical paints.

Wallpaper Videos

Watch these videos to get an idea of what you're up against. You can do this job since it's a small room and there's not much to cut around.


If you’ve never hung wallpaper before, I highly recommend you practicing in a closet. This sounds crazy, but you’ll discover how to trim paper at the ceiling and floor, as well as what to do at inside corners.

One of the most important things you need to do with wallpaper and borders is to allow them to relax just after you activate the glue. The paper expands after the glue is wet. If you apply the paper immediately after activating the glue, you can end up with countless blisters and bubbles that will not come out at a later date.

It only takes about five minutes for the paper to relax and expand. Be sure to book it after you activate the glue. This means fold the glue side of the paper back onto itself. Don’t worry, you’ll be able to peel the paper apart. This booking ensures the glue doesn’t air dry as the paper relaxes.

I prefer to use gel-type paste activators rather than water to activate pre-pasted papers. A paint roller is a great tool to use to apply the activator. When the wallpaper is first installed, there will be a bumpy appearance even though you’ve smoothed it with a wallpaper brush.

Don’t freak out if it looks slightly bumpy. Those bumps will completely disappear within 24 hours as the water leaves the glue.

CLICK HERE to get FREE & FAST BIDS from local wallpaper hangers who can install your Home Wallpaper in case you're getting cold feet.

Column 793

Roof Repair Seattle

Roof repairs in Seattle, WA, or any other city in the USA, are not much different. Depending on the roofing material and the slope of the roof, the average homeowner or businessperson probably can’t do the roofing-repair work. Although the average repair is not necessarily hard work, it requires an understanding of how the different materials work and interact with the other things on roofs such as skylights, plumbing vent pipes, ventilation fans etc.

Rubber roof repair is almost always best left to a professional. The solvents and chemicals used to bond different pieces of rubber together can be a little tricky to work with. Metal roof repair is absolutely a job for a professional. I can’t think of one homeowner I know that could possibly have the tools and skills to make a metal roof leakfree!

Roof flashing repair is typically the job that has to be done. In my experience, I’ve determined that over 90% of roof leaks happen at flashings. A flashing is a transitional roofing material. It connects the roofing to something that’s not a roof.

For example, you need a flashing where a plumbing vent pipe pokes through a roof. It needs to be laced correctly in with the roofing materials to stop leaks. You’ll find flashings around chimneys, skylights, vent housings, etc.

What virtually every homeowner or business owner wants is a real professional roofer to do the work. It’s not as hard to find one as you might think, but the traditional methods of locating them can’t always ensure you’ll get a pro.

I’ve discovered that it really helps to get educated about the roofing materials, and ask questions of the roofers to see if they know the answers. It’s also important to have them supply all insurance documentation as well as solid references.

Years ago, I developed a systematic checklist that homeowners can use to help them select the pro roofer. Inside the checklist are four videos that show you the real secret on how to locate the names of the real professionals. That’s really what you want - you want the names of the roofers to call who will do your roof repair right the first time!

August 18, 2009 AsktheBuilder News And Tips

What's in This Issue?

Washable Air Filters
Spacking Compound
Extreme Defy Deck Sealer
Husbands and Mermaids
Latest Columns and Videos

FOLLOW ME ON TWITTER

Friendly Question Reminder!

If you have a question for me, don't hit the Reply button just yet. Go immediately to my web site and in the keywords about your problem into my Search engine. The search box is at the top of every page of my web site. You could have your answer in seconds if you do this! Please pay attention to all links you see at my web site. The exact products and services you often need are right in front of you, and you might be ignoring them.

Never forget that all past issues of my Newsletters can be found at my website.

I'm in the final few days of an enormous remodeling project at my home. It was time to update the master bathroom and bedroom. In fact, in just a few minutes, the carpet installers will arrive to put down the bedroom carpet. In the next four days, I need to grout the tile, connect all the plumbing fixtures, hang the wallpaper and install all the mirrors and light fixtures. Whew, I'll be busy! Then I drive with Tristan back to New Hampshire so he can start school next week.

Washable Air Filters

Moments ago, my best friend Richard Anderson called me. In my opinion, he's perhaps the best heating and air-conditioning technician within 100 miles of Cincinnati, OH. Now that we're in peak air-conditioning times, Richard had some great advice. He said that he's going on more service calls where a clogged air filter has caused the interior coil to freeze up. When this happens, you have no air conditioning and possibly a huge mess if the ice thaws and ruins your house or your possessions.

The big problem Richard is seeing are washable air filters where the garden hose pressure is not cleaning them. They look clean, but in reality dirt deep inside the filter is not being removed. If you have a filter like this, you should consider trying a pressure washer. If you don't own one, go to a self car wash and use the one there. Clogged air filters reduce air flow across the interior cooling coil. This makes your unit work harder to cool, and wastes energy.

A Great Spackling Compound

The past week, I've been spackling my share of nail holes. Installing all new woodwork in the bedroom and bathroom was part of the project. In the past I used lightweight spackling. It worked well. But a spackling manufacturer, Crawfords, sent me a quart of product that I thought I could use as a weight-training aid. I've never held a heavier one-quart can! I thought it had lead in it, but my guess is that the product contains massive amounts of powdered limestone.

Anyway, I resisted using it for fear of extra sanding work. I'm here to tell you that this product is the best spackling compound I've ever used. It didn't shrink, it dried quickly and most important, after painting you simply can't see the spackled hole. With the lightweight spackling, I could always see the hole, even after priming the material. The spackling was flush with the wood, but it's texture was different. The Crawford's material is so dense, it matches up well with the density of the wood.

This product was easy to apply and it sanded with no effort. I urge you to try it.

Extreme Defy Deck Sealer

Just after my birthday, it feels great to be 35 again!, I told you about my golf game and lunch with John Meredith, the president and owner of Saver Systems. John had shown me photographs of ultraviolet (UV) light testing of his latest advancement in deck sealers. Nanotechnology chemistry has produced a deck stain that simply doesn't fade at the drastic rate of the other deck sealers on the market. The photo results were stunning.

Anyone can buy this product now in the clear version, as I used it on my boat dock in New Hampshire back in June. But many customers want the deck stain in a color, as did I. The clear is fine, but I really wanted that rich cedar color for my dock. John's cedar tone color is far away his most popular color in his regular line of deck-sealing products. Based on what I saw in the photographs, I begged him to make a batch of Extreme Defy in cedar tone so that you could protect your deck before this winter. With Labor Day just around the corner, it's the perfect time.

John agreed, and the best part is that no one else in the world can buy this tinted deck sealer except for you. It's only available to subscribers of this newsletter. The only problem is that John only made 3,000 gallons. You may think that's a huge amount, but it's not. With his ten-gallon limit per customer requirement, that means you will be in a select group of only 300 people who get to treat their decks with perhaps the best deck sealer in the world. This product will not be available to the general public until the spring of 2010.

Oh, I forgot to mention, John said you can have free shipping! I can't believe he's doing that. I urge you to take a look at the photos of the UV testing. They speak for themselves.

P.S. I don't get one penny from John for mentioning this special pre-release batch of Extreme Defy. My motivation is to get you a great product and to prove to John that my subscribers listen to what I have to say. Show John that's true. Order a few gallons right now and be part of a very select group.

Husbands and Mermaids

Jackie Pitruzzello wrote to me from steamy Huntsville, Alabama:

"I so hope you can help us. We have a driveway that the builder sloped toward the house, so when there are heavy rains, the driveway ponds the water and comes into the garage. We have had two different foundation repair companies look at this problem.

The first wanted to cut out the driveway, install a open drain and have the water come out at a different place through a pop up valve. The second said this probably would not help due to the absence of sloping in the yard. Yes, the ground is almost level on the entire area. If we don't get help soon I'm afraid one of these days when it rains, my husband will find a mermaid and run off with her!"

Here's my advice, Jackie. It's possible that you have a nearly level lot, but I doubt it. I've seen lots that look absolutely flat, but in 50 feet, there is perhaps 12 to 16 inches of fall. To get an open trench drain to work at your garage door, you need about 12 inches of fall.

Contact a remodeling contractor that has a builder's level. This is an optical or laser instrument that can project a level line outdoors. Using a grade pole, you can quickly determine how much fall you have on your lot. Here's a column I wrote about these fantastic tools.

I'll bet you can hire a contractor to do this for you now in this poor economy for less than $50. It takes minutes to set up the instrument and take the reading.

As for worrying about mermaids, I suggest that you mimic one around your home one day and see if your husband even has an interest in these mythical creatures!

Latest Columns and Videos

Want to get pro results when painting an interior door?

Backsplash tile can really set off a countertop.

Marble tile can be a breeze to install if you have a wet saw, good knee pads and patience!

AsktheBuilder.com

Paint Door

DEAR TIM: I have to paint a door. The last time I tried painting a door, it ended up in a disaster. Paint ended up all over the hardware no matter how careful I was. Can you coach me so I know how to paint a door like a professional? What skills and magic do you draw upon to get results that us mere mortals only dream of achieving? It can’t be that hard painting a door, or is it? Cindy B., Palo Alto, CA

DEAR CINDY: I’m just a mortal like you, so don’t think that I have super-human skills. What I do have that you might not have is thousands of hours of painting experience. My guess is that if I went back in time 40 years, you and I would see lots of paint on the hardware of doors I painted, as well as other rookie mistakes. But over time, I’ve developed a system that really works well for me for painting new or existing wood doors. Talk to other painting professionals, and they may have their own way to paint doors.

Long ago, I discovered that I’m a perfectionist in certain areas of construction. I’m the guy that has to have the screw slot perfectly plumb on electrical cover plates. Paint on hardware is simply unacceptable to me, as are the tiny unpainted lines near hardware where paint can’t cover and the brush strokes that don’t match the wood grain of the door. For these reasons, I prefer to remove as much hardware as necessary so it’s simply out of the picture when it comes to painting. This almost always means removing the door from the jamb as well as removing the door hinges.

This door is not in its jamb. Removing it from the opening allows you to achieve true professional results. PHOTO CREDIT:  Kathy Carter

This door is not in its jamb. Removing it from the opening allows you to achieve true professional results. PHOTO CREDIT: Kathy Carter

Removing the door hardware takes a few minutes, but I’ve timed it compared to carefully cutting in with a brush. For me, removing the hardware ends up being faster. No doubt another painter may be able to do just the opposite, so your mileage may vary.

Part of your problem may have been the brush you selected as you prepared to paint the door. I’ve learned the hard way that it really pays to purchase a high-quality brush when painting. What’s more, I’m very partial to using a tapered brush for all interior trim work. These brushes have a chiseled bristle profile instead of the common profile where all the bristles are the same length. You’ll discover that using a tapered brush gives you fantastic control when painting in corners and cutting in fine edges.

There are many tricks you need to know to get professional results, and I’ll cover as many as I can fit into this space. For starters, if you want a smooth finish, the door itself must be smooth before you apply the finish coat. If you’re painting a new wood door, this means the door needs to be sanded after you prime it. Primers tend to have heavy pigments that fill microscopic voids in the wood. Water-base primers will raise the grain of wood doors slightly. Sanding the dry primer with a sanding sponge that has 120 grit abrasive usually will suffice. Be sure to brush away all dust. If you’re sanding a previously painted door in an older home, be very careful. If the door was painted prior to 1967, there is a good chance there might be lead in the paint. Lead dust is highly toxic.

You may be able to get by with one primer coat and one finish coat of paint, but that will only happen on rare occasions. Typically you’ll need three coats to get professional results. The key is to apply thinner coats of paint, not a thick coat that might run or sag.

You can use a roller to apply paint to wide open areas of the door, but I would recommend brushing the paint immediately to give you the look that the paint was brushed on. Some people don’t like the texture created by paint rollers. You’ll have to experiment to see if you like the texture. Be sure to use a roller cover with minimal nap if you decide to do this.

Watch for paint that builds up on the edges of the door. This excess paint can be very problematic when the door hits against the door jamb. If the door was a tight fit, the paint may cause the door to bind. If you hang the door before the paint cures, the paint on the door can stick to the paint on the jamb and you’ll have a huge mess.

Spray painting doors can save enormous amounts of time. There are some fantastic spray-painting tools that give you professional results with a very small learning curve. If you have access to a garage where you can spray the doors all at once, you’ll save hours of time.

The trick is to stand the doors up and tack them together with wood strips at the top of the doors. You want to assemble the doors in a contiguous V-pattern much like the sections on an accordion door. Just be sure you can easily get the spray tool into the inside angle where two doors meet. Setting the doors at a 45-degree angle should give you plenty of clearance.

It only takes minutes to clean the spray-paint tool, so don’t let the cleanup process stop you from trying to use this method. Spraying paint indoors in an occupied home with furniture and finished floors can be problematic. I don’t suggest spraying paint indoors in these situations.

Column 792

Backsplash Tile

DEAR TIM: I want to spice up my bathroom with backsplash tile. I’ve seen a kitchen tile backsplash and loved it. Are backsplash tiles different from other tiles? Can you help me with any backsplash tile ideas as well as do’s and don’ts? I’m especially interested in subway backsplash tile. Mara V., Brookville, IN

DEAR MARA: Two years ago, I installed for my wife a very unique backsplash tile that was part of our major kitchen renovation. The tile consisted of a decorative band of tile that rested on the granite countertops. Above this band of tile, larger tiles that simulated basket weaving filled the gap up to the wall cabinets. Visitors to our kitchen always remark how interesting the backsplash is. I have to admit myself that it’s stunning.

This two-part decorative backsplash tile just needs grout before it makes its debut. PHOTO CREDIT:  Tim Carter

This two-part decorative backsplash tile just needs grout before it makes its debut. PHOTO CREDIT: Tim Carter

The tile for a backsplash is not much different than regular ceramic tile. What’s important, in my opinion, is that it have a durable glaze, especially in areas where it will get wet and soiled. You don’t want to stain the tile with personal hygiene chemicals that might get splashed onto the tile as you use your bathroom. Accidents happen, but a good glazing can prevent permanent damage.

Backsplash tile designs are as abundant as stars in the night sky. All you have to do is go to a specialty tile store to get a feel for the hundreds, if not thousands, of tiles you might use for a backsplash. Your choices can range from standard tile with a regular bullnose finishing tile to custom-made tiles that have your own ideas and colors as part of the tile. In between these two extremes are endless possibilities of tiles that will make your bathroom stand out from the crowd.

It’s interesting that you mentioned subway tile. My wife just selected a subway tile that has beveled edges to use as a wainscot tile in our master bathroom. The tile we used had accessory tiles that we used as a backsplash. It’s a two-part backsplash tile with the bottom tile measuring 3 inches by 6 inches. This tile has a repeating pattern of concentric circles and leaves.

On top of this decorative tile, we placed a tile that mimics crown molding. This tile is only 1 and 1/4 inches high, but it’s 6 inches long. It has a finished top edge that sticks out from the wall nearly three-quarters of an inch. It’s extremely distinctive and makes it look as if the tile were installed in the early 1900’s.

There are countless tips I can offer with respect to installing this tile, but I’m horribly limited on space. Suffice it to say that the wall surface needs to be clean, free of defects and very smooth or flat. The tile you select will determine the mastic you use to attach the tile to the wall. I had to use organic mastic for the decorative tile, but cement thinset to permanently bond the crown-molding tile to the wall.

Be sure to think about how the tile will end. Most tiles do not have glazed edges. The tile manufacturers almost always make special accessory tiles that allow you to terminate the tile so you don’t see an unfinished edge. Be sure you talk about this with the salesperson at the tile store. I always suggest taking in some rough drawings of what you want to do as well as photographs of your current room that will show the tile salesperson the challenges you face. The last thing you want is to discover you can’t get the exact look you have constructed in your mind.

Be aware that to get a great bond, you can’t leave an organic mastic open to the air for a very long time. This is especially true in hot, dry climates. If the mastic starts to develop a skin, the tile will not bond well. You may discover it’s best to apply the mastic to each tile separately rather than spread the mastic on the wall. If you spread the mastic on the wall, keep in mind it works best if you cover it with the tile within ten minutes.

Cement-based thinset works the same way. Once mixed with water, you only have so many minutes to use it. I would only mix as much thinset as you can use and cover with tile in one hour or less.

Be sure to wait one day before you grout the tile. This wait time allows the mastic or thinset to harden. Some backsplash tile require you to create the spacing between tile. You can purchase plastic spacers that create equal gaps, but coins can do the same thing. On my recent backsplash tile job, I used dimes to create the perfect grout line between the crown-molding tile and the decorative band of tile below it.

When setting tile, the mastic or thinset might ooze in between the tiles in case you put too much adhesive on the wall. If this happens, it’s imperative you remove this adhesive from the joint immediately. If you don’t get the adhesive out of the joint, the grout will not be able to penetrate between the tiles.

I use any number of tools to remove excess adhesive from between tiles: a razor blade, toothpicks, or a thin screwdriver. When using metal, work slowly so you don’t mark the tile. Use a damp sponge to remove mastic or thinset residue from the face of the tile.

Column 791