DEAR TIM: Can you educate me on all the different toilet parts and how they work? My mom or dad never took the time to educate me, or if they did, I didn’t listen well. Now that I have my first home, I need to purchase toilet replacement parts and am clueless. My toilet appears to be fairly standard looking with a rectangular tank that rises up from the bowl. Do you think I’ll be able to replace parts easily, or will I have to call a plumber? Money is very tight now, so I’d love to be able to tackle this myself. Steve R., White Plains, NY
DEAR STEVE: I’ve never thought of myself as a Toilet Professor, but being a master plumber as well as a builder, you can bet I’ve put in my fair share of toilets. Most toilets have similar parts, as the function of activating the flush is pretty standard. The parts may look different, but they do the same thing.
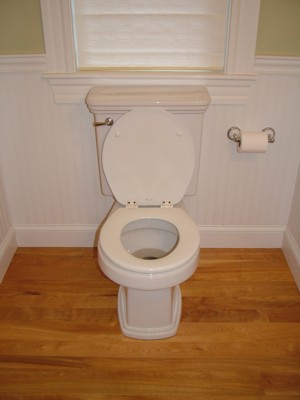
This toilet looks pretty benign, but it has quite a few parts that make it work reliably. PHOTO CREDIT: Tim Carter
For sake of discussion and based upon your description, I’ll be describing a toilet that has a tank that stores water in it for the flush. Commercial toilets don’t typically have tanks. Those toilets use the incoming line pressure of the water supply line to do a direct flush.
Let’s start with the china parts of a toilet. Usually when you purchase a new toilet you get three parts: the bowl, tank and tank lid. The most common ones are made from clay that’s fired in a kiln. The visible parts are coated with a clear glaze that’s very close to the hardness of glass. This glazing is what allows the toilets to be cleaned fairly easily. You should never clean a toilet with an abrasive cleaner as they will scratch the glaze creating a dull appearance.
The toilet bowl has two important aspects that you need to know about. The water enters the bowl through a large hole at the top rear of the bowl. The moving water has two choices of where to go: the small holes in the underside of the bowl rim and the siphon-jet hole at the bottom of the bowl. You’ll have to peer inside the bowl to see these. Use a mirror to see the rim holes in an existing toilet.
A forceful flush happens when the water from the tank rushes quickly into the bowl. Water passing through the syphon-jet hole pushes water out of the bowl into the drain line in the floor. Water that passes through the rim holes is supposed to wash the sides of the bowl.
Water enters your toilet through a shut-off valve that’s connected to a water line that either comes out of a wall or up through a floor. These valves sometimes will not shut off the water to the toilet as sediment builds up inside them. A flexible line pipes water between the valve and the bottom of the toilet tank. I love the new braided lines that you can practically tie in a knot.
Inside the tank you’ll see a menagerie of confusing parts. The two parts that cause the most frustration for homeowners are the fill valve and the flapper valve. The base of the fill valve connects to the flexible water supply line. The flapper valve connects to the giant hole that’s in the bottom of the tank.
In the past 30 years, there’s been an engineering revolution with both valves. Old toilets had a float ball that connected via an arm to the fill valve. You may still have this type. Newer fill valves have the float ride up the center core of the fill valve. These newer valves almost always provide a full-flow fill until the moment the water shuts off. Older valves were plagued with whistling noise as they aged.
The flapper valve is typically a round disk that’s connected to a chain attached at the other end to the flush handle trip lever. When you push down on the handle on the outside of the tank, it lifts up the flapper valve allowing the stored water in the tank to rush into the bowl. It’s that simple!
Believe it or not, you can almost always install a new fill valve without the aid of a plumber. Of course, you’ll have to check your local codes as some cities, for some reason, feel that you’re not able to do it and require a plumber to do it for you. But remember that young plumber once had to replace one of those valves on his own the first time. He was just as nervous and inexperienced as you are.
The flapper valves can be restored with little effort. You can purchase kits that allow you to install a new flapper valve in minutes. Your biggest challenge is turning off the water to the toilet. You may have to shut off the water to the entire house in case the shut-off valve at the toilet won’t behave.
My best advice is to have a plumber waiting in the wings in case you have a problem. Don’t try the repair on Christmas Eve or if it’s the only toilet in the house. If this is your first time, have a garbage can of clean water in waiting. You can always use this water to flush the toilet as you wait for the plumber to come. You just pour the water from a bucket into the bowl quickly to flush the toilet after use.
Column 804