Building Inspector

I was a pretty young pup when I had my first encounter with a building inspector. To be honest, I can’t tell you the exact outcome, but I’m sure everything went well. I don’t ever recall failing a building inspection, but on some of my jobs other subs failed electrical or other inspections because of small issues.

Building inspectors are necessary evils. I hate to put it in that light, but a building inspector with the wrong attitude can be a builder’s worst nightmare. What is that saying about absolute power corrupting? Some inspectors thrive off the power they wield over builders and subcontractors. I would be fascinated to see the psychodemographic analysis data about the psychological profile of most building inspectors. Something tells me it would be close to that of young police officers. Now mind you, I’m not saying all building inspectors and police officers are power freaks.

Building inspector jobs are sought frequently by contractors who used to work in the building industry. My conversations with many indicated they preferred to be around the activity, the sawdust, the mud and the outdoors, but they didn’t want the uncertainty of a paycheck. When you’re a building inspector, you tend to have steady employment and little fear of layoffs. Of course with the huge historic downturn in construction in 2008 and beyond, I’m quite sure several building inspectors at the bottom of the totem pole have lost their jobs.

Depending upon where you live, you’ll deal with a county building inspector or a city building inspector. I had to work with both in Cincinnati, OH. The city building inspectors only had jurisdiction within the city limits. But the county inspector could look at anything in the county. The interesting thing is that they used slightly different codes. Yes, each government body can modify the building code to suit the situation in their area. Imagine being a builder and having to keep all of that straight. You can do something correctly in one area and a mile away it becomes a code violation. Strange but true!

To become a building inspector you have to go through a certain amount of training. There are any number of building inspector certification programs throughout the nation. It’s important that you make sure you get the correct certification that’s recognized by the place you’re trying to get a job.

If you start studying to become a building code inspector be prepared to learn all about soil strength, concrete, reinforcing steel, beams, framing connectors, safety issues, handrails, etc. There are many things in the building code that are quite technical, and it’s really important that you grasp how all these things interact to make a structure that’s safe. That’s the primary purpose of the building code - to ensure a building is safe to occupy and will remain safe for a number of years.

Building inspector training can happen in the classroom to a certain degree, but the real education happens in the field on real job sites. The one thing you can say about many of the sections of the code is that the issues are black and white. Either something passes the code or it doesn’t. There are few gray areas. If you don’t believe me, just grab a copy of the code. Here’s an example: The code gives minimum and maximum dimensions for stair risers and treads. That’s something that’s crisp, can be measured and where there would be little room for argument.

If you decide to become a commercial building inspector, be prepared to study that much harder. The commercial building code is intensely complicated and expansive. Public safety in commercial buildings is paramount. If something goes wrong in a large commercial building that contains thousands of workers, shoppers, visitors, all sorts of bad jujumagumbo can happen.

When you become a building inspector, try to be understanding. What most builders want is an inspector that’s tough but fair. Resist the temptation to cut corners because you happen to like a particular builder. Be very careful of accepting gifts of any kind as that will flip a switch in your brain that makes you feel compelled to go easy on a builder.

Always think of all the people in the future that will occupy the building you’re inspecting. They are counting on you to make sure they’re safe. Never forget that you didn’t pass the code - you just are expected by the public to enforce it. Remember that some builders are like little children, they continually ask for favors just to see when you’ll cave in. Don’t do it. Stay strong and enforce the code.

Column Q&A

Your FREE Newsletter is Activated!

Welcome and Congratulations on activating your Newsletter!

Thanks again for subscribing to my AsktheBuilder.com newsletter. I promised you the Top Five Home-Improvement Tips of All Time and ways to start saving you time and money. Your money saving offer follows these tips.

Top Five Home-Improvement Tips of All Times.

You might be surprised by them. I urge you to print them out and have them handy anytime you are about to do a job or spend money on something around your home:

1. Plans - Yes, you may not think this is sexy, but this is where millions of dollars are wasted each year by homeowners. Perhaps tens of millions of dollars. If you're going to embark on a big project, stop and develop fantastic plans. Make sure your ideas work on paper. Pick out all of the things you want to eliminate the money pit of Allowances. Great plans also eliminate costly change orders. Even building a simple deck requires a great plan. Why? Because you can ensure the deck is large enough to fit all the furniture you want to have on it.

2. Read the Label - When was the last time you really read the product label or the installation instructions? If you goof up this very important step, you can void the warranty of the product, or significantly shorten its useful life. For example, when painting outdoors what does the label say about really cleaning the surface? What does it say about the air temperature? If the paint doesn't chemically cure before the temperature drops to a certain point, the paint can be ruined. What about using the correct adhesive with floor tile? What do the instructions say about the size of the notched trowel? Use the wrong one, and the tile will pop off the floor. How much will that cost to fix?

3. Building Code = Minimum Standards - Don't be fooled by a builder, remodeler or salesperson who says "Your job meets the building code!" Were you proud that you got a 70 percent on your tests when you were in school? That's what it's like when you pass a code inspection. Your project got a 70 percent. The Building Code is a set of MINIMUM Standards. You can always do a job that's better than the code. It will cost more, but usually not much, but it can last twice or three times as long.

4. Hidden Hazards - Older homes are filled with hidden hazards: asbestos, lead, bird and bat excrement, etc. You can get seriously ill or even die from exposure to things you may not even be aware of. Lead can be in clear varnishes in very old homes. Crawling around in a dusty attic can get you extremely ill if you breath in the wrong things. It's bad enough that splinters, power tools and other things can hurt you, but you at least can see many of these things. Always keep in mind that even silica dust from cutting concrete, cement-based backer board and other things is harmful. Wear great protective gear to minimize or eliminate getting poisoned.

5. Do the Math - Always - How many times have you heard, "You'll SAVE Money if you buy ........." Really? When do the savings start? Never forget this: If you have to SPEND money to SAVE money, your savings don't start to happen UNTIL you've recaptured ever penny you spent PLUS any interest you might have received had the money stayed in your savings account. What? You didn't pay for it with SAVED money? You used a credit card and are paying interest on the balance each month? That's Death on a Stick. If you're financing a money-savings installment, you must factor in ALL of the interest you'll pay over the life of the loan. Using borrowed money, you possibly will never save anything. Take the time to really calculate when you'll save money and how much.

SPECIAL ONE TIME OFFER (this is the only time you will see this page):


SALE ON ALL INDOOR CHECKLISTS Indoor Checklists
SPECIAL: $56.00 $22.00
You save: $34.00
Buy It Now

This is an offer only for NEW subscribers to the newsletter, and you'll never see this screen again. So if you want the special deal, you MUST act now.

The Contractor Hiring Guide & Checklists you will instantly receive:

Buy It Now


Do you need more information? Take a look at a sample checklist.

If you are still not sure, check out what others are saying about my checklists:

"We found the checklist very helpful. Using the checklist, we knew what to ask bidders and understood their replies. We knew what to ask for also, since we had informed ourselves. Our project is completed now and we are very pleased with the results.

Thank you for being somewhere to go for information."

- Sue A., Tacoma, WA


"Thank you for sending me the Checklist. I read through the document, and it's quite thorough. I know that this will be a useful and valuable document for me."

- Fredia J., Ft. Washington, MD


After hearing countless heartbreaking and mind-wrenching stories people shared about being taken advantage of, I decided to create these checklists to put an end to it. This collection of checklists will help you make the best possible decisions. You will find numerous insider tips, industry secrets, and more - all in an effort to prevent you from losing your VALUABLE time and money.

To take advantage of this SAVINGS and to receive the Outdoor Checklists, please act now. Click on the button below.

Buy It Now


Click here to catch up and read past copies of my newsletters.

March 10, 2009 AsktheBuilder News And Tips

What’s in This Issue?

FEED BACK
RENEWABLE FOAM INSULATION
NEW ZEALAND, AU AND USA SHED COMMENTS
FANTASTIC INTERIOR DOORS
TANKLESS HEATERS
HABITAT'S RESTORE PROGRAM
SPECIAL DECK GRATING
RIDGID MICROEXPLORER DIGITAL INSPECTION CAMERA
CROWN MOLDING
INSULATION DVD


FOLLOW ME ON TWITTER


You better grab a cup of bean juice or some other comfort liquid. This newsletter is packed with information and tips. Strap yourself in.


FEEDBACK

Last week I mentioned how after I hit the Send button, I prepare for the incoming replies. Most of them are positive comments, but just as you might expect, I get my fair share of negative ones. Most of the time the person is complaining about not wanting to hear about my personal life. Last week I got an email from a man who didn't want to hear about my slippers - he just wanted hard-core home-improvement tips. I so wanted to reply to him mentioning that he gets the newsletter *for free*. But I restrained myself.

Needless to say, reading the negative comments really gives you a peek inside the heads of some people. If you're a person who works eight hours a day in a Customer Service position and fields negative calls like that, all I can say is God Bless You!


RENEWABLE FOAM INSULATION

I'm getting ready to start writing the specifications for my new home here in New Hampshire. The builder I'm using recently switched from using fiberglass to spray foam. I'm attracted to spray foam for a number of reasons. I used it many years ago for a customer, and it was an amazing product. I may have been one of the first builders in Cincinnati, OH, to use foam on a residential job.

In case you're wondering, I'm using a local builder because I want to enjoy the process and walk through the house each day taking photos and taping videos. I don't want to be involved in managing the subs and ordering materials and stressing out. But I digress.

So right now I'm trying to be as green as possible where it really makes sense. There's a tremendous amount of greenwashing going on right now where companies are saying their products are *green*, when in my opinion they look like the identical product from three years ago.

It appears the foam I may use is indeed a really green product and quite good. Icynene is sporting a new foam insulation that has my attention. It doesn't contain hydro-fluorocarbons (HFCs) and Polybrominated diphenyl ethers (PBDEs). Yikes! That was scary just typing those words.

This new Icynene product has castor oil in it with no chemical additives. Castor crops have all sorts of other benefits, and they don't compete with food crops. I'm going to get some testing information, and I'm going to visit a few job sites where it's being installed. I'll keep you posted. Read more about this green foam insulation.


NEW ZEALAND, AU AND USA SHED COMMENTS

Last week, I mentioned a great coffee-table book about sheds. I know from my own website records that sheds are popular. You may have been one of the 2,300 in just the past eight days to click to get more information about that book. However, I had the pleasure to hear from my friend Graham Green in New Zealand and Caelum Brice who lives in Australia as well. Sheds are BIG down under indeed! Kevin Allen also piped up.

Graham said,

"I don't know if you've ever visited the north of England but up in the grim north when a young man has impending marriage, his thoughts turn to shed.

The bride to be and her mates will occupy themselves with frippery whilst the men get the shed sorted out. This is so that he'll always have somewhere to go.

Here in New Zealand, we have a monthly glossy magazine with pretty high production values called: The Shed.

When you consider all of the things that have been invented in sheds and, indeed, in Britain are still manufactured in sheds I think that there is a case for state shed sponsorship. This idea is not very far from the English principle of providing city dwellers with 'an allotment' for growing vegetables. That started during the second World War and is going strong today. There are long waiting lists for council allotments.

So Tim, I hope we are going to get a design and build blog for your shed. I have but one suggestion for the mix. I put stuff called D-C Fix transparent window covering on my shed windows for a little bit of privacy. It comes in an ever increasing range of styles and densities and is just the job if you want a quick repair for a cracked pane or something to take the sting out of direct sunlight."

Graham, I'll for sure chronicle the construction of my shed. No worries there. You may get some interesting input from some of my subscribers about your *frippery* comment. I'll be sure to collect them and send along to you. Yikes!

Caelum wrote, "I've been getting your newsletters for a year or so and although they're US-based often find something interesting in them. Your link to Designer/Elegant Sheds reminded me of a great series of books about Australian sheds called Blokes and Sheds. It's really the opposite of "designer sheds", but well worth a look. The author/photographer Mark Thompson delves into the Australian backyard to find examples of blokes in their natural habitats! His other books are also worth checking out."

Kevin Allen lives here in the USA and wrote, "About sheds, I built mine myself and am very happy with it. I was stunned to see that 10' x 12' shed kits were selling for about $1,600 in this area. I went to the privately owned lumberyard that supplied me with the building materials for my new house. They had 5 trusses built exactly to my specs that were the skeleton of the shed. They cost about $50 total and no other 2" x 4"'s were needed for the walls. I had the other supplies (siding, shingle, nails, decking, etc.) delivered for no charge and ended up with a 12' x 12' shed for less money than the national stores wanted. My shed also has 12" overhang which keeps the rain out of the way and off the siding. I haven't seen that in the stores either.

My message to all is when you want to start a project, go to your local independent lumberyard for a competitive quote. In the end you may save money and get better quality materials like I did.

Thanks and keep doin' what you're doin'."

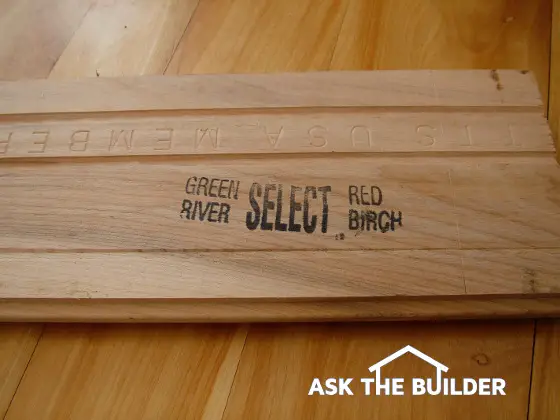
Kevin, I couldn't agree more. ALWAYS visit your local lumberyard. They always have more lumber than the home centers, usually better grades, more selection and lots of knowledgeable staff ready to give free advice.


FANTASTIC INTERIOR DOORS

Money may be very tight for you right now, but you want to desperately update the inside of your home. If you're like many, you might tend to overlook the interior doors of your home. Doors and the trim around them can really set the mood in a room.

I had the good fortune years ago to discover an amazing company in Canada that makes the best interior wood doors I've seen and installed. They also make exterior doors. There may be better ones, but I've not yet been introduced to them. Connie and Paul work together with other employees at Byrcon Wood Products to produce doors that will last generations.

Just about every interior door at my Cincinnati home is a gorgeous solid poplar door made by Paul and Connie. Check out this column to see a close up of one of my doors.

They shipped them right to my doorstep. It didn't matter if I wanted just one door or thirty. The doors are shipped with the hinge mortises complete, even if you want the traditional square mortise for square-butt hinges. That's what I have, as I wanted the traditional Victorian look in my home. Byrcon will be supplying the interior doors for my new home. Of that you can be quite sure.

When you see the number of styles of doors you can get from them, you'll be starry eyed. I'm a finish carpenter, and I can't begin to tell you how pleased I am with the fit and finish of my doors. Go visit Byrcon Wood Products web site and see what you think.


TANKLESS HEATERS

Alan is a subscriber to the newsletter. Last week he said, "If possible, could you discuss tankless water heaters in your newsletter in the future. I believe they now qualify for the tax credit also. Thank you in advance for your thoughts."

Alan, your email brings up several great points. The one is that I've covered this topic in great detail in the past, and the columns were waiting for you all along. All you had to do was type: tankless heaters into the Search Box at the top of any page at AsktheBuilder.com and you would have had your answers in seconds.

This happens each week. I get at least twenty or more emails after the newsletter goes out. In each and every case, I've already answered the question in a past column. To save yourself lots of typing and time, just go to my website and take your time using my Search tool. It's really powerful. But I digress, again.

Alan, here's what you need to know about tankless heaters. Pay VERY close attention to the real payback period. It can take many years for you to recapture in fuel savings the extra money you spend for the heater as well as the possible extra installation cost. I cover all of this in great detail in my past columns on tankless heaters. In some instances, people who install them actually end up spending more money each month in fuel costs. Why? Because there's now an endless supply of hot water!


HABITAT'S RESTORE PROGRAM

Deedra, from Wakefield, Rhode Island, is a subscriber. She reached out last week asking me to mention the ReStore program that's a part of Habitat for Humanity.

Deedra said, "Many affiliates throughout this country operate a retail operation called ReStore to offer donated building materials, appliances, furniture, and a variety of other useful products at very affordable prices. From the sale of these items, additional funds are generated to support the building of more homes. Individuals and businesses who provide inventory items to a ReStore are given a receipt for their tax-deductible donation. Different ReStore operations have specific lists of items they want, or don't want, but all items are in good and useable condition. Many ReStore facilities can even provide a pick-up service."

Go here to discover more about ReStore.


SPECIAL DECK GRATING

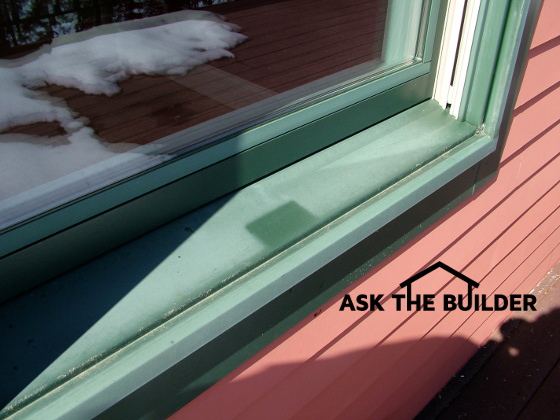
I have a huge problem at my New Hampshire house. Thousands of other people have it as well. Many houses here in New England have no gutters and they have wood decks attached to the houses. When it rains or the snow melts, the water dropping from the roof splashes onto the siding and doors. I've visited all the local hardware stores, the home centers and went online doing an exhaustive search only to come up empty handed for a solution to the problem.

I'm looking for a grating system that I can cut into the planking of my deck. Ideally it would be about 4-inches wide and the gaps between the grating would be substantial so that drops of water would make it through without splashing. The grating would have to be installed flush with the decking to prevent problems with bare feet. It also needs to be corrosion resistant. Have you seen a product made for this specific purpose? Can you contact me with a link to it?


RIDGID MICROEXPLORER DIGITAL INSPECTION CAMERA

About a month ago, I tested a super digital inspection camera. This tool has a 3-foot flexible cable with a camera and LED lights at the end of it. You only have to drill a small hole to get the camera into a wall or ceiling.

At the other end of the tool is the screen. You see in color what the camera is seeing. When equipped with an SD storage chip, you can take digital photos and videos of what your looking at. It's perfect for all those places you can't see! Read the column I wrote about this tool. It really covers camera inspection.


CROWN MOLDING

Earlier, I mentioned interior doors as a remodeling project that really spices up your home. Another thing you can do to set off a room is add crown molding. If you want a few tips, watch this crown-molding video of mine.


INSULATION DVD

It's nearly the end of winter and summer is almost here. Insulation can help you lower your energy bills. While it's not the perfect answer, insulation does work.

I taped a pretty informative DVD a few years back covering many types of insulation and some tips in working with it. We've decided to put them on sale for only $9.97 in an effort to help you lower your fuel costs. There are only a limited number available in the warehouse, and we will not be reordering these. If you decide to get one, you'll own a piece of AsktheBuilder history indeed!

That's enough for this week. I'm afraid of giving you sensory overload. Next issue I'll be giving you a boatload of links to new columns I've written. There are many!

AsktheBuilder.com

How To Screen Porch

When you see me write how to screen porch, you may wonder if my building skills are as poor as my grammar! Rest assured that I know it should be how to screen a porch, but I’m just responding to the habits of all those who have become addicted to instant gratification on the Internet. People are in such a hurry they just don’t have time to type in an extra letter and a space. It’s crazy but true.

I’ve built my fair share of screened porches over the years. They are really fun projects because they go from start to finish so quickly. Once the rough frame is up and the roof is done, you can have a finished structure in just days. This assumes you had a local mill construct the screen panels for you in advance. Even if you decide to go to all the trouble to make the panels, the time frame is short.

If you are in a rush to get your screened porch built, you may have typed how to screened porch to discover this column. No worries as in just a few short minutes I’ll share some very important tips with you. What you really were searching for was how to screen in a porch. I understand, as I’ve worked for many an impatient homeowner.

There are any number of ways to build a screened-in porch. The classic look is to use wood for the structure and the screened panels. Many camp houses by lakes have these. You’ll see them all over New England at lake houses or camps. But go south and you’ll quickly discover screened porches made entirely from aluminum. Down South the heat, humidity and insects destroy wood like The Who shattered their guitars, amps and drums. Aluminum is simply the better material to use when your faced with wood rot.

As you start to plan your screened porch, the first thing you should to do is make a visit to the zoning and planning office in your town or city. There often are zoning regulations that control the size and how close these structures can be to your property lines. So as not to waste lots of money on plans, make sure you can build the porch onto your home with no or minimal hassle from your government officials.

You may have to get a variance in certain cases to construct the porch. A variance is permission to build when your porch plans don’t meet the letter of the law. Many zoning laws are written that in order to get a variance, you have to prove a hardship in being able to comply with the zoning laws. Simply demonstrate to the officials what your hardship is. You better have a good reason. I know as I used to sit on my village’s Planning and Zoning Board for eight years and attended many a zoning hearing.

To build a screened porch, you’ll have to have moderate carpentry skills and roofing talents. Depending on how many creature comforts you want, you may need electrical skills as you might want lights, a paddle fan and electrical outlets on the porch. Electrical wiring on a screened porch is problematic as you can’t hide the cables in wall studs like an ordinary wall. Seasoned electricians and carpenters know how to bury conduit behind trim lumber on wood screened porches. Aluminum porches can be extremely challenging when it comes to electrical outlets on each wall of the porch.

If you typed how to build screen porch, I knew you weren’t one of those old Hollywood actors playing the part of a native American. What you really wanted to know was how to build a screen porch. Understand that one of the first decisions you have to make is what will the floor of the porch be? Will you have a concrete slab, or will you build your screened porch on top of a wood deck? It can be done successfully on both surfaces.

Keep in mind that you’ll always have to deal with water. As much as you try to prevent it, driving rain will one day make its way into the porch. You need to plan for how this water will make its way naturally back outdoors, without you having to mop it up or use a wet-dry vacuum. Drainage slots need to be engineered into the bottoms of the screen panels, and the floor of the porch needs to always slope ever so slightly to the exterior walls. You surely don’t want water ponding on the floor of the porch.

Remember that a screened porch is not any different than a regular room addition. This means if you live in an area that experiences cold weather, there must be a proper foundation under each of the bearing posts of the porch, and these must be set below the frost level in your area.

Concrete piers used as frost footing must be wider at the bottom than at the top of the pier. Typically, the opposite happens as you dig. Post holes tend to be narrower at the bottom than the top looking like an ice-cream cone. This is a huge mistake because as the frost penetrates down into the soil, it actually pushes the cone-shaped concrete out of the ground. Always make the bottom of the pier hole larger than the top by at least 4 to 6 inches.

Be sure to use high-quality treated lumber as the framing for the porch at least up to the beams that support the roof. You don’t want the posts to ever rot causing the porch to tumble down.

Column Q&A

Fieldstone

Fieldstone is an interesting word. Its origin is based on an annual ritual that early farmers, and farmers today, had to perform each spring. After the snow would melt off the fields, there would be stones popping up through the soil where none had been the previous fall.

These rocks are forced up little by little each winter season through the soil by frost action, and every year some finally burst through like a little chick pops out of an egg. Since these stones were discovered in the fields, the farmers would call them fieldstone. See Mom, that college tuition paid off! When I went to college, I majored in geology, and learned all about frost and stones at that time.

It didn’t take farmers long to figure out what to do with these seemingly pesky stones. The first use of the stones was for foundations to the homes, barns and outbuildings as well as a fieldstone fireplace or two. But as more stones floated up to the surface, farmers discovered they were perfect for a fieldstone wall. I’m fortunate to have many of these ancient fieldstone walls on my land in New Hampshire. When constructed properly, these walls can last hundreds of years without any mortar between the stones or a foundation!

Travel to different parts of the USA and you’ll see a fieldstone home or two both in the country and even the city. I can take you to any number of homes in Cincinnati, OH, where fieldstones were used as the exterior skin of the home.

One of my own jobs incorporated a unique use of fieldstone. I built a splendid room addition for Matthew Motz on Clough Pike in eastern Cincinnati. Matt was an amazing man who loved simplicity and times gone by. He wanted the entire end wall of the basement family room as well as the wall above in his bedroom to be made from fieldstone. Suffice it to say it was drop-dead gorgeous.

The fieldstone for Matt’s interior walls was installed exactly how I would install a fieldstone veneer on the exterior of a home. A veneer is just that - a thin coating of something that you see as the final layer. You can build a solid stone wall if you want, and many older homes are constructed this way, but they are not very energy efficient. By adding a fieldstone veneer to a frame wall, or some other highly insulated masonry bearing wall, you get the look of a solid stone wall, but the efficiency of a well-insulated wall.

When you install a stone veneer, the stone needs only be 4 or 5-inches deep. You stack them on top of one another using varying amounts of mortar depending upon the look you want. Every 16 inches of vertical height of the wall, you need to install corrugated metal strips that are cemented into the rock wall and bent up onto the stud wall and nailed to the studs. These metal strips prevent the stone veneer from tipping over and falling to the ground. Believe me, it’s happened with stone and brick veneers in many locations.

Fieldstone construction is an art. Often the stone masons can be seen chipping away at the rocks to make dressed fieldstone so that each stone can fit perfectly adjacent to other stones. You can see this done on many a fieldstone retaining wall that’s made from coarse fossilized limestone. Rounded fieldstone will rarely be dressed. The masons simply look for different sizes of stone that work well together.

Natural fieldstone can be found throughout New England, the upper Midwest and in farming areas of the West. If you want to see it in its splendor, go on a day road trip out into the country and see if you can talk with a farmer. Ask if he can take you out to a field to see one of the beauties that’s sticking its nose out of the ground. This may seem extreme, but it could make for a very fun day. You just may luck out and meet a fascinating farmer that will be glad to take you on a small tour of his land and farm. Stranger things have happened!

Column Q&A

Wall Cabinet

A wall cabinet is perhaps the second most-needed cabinet in a house. I say this as virtually every kitchen has a countertop, and base cabinets are the most-common support used for this heavily used flat surface. You’ll almost always see wall cabinets in a kitchen, but it’s possible to survive without them as open shelves can be used.

What you may find amazing is the popularity of bathroom wall cabinets. Many people forget that a bathroom wall cabinet will fit nicely over a toilet. You can place a cabinet that’s 24-inches wide by 42-inches tall if you want over a toilet. All sorts of bulky bathroom items can be placed in this bath wall cabinet, instead of trying to stuff it in the tiny vanity base cabinet or a medicine cabinet that’s got a mirror.

A wall-mount cabinet is almost always attached to a wall using 3-inch-long screws that penetrate a wood rail at the top and bottom of the cabinet. It’s very important that these screws go into a wall stud. The weight of a wall cabinet that contains ceramic plates or glasses can be in the hundreds of pounds. Years ago, the sides of a wall mounted cabinet in our kitchen started to pull away from the rail that was screwed into the wall. It was a 42-inch-wide wall cabinet filled with plates, cups and bowls that simply couldn’t handle all the weight.

Another overlooked location you can use reclaimed wall cabinets is in your garage, basement workshop or in a shed. I have at least one wall storage cabinet in each of these locations at my home. Many of the cabinets were salvaged from my own jobs or are my own hand-me-downs as I’ve remodeled and removed cabinets from my own home.

My Aunt Juanita had a gorgeous curio wall cabinet in her house. I’ll never forget the stunning cut-glass figurines she had in that cabinet. I’ve seen similar cabinets like these at antique stores that have a line of furniture. If you hunt around, you’ll possibly score a great curio cabinet that has style, class and undoubtedly some stories to tell.

Cabinets can be any color, and even stained wood. But don’t discount a white wall cabinet. One of the last major kitchen remodeling jobs I did contained these gleaming white cabinets. They had a glossy finish that made them shine as if a buffer had just stopped spinning. In my own kitchen here in New Hampshire, I have white wall and base cabinets. When the walls are painted a different color or are wallpapered, the white cabinets really stand out.

A glass wall cabinet is rarely found in a residential home unless the home is one that features modern architecture and interior design. You’ll typically discover these glass cabinets in commercial stores as they work well to display items and keep them safe. If you install a glass wall cabine,t or even a cabinet with glass doors, you’ll quickly discover that you need to really have things nice and neat inside the cabinet as they’re always seen. Accent lighting in these cabinets really allows you to show off the contents in the cabinet.

Perhaps the most common cabinet you’ll find is a wood wall cabinet. Wood is easy to work with and it’s a sustainable commodity. I have a metal wall cabinet, that was made in the 1950’s, in a hallway at my old home. The quality of this metal cabinet is stunning. You can’t say that about all wood cabinets, as many cheaper ones are built to minimum standards. Let price be your barometer when you are looking for quality. Well-made cabinets will cost more money.

A corner wall cabinet is a mainstay in most kitchens. The most common ones come with a diagonal door and a lazy Susan inside that allows you to access the contents of the cabinet. There are other corner cabinets that have very sophisticated pull out shelves that also rotate giving you access to the deep inside corner that would be otherwise hard to reach. To really get a good idea of all the clever corner cabinet possibilities, visit several cabinet showrooms at businesses that specialize in cabinets. You’ll not see all the options at a typical home center.

If you want a free garage wall cabinet, all you have to do is contact a local remodeling company. If you tell them you’ll take cabinets off their hands, they’ll often give them to you the next time they do a kitchen remodeling job. You may have to wait, so build relationships with several remodeling companies and see if they will help you out.

Column Q&A

Roof Repair

Roof repair is one issue just about every homeowner frets about. Water leaking into a home can cause serious damage in a short amount of time. Just one leak from one storm can cause an entire drywall ceiling to fall dropping mushy gypsum board and messy fiberglass insulation onto you and your possessions.

If you have a traditional asphalt shingle roof, roofing repair is often not that hard. Let’s say you have a damaged shingle that needs to be replaced. Watch my video to discover how a flat pry bar, a hammer and a few nails allow you to remove the old shingle and install a new one in minutes.

Roof repairs involving metal flashing are more problematic. You may have to call in a real professional to deal with these as it can be hard to get the new flashing to connect to the roof and the adjacent wall, chimney, skylight or plumbing vent pipe. Realize that 95 percent of roof leaks happen at flashings. Don’t ever underestimate the difficulty of installing flashings the correct way.

Flat roof repair can be as bewitching as a full moon on Halloween. The actual location of the leak in the roofing material can be many feet away from where you may see the leak manifest itself indoors. The same is true for leaks on sloped roofs. Flat roofs pose special problems for a number of reasons. The sun’s ultraviolet (UV) rays strike the roof at a 90-degree angle at high noon when they pass through the least amount of atmosphere. These intense invisible rays can rapidly deteriorate roofing materials. Add to that the countless expansion / contraction cycles the roofing materials experience each day and you can see why the seams where layers of material meet can be stressed and stretched easily.

Roofing repairs attempted by a rookie homeowner should be done with great care. Not only is it dangerous to work on roofs, you can cause more harm than good, if you are not careful. When working on sloped roofs with asphalt shingles, note how one layer overlaps the other. This engineering principal is what allows the water to stay out of your home. I can’t tell you the number of times I’ve seen a plumbing vent flashing installed where the top edge is on top of the shingles, not under them. The rookie homeowner smeared roofing cement on the seam or caulked it hoping that would stop water from running under the flashing.

To repair a roof properly, take the time to do some research. Read many of my past columns to get a feel of how the different roofing materials connect and work together. You may be tempted to use aluminum flashing material on a masonry chimney because aluminum is so easy to work with. It’s a mistake as the alkaline chemicals in the mortar will corrode the aluminum over time. You may want to use caulk instead of soldering tin. Caulk, in my opinion, is not a permanent roofing material. There are some specialized commercial caulks used on flat roofs, but some of these are formulated to work only with special materials. Beware of caulk on residential roofs. They’re not needed as there are other time-tested methods that work and will keep your home dry.

Roof leak repair doesn’t have to be scary. There are tough roofs to work on no doubt. Attempting roof repairing on a steep slate roof repair should be left to the professionals. The same is true for metal roof repair or even tile roof repair. These are tricky materials to work with. But you should be able to successfully do home roof repair if you have a low-slope roof, a cool day and the right attitude.

As I stated earlier, shingle roof repair is by far the easiest. It’s best to attempt this task on a warm, but not hot day. Working with asphalt shingles on a cold day is not a great idea. Asphalt gets very brittle in cold weather, and it’s easy to crack the shingles. In warm weather, the asphalt shingles are very manageable. But beware of hot days. The shingles can get so hot you’ll burn your hands easily. You can also get dehydrated rapidly working on hot roofs. Dehydration can contribute or intensify vertigo causing you to become dizzy and possibly fall.

Remember that roof flashing repair is the most challenging and the most important one to have done correctly. If you don’t know exactly what to do, absolutely call in a professional to repair your leaking roof at the flashing location. The real pros who work with tin flashing will come with their charcoal pots, special soldering irons, ruby fluid and magic sticks of lead solder.

It’s craftsmanship at its best to see roofers who can carefully solder a vertical seam in tin flashing. I can do it, but not nearly as fast and as gorgeous as the late Bill Siegel. Bill was a talented roofer who could solder tin so it was watertight and looking like it was a work of art. We had to send Bill back to Heaven years ago because God needed a real pro to fix a few leaks up in the sky. Rest in Peace Bill!

Column Q&A

Hardwood Floor

DEAR TIM: I know I want a hardwood floor, but I need answers. Is hardwood flooring as durable as the salespeople say? Do you think it’s possible to do the hardwood floor installation myself? I have a friend who’s a finish carpenter who said he’d help. How often do you have to do the dusty hardwood floor refinishing? Should I go with oak hardwood flooring, or are there other choices? Michelle D., Londonderry, NH

DEAR MICHELLE: A hardwood floor is nearly as durable as the granite that’s responsible for your state’s nickname. I can take you to commercial buildings in New Hampshire where hardwood floors have been in continuous use for well over 150 years. I would say that absolutely passes the durability test, unless you’ve somehow figured out how to stop your body from aging. With proper care, hardwood flooring can last in a home for generations looking as good as the day it was installed.

red birch hardwood flooring

This red birch hardwood floor has a gorgeous golden-red coloration that gets compliments from all who see it. PHOTO CREDIT: Tim Carter

Hardwood floors can be found in every home I’ve ever owned. In my opinion, they add an ambiance that no other flooring material can really match. I believe the connection is hard wired into our DNA as wood was an early building material for man and used heavily for heating and cooking. Wood is engrained in our culture and civilizations. Cleaning hardwood floors is easy, and they are a sustainable resource that grows like any crop.

You and your carpenter friend may be able to survive the hardwood floor installation if the room is small and a simple square or rectangle. While you might think that it’s not hard to install a hardwood floor, it can be very challenging. There are many tricks and skills you have to acquire to have a hardwood floor that doesn’t squeak, stays in alignment and doesn’t buckle or develop shrinkage cracks.

The biggest mistake you can make is not allowing the flooring material to acclimate to the temperature and humidity of the room before it’s installed. Hardwood flooring is a hygroscopic material meaning that it will change it’s shape and size with changes in temperature and especially humidity. Make sure the house and room where the flooring material will be installed is at the temperature and humidity it will be at when you live there. Purchase the hardwood flooring and bring it into the room. Unbundle it and allow it to acclimate for seven to ten days before you install it to be safe.

Hardwood floor refinishing is the bane of many a homeowner. Years ago, it was common for clouds of very fine dust to billow throughout the house as a pro would refinish the hardwood floors. Modern refinishing equipment has eliminated virtually all of the dust. But the great news is that if you do regular hardwood floor care, it should never have to be sanded again.

AsktheBuilder Podcast

CLICK this image and listen to the first call on the podcast. I talked to Jill about how to repair wood kitchen flooring, and possibly installing an inlay border as an option. Copyright 2018 Tim Carter

Most hardwood floors are coated with multiple layers of clear urethane. Some of these urethanes are extremely durable. Many people forget that you don’t walk on the wood floors. You walk on the thin layers of urethane. If you make sure the urethane doesn’t wear off in the high-traffic areas of the hardwood floor, there’s no need to ever sand the wood. If you simply add a new coat of urethane every three to five years, you should never have to bring in the heavy sanding equipment. You only need to lightly screen or sand the urethane prior to applying the new coat.

Oak hardwood flooring is perhaps the most common material used as flooring because it’s plentiful, affordable and extremely durable. The two species that I used in my homes and jobs are white oak and red oak. I’m very partial to red oak as when finished with a clear urethane, it looks like the most gorgeous strawberry blonde lass you’ve ever seen. White oak hardwood flooring finishes with a more stark light coloration.

There are many other hardwoods that are turned into flooring. Maple hardwood flooring is a popular choice because of its durability and its fine-grained appearance. Oak has a heavier grain. You can also get, with minimal effort, a cherry hardwood floor or even a drop-dead gorgeous red birch hardwood floor like I have in my New Hampshire house. Walnut, ash and poplar are other hardwoods you may want to consider.

red birch hardwood

You can clearly see the species and grading stamp on the underside of this piece of hardwood floor.

When you narrow your hardwood floor selection, be sure to look at samples of the wood. Sometimes the showrooms will put on display the finest material that has no knots in the sample. This grade is called Select. Be aware that when you see a larger sampling of the hardwood, there may be some tiny knots in Select grade.

But the salesman may talk you down to a different grade called Number 1 Common. Before you approve of this grade, look at many pieces to ensure you’re okay with the size and number of knots that will be visible in the flooring.

If you’re interested in learning more about prices for hardwood flooring I have an article here.

Some people like knots as they produce a floor with a certain degree of character. I prefer to have as few as possible. The species and grade of the hardwood flooring are almost always stamped on the underside of many of the pieces of lumber. When the material is delivered to your home, unbundle it and look to see if it’s the species and grade you paid for.

Column 769

Anderson Windows

Faded Window

Look at how faded the green vinyl is. The dark patch is close to the original color. It's darker because a large tab from the insect screen blocks the sun from hitting the sill. PHOTO CREDIT: Tim Carter

Anderson Windows is a major window manufacturer here in the USA. The actual spelling of their name is Andersen Windows, but since many people know the common surname of Anderson, they misspell it. In fact, my best friend’s name is Richard Anderson! So you can see why there’s the confusion. I’m sure the misspelling frustrates the executives at Andersen Windows, but by now they surely understand that it’s just going to keep happening.

When I was still building each day, I purchased and installed hundreds of Anderson windows. Many of my jobs called for them. At the time, I seem to remember a statistic that Anderson windows were so popular the number of windows made each day at the giant Anderson factory in Minnesota was more than all the windows made each day by quite a few of the major manufacturers at the time.

I was never able to confirm this, but I can tell you that Anderson windows were enormously popular in the 1970’s, ’80’s, and are still very much in demand. They have a very strong brand. The house I’m living in here in New Hampshire has all Anderson windows and doors. The windows and doors here seal as tightly as any windows or doors I’ve ever owned.

I remember installing my first Anderson window. It was a room addition nightmare where the original contractor disappeared from the job. All that was in place was the foundation, and some of the wall framing. I was working with some partners at the time and we were able to finish the roof, install the Anderson windows and doors as well as the vinyl siding. By the time we got the addition weather proof, the owners had run out of money. To this day I don’t know if the inside was ever finished, but I assume it was.

I’ll never forget how easy it was to install the windows. This job required Anderson casement windows. These operate with a crank and open just like a door by swinging out past the wall plane of the house. The vinyl-coated wood windows had this wonderful nailing fin that had prepunched holes. You set the window in the rough opening, plumbed it and then nailed the fin to the exterior sheathing. We used house wrap at the time to flash the window, because back then the fancy flashing tapes were not yet invented.

My first major Anderson windows replacement job was at my father-in-law’s house. He asked me if Anderson Windows were a great choice, and I said yes. The only issue was that these windows were not available in custom sizes. You had to get the windows close in size to the wall opening and then use vinyl-coated pieces of wood to fill all the gaps between the edges of the windows and the exterior brick of his home. It wasn’t really that hard to do, it just took extra time. These were installed in early 1980’s and they still look spectacular today.

Many Anderson windows are vinyl-coated wood. That’s primarily what I installed and what are in my New Hampshire house. The vinyl coating really protects the wood, but the darker colors do fade over time. I have the deep-green vinyl coating on my windows here in New Hampshire, and the ones that face East have severe fading. Be aware of that as you choose your exterior color. My windows are only seven years old as I write this.

Anderson windows hardware is very stylish. The hardware for both the windows and doors comes in a number of finishes, and it’s very sleek. I’ve never been disappointed with the quality of the hardware. My suggestion is to always buy extra hardware at the time you buy the windows in case you need spare Anderson window replacement parts at a later date. You can’t always count on getting the same locks or crank handles, so just spring for the parts, place them in a plastic bag and screw the bag to the top of the pegboard in plain sight at your workbench.

If you plan to buy and install Anderson bay windows, pay strict attention to the installation instructions. It’s vital that bay windows have proper support using brackets below the window or cables that provide lift at the top of the bay-window corners. Without support, the window will torque out of shape and the sashes will not open and close smoothly, nor will they seal correctly.

Pay attention to the Anderson windows glass when you purchase your windows. They have several different types of high-efficiency glass. They also have a special glass that stays cleaner on the outside. I’m sure it’s nanotechnology at work in keeping the glass clean. Try to buy the most efficient glass you can afford as the glass is the weakest R-value link in your entire home. If you live in the house for a long time, the extra money you spend on the best glass will eventually pay you dividends.

Column QA

Home Repair Foundation

If you are faced with a home repair to your foundation, don’t ignore it. The foundation of a home is the most important structural element in a house. Floors, walls, the roof all depend on solid bearing, and if the foundation to your home is splitting apart, dropping, sliding, etc., the rest of your home will probably suffer significant damage.

The home foundation repair cost that you may get quoted by a contractor will likely take your breath away. It can take specialized equipment and methods to stabilize a foundation. Some repairs that correct a bowing concrete-block foundation wall can be done with little effort, while installing poured concrete piers under a settling footer can by much more invasive. Each job often has a specialized solution.

If you’re interested in learning more about foundation repair cost I have an article here

Foundation Crack

To repair a home foundation, the first thing I recommend is to call a residential structural engineer. These professionals know the real stresses on a foundation, and they can provide solid engineered solutions based upon physics, mathematics and schooling. These engineers often know excellent foundation repair contractors who do very good work.

One of the things you have to be very careful of when repairing a shifting foundation is concentrating loads to other points of the foundation as you try to repair the problem. A great engineer will make sure this doesn’t happen. For example, let’s say a house is constructed on spongy soil. One end of the house is settling more than the other. If you pier just the one drooping end and stabilize it, you can create new cracking at the other end as it may continue to drop. It’s all very complicated, and repair companies may not have the engineering background to anticipate this.

Unfortunately, when you start to look into the event that was the cause of the home foundation repair, it is almost always related to poor construction practices by the builder. The home may have been built on poorly compacted soil, a footer may be too narrow or too thin, there may be no reinforcing steel in a poured concrete wall, or a concrete block foundation wall may have never been filled solid. There are many places where a builder can cut corners or not make the foundation as strong as possible.

It’s imperative that you consult with a great engineer as you plan to build a home so that you take the time to construct a solid foundation. It often costs just a little more to get a superb foundation that will not let you down.

Foundation repair is a huge industry. There are many types of methods and products that will do a fantastic job of making permanent repairs. When I was still building on a day-to-day basis, I did several major repairs to foundations. The most common foundation failure I witnessed in Cincinnati, OH, was an older poured concrete foundation that would develop a horizontal crack in the wall. In many cases, the soil pressure would cause the wall to bow inwards. A thicker concrete wall or vertical steel bars in the wall would often prevent this.

To repair this horizontal crack, you had all sorts of options. You could actually straighten the wall by digging out the soil around the exterior of the foundation and using horizontal jacks to push the crack together. Once the wall was plumb and in the same plane, vertical small I-beams could be placed tight against the wall so it would not bow inwards once the soil was placed against the wall.

In certain situations, you didn’t have to do all this work as the same result could be achieved by placing large steel plates at the crack on the inside of the home. A thick threaded rod would then be placed through the wall and connected to a large plate put in the soil outside. When you turned a nut inside, it would pull the two plates together which over time would straighten the wall. The point is that there are different methods to repair foundations.

Cracks in poured concrete foundation walls can sometimes be repaired with amazing epoxy compounds. When the epoxy is applied to solid, clean concrete, it can lock the two pieces together permanently. In some cases, the cured epoxy is many times stronger than the original concrete.

Column QA