May 20, 2008 AsktheBuilder News

What's in This Issue

FEEDBACK!
HOME DEPOT AND LOWES IN THE NEWS
LOW WATER FLOW
MY ROOF
TALK TO ME


Feedback!

As you might expect, the unusual piece I did in last-week's newsletter about my phone call with US Senator Jon Kyl generated some great responses. You can't believe how much I value the effort made when you reach out to me. It makes all of what I do worthwhile.

Here are a just a few of the messages I received:

Matt Reeder from Columbus, Ohio wrote,

"I am a huge advocate on something called the fair tax. There is a huge grassroots organization in place. Check out fairtax.org Congressman Linder and Neil Boortz have written 2 books on the subject. Next time you are on a plane I would suggest the read."

Not too long after his email, I heard from Jenny who also lives in Ohio. She wrote:

"As the wife of a committed public servant. What you have said resonates with me and I congratulate you for your service. The fact that you are a flat-tax advocate makes you a voice of reason in a very crowded Internet world.
I'm an aspiring, stubborn do-it-yourselfer who found your site by home improvement searches. I am now a devotee because you provide an easy to follow format for diy'ers and share very common sense beliefs.
We live in Northeast Ohio....the rust belt. Should you find yourself in this neck of the woods, please let us know. We are very active, know many like-minded folks and will go shoulder to shoulder with you to advance the cause!!"

Then an hour or so later Joseph Broder from up east in Connecticut emailed me. He definitely had some first-hand experience in the subject. Check out what he said:

"You are spot on about contacting one's elected representatives. Having served in the Connecticut state legislature and on the Glastonbury, CT town council, I can attest to the fact that few constituents ever bother to make contact. Accordingly, when I would receive more than a few contacts on a particular subject, it usually made a significant impression. (Of course, if the contacts appeared to be an orchestrated effort, the contacts were sometimes suspect.) Actually, even a single contact, thoughtfully expressed, would often move me and/or colleagues to investigate or act on a particular issue or matter."

I don't know about you, but the message is crystal clear. Together we can make a difference. Please consider taking some of your daily energy and allocate it to a cause you are passionate about.


Home Depot and Lowes in the News

Today as I was eating breakfast, I saw a small article in the paper about how Lowes is suffering from lower earnings. They expect Home Depot to report similar numbers to their stockholders. The housing slump and soft economy are no doubt to blame.

If you are a long-term subscriber, you know that I am not a huge fan of either giant retailer. Yes, they offer convenient shopping hours and one-stop shopping, but as far as I am concerned, that is where it ends. I know you might have a connection to one of these companies, so please hear me out.

One of the things that gets stuck in my craw is the perception they create about having low prices on all things. Nothing could be further from the truth. Just a month ago, I discovered that I could get crown molding from a lumber yard for 65 percent less than what it was being sold for at Home Depot. I am talking about the exact same item, not a substitute.

There are many other examples I could draw upon, but that is not the point. In these tough times economically (gasoline above $4.00 per gallon!), we all need to preserve cash. I urge you to really spend some time calling around to other businesses before you start your next project. You may discover what I already know - that I often can get better prices, better quality and better service shopping at places other than the big box stores.


Low Water Flow

I get many questions about mysterious low-pressure problems in kitchen and bathroom faucets. The water flow is fine in other fixtures, and this puzzles people.

The cause is almost always related to small pieces of sediment that are clogging the aerator on the faucet or the small port openings in the faucet cartridge. Most of the time it is the aerator at the tip of the faucet.

When you remove the aerator, look up inside the faucet to make sure you have all of the parts. You may see a small plastic disc in the aerator that has tiny holes in it. My guess is you will see little bits of crud there. Use a pin to clean it. If there are hard-water deposits on the aerator, soak it overnight in some warm white vinegar.
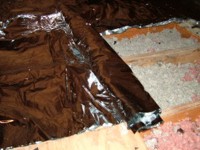

My Roof

This summer I am having a new roof installed on my own home. The original shingles are worn out. When I built my home years ago, I installed the roof with some helpers. Time has taken its toll on my body, so I am hiring one of the top roofers in Cincinnati to do the job.

You may be in the same situation. You need a new roof, and do not want to have some bottom feeder up on your roof creating a bunch of leaks. Are you wondering exactly what I did to find the best roofer? It is not as hard as you might think.

Since I can't do a Vulcan mind-meld that would transfer my knowledge into your head like Leonard Nimoy used to do in Star Trek, I did the next best thing. You can use my Roofing Checklist. Actually, it is my New and Improved Checklist.

This checklist ensures you will find the best roofer in your area. There are a series of questions you ask in a face-to-face interview, but more importantly, I give you secret links to four videos I taped that show you the exact method I use to find a pro. It is a bulletproof method. In the videos, I also tell you all about the pitfalls in contracts, plans and specifications and change orders.

My Roofing Checklist also has a really detailed spreadsheet outlining all of the cost items in a regular roofing job in case you want to discover what the materials cost on your job. Also included are all of the really important things I have written about roofs.

All of these money-saving tips and secret techniques in one Instant-Download .pdf document! Can you believe that? To celebrate my own roof job, I am putting my Roofing Checklist On Sale for the next three days with a huge 25% discount. You can have it right now for just $12.75. (Offer expired on May 23, 2008.) You get it as a download file minutes after your order is complete. All you do is check your email after you click the Submit Order button.

Go here to get the Roofing Checklist:

To get the discount, use this Promo Code:

roofcheck

Note - all lower case and no spaces!

This offer expired on Friday, May 23, 2008, sorry.


Talk to Me

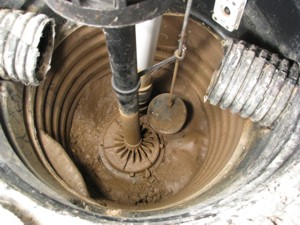
Just over an hour ago, I hung up the phone with Dr. Mitch. He is an emergency-room physician up in Minneapolis. Dr. Mitch had seen in my store the neat product where you can talk with me. Yes, I call you on the phone.

He has a home on five acres and his sump pump runs quite a lot he told me. So much so that he is terrified of flooding in his basement. Dr. Mitch wanted to talk to me about what he could do to get rid of that constant worry, especially in the spring when the snow melts.

My 15-Minute Phone Consult did the trick! In fact, I went over about five minutes with him at no extra charge. He said he is going to send photos of the completed project, and I can't wait to see them.

If you have a problem that is stumping you, and you want to discuss it with me, you can do it.


Index of past newsletters.


May 15, 2008 AsktheBuilder News

What's in This Issue

HOT ATTICS
TIPS FROM A BUDDY
4-WAY SWITCH VIDEO
US SENATOR JON KYL


Hot Attics!

Soaring temperatures are just around the corner. When your attic gets hot, and I mean hot like 140 F or more, the insulation that is supposed to keep you cool gets hot. You don't believe me? Take an old thermometer and bury it deep in the insulation so it is in contact with your ceiling. Go take a reading at 5:00 p.m. after the attic has been cooking all day. You will be shocked at what the thermometer reading is.

If you want to lower the temperature of your insulation, which in turn causes your air conditioner to run less and use less energy, you may want to install a radiant barrier. Please read this past column of mine about a Radiant Barrier product I tested. Then read the other columns in my Radiant-Barrier category to get a pretty clear picture of how they work.


Tips from a Buddy

I belong to a secret group of Internet Entrepreneurs. Over the years, some of the members have become dear and trusted friends. One of them is Chuck Eglinton. Chuck has a passion for electronic gadgets, travel deals, and how to get amazing bargains on top-quality things. Each time he discovers something special, he sends out a quick email to a select group of his friends.

I am on that list, and just last Friday he told me about a $99 deal on a TomTom One GPS unit. I immediately bought one, got it two days ago with the free shipping, and once again Chuck's advice was solid. The unit is now in my youngest daughter's car. It is great security for Kathy and I as our youngest just started driving and I worry about her getting lost, especially at night.

Chuck has given me permission to invite you to his very exclusive list. I may regret this in the long run as you may beat me to a deal. You will learn that when you get his email, you better read it and react. The deals he tells us about are never unlimited.


4-Way Switch Video

Would you like to discover a correct way to wire the magical 4-Way switch? I just loaded a video about this to my website. These special switches are required when you desire to control a light(s) from three or more switch locations. There are three places in my own home where I have one or more lights controlled by four different switches!

After you watch the video, check out the new gadget to the left of the video. This is a new tool at AsktheBuilder that suggests other videos of mine that are related to the one you just watched. It has some incredible technology behind it.  Tell me what you think of that gadget, and how it can be improved.


US Senator Jon Kyl

A week or so ago, I promised to tell you a story about a phone call I had with a United States Senator. Now don't think that I am going to get political on you, as this is a Home-Improvement newsletter. You didn't sign up for politics, and I am by no means a political pundit.

The purpose of this story is to be motivational in the event you are upset by anything at all that is impacting your life. Perhaps the cost of gasoline is crushing you. Maybe you are aghast at the cost of food. Do you operate a small business, like I do, and are there things that are holding you back? I think you get the message.

Several years ago, I got a phone call from a reader named Patricia Allen. Patricia lives up in the mountains in eastern Arizona. She read my columns for years in the Arizona Republic and started to write to me with questions. I always answered, and on this particular day she called me with a sense of urgency.

Her husband and their neighbor were about to make some adjustment cuts on laminate tops for the neighbor's kitchen. Patricia felt like they were way out of their comfort zone and said, "Tim, would you help me and talk with my neighbor?" I said, "Sure, what is his number and I will call him."
"You don't have to do that as he is standing right here. His name is Senator Jon Kyl." I said, "State senator or US?" Patricia responded, "US."

Well, I gulped and talked with Senator Kyl. He was very pleasant, apologized for interrupting my day and was very polite. After I told him how to make the cuts and not ruin the tops, he said, "What can I do for you?"
"Well, just call me back and give me a full report," I said.

Forty-five minutes later the phone rang, and at the end of the line was a beaming Senator Kyl. He told me the job was a huge success, and that my advice had saved him $6,000 in new countertops. In an effort to repay me, Senator Kyl offered to take Kathy and I to dinner the next time we were in Phoenix. I said thanks, but that the odds of that were slim.

But I did ask him, "Senator Kyl, I am really interested in the Flat Tax initiative. What does it take to get that into law?" He responded, "Tim, you need to get a grass roots movement started. Many of us in Congress really pay very close attention to messages from a grass roots campaign."

Since that call, I can attest this to be true. I just completed ten years of public service in my own village - eight years on our Planning Commission and two years as an elected Councilman.

In two weeks, I have a meeting with Congressman Steve Chabot, the standing member of the Small Business Committee in the U.S. House of Representatives. I will be discussing how the Internet and my small business interact. The point is I am trying to make is that we need to reach out and make a difference.

If you are upset about anything, contact the local, state or federal elected officials who can change things. Start a national movement. Get involved. You don't think it is possible to make a difference? Think again. Go read how Mothers Against Drunk Drivers got started. You have what it takes to be the next Candy Lightner.


Index of past newsletters.


How to Wire a 4 Way Switch Video

How to Wire a 4 Way Switch

How would you like to be able to control one or more light fixtures from three or more switch locations? It is done with a 4-way switch. This video will show you how to install a four way switch in your home.

First, be sure to turn off the electric service to the circuits you are working on. A 120 volt circuit can kill you. To install a 4 way switch, you need to install it between two 3-way switches. To review, watch the Three Way Switch video first. Tim will wait while you watch.

Now that you have an understanding 3 way switch wiring, do you recall that the white cable, running between the two switches, has a red wire, black wire, white wire and a bare, copper ground wire. These wires will feed right through the 4 way switch. It is just that simple.

A 4 way switch has five screw connections total. There are two on the top, two on the bottom and the green grounding screw. The important thing to remember about the 4 way switch is it must be installed between two 3 way switches. If it is not between the three way switches, it will not work.

The video shows the switch boxes being numbered to help with the description. Box 1 is the first on the 3 way switches; box 2 is the new 4 way switch box being installed and the last 3 way switch box will be number 3.

Cut the white cable near the spot where the 4 way switch box will be located. Mount the switch box and feed both ends of the white cable into box 2 (the 4 way switch box). You should end up with a cable from box 1 going into box 2 and a separate cable from box 3 going into box 2.

Strip the insulation off the two cables and you will be ready to connect the 4 way switch. There will be two sets of red, black, white and copper wires inside box 2. To make the connections:

Wire nut the two white wires together. Twist the two copper wires together, leaving a pigtail to attach to the green ground screw.

That will leave you with 5 wires - two red, two black and the one copper pigtail. Since there are five screw connections on the 4 way switch, all the has to be done is connect these wires to the proper connections.

Where a lot of people make a mistake is if you take the two wires coming from one of the boxes, say box 1, connect one of them to the black screw and on to the brass screw on the same side of the switch, it will not work.

To properly wire the switch, you must connect the wires from box 1 to the two brass screw connectors. It does not matter which color wire goes on which brass screw. Then connect the two wires from box 3 to the two black screws. Again, it does not matter which color wire goes on which black screw. Finally, install the bare copper wire on the green grounding screw.

Restore the power to the circuit and give it a test. Your light fixture is now controlled by three different light switches. As long as the 4 way switch is wired between two 3 ways switches, you will be good to go. Flip the switches and you are done.

Please CONFIRM Your Subscription to AsktheBuilder

Thanks for subscribing to my newsletter! But to get it each week, I need you to confirm the subscription.

Please go check your email now and look for a new message from me. Inside that email is a link you need to click to confirm your subscription. Don't worry, it's not some evil link. I need to make sure it's really you asking to get my newsletter. This second step also allows me to comply with the Federal CAN-SPAM law.

I really appreciate you taking the time to confirm your subscription for me.

Tim Carter

Shed Plans


"The first thing you should consider when looking for wood-shed plans, garden-shed plans or any storage outbuilding plans is function, not form or looks. In other words, you need to make sure that the building is going to be big enough for the things you need to store."

Shed Plans Checklist

  • Layout items to be stored in the shed on grass
  • Be sure to have open space to get to all things
  • Use treated lumber for floor joists and shed floor to prevent rot
  • A six-foot-wide overhead garage door is best for access

Shed Plans Are Mission Critical - Don't Hope Shed is Big Enough

Related Links

How To Build a Shed in Days - SECRET TIPS - Do NOT Share.

Use a Ramp to Get Into Your Shed

DEAR TIM: I'm in desperate need of shed plans because the clutter in my garage has become unbearable. What should I be looking for when I consider storage-shed plans? Is it really necessary to have detailed shed building plans if I am going to do the work myself? How would you construct the shed to be both easy to build and long-lasting? Johanna C., Woodbury, NJ

DEAR JOHANNA: Three years ago, I took back ownership of my garage for my vehicles. When I first moved into my home, we could easily park my truck and our car in the spacious garage. But over time, we accumulated too much stuff which forced the cars outside. When I showed my wife a set of shed plans that matched our Queen Anne Victorian home in every detail, her only question was, "How soon can you have it completed?"

Free & Fast Bids

CLICK HERE to get FREE & FAST BIDS from local shed builders.

What Should Plans Focus On?

The first thing you should consider when looking for wood-shed plans, garden-shed plans or any storage outbuilding plans is function, not form or looks. In other words, you need to make sure that the building is going to be big enough for the things you need to store. You can make the outside of any storage shed look like any style you desire. It is easy to make a storage shed match the style and character of your existing home.

Garden Shed

This L-shaped storage shed was constructed using plans created with computer software. IMAGE CREDIT: Tim Carter

What is the Most Basic Part of Shed Plans?

The most basic component of your shed plans is the two-dimensional floor plan. This tells you how long and wide your shed will be.

All too often people think a storage shed will be large enough on paper or when they see a pre-built one in a home-center parking lot. But reality soon sets in when they start to cram all of the things in the new building.

How Will I Know My Shed Will Be Big Enough?

The way to ensure your new shed will be large enough is to take the things you want to put in the shed outside on your drive or lawn.

Once all of the things are outside, arrange them in a way you would like to see them in the shed. Be sure there is enough room around the items so you can get to each thing without having to crawl over other something. If you make a mistake and make your shed too small, you will be grouchy each time you have to pull out three or four things to get to something way back in the shed.

How Much Detail Must My Plans Have?

The needed detail on the plans is a function of what may be required by your local zoning and building department. Some communities have strict rules as to how a shed must look, the size of the building with respect to the size of your home, and even which direction doors must face. You should absolutely visit your local government offices to discover what guidelines you must follow before you purchase shed plans or even draw your own.

CLICK HERE to get FREE & FAST BIDS from local shed builders.

What Do Great Shed Plans Look Like?

Great shed building plans have lots of detail. Here's a page from the plans I used to build my own two-story shed in New Hampshire.

Sample Shed Plans

I feel it is a good idea to have detailed storage-shed plans even if you plan to build it yourself. The plans will help you produce an accurate material list so you only buy as much material as you need.

Can I Buy Your Amazing Storage Shed Plans?

Yes, you can buy and download instantly my deluxe two-story storage shed plans. CLICK HERE to get the shed plans now.

Another benefit of well-thought-out shed plans is minimal waste. By taking the time to think through modular design and economical building, it is possible to build a shed with virtually no waste. This is a green-building practice all should do no matter what the project might be.

What is the Best Material for a Storage Shed?

For ease of construction, you should probably lean towards using wood. Masonry storage sheds require a unique skill set as does working with metal. Many people have simple tools to cut and assemble wood.

The floor of the shed can be made just like a wood deck that hugs the ground. Use treated-lumber for the support posts, floor joists, and the actual floor.

You can buy treated-lumber plywood. This is what I have in my own shed, and I never have to worry about driving my wet or snow-encrusted tractor into the shed.

Water is the biggest enemy of a wood storage shed. There should be at least 6 inches of space between the soil and any wood that is not treated for rot. Water that splashes on the sides of the shed can cause rot over time. The best way to minimize this is to create generous 16-inch overhangs on the roof and use gutters and downspouts to collect and redirect roof water.

Can I Use a Narrow Overhead Door For a Shed?

Instead of using cumbersome swinging doors for access, consider purchasing a 6-foot-wide overhead garage door. These are economical, practical, attractive and easy to assemble. Traditional swinging doors can be problematic on windy days, and they can be difficult to build from scratch if you are a rookie do-it-yourselfer.

garden shed garage door

Garden shed plans are easy. This garden shed features a 6-foot-wide overhead garage door. Copyright Tim Carter

It is a good idea to install several skylights that allow abundant natural light to stream into your shed. If possible, try to incorporate a steep roof. This will allow you to create some bonus storage space above the floor of the shed. You can't have too much storage space in a storage shed!

CLICK HERE to get FREE & FAST BIDS from local shed builders.

Column 724

Trench Drain

DEAR TIM: Do you think a trench drain or a French drain will solve my soggy yard as well as the chronic leak in my basement? Many of my neighbors suffered from the recent heavy rainfall, and we all are tired of dealing with water in and around our homes. Will a trench drain really work, what is proven design and how does one go about installing a French drain? Robin R., Dawson Springs, KY

DEAR ROBIN: I know for a fact that a trench drain will solve your swampy yard. If you install this trench or French drain correctly, it will also stop the water from entering your basement. Thousands of people have used a trench-drain design I perfected years ago to redirect water that was coming from my neighbor's yard. It worked so well, I started using the same system on all of my jobs where customers had poor drainage and needed relief.

My college degree is in Geology, and I had a special interest in hydrogeology. This is the study of groundwater. To understand how to drain land and keep your house dry, one needs to understand the movement of water after it enters the soil. Many people believe that water travels straight down through the soil on its way to the water table. It can in certain areas, but often as it moves to a layer of porous rock, it travels sideways through the soil. This is especially true in areas where the top layers of the soil horizon have a clay composition. Clay is a highly-effective water blocker, and as such acts as a great liner for lakes and ponds.

This is the outlet for a trench drain. Since the ground slopes and the trench is kept nearly level, the pipe eventually pokes through the soil to daylight. PHOTO CREDIT: Tim Carter

This is the outlet for a trench drain. Since the ground slopes and the trench is kept nearly level, the pipe eventually pokes through the soil to daylight. PHOTO CREDIT: Tim Carter

Top soil has a very open structure, and is filled with lots of air voids when the soil is dry. As rain falls from the sky and enters this top soil, it enters this network of interconnected air spaces. If the water travels down under the pull of gravity and hits a dense clay subsoil, the water starts to move sideways along this clay zone moving down slope as the ground slopes toward creeks, streams and rivers.

A trench drain installed on the high side of your land can intercept this water as it is moving directly towards your home. The trench drain acts exactly like a gutter on a roof by collecting the water and redirecting it to another location. The water enters the trench drain and flows through it because the design of the trench drain offers much less resistance to flow than the water moving through the soil.

My trench-drain design is simple. You dig a 6-inch-wide trench about 2-feet deep. The bottom of the trench stays parallel with the top surface of the ground on the high side of your land and as it passes on either side of your home. Once the trench passes your house, the bottom of the trench should be made nearly level with a minimal slope. As the ground slopes from your house, the bottom of the trench gets closer and closer to the surface until it pokes through to the surface much like a horizontal mine shaft.

The trench contains rounded washed gravel and a perforated 4-inch-diameter drain pipe. The pipe is simply a high-speed conduit that acts like an underground river in times of heavy rainfall. You install 2 inches of gravel on the bottom of the trench then the pipe. The pipe is then covered with additional washed gravel to within 1 inch of the surface. You can then add soil or sod if you want to hide the location of the trench drain.

There is no need to install a geotextile sock around the pipe or use it to line the sides of the trench. These materials are designed to stop silt from clogging gravel or drains. This is needed when you install fluffed dirt over drainage systems. In my design, the small amount of soil added to the top of the gravel will not be a factor.

Water flowing through soil does not contain silt except in the situation described above. In virgin soil or compacted soil, silt is a surface phenomenon. Creek water in a storm is muddy because of dirt that is eroded from the surface and carried overland to the stream, brook or river. Proof of this is the crystal-clear water that flows into wells and out of surface springs. You will also see clear water flowing from the outlets of your trench drain once you install it.

To stop water from entering basements, a trench drain is but one part of a system. The water from roofs and all paved surfaces like patios, sidewalks and driveways must not be allowed to discharge or collect near the house. This water must be collected and piped to the lowest part of the building lot away from the house.

There has to be positive drainage away from the house foundation. The building code, which is a MINIMUM standard, states that in the first ten feet of horizontal distance away from a foundation, the grade must drop 6 inches. This is not enough in my opinion. It is better to have at least 12 inches of drop. What's more, I frequently see landscapers or homeowners who pile mulch around foundation plantings. This mulch creates dams and can cause ponding of rainwater around a foundation.

A trench drain can be installed with a powered ditching machine and some strong boys who can cart away the soil and bring back gravel to fill the trench. If you want to use powered equipment for the whole job, visit a tool-rental business. There are wonderful miniature loaders that can move both soil and gravel with minimal disturbance to your yard. Be sure to have all underground utilities marked before you dig.


Author's Notes:

You may wonder if my advice is worth anything. Well, read what Jim Sanders wrote to me when he was at the end of his rope:

"Hi, I just wanted to write to give you the results of my "Trench Drain". I have had a wet crawlspace for 15 years. Water would fill the crawlspace at times, so we actually had to drill weep holes at the base so that it would enter the basement and eventually, the sump pump.

I have tried everything. Several contractors said that the only thing we could do was to bring the water into the house via drainage tile and let it enter the sump pump. That would work, but because I live on a 6' elevation, there is no reason that I should have water problems. It became like clockwork...when it rained, we would rush home from the lake or wherever we were vacationing so that we could be prepared to start the backup generator, in case the power failed. We even had our alarm company put a sump alarm on our system, so they could notify us if we had a power failure. Battery backup was not an option, because sometimes we lose power for days and during any rain, our sump would run every 7 minutes...just like clockwork.

I found your site and read the article on the trench or French drain. At first, it sounded a bit like "holistic healing" to me. I failed to understand why a 2 ft. deep trench, 4 ft. away from the house would do any good. How could this simple thing correct an extreme water problem that has plagued me for years, cracked my foundation, settled my garage floor and ruined almost every vacation?

The Linear French Drain trench running from the house. PHOTO CREDIT: Jim Sanders

The Linear French Drain trench running from the house. PHOTO CREDIT: Jim Sanders

I decided "what the heck". I had to dig by hand using a trenching spade and a pick-ax, because the builder back-filled our property with brick and blacktop. It took quite a bit of time. Because the ground level varies so much on that side of the house, I was not able to achieve exactly 2 ft. deep. It varied from 18" to 30" in spots, but the slope was downhill. The trench is about 80 ft. long. At times, I thought about filling it all in, because I just didn’t believe that it would work.

I stoned it, put tile in, and filled it with #1 round stone. I socked the pipe just for safety measure and I also used geotextile fabric on top, so I could cover with dirt and grass. I also ordered some clay and pitched from the house to the drain.

After a short rain, water is running away from the house. PHOTO CREDIT: Jim Sanders

After a short rain, water is running away from the house. PHOTO CREDIT: Jim Sanders

Result? For the last month, we have had 7 or 8 torrential rains, the worst of which was last night. It rained so hard, that our lawn washed out in spots because of the high clay content. Our sump pump, that normally ran every 7 minutes during and after rain, has not turned on for 4 weeks. The silt at the bottom of the sump well is now dry and cracking. Our crawlspace has not shown a trace of water or even moisture.

Since I couldn’t see correcting the foundation cracks or the garage floor settling and tilting until I corrected the problem's source, I waited to see if the trench drain worked first.

This week, I had a company come in and perform sort of a "mud-jacking" technique on the garage floor, which worked perfectly. Also, during the past few weeks, I parged the cracks in the foundation.

A dry sump pump. PHOTO CREDIT: Jim Sanders

A dry sump pump. PHOTO CREDIT: Jim Sanders

I just wanted you to know how this worked. I stressed for many years over this issue and the solution was nowhere near as difficult as I thought it would be.

As a side note, I went to the end of the drain tile during a hard rain to see what was happening. Water was running out of the drain tile in about the same exact volume that it previously ran out of the weep holes in my crawlspace. This winter will be interesting, because last year, the ground next to the house was so saturated that during a thaw, my sump would run constantly. I'm guessing that the ground between the trench and the house will probably be drier now going into this winter."

- Jim Sanders, Upstate area - New York

CLICK HERE to get FREE & FAST BIDS from local drainage expert contractors.

Column B339

Column 721

Gutter Protection Video

Important Author’s Note Update: Since this column was written, I have discovered at least two other gutter guards that sport the micro-mesh filtration screen. Testing of these Micro-mesh guards began early Spring of 2008. The results of the test are in! After 10-years of testing various types, a winner has been declared! Click for the gutter guard I installed on my house - Gutter Guard Test Results.

gutter guard installed

This is the best gutter guard I've ever tested. A stainless-steel micro mesh prevents any pine needles from getting into the gutter. Copyright 2017 Tim Carter

Good morning from the roof of the AsktheBuilder World Headquarters. It is early spring, and Tim met the inventor of a really cool gutter protection system. This system has a very fine mesh covering. That is important because in all previous tests of gutter guard systems, in the spring most of the systems fail. The small debris that trees produce, like seeds, blossoms and little pieces of bark, clog up other gutter protection systems and even work their way down into the gutter.

Free & Fast Bids

CLICK HERE for FREE & FAST BIDS from local companies that can install micromesh gutter guards.

Consider purchasing a micromesh product from Amazon.com and having your local handyman install them for you. CLICK the photo below for just one of the micromesh products I discovered on Amazon:

inspecting gutter guard

There are many micromesh gutter guard products. You can save LOTS of money putting them on yourself. CLICK ON THE IMAGE to see how low-cost they can be.

These gutter guard systems have been tested on the AsktheBuilder’s roof. The first one ever installed was a plastic protection system with diamond shaped holes in the covering. It has been installed for about eight - nine years. It allowed water from a garden hose to sprayed into the gutter to clean out the small debris. But the holes would get clogged up with those little helicopter seeds and the lacy blossoms from the oak trees. This system is being removed and replaced with a newer system.

The new system looks like a very large bottle cleaning brush or pipe cleaner. According to the inventor, you just put it in the gutter. When it gets clogged, and it will, you just pull it out, shake it clean and place it back in the gutter. Not sure if that will work, but it will be installed and tested for the next four to five weeks during the spring season.

Check back later for the next video showing the results of Tim’s testing of this new gutter guard system at the AsktheBuilder World Headquarters.

Ceramic Floor Tile

Ceramic floor tile can be repaired with the right tools and some patience. PHOTO CREDIT: Tim Carter

Ceramic floor tile can be repaired with the right tools and some patience. PHOTO CREDIT: Tim Carter

Ceramic Floor Tile Installation

DEAR TIM: I have ceramic floor tile in my kitchen. We removed a wall to open up the floor plan, and now I must replace the cut tiles with full ones to make the ceramic tile floor look perfect. Lucky for me my builder left behind a box of the original tile, so I have the pieces I need.

Can you tell me how to install ceramic floor tile in this situation so it looks superb? I am worried about matching the height of the existing tile and getting the grout to match. Alicia R., West Fargo, ND

DEAR ALICIA: Laying ceramic floor tile can be challenging, but repairs to existing tile can really be a test for a seasoned pro. You are going to need a large bucket of patience as well as a few simple tools to heal the wound in your floor. Lady Luck is already with you since you have the original tile on hand. That is a good omen of what is to come.

The first step in the process is to carefully remove the old cut tiles. There are any number of ways to do this, but I discovered long ago, that you must remove the grout around a tile so you do not crack an adjacent ceramic tile. You can chisel out the grout with a hammer and a small cold chisel, or you can try to use a powered grinder to help cut away the grout. Be very careful as you work near the ceramic tile you want to save. Never chisel towards tile you want to save. Chip away from the tile.

Once the grout is removed, you can try to pop the cut tile from the floor using a wide stiff putty knife that is driven at a low angle under the tile. Start the knife under the cut edge that was against the old wall. Tap the putty knife with a hammer. If you are lucky, the entire tile will lift at once. You may end up shattering the tile and it will come out in pieces. That is fine, just be careful you do not cut yourself as ceramic-tile shards can be very sharp.

When the old tiles are removed, you need to scrape off any adhesive. If the original installer used an organic mastic similar to cake icing, you may be able to use an adhesive remover to soften the old glue. If the adhesive is cement thinset, you will need to chisel or grind it off with a power tool. Use a wet-dry vacuum and pipe its exhaust outdoors as the thinset will produce silica dust which is not a good thing to breath into your lungs.

The space where the old wall was needs to be brought up to the level of whatever underlayment was used by the installer. If the tile was installed on a concrete slab, you may have to do nothing. But often a ceramic tile floor is installed over wood. You may have to install a strip of matching underlayment made from cement board or a gypsum-based underlayment. The new product you install must be at the same level as the rest of the underlayment. Under no circumstances can it be higher than the existing surface immediately beneath the adjacent ceramic tile.

At this point the hard work is complete. Laying the ceramic floor tile in this small area is no different than doing an entire floor. You apply an adhesive to the same thickness as the original and set the tile into it. Use a straightedge or a level that rests on the existing tile and the new ones to ensure the replacement tile are not high or low with respect to the full tile already in place.

Matching the tile grout may be slightly problematic. Even if the builder saved some grout, it may not be usable as it could have hardened in the bag after several years. To match tile grout you must clean the existing grout well to see what its color really is. You can clean ceramic tile grout fairly easily using a solution of oxygen bleach. This is a powder you mix with water. Once mixed, you apply the solution to the grout, let it soak for about 15 minutes and then scrub with a stiff brush. Years of dirt come up with ease.

Once the grout is clean, let it dry well for two days so you can start to match it. Ceramic-tile stores usually sell many different grouts and matching a color is not too hard. Your existing grout must be dry to get a perfect color match. Remember not to fret when you mix the grout you buy. When wet, it always looks darker, so you may think the color is way off when in fact it is just right. Mix up some test grout and let it dry before you grout your replacement tile.

You can ruin the grout by adding too much water in the mix. The wet grout should be the consistency of wet clay. You should be able to form the wet grout into a ball with ease and it keep its shape without sagging.

Remove all excess grout from the tile as you grout. Use a damp sponge to do this making sure all water is squeezed from the sponge as you wipe across the tile. Wipe with very light strokes to make sure you do not remove grout from the joints. Change the rinse water frequently so you are not leaving a grout haze on the tile.

Message from Tim:

Years ago while researching a column about cleaning decks, I discovered the wonders of Oxygen Bleach. It is perhaps the 'greenest' cleaner I know of as it uses oxygen ions to break apart stains, dirt and odor molecules. There are no harsh chemicals, and it works on just about anything that is water washable.

I decided to create my own special blend using ingredients made in the USA. In fact, the raw materials in the active ingredient are food-grade quality registered with the FDA. I call my product Stain Solver. I urge you to use it to help with cleaning your tile grout. You will be amazed at the results!


Column 720

Kitchen Cabinet Remodel

DEAR TIM: My kitchen cabinet remodel job has turned into a disaster. I contracted the job through a national home-center chain who demanded I pay in advance for the entire job. There are numerous issues, and the granite top is sagging in the middle of my sink. My complaints are going unanswered. The installer will not come back, and my calls to the home center are getting me nowhere. Is it time to call an attorney? Should I sue to get my money back? What went wrong as I trusted the large national company? Andy E., Lexington, KY

DEAR ANDY: If I had a nickel for every letter and email I have received like yours, I would have my own private jet. The Better Business Bureau statistics echo this as complaints regarding home building and remodeling are always make the Top-Ten List of consumer issues. Let's put on the rubber gloves on and do an autopsy to discover what went wrong. It's important to find the cause, so this never again happens to you.

You undoubtedly had lots of anxiety going into this project as you indicated that trust was a major factor in your decision who to hire. My guess is that you did not know exactly what needed to be done on the job, so you wanted to go with a large branded company you thought would make your life easy. This, in my opinion, is a huge mistake. You always need to investigate what is involved, how things work and how to spot a pro from the get go. This way you protect your interests at all times.

A granite top like this must be installed on kitchen cabinets that are level and sturdy.  PHOTO CREDIT: Tim Carter

A granite top like this must be installed on kitchen cabinets that are level and sturdy. PHOTO CREDIT: Tim Carter

The actual cause of death was you making the payment in full at the beginning of the job. When you do this, the only leverage you have to make sure your kitchen remodel dreams come true is hope. You "hope" that all goes well and you "hope" you get what you paid for. Never again pay the full amount in advance for any remodeling job. It is unnecessary, and it puts you in grave financial risk.

It is reasonable to have to pay some money up front in rare situations. Your kitchen-remodeling job is one of them. If the cabinets you ordered were custom ones that are not normally stocked by the home center, then it is reasonable for them to request a 50 percent deposit to order the cabinets. It is reasonable for them to ask for a similar 50 percent deposit for the granite top as it will probably only fit in your kitchen. You should not forward any monies for installation labor - never. You only pay for labor once it is complete and satisfactory.

When you have the money in your possession, you have the power to get results. You can create a fair payment schedule that distributes a certain amount of money as the work progresses. If this means you have to make smaller payments every three or four days on smaller jobs, it is worth the inconvenience.

You said the home center demanded payment in full before the work progressed. I don't doubt that, but the marketplace is so competitive, it is possible you might have negotiated special terms that allowed you to make staggered payments as the work progressed. Use the economic law of supply and demand to your favor whenever possible. There are many other smaller professional remodelers who would have agreed to take your money as the job progressed.

As for calling an attorney, you can do that as a last resort. I believe you will discover that you will have to pay the attorney's fees no matter what happens. It is entirely possible you will spend thousands of dollars to get the same results as that you might do on your own by becoming the squeaky wheel that ultimately gets the grease.

Start by contacting your local Better Business Bureau to see if the national home center is obligated to enter into arbitration. Then contact the headquarters of the home center, fill out online complaint forms at their website, contact any local consumer reporters at your media outlets, visit websites where consumer complaints are lodged, etc. In other words, don't look like a doormat or otherwise you will become one.

When you decide to remodel your kitchen or any job for that matter, you can use professionals who will not demand full payment up front. They don't require this as they know the job will turn out fine, and that you will be satisfied with their work.

The key is to spell out in the contract what monies are due when. You must always hold back enough money to be able to finish the job at any point. If you give the contractor too much money, you loose your leverage. Imagine what might happen if the contractor gets injured on your job and you have to bring in another company to finish. You must always have that money needed to finish in your possession.

It is critical that you make timely payments when you say you will. This is paramount to the two-lane trust bridge between you and the contractor. You are trusting that the contractor will do great work and do it on time. The contractor trusts that you will do your part and make the correct payments on the day they are due. Remember that excuses are reasons for failure. Do not fail your contractor and he will not fail you.

Column 719

Hydronic Heating Manufacturers

Hydronic Heating Books / Publications / Information

OK, so you want hydronic heating information, books, and what not? Get ready! The absolute best book on the subject is called Modern Hydronic Heating - For Residential and Light Commercial Buildings, 2E by John Siegenthaler, P.E. This 575 page hard cover book is one of the best construction books I have ever seen. If you read it cover to cover you will probably discover more about the topic than you could imagine.

It is simply a MUST read if you want to incorporate ANY type of hydronic heating in your next home. I have a copy of this book that was sent to me by the publisher. After reviewing it, I would be willing to pay for the book - it contains SO much invaluable information. It is available from Amazon.com and from the Radiant Panel Association. Visit their online store.

Here are some other publications that might interest you that are stocked by the Radiant Panel Association, PO Box 717, Loveland, CO 80539:

RPA Guidelines for the Design and Installation of Radiant Panel Heating and Snow/Ice Melt Systems
Intended for reference use by code officials, designers and installers. Deals with both hydronic and electric floor, wall and ceiling applications.

Radiant Precision 2007
Intended for those who have a basic knowledge of such systems, but seek to expand the design capabilities.

Radiant Basics Section 1 to Radiant Basics Section 9
Downloadable PDF booklets covering various aspects of radiant panel heating systems.

Hydronic Design Studio Software
This is also by John Siegenthaler and an associate author. This is a MUST have if you are going to design a hydronic system. Heat loss calculations and much. much more.


Hydronic Heating Equipment Manufacturers

Now here is an industry that is experiencing rapid growth. There is great interest in hydronic heating. The problem with this is that newer companies can sometimes get into financial trouble by growing too fast. You need to ask questions about how long a company has been in business before you invest lots of cash in a system. Where known, I have listed what the company makes and whether. Association membership is preferred if you are making a purchasing decision, but it is not absolutely necessary. Check the companies to determine if they are member of associations like the Radiant Panel Assocation.

In all likelihood, the components of your hydronic system will come from a variety of sources. You may purchase a high quality boiler or hot water heater from one company, the controls and valves from another, and the water tubing or coils from yet another. It is a highly fragmented business. The trick to making intelligent choices lies in getting an education about hydronic heating. You need to read about the topic and then ask the right questions to the potential installers.

Amtrol Inc.
401-884-6300
www.amtrol.com
Hydronic Accessories

Bradford White
215-641-9400
www.bradfordwhite.com
Water Heater / Space Heating

Buderus Hydronic Systems
603-898-0505
www.buderus.net
Boilers / Radiators

Burnham Radiant Heating
717-397-4701
www.burnham.com
Boilers

Calorique
508-291-4224
www.calorique.com

Central Boiler
800-248-4681
www.centralboiler.com
Boilers

ComfortPro Systems
800-968-8905
www.comfortprosystems.com
PEX tubing / controls / manifolds

Crown Boiler Co.
215-535-8900
www.crownboiler.com
Boilers

Danfoss Inc.
410-931-8250
www.us.refrignet.danfoss.com
Hydronic controls

Delta - Therm
800-526-7887
www.delta-therm.com
Hydronic tubing / Elec. cable

Dunham-Bush
703-434-0711
www.dunham-bush.com

Dunkirk Radiator
866-847-6656
www.dunkirk.com
Boilers

E - Beam Services
877-41E-BEAM
www.ebeamservices.com
Electron Beams

Easy Heat Inc.
877-656-6331
www.warmtiles.com
Electric Floor Heat

Electro Plastics
314-781-2121
www.electroplastics.com
Electric Heating elements

Embassy Industries
631-694-1800
www.embassyind.com
Hydronic heating products


Are you one of the manufacturers listed above? Do you want your company name to be a link to your website? Click here.


Environmental Technology
800-234-4239
www.networketi.com
Controls for floors and snow melt

Flow Design Inc.
800-275-3569
www.flowdesign.com
Controls

Glow Core A.C., Inc.
214-330-8852
www.glowcoreac.com
Stainless steel exchangers

Grundfos Pumps
847-549-8950
www.grundfos.com
Water circulation pumps

Hacker Industries
800-642-3455
www.hackerindustries.com
Gypsum Underlayment

Heat Transfer Products
508-763-8071
www.htproducts.com
Water heaters / Heat exchangers

Heat Timer
973-575-4004
www.heat-timer.com
Controls / valves

Hydro-Temp Corp.
800-382-3113
www.hydro-temp.com
Ground source heat pumps

Hydronic Technologies
800-365-6746
www.hydronictechnology.com
Injector pumps / controls

IPEX
866-473-9462
www.ipexinc.com
Metal - plastic piping / fittings

ITT Fluid Handling
847-966-3700
www.bellgossett.com
Pumps and Controls

Lochinvar
615-889-8900
www.lochinvar.com
Boilers

Maxxon Corp.
763-478-9600
www.maxxon.com
PB and PEX tubing / elec. cable

Monitor Products
800-524-1102
www.monitorproducts.com
Room heaters

NuHeat Industries
800-778-9276
www.nuheat.com
Electric cable for floors

Orbit Manufacturing
215-257-0727
www.orbitmfg.com
Electric cable for floors

Panel Radiator (Rittling)
800-346-8823
www.rittling.com
Wall and ceiling panels

Peerless Boilers
610-367-2153
www.peerlessboilers.com
Boilers

PFG Industries
206-463-1267
www.radiantec.com
Plastic module floor system

Raypak, Inc.
858-571-7883
www.raypakboilers.com
Copper fin boiler

Rehau, Inc.
800-247-9445
www.rehau.com
PEX tubing / controls/manifolds

Roth Industries
315-755-1012
www.roth-usa.com
PEX tubing / manifolds

Runtal, Inc.
800-526-2621
www.runtalnorthamerica.com
Wall and ceiling radiators

Sioux Chief Mfg. Co.
800-821-3944
www.siouxchief.com
Manifolds and Headers

Slant/Fin Corp.
516-484-2600
www.slantfin.com
Boilers

Spirotherm
630-307-2662
www.spirotherm.com
Air separators

Taco Inc.
401-942-8000
www.taco-hvac.com
Hydronic circulators

Tekmar Controls
250-545-7749
www.tekmarcontrols.com
Solid state controls

Thermal Ease
360-779-1960
PEX tube / controls/manifolds

Trianco-Heatmaker
781-961-1660
www.triancoheatmaker.com
Steel boilers

Triangle Tube
856-228-8881
www.triangletube.com
Heat exchangers

Utica Boilers
866-847-6656
www.uticaboilers.com
Boilers / indirect water tanks

Viega
800-775-5039
www.viega-na.com
PB and PEX tube / manifolds

Water Furnace
800-GEO-SAVE
www.waterfurnace.com

Weil-McLain
219-879-6561
www.weil-mclain.com
Cast iron boilers