DEAR TIM: My husband and I plan to build a custom home. Since we already own an existing home and need to stay here while the new home is built, how do we pay for the new home? What type of financing do you get that allows you to make payments on your existing home and the new home at the same time? What can we do to minimize the financial pain of owning two homes at one time? Gina M., Park City, UT
DEAR GINA: You need a construction loan to build your new home. This is a common product sold by banks, credit unions and traditional building and loan companies. Bankers and lenders know that building new homes is great for their businesses, so they have developed loan products that takes most of the sting out of borrowing money for a new home.
One of the first things I think you need to get your arms around is the concept that banks, credit unions and other lending institutions sell money just as a grocer sells food. The money you and I borrow when we go to banks is a commodity item your lender gets from other banks, their customers and the Federal Reserve. Just as grocery stores get stocked with fresh food from farmers and other food producers, your lender may need new money each week.
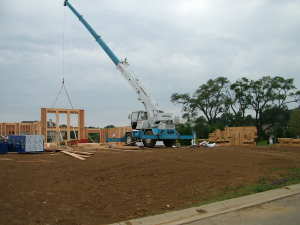
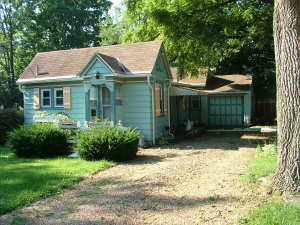
You often need a special construction loan to build a new home. PHOTO CREDIT: Tim Carter
This system allows you and I a slight competitive edge since lending institutions are always trying to sell their supply of money each week or each month. This supply/demand situation forces many lenders to offer competitive rates, terms and loan packages. For this reason, it can really be to your advantage to shop different lenders to see what rates and terms they are offering for new home construction loans.
Traditional construction loans work in this fashion. You borrow a fixed sum of money that you combine with any personal savings and/or equity in your own existing home. The total of all of these monies should be equal to or slightly greater than the total cost of your new home. I suggest a loan package total that is at least five percent greater than the total projected cost of your new home, as there always seem to be cost overruns or surprises that can ding your pocketbook.
As your home is built, the builder will make draws against the loan money. To draw down the loan money, he will have to supply to your lender legal affidavits for all subcontractors and material suppliers that have performed work on your home and/or supplied material up to the time of the draw. The bank then issues checks to these individuals that match the amounts stated on the affidavits.
As soon as this happens, the interest meter starts running on the construction loan. The following month you will have to make an interest payment on the amount of money drawn from your loan account. You continue to make these monthly payments as time progresses. But as the house is built and more money is drawn down, your interest payments grow larger and larger each month.
Once the home is finished and it is time to move in, your construction loan must be converted to a permanent mortgage where you make both interest and principal payments. If you bargained well before you purchased the loan, you will have a competitive interest rate for the life of the loan.
You can minimize your financial risk and pain by selling your existing home before you build the new home. This allows you to cash out of your existing home and have all of the equity at hand. You will have to make rent payments for your temporary living quarters, but see if you can't survive in a smaller apartment for the time it takes to build your home. Find an apartment, if possible, that allows you to rent month-to-month. If you sign a fixed lease and your house is not completed by the time you need to move out of the apartment, you may be in a world of hurt as you have to find very short-term living quarters.
One of the biggest advantages to selling your existing home early in the process is that you can use your equity to fund the initial stages of construction. This will minimize the time you actually use the bank's construction loan money. Furthermore, you may be able to get a better interest rate since you present a lower credit risk to the lender. You also have enormous peace of mind knowing that you don't have to make two mortgage payments after you move into your new home while your existing home sits vacant.
It is vitally important that you talk with your lender about all conditions regarding your construction loan. For example, the lender will want to be assured of a clear title with your land, and furthermore, he will want to be in the first position with regards to lien rights. Since many states have strong protective lien laws that are in place to protect the rights of workers and suppliers, the lender will often insist that no one is allowed to do anything on the land until you have closed on the loan. This means you can't even have the lot staked out by a surveyor for the builder before the loan closing!
Try to shop for a combination loan that only requires one closing. This is a construction loan that is bundled with a permanent financing mortgage. Getting a loan such as this minimizes closing costs, and could save you thousands of dollars in loan fees.
If you want to discover more information about constructions loans and many other types of loans, I suggest you check out a cool website I recently uncovered. Don't let the name of this website fool you. It has scads of information about all types of loans:
www.StudentHomeMortgageLoans.com
Column 635