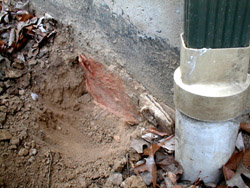
AsktheBuilder mp3 Radio Show Nov 12 2005

Each title below is a direct link to a downloadable mp3 file. Just click the title if you want to listen. Right click if you want to download into your computer to save and play at a later date.

The Copyright to all radio segments is owned by Tim Carter. I would love to know what you think of these radio segments. Do you like them? Do they help you? Have they saved you money and/or time? Let me know by sending me an email: [email protected]


Tim Elected to Amberley Village Council

Building Wood Shelves

No-Solder Epoxy for Copper Pumbing Pipes

Painting a New Wood Shed

Mystery Condensation Problem

Kim Wagner From The Mansion Reality Show

Interview: Building Your Own Home for Dummies

AsktheBuilder mp3 Radio Show Nov 5 2005

Each title below is a direct link to a downloadable mp3 file. Just click the title if you want to listen. Right click if you want to download into your computer to save and play at a later date.

The Copyright to all radio segments is owned by Tim Carter. I would love to know what you think of these radio segments.Do you like them? Do they help you? Have they saved you money and/or time?Let me know by sending me an email: [email protected]


Google Video News

Basement Waterproofing Observations

Making Two Ceilings the Same Height

Large Blisters on Painted Exterior Cedar Shakes

Five Women and Hair in Bath Drain

Curved Gutters and Asbestos in Zonolite Insulation

Newer Recessed Lights Leaking Cold Air in A-Frame House

AsktheBuilder mp3 Radio Show Oct 29 2005

Each title below is a direct link to a downloadable mp3 file. Just click the title if you want to listen. Right click if you want to download into your computer to save and play at a later date.

The Copyright to all radio segments is owned by Tim Carter. I would love to know what you think of these radio segments. Do you like them? Do they help you? Have they saved you money and/or time? Let me know by sending me an email: [email protected]


Tim Visits Google Headquarters and Google Earth

How Many Turbine Vents Does a House Need?

Concrete Overlay on a Garage Roof

Mechanical Plumbing Vent in an Old House

Water Leak in a Plumbing Vent Pipe

Installing a Used Gas Water Heater

Substituting Sand for Gravel in a French Drain

Metal Pegboard Source

Worn Shingles

Screw Extractors

DEAR TIM: Please advise on how to get the stripped screws out of my plywood shutters. Wilma, the hurricane, has been gone a couple of weeks and I still have boards on my windows! I have an electric drill and most of the screws came out or had enough of the metal head showing to use gripper/vise pliers. The rest of the screws are keeping the boards on the windows and I'm getting stir crazy....Woman with drill and no knowledge, Sheila M...thank you for your help!

DEAR SHEILA: All you need is a screw extractor. These little bits fit into a standard drill. The bit has a hardened steel head and the cutting edges actually bite into the head of the screw as it spins counterclockwise. Once it grabs, the screw starts to magically rotate out of the wood.

Two styles of screw extractors. They dig into the damaged screw head and back the screw out. PHOTO CREDIT: Roger Henthorn

Two styles of screw extractors. They dig into the damaged screw head and back the screw out. PHOTO CREDIT: Roger Henthorn

The screw extractors must be used with a power drill that can go in reverse or spin counter-clockwise. The cutting surfaces of the extractor are made to bite into the head of the screw when they rotate in this direction.

The extractors come as a set and can be found at large retail stores that sell clothes, appliances and have a hardware and paint department. Can you think which store that is? It begins and ends with an "S".

Bouncy and Springy Floors

Dear Tim: I live in a new town house where Trusjoist beams were used in my unheated basement. They were used within code for the span ... 16-17 ft. However in my bedroom the handles on my dresser rattle when I walk across a carpeted floor. I am a normal weight 130 lbs., and am going crazy with this problem.

Truthfully, my builder has made some half baked efforts to correct the problem, even Trusjoist people looked at it. Of course, they're not going to say it's been put up right, but also wrong for my house. Do you have a suggestion? Alice S., Delmar, NY

Dear Alice: There are tens of thousands of people out there like you who suffer from bouncy and springy floors. As crazy as this sounds, the floor may indeed be built completely to code and to the manufacturer's specifications. But that doesn't mean you need to suffer.

Floor joists, whether they be solid wood, engineered lumber like yours or even steel, can deflect or bend under a given amount of weight and a given amount of span. If you take a 2x10 solid lumber floor joist that is spanning 16 feet and place a 94-pound sack of cement in mid span, the floor joist will bend downwards a given distance.

But if you remove the sack of cement and shorten the span down to 8 feet and then place the bag of cement at mid span, the floor joist might not deflect a bit or such a small amount as to be hard to measure.

ATB_Art_NewConstruction_EngineeredWood_BTF_UnderSidebar_120x600

This deflection is allowed and is not unsafe if it falls within limits. The building code and most engineering books allow a 1 in 360 deflection. This means that the floor joist is permitted to deflect 1 unit of measure for every 360 units of the same measure of the span. But keep in mind, this is a minimum standard!

The sad thing is the floor could have been designed to meet a stronger standard - the 1 in 480 deflection standard. This simply means the floor joists needed to be the next size up or even taller for the given span you have. You can sometimes achieve the tougher standard by decreasing the spacing between floor joists. This means instead of placing them 16 inches on center you put them 12 inches on center.

The company that made your floor joists have published booklets for years showing both standards to builders. Your builder chose to use the minimum standard.

The floor can be fixed by placing a new beam at mid span down in the basement. This will make the floor as solid as if it were concrete poured over solid rock.

Removing Foundation Tar

Dear Tim: I am putting in a new patio at my home and had to dig out quite a bit of dirt from around my foundation. Now I have the tar that they used to seal my foundation exposed. What is the easiest and best way to remove the tar so I can paint the foundation that is now exposed? I was told by someone in the store that I would have to peel it off but, that would take forever since it is a pretty large area that needs to be done. Is there a chemical that I can use to remove it? Kim P.

Dear Kim: That dampproofing tar is probably old-fashioned asphalt cement. If so, the only liquids I know that will get it off are volatile and dangerous solvents like paint thinner, gasoline, kerosene, etc. These are all distilled hydrocarbons that can soften the tar. I would not use them as the fire hazard is so extreme.

The first thing I would try is a sandblaster. If you are lucky, a tool rental shop may have a small sandblasting kit that works off of an air compressor used by carpenters. Test it for effectiveness. If it works, then move up to the industrial sandblaster that uses the giant compressor contractors use to power jack hammers.

If this fails, then contact the different foundation dampproofing companies in your area. Tell them you have to remove asphalt cement from a foundation and see if they have a suggestion. After all, they apply the asphalt cement all day and perhaps they make mistakes and spray it where it doesn't belong.

Installing Wood Siding

DEAR TIM: The house I grew up in had traditional wood lap siding. It seemed to wear like iron and it has a fantastic traditional look and feel. I would like to install some on a new home and wonder if it is still available and what is the best way to install it. Perhaps the biggest question is how do I make sure that paint will never peel or blister on this new wood siding? Phoebe H., Palo Alto, CA

DEAR PHOEBE: You know what they say don't you? Imitation is the highest form of flattery. It seems like all of the non-wood siding products for years have copied the lap wood siding look. Aluminum, fiber cement and vinyl siding have had imitation lap sidings for years. This tells you that not only is the wood siding a timeless material, the lap siding look is perhaps the most popular. My wife and I love the real lap wood siding on our own home.

Lap wood siding is still available but you have to be sure you buy the right one. I prefer wood products that include preservatives injected by Mother Nature. Cedar and redwood are two such sidings. Both of these wood species have a considerable amount of natural preservatives. You may find other soft or hardwood siding materials, but only buy them if you can be sure they have been treated against wood rot.

Installing wood siding takes time and is not hard to do. Note the painted ends of the pieces behind my head. Each end is painted before the siding is nailed to the wall. PHOTO BY: Kathy Carter

Installing wood siding takes time and is not hard to do. Note the painted ends of the pieces behind my head. Each end is painted before the siding is nailed to the wall. PHOTO BY: Kathy Carter

Be sure to discuss wood grain orientation with the siding salesperson. The best wood siding has vertical grain. Less expensive wood sidings will sport flat grain. You can easily tell a vertical grain wood siding if you look at a freshly cut end. If you see ten, twenty or even 50 of the dark tree rings on the cut edge, the siding is indeed vertical grain. Flat grain wood siding may only have one, two or three dark tree rings visible on the end of a piece of siding. The vertical grain wood siding is more stable and the grain will not raise on the flat surface that you see once it is installed.

Before you even think of nailing up your first piece of siding, there is a critical step you must follow. The wood siding needs to be primed on both sides and all edges before it is installed. Furthermore, each time you cut a piece of siding and are sure it is the correct length, those exposed cut ends must be painted before the siding is nailed to the wall. These critical painting steps help ensure the finish coat of paint will never peel or blister. I feel the best finish paint to use is one that is a blend of acrylic and urethane resins.

If the back and edges of the wood siding are not painted and water soaks into the wood, paint failure is an almost certainty. The water in the wood wants to get back into the atmosphere and it works its way to the front surface of the siding. Once there, warmth, wind and direct sunlight cause the water in the siding to form a vapor which can actually create a real blister in the finish paint. If you paint the back and edges of the siding, water can't get into the wood in the first place.

The sides of the house must also be covered with a water barrier such as traditional asphalt-saturated felt paper or some of the modern synthetic fiber woven water and air barriers. You must use metal flashings and special drip caps moldings above horizontal trim boards, windows, doors and any other dissimilar material other than the siding. The flashings and drip caps help direct water away from the siding and prevent water from getting behind the siding or any trim boards used with the siding.

Be sure the first piece of wood siding or the lowest wood trim board laps over your foundation at least one inch. Water is your worst enemy and you want to ensure that water gets away from the siding and foundation of your home as quickly as possible. Follow all building codes with respect to the height above grade where the siding must start. Not all codes are the same, but I would not have the wood siding any closer to the soil than six inches. The greater the distance between the soil and the first piece of wood the better. If you can adjust your foundation height so there is a ten or twelve-inch space between wood and soil, do so.

Here is the finished product.  Isn't this a handsome garden shed? The wood siding and all trim details match my house perfectly. PHOTO BY: Tim Carter

Here is the finished product. Isn't this a handsome garden shed? The wood siding and all trim details match my house perfectly. PHOTO BY: Tim Carter

The nails you use for wood siding are very important. The best nails are specific siding nails which have very blunt points and are made from stainless steel. These nails also have stacked rings on the shank of the nail for extra gripping power. Siding nails often have smaller heads as well so they are not that obvious if you install them flush with the surface of the wood siding. On painted siding, I always countersink the nail and fill the resulting hole with exterior spackling compound.

To make sure the wood siding does not fall off the wall over time, be sure the nails used are long enough. The nail must pass through the siding, then pass through any sheathing such as plywood, foam board or oriented strand board and finally into a wood wall stud. The nail needs to penetrate the wood stud at least one and one-quarter inch. Do the math and you will discover it is best to use a nail that is 2.5 inches long.


Author's Note

I received this email recently:

Tim, We recently bought a fixer upper that we planned on updating with wood siding. However, we've found that underneath the aluminum siding there are block walls. How can we attach the siding to the blocks? Dawn from Williamstown, MA.

-----

Dawn, You need specific instructions to the wood siding you purchase....ask for the instructions at the lumber yard. If they cannot produce them you can try to get them from the mill that cut the siding or from an association.

Here are some lumber associations: International Wood Products Association, North American Wholesale Lumber Association, Southern Forest Products Association, Southern Pine Council, Western Red Cedar Lumber Association, Western Wood Products Association, Wood Component Manufacturers Association.

Column 589

How To Remove Wallpaper

Dear Tim: I was attempting to remove some old wallpaper and found the previous owners of our home had applied the wallpaper over the wallboard un-primed (or at least that is how it appeared). I pulled off a great deal of wall board facing right down to the plaster core.

Thanks to your columns on the subject of wall covering, I think I have made the proper repairs, re-plastered, used shellac to keep plaster from soaking and drying too quickly, used a wall covering primer to provide the correct surface for wallpaper. I am also planning to use a sizing to help with the application process - good idea?

My question - My days are very limited and I do not know if I have the opportunity to apply all the wallpaper in one day? Can I set-up and apply only 4-5 pieces of wallpaper one day, and then come back days later and apply some more, and keep this progression till I am finished? With all the discussion of shrinkage and stretching, and the necessity to 'book' the wallpaper, I wondered if this would effect the wallpaper. George B.

Dear George: It sounds as if you have done all of the right things in getting the walls ready for the next wallpapering job. As for sizing, you absolutely must do it. I use a paint-like product that once dry appears to be a semi-gloss paint. But it is indeed a wallpaper primer that functions as a traditional sizing compound.

The purpose of this product is to block the adhesive from making its way to a traditional plaster surface or to the paper facing of traditional drywall. If the tough glue does this, you know the horrible results. This paint sizing is easy to apply and dries quickly.

As for applying wallpaper on different days, there is no problem with that at all. You only paste up and book as many sheets of paper as you can hang in one hour. The way I do it is that I always have one piece of cut paper pasted and booked as I am hanging the one before it. As soon as I finish hanging a strip of paper, I then cut a new piece from the roll, apply the paste activator, book it and then set it aside. At this point I have two pieces of booked paper, the first one having been set aside perhaps 15 minutes before.

The paper will expand at the same rate each day so you will not have any matching problems whatsoever.

Restoring a Metal Firebox Damaged by Hurricane Katrina


DEAR TIM: My house was flooded with 4' of water during hurricane Katrina on 8-29-05. My built-in wood burning fireplace, which is a metal box, is starting to rust. Can I wire brush the rust and clean with a strong cleaner and avoid having to replace it? Walter B.


DEAR WALTER: You absolutely can clean the firebox and reuse it. The only thing that would be a reason to condemn it is if the metal firebox has developed a crack or hole that would allow embers or hot flue gases to bypass the box and enter anything other than the chimney.

The fire and draft created by a fire will help sanitize the unit. Do not bother to paint the firebox as the heat will destroy most common paints.

AsktheBuilder mp3 Radio Show Oct 22 2005

Each title below is a direct link to a downloadable mp3 file. Just click the title if you want to listen. Right click if you want to download into your computer to save and play at a later date.

The Copyright to all radio segments is owned by Tim Carter. I would love to know what you think of these radio segments. Do you like them? Do they help you? Have they saved you money and/or time? Let me know by sending me an email: [email protected]


Tim Does Phone Consults, Bad Drywall Problem

Detached Garage Structural Problems

Caller Comments About Detached Garage Structural Problems

Locating Fantastic Super- Duct Tape

Solving Poor Drainage Around a New Jersey Garden Room

Truss Uplift Solutions

Removing a Rusted Washing Machine Hose

Tim Goes to Google Zeitgeist