Deck Cleaning / Use Oxygen Bleach – Avoid Damage

! ! ! See Author's Notes at Bottom of Column ! ! !

Start the presses! The raw data from the latest Earlham University study about wood sealer performance has just been received! The final report will take a few weeks to be generated but the visual findings tell the tale. The actual findings were just released to me several months ago on May 2, 2001.

Why are these test results so important? It just so happens that outdoor wood cleaning and sealing is one of the most important topics I have ever covered. I have discovered that homeowners like you are disgusted with the poor performance of the heavily advertised brands you see on TV and those that clutter the shelves of many of the big box home centers that dot the fruited plain.

It takes a lot of work to clean a deck or wood siding and then seal it. It is no wonder that you get upset when the deck or siding turns black, gray or green after six to nine months! Imagine a wood sealer that lasts two to three years! It is possible to get results like that if you choose wisely.

Cleaning First

Before you apply any wood sealer - preferably a penetrating water repellent - the wood needs to be clean. This is a common sense issue. Each and every spring I am amazed at how much disinformation there is out there about this process. Each spring I see magazine and newspaper articles promoting the use of chlorine bleach-based products.

Chlorine bleach is a wonderful sanitizer. If you want to kill germs, use it. If you want to kill the trees and plants around your house, use it. If you want to take the color out of your deck lumber, use it. If you want to accelerate the corrosion of the nails, screws and structural hardware that holds your deck together, use it.

If you want to avoid all of the above problems, use Oxygen bleach to clean your deck! See below for details about oxygen bleach.

The Cleaning Process

I wish I could share with you all the handwritten letters and emails I have received about decks that have been ruined by power washing. This method of cleaning decks is simply a huge mistake in my opinion. It doesn't take a rocket scientist to figure out that wood is soft and can be easily eroded with a high pressure stream. I get calls from professional cleaners all the time telling me I am wrong. They say if you hold the wand just right there is no damage. They are wrong. There is damage, it just may not be visible unless you look closely. What's more, the damage is cumulative. Wash your deck with a power washer year after year and I guarantee that you will see erosion of the light colored areas of the lumber.

I have written a step-by-step deck cleaning tutorial . The photos at this section are not enhanced! Wait till you see the before and after shots. I did the entire thing with oxygen bleach and it is so easy to use. We were working above a valuable rose garden and the rose bushes were not harmed in the least by the oxygen bleach cleaner.

Really Easy

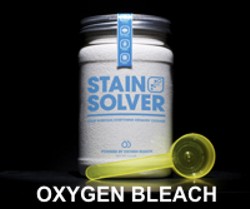
I get reviews every week from people who have used my Stain Solver Oxygen bleach. I started selling oxygen bleach many years ago, when I saw how well it performed. Within the past two weeks, I received test data that shows that my oxygen bleach product works even better than pure oxygen bleach. I know it sounds crazy, but it is true. Mark U. is a satisfied user and told me this:

"Tim, your Stain Solver exceeded our expectations! The deck looks superb! The product was easier to work with than you said it would be."

It is indeed easy. You simply pour the oxygen bleach powder into some warm water, let is dissolve, apply it, let it sit, lightly scrub and rinse!

The trick to cleaning decks with oxygen bleach is to work in the cooler part of the day and to keep the surface of the wood wet with the solution for 15 to 20 minutes. It will foam and bubble and the oxygen is working, not you. Lightly scrub to remove loose and UV damaged wood fibers and rinse with a garden hose. It is that simple! I URGE you to go to my website to view the tutorial!


Author's Notes:

Read Sheryl's comments about using a pressure washer on her deck.

Tim,

"I am going to order some of your Oxygen bleach to clean my wooden deck that is on "the list" this summer. I sure wish I had known about this product before I power washed it two years ago - as I wondered why the wood looked messed up afterwards."

- Sheryl W., State Park, SC


Message from Tim:

Years ago while researching a column about cleaning decks, I discovered the wonders of Oxygen Bleach. It is perhaps the 'greenest' cleaner I know of as it uses oxygen ions to break apart stains, dirt and odor molecules. There are no harsh chemicals, and it works on just about anything that is water washable.

I decided to create my own special blend using ingredients made in the USA. In fact, the raw materials in the active ingredient are food-grade quality registered with the FDA. I call my product Stain Solver. I urge you to use it to help with cleaning your deck or wood. You will be amazed at the results!

Column B378

Oxygen Bleach / Deck – Siding – Multi-Purpose Cleaner

! Oxygen Bleach !

Now, here is one of the best kept secrets out there about oxygen bleach. Go to stores and the clerks and managers look at you like you are crazy! Why? Because it takes years and tens/hundreds of millions of dollars of advertising to build brand awareness of a product.

If you watch TV, you have undoubtedly seen commercials and infomercials about some oxygen bleach products. The trouble with what you see on TV is that the commercials and infomercials are very sensational. There is some smoke and mirrors going on, trust me. Oxygen bleach does all of those things you see and more, but it doesn't do it in seconds like they show you! What's more, the products that are advertised on TV contain a significant amount of filler. In addition, some of the TV products contain the active ingredient oxygen bleach that is NOT made in the USA. The purity and quality of this oxygen bleach may be suspect. If you buy products whose ingredients are NOT made in the USA, you very likely are not getting the best buy for your money.

Just after I published the column about cleaning wood siding, I learned that the most powerful Oxygen bleach available is one that is blended with a precise amount of soda ash. The soda ash boosts the alkalinity of the solution but surprisingly does not raise the pH. This means it is safe to work with and yields the best cleaning results. I now sell Oxygen bleach that is blended to achieve this high standard. I call my product Stain Solver. To the best of my knowledge, I am the only company in the USA that blends it to this precise concentration. What's more, the ingredients in Stain Solver are all made right here in the USA. I have had tens of thousands of people buy it over the years and they are all satisfied.

Stain Solver cleans Cedar SidingBetter Buy???

I have also seen some of my competitors products for sale in grocery stores, warehouse membership clubs and national chain discount stores. They are Oxi-Clean, Oxygen 8, Wolman's Deck Brightener and a product called Timberwash. BUT, do the math before you buy! By the time you calculate the amount of actual oxygen bleach you are getting, your cost to drive to pick it up, your wait in the checkout line and all of the other hassles, you just might be better off buying an oxygen bleach product that has the highest concentration of active ingredient. Most of the competitors have only 70 percent active ingredient. Others have only 65 percent and one of the above has, I am told, just 50 percent!

How Much Do I Need?

People want to know how much to buy. Two pounds of my Oxygen bleach needs to be mixed with 5 gallons of water to get the best wood cleaning results. If you buy another brand, you will need to add more to get similar results.

I find that 5 gallons of oxygen bleach solution will clean 300 to 500 square feet of surface area. People often underestimate the amount of square footage in deck railings. The average railing on a deck contains four square feet of surface area for each linear foot of railing. It sounds unbelievable, but it is true. The bottom line is that the average sized deck that may be 15 feet by 20 feet needs at least 5 pounds of Stain Solver. Most people order 9 pounds just to be on the safe side. Cleaning the wood siding on a house may easily take 18 pounds or more.

You can call us at 513-407-8727 to order if you like, or go to www.stainsolver.com.

Stain Solver Website

Message from Tim:Years ago while researching a column about cleaning decks, I discovered the wonders of Oxygen Bleach. It is perhaps the 'greenest' cleaner I know of as it uses oxygen ions to break apart stains, dirt and odor molecules. There are no harsh chemicals, and it works on just about anything that is water washable.

I decided to create my own special blend using ingredients made in the USA. In fact, the raw materials in the active ingredient are food-grade quality registered with the FDA. I call my product Stain Solver. I urge you to use it to help with cleaning projects. You will be amazed at the results!

Column B378

Wood Finishes – Water Repellency Test Results

The Latest Independent Wood Finish Test Results as of 11/2000

NOTE FROM TIM CARTER - Founder of AsktheBuilder.com - posted October, 2016: I no longer would apply Defy deck sealer to any exterior wood that I own at my own home.

The information below is very dated and what's more, just about all deck sealers will look good after six months. In 2012, I began an extensive test of my own on many popular deck sealers. CLICK HERE to read about this test. TC

# # #

On November 1, 2000, the Earlham Analytical Testing Labs located in Richmond, Indiana started a weathering test of 30 penetrating wood finishes. To make sure apples were being compared with apples, only penetrating semi-transparent finishes were tested. This is important! In other words, clear finishes that contain little UV protecting pigments were not included in the study.

It is not uncommon for the testing procedure to look at the samples after six months and then continue on with the testing until certain products begin to fail. Preliminary results of this ongoing, independent testing on penetrating semi-transparent wood finishes indicates that the products listed below are ranked in the top five, based on performance in ASTM water repellency testing and six months of outdoor exposure. The five products listed in alphabetical order are:


  • DEFY Penetrating Water Repellent Wood Finish manufactured by SaverSystems is a water-based, synthetic resin formula. Defy comes in a range of colors which are illustrated on their web site.
  • F & P Premium Wood Finish manufactured by Wolman Wood Care Products is an oil-based formula.
  • Sikkens Cetol SRD manufactured by AKZO Nobel Coating, Inc. is an oil-based formula.
  • Storm Stain Linseed Oil Alkyd Decking Stain manufactured by California Products Corp. is an oil-based formula.
  • TWP Total Wood Preservative manufactured by Gemini Coatings, Inc. is an oil- based formula.

These are the six months preliminary results as of 2001. For an update on this topic, read my column on Clear Epoxy Deck Cleaner.

Synthetic Resins vs. Natural Oils

Only one of the top five performers is a synthetic resin based product. Natural oil products often become food for mildew and algae once the mildewcides and fungicides in the finishes are damaged by sunlight and/or dissolved away by repeated rainfall or snow melt. This may be the biggest reason your past deck finishes have turned black or green. The mildew and algae were actually eating your deck finish. This is often not a problem with synthetic resin finishes.

No matter what product you choose to use, read the directions and follow them closely. I have personally used Defy on my wood porches over the years and have had great success. Many, many past readers of my columns and bulletins have also had huge success with Defy. I get phone calls, emails and letters with photos on a regular basis from homeowners just like you that love the performance of Defy. Remember, follow directions of any of the above products to get long lasting results.

Column B378

Vinyl Siding – Solid Core

Several months ago, I was contacted by a public relations firm about a new vinyl siding product. At first, I simply couldn't get too interested in the product. After all, vinyl siding is vinyl siding, right? Chris, the account manager at the firm continued to make timely and patient calls to see if I had reviewed the sample board and the printed materials. My answer was always the same, "I am going to do it soon!"

The Invitation

One month ago, I got a call from Chris and he invited me to tour the vinyl siding manufacturing plant and meet face to face with the team of people who made this revolutionary product. I needed a break from the office, the plant was only a two hour drive so I said, "Yes."

Little did I know that I was about to uncover a very intriguing building material. In fact, it turns out that the product is so unique it has caused an overwhelming response for this Builder Bulletin. Every now and then, I stumble across a product that really hits the hot spot with consumers. This is one.

Guaranteed Winner

One of the new betting games is to bet on the loser of a game. When I visited the siding plant four weeks ago and toured several model homes that had this new siding product, I knew instantly that the company had a guaranteed winner.

This revolutionary vinyl siding solved several problems that traditional vinyl could not seem to escape from. First, the solid core siding is surprisingly realistic. It simply looks like wood siding. The company achieved this by removing the characteristic bow or curl you often see in vinyl siding. They also increased the depth of the product so the shadow line of the overlaps look deeper.

The solid core nature of the product also solves the flimsy or rattle problem. Touch or push against any other hollow vinyl siding and you think of the little pig who built with straw in the Three Little Pigs fable.

The solid foam core, by default, solved the energy issue. No other vinyl siding could ever say it saved energy. This new product, with its integral foam core, has an R-value of 4.0. It is indeed in a class all by itself.

Quit Teasing Me Tim!

Okay, so now I have you all hot and bothered and you are tired of waiting to see who makes it. Would it be a surprise if I told you that the company that makes this siding was the original manufacturer of vinyl siding? It is made by Crane Plastics Inc. based in Columbus, Ohio. They have renamed the product and have removed the word vinyl from its name. They prefer to call it: CraneBoard.

An interesting fact is that for many years the folks at Crane made siding for other companies. They were a jobber in my opinion. They just cranked out siding and pretty much kept to themselves. As soon as they had the idea for this product, someone in the company figured out that they better keep this to themselves and sell it exclusively. It was a brilliant decision.

Not Far Behind

This new product hit the market in the spring of 2001. It didn't take long for other competitors to see what the Crane folks had seen 18 months before when they developed it. The other vinyl siding manufacturers are scrambling to bring a knock off product to the market. This is good! Why? Because it will cause all of the players to further refine the product. The first company that has produced a knock off is Norandex. They call their new siding Polar Wall Plus.

Related Column: The Next Generation Of Vinyl Siding - Solid Core

Column B383

Vinyl Siding Installation Tips

vinyl siding installation

Vinyl siding installation - This is classic double-lap vinyl siding being installed. A small crew of workers can completely cover a house in a day or two if nothing is in their way. Copyright 2018 Tim Carter

"Wind can cause the vinyl siding to rattle. The sun and heat can cause the vinyl siding to grow or expand."

Vinyl Siding Installation Checklist

  • Vinyl siding is affordable
  • Dark colors can fade
  • Never nail the siding tight to the wall
  • Water barrier must be installed behind the siding

How Popular is Vinyl Siding?

Vinyl siding is just about the most popular exterior building material in use today. It's used in vast quantities in the remodeling market as people replace old aluminum siding or cover wood siding maintenance nightmares. Over two billion square feet of vinyl siding is produced each year in the USA.

This number is expected to rise significantly because of the arrival of the new solid core siding product. People who were previously turned off by the look of vinyl may be attracted to this product. Rising energy costs will undoubtedly cause more builders to use this siding to make their homes more energy efficient.

Related Links

Painting Ugly Vinyl Siding - SECRET Information - Please Do NOT Share

How To Clean Vinyl Siding

Free & Fast Bids

CLICK HERE to get FREE & FAST BIDS from local vinyl siding contractors.

Is it Hard to Install Vinyl Siding?

Vinyl siding is not too hard to install but it takes a little skill, proper equipment to get you and the product up in the air, and some layout skills. You need to be able to look forward and above you to see how you are going to deal with certain details on the home.

You must always be aware of drainage paths and protection of the framing lumber. Water can get behind vinyl siding and it must not be allowed to touch any wood!

What is the #1 Problem with Vinyl Siding Installation?

Guess what? The number one problem with vinyl siding is improper installation by the installer! Over 99 percent of all problems can be traced to installers.

Unfortunately, many installers use unskilled laborers to install the product. Or, some builders allow untrained individuals to attach it to walls and gable ends. While it is not a hard product to install, there are many things you need to know if you want a professional installation. Here are several of the most important aspects of installing vinyl siding:

What Tools are Required?

Vinyl siding requires some very basic tools. Here is a list of tools that will help you complete the job:

  • hammer
  • level
  • tape measure
  • chalk line with blue chalk
  • circular saw with a fine blade
  • utility knife
  • tin snips
  • framing square
  • caulk & gun
  • drill (optional)
  • cutting/sawing table
  • ladders
  • misc. other staging equipment

Here are a few specialty tools that can come in handy:

  • snaplock punch
  • nail slot punch
  • zip unlock tool

How Smooth Should the House Be?

The surface to which the siding will be applied must be as smooth as possible and solid. Now is the time to seal energy leaks. Caulk all cracks around windows and doors at this time.

If you want to increase the energy efficiency, you may want to install foil faced foam sheathing at this time. This is especially true if you are installing vinyl over an existing brick or wood sided house. If you are installing vinyl on a new home, be sure you have instructed your builder to install foil faced foam sheathing AND an air/water infiltration barrier.

CLICK HERE to get FREE & FAST BIDS from local vinyl siding contractors.

When are Vinyl Accessories Installed?

Corner posts, J channels, light blocks, dryer vent accessories, front door cornices, arches, etc. are all installed first. The vinyl siding is actually the last thing that is installed.

The corner posts, J channels, and other trim pieces have a channel into which the ends of the siding rests. This hides the cut end of siding from view. Why? Vinyl siding is not solid. If you were to look at it sideways, it would be quite unattractive.

Is Vinyl Easy to Work With in Warm Weather?

Vinyl siding and trim is very pliable in warm weather. It will cut readily with tin snips. Vinyl siding may crack and chip if you work with it when temperatures drop below 20 F.

What is Vinyl Siding J Channel?

J channel is the trim piece that is used to surround windows and doors on many occasions. It is available in a standard width and often an extra wide width. The extra wide material looks more like real wood trim. I suggest you consider it. There are special ways that the trim must be cut and nailed. Each manufacturer publishes a handy installation guidebook with easy to understand language and illustrations. You must follow the instructions so that rain water does not get behind the siding and trim!

How Does Vinyl Siding Install?

Vinyl siding pieces interlock with one another. You install vinyl siding from the bottom of the structure and finish at the top. The material is blind nailed through slots found at the top of the siding.

How Do You Install the First Piece of Siding?

You install a pre-bent piece of the aluminum starter strip. It must be installed level or parallel with the line you wish to follow as the siding goes up.

Remember, the first piece of siding is pulled up tight to the starter strip. Each successive piece of siding is pulled tight to the one below. So, if you goof up the starter strip, all the rest of the siding will be crooked!

How Much Does Vinyl Siding Expand?

Vinyl siding and trim expands and contracts with changes in temperature. A standard 12-foot piece of vinyl siding can expand just over 1/2 inch from what it measures in the dead of winter to a blistering-hot summer day.

Warped vinyl siding

Vinyl siding is plastic. If it gets up over 200F, it can melt and distort. This damage was caused by windows on another house that reflected and concentrated the sun's rays. Copyright 2018 Tim Carter

How Are Corner Posts Installed?

The corner posts must be installed 1/4 inch away from the soffit or another horizontal stop point at the top of each corner. Plumb each corner post and drive the first nail in the top of the nailing slots.

All nails must be nailed in the top of the slots so that the corner posts 'hang' from the nails. Keep the nail head 1/32 inch away from the vinyl. This will allow the vinyl room to expand and contract.

If you need to splice two lengths of corner post together, the upper piece overlaps the lower piece. This allows rainwater to shed off just like a shingle roof.

Should I Study a Piece of Vinyl Siding?

Look at a full panel of siding before you install it. Note the upper and lower corners on the front and back.

There are factory-made notches. These notches are important. You may find yourself replicating them on a cut piece. These notches allow you to overlap pieces of siding. The siding pieces can move sideways independent of one another because of the notching.

Why Does Vinyl Siding Rattle?

Wind can cause the vinyl siding to rattle. The sun and heat can cause the vinyl siding to grow or expand. For these reasons, it's VITALLY important that vinyl siding is nailed properly!

If you nail too loosely, the vinyl siding will rattle and flap as the wind blows. If you nail it too tightly, then it will bubble and bow on a hot day. The proper nailing is somewhat easy.

How Do You Nail Vinyl Siding?

The vinyl siding flange must be tight against the sheathing. The head of the nail must stop within 1/32 inch before touching the vinyl siding. This space is just less than the thickness of a dime! Make sure you and/or your installer does this part correctly!

How Do you Make Angle Cuts?

How do you find these angles? Easy! Slide a full piece of siding so the top corner just touches the angle. Lay a scrap piece of siding against the gable end angle.

Trace along the bottom of the siding a line which is parallel to the roof line. This is the line you need to cut to produce the gable end angle. If, after cutting, the piece fits (it should!), then save the outfall and use it as a template for all future cuts.

Should I Read the Installation Booklet?

Get the booklet from the manufacturer! It will be a great aid to you.

CLICK HERE to get FREE & FAST BIDS from local vinyl siding contractors.

Column B383

CCA Lumber – EPA Press Release

EPA Press Release Concerning CCA Lumber

FOR RELEASE: TUESDAY, FEB. 12, 2002

WHITMAN ANNOUNCES TRANSITION FROM CONSUMER
USE OF TREATED WOOD CONTAINING ARSENIC

Contact: Dave Ryan, 202-564-7827

EPA Administrator, Christie Whitman, today announced a voluntary decision by industry to move consumer use of treated lumber products away from a variety of pressure-treated wood that contains arsenic by December 31, 2003, in favor of new alternative wood preservatives. This transition affects virtually all residential uses of wood treated with chromated copper arsenate, also known as CCA, including wood used in play structures, decks, picnic tables, landscaping timbers, residential fencing, patios and walkways/boardwalks. By Jan. 2004, EPA will not allow CCA products for any of these residential uses.

"This action will result in a reduction of virtually all residential uses of CCA-treated wood within less than two years," said EPA Administrator Christie Whitman. "Today's announcement greatly accelerates the transition to new alternatives, responding to marketplace demands for wood products that do not contain CCA. This transition will substantially reduce the time it could have taken to go through the traditional regulatory process."

"This is a responsible action by the industry," Whitman continued. "Today's action will ensure that future exposures to arsenic are minimized in residential settings. The companies deserve credit for coming forward in a voluntary way to undergo a conversion and retooling of their plants as quickly as possible. The transition to new alternatives will provide consumers with greater choice for their building needs."

The transition period will provide consumers with increasingly more non-CCA treated wood alternatives as the industry undergoes conversion and retooling of their industrial equipment and practices, while also allowing adequate time to convert treatment plants with minimal economic disruption for the industry's employees. Beginning immediately, and over the next 22 months, wood treatment plants will convert to new alternative wood preservatives that do not contain arsenic. In the current year, manufacturers expect a decline in production of CCA products for affected residential uses up to 25 percent, with a corresponding shift to alternatives. During 2003, the companies expect the transition away from CCA to continue and increase, with a decline in production of CCA products for affected residential uses up to 70 percent, with a corresponding shift to alternatives. New labeling will be required on all CCA products, specifying that no use of CCA will be allowed by the wood-treating industry for the affected residential uses after Dec. 31, 2003.

EPA has not concluded that CCA-treated wood poses unreasonable risks to the public for existing CCA-treated wood being used around or near their homes or from wood that remains available in stores. EPA does not believe there is any reason to remove or replace CCA-treated structures, including decks or playground equipment. EPA is not recommending that existing structures or surrounding soils be removed or replaced. While available data are very limited, some studies suggest that applying certain penetrating coatings (e.g., oil-based semi-transparent stains) on a regular basis (one re-application per year or every other year depending upon wear and weathering) may reduce the migration of wood preservative chemicals from CCA-treated wood.

Arsenic is a known human carcinogen and, thus, the Agency believes that any reduction in the levels of potential exposure to arsenic is desirable. As always, when children play outside, whether around CCA-treated play structures or not, they should wash their hands prior to eating. Also, food should not be placed directly on any outside surface, including treated wood. CCA-treated wood should never be burned, as toxic chemicals may be released as part of the smoke and ashes. Consumers who work with CCA-treated wood are encouraged to use common sense in order to reduce any potential exposure to chemicals in the wood. Specific actions include sawing, sanding and machining CCA-treated wood outdoors, and wearing a dust mask, goggles and gloves when performing this type of activity. Clean up all sawdust, scraps and other construction debris thoroughly and dispose of it in the trash (i.e., municipal solid waste). Do not compost or mulch sawdust or remnants from CCA-treated wood. Those working with the wood should wash all exposed areas of their bodies thoroughly with soap and water before eating, drinking or using tobacco products. Work clothes should be washed separately from other household clothing before wearing them again.

Chromated copper arsenate, or CCA, is a chemical compound mixture containing inorganic arsenic, copper and chromium that has been used for wood preservative uses since the 1940's. CCA is injected into wood by a process that uses high pressure to saturate wood products with the chemicals. CCA is intended to protect wood from dry rot, fungi, molds, termites, and other pests that can threaten the integrity of wood products.

During the past several months, CCA-treated wood has been the subject of an EPA evaluation under provisions of the Federal Insecticide, Fungicide, and Rodenticide Act, which direct EPA to periodically reevaluate older pesticides to ensure that they meet current safety standards. The Agency is continuing to proceed with a risk assessment. EPA is also continuing to evaluate public comments and input from an external scientific review panel on methodologies to perform a risk assessment for residential settings and potential exposure to children from CCA.

More information on this subject is available at: http://www.epa.gov/pesticides/factsheets/chemicals/1file.htm

Column B408

CCA Lumber – EPA Ruling

EPA Ruling on CCA Lumber

CCA lumber .... I remember clearly when I first saw it at the lumber yard. The salesman said, "Here it is. Miracle lumber. You don't ever have to do anything to it." My guess is that this is what the lumber wholesaler told him. For all I know, they all believed what they were saying. I can tell you that 25 years ago, they sure convinced me.

But after installing some of it and seeing what happened when the chemical-saturated lumber dried out, I knew they were wrong. Sure, the wood didn't rot, but it cracked, twisted, warped, cupped, turned gray, etc. In addition, it appears there is a good chance, it was silently contaminating people and property that came into contact with it.

As we all know now, the lumber contained large amounts of three chemicals that were working to preserve it from rot and insect attack. The three chemicals are: inorganic arsenic, copper and chromium. Just about everyone knows what arsenic can do if you ingest enough of it. Copper is somewhat harmless, but chromium is indeed a heavy metal. Ingest too much or too many different heavy metals, and you can have health problems for sure. It is a known fact.

Water is the Problem

The chemicals are delivered into the wood using water. All three of the chemicals can be dissolved in water. Raw lumber is placed in a pressure vessel with the chemical brew solution. The pressure is turned up and the chemical solution is drawn into the wood.

The trouble is that the process can be reversed. Rain water and snow melt can leach these chemicals back out of the lumber that is used on your deck and playset.

You can actually create even more problems if you use a pressure washer to clean your CCA deck or lumber. Why? These devices drive water deep into the lumber. There they can dissolve even more chemicals. The pressure washers also erode the wood fibers that contain the preservatives. This contaminated wood fiber ends up in the soil around your property.

Are you scared yet? Don't be. Should you be concerned? Absolutely yes.

Encapsulation

The Environmental Protection Agency press release concerning this issue clearly states that you don't have to go out and destroy your CCA lumber. You can safely co-exist with it if you simply keep it well sealed. This sealing process stops water from infiltrating into the wood. Stop water infiltration and you stop chemical leaching.

The Best Sealer

Talk to different people about deck sealers and you get different answers. One thing I can tell you is that MANY highly advertised national brands and those available at home centers are made using natural oils. These oils are food for mildew and algae. As soon as the mildewcides contained in these products break down, your deck becomes a buffet for mildew and algae.

I have found, along with thousands of my readers over the past six years, that there is a wonderful synthetic resin sealer called Defy. The Defy product is not mildew food. It is a very environmentally friendly product that is water based. It comes in 10 different colors and is semi-transparent.

NOTE FROM TIM CARTER - Founder of AsktheBuilder.com - posted October, 2016: I no longer would apply Defy deck sealer to any exterior wood that I own at my own home.

What's more, over the past six years, it has consistently finished in the top five of the Earlham University Deck Sealer studies. The bottom line is that it is a superb deck sealer that holds up better than virtually any other product.

Column B408

Plywood – Proper Installation & Handling

Plywood Tips

Many people have seen plywood swell. It is not a pretty sight. Individual pieces of plywood buckle, twist and sometimes bubble or delaminate. These problems are, more often than not, caused by water or water vapor.

When this swelling takes place after the plywood is installed, flooring, roofing, and or siding products can begin to look less than perfect. Corrective measures can be expensive. Hoping that the plywood will shrink and return to its original shape can be futile. Rarely, if ever, will the plywood return to its original shape and size.

The key to avoiding these problems is to plan for the swelling. This is accomplished quite easily if you simply follow established guidelines offered by plywood manufacturers and associations.

Plywood and Expansion

Wood, because of its cellular and fibrous structure, can readily absorb water. It can absorb water in the liquid state as well as the vapor state. This is extremely important to know, as many residential problems are related to water in the vapor state.

When water vapor levels rise, the cells within a piece of plywood pick up the water. The cells begin to expand ever so slightly. This expansion is greatest along the face of the grain of a piece of wood. This means that on a piece of 4 x 8 plywood, you can experience expansion due to swelling across the 4 foot dimension as well as the 8 foot dimension. Don't forget, plywood has the face grain aligned in two directions! That's why they call it plywood. The face grain of each ply, or layer, is oriented 90 degrees to the ply immediately above or below. You can see this orientation and layering when you look closely at the edge of a piece of plywood.

This means that plywood expands both lengthwise and widthwise when it is subjected to excessive moisture. Knowing this, it is important that you plan for this expansion.

Puckering Plywood

I have seen hundreds of houses where the roofing plywood has been installed improperly. The evidence is unmistakable.

Depending upon the time of day, the angle of the sun in the sky and the pitch of a roof surface, sunlight will expose minor imperfections in either the shingles or the plywood beneath the shingles. The humps and bumps in the roof cause the light to be reflected differently from the ceramic granules on the shingles.

If you install plywood sheets tightly against one another, the edges tend to pucker upwards when they expand. This happens because there is no other direction for them to go to relieve the swelling pressure. In severe cases, the sheets of plywood can actually create humps and dips between the roof framing members.

The Solution - 1/8" Spacing

Plywood manufacturers are aware of these problems. Virtually every one recommends that you, your carpenter or builder create a 1/8 inch gap around all edges when installing plywood. This gap will minimize or totally eliminate any puckering caused by swelling. Use a 16d sinker nail for this purpose. The shaft of the nail is slightly larger than 1/8 inch.

Nailing is Important Too!

In order to achieve the best results when installing plywood products, it is very important to use the proper size nail. The nailing pattern that is used is also very critical. Not all plywood applications require the same size nail or spacing between nails. You must check before you nail. Not only that, the spacing of nails on the edges of a panel are frequently different from the spacing within the panel.

Wind Forces and Plywood

A 4 x 8 piece of plywood when exposed to wind forces is nothing more than a large sail. I have almost been blown off roofs on windy days when handling plywood. Because of the large profile that plywood presents, it is important to nail the edges securely. Strong winds can begin to easily pull plywood from walls or roofs in the event they have not been secured properly. Many manufacturers recommend that nails be spaced no farther apart than 6 inches on the edge of a sheet.

Also, nails should be no closer than 3/8 inch from the edge of a panel and driven flush. Do not countersink these nails!

Column B47

Wood / Plywood Manufacturers & Associations

Plywood Manufacturers and Wood Products Associations

The following manufacturers and associations can provide you with helpful literature and information concerning plywood, its characteristics, recommended installation and storage procedures, and care instructions to maximize its useful life. Read as much as you can on each web site!

  • Georgia Pacific

  • K Ply, Inc.

  • North American Plywood Corp.

  • Weyerhaeuser

  • APA - The Engineered Wood Association

  • American Wood Council

  • Southern Forest Products Association

Column B47

Ventilation Hints

Ventilation Hints

Many model building codes call for minimum ventilating areas for attic spaces. The requirements in many of these codes are based on net free ventilation area. This means that you must measure the space of the opening without any screening material which slows air flow. This is often overlooked by many builders. Pot vents with insect screening often have the net free ventilating area stamped on them.

1. The minimum net free ventilation area called for in many building codes is 960 square inches for each 1,000 square feet of ceiling area of the house. If you use a continuous ridge system combined with a continuous soffit system, you can reduce the net free area to 480 square inches.

2. NEVER vent exhaust air from clothes dryers, bathroom fans, or kitchen exhaust fans into attic spaces. These devices can exhaust massive quantities of moist, humid air into attic spaces. Kitchen fans can also exhaust grease laden air into attics which can create an extreme fire hazard.

3. Cathedral ceilings require special attention. Each joist space must be separately vented. Interruptions of framing members for skylights must be side vented to adjacent free flowing joist spaces.

4. During construction, be sure to caulk or seal around all pipes and wires that penetrate the top plates of walls. Air can readily leak into attic spaces around these openings.

I have found that it is often best to vent fans and dryers through the roof. I urge you to watch this video of mine to see how easy it is to install the correct vent-cap flashing on a roof. Have no fear - if done right you will have no leaks.

Column B47