Column B38
Drywall Finishing Tips
Mixing the Compound
Probably the biggest mistake I see amateurs make is applying the joint compound straight from the bucket. Professionals always add a slight amount of water and use a drill or hand operated mixing tool to whip the compound into a creamy mix. It should have the consistency of cake icing. It should be very smooth. Often the easiest way to mix is to have a spare five gallon bucket. Open the new container and scoop half of the unblended compound into the spare clean bucket. This will make mixing very easy. Only mix half at a time, in case you add too much water. The addition of too much water will cause serious problems. The compound will lose its strength and durability characteristics.
Drywall Taping
When taping, do not scrape too much compound from beneath the tape. Blisters will develop if you do this. Believe me, you will know when you put on your second coat. Common sense tells you not to put on too much. Before you even begin to tape, take a straight edge and put it across the tapered joints where two pieces of drywall meet. There is not that much space. Imagine this space filled with joint compound and tape after you are finished. The tape should be in the middle of two layers of compound! It is not as easy as it looks. Too little mud and you get blisters. Too much mud and you will have a hump. Try a little area and practice. Some people can do it and some cannot. I had one helper who worked for me for six years and he never was able to develop the touch. Good luck!
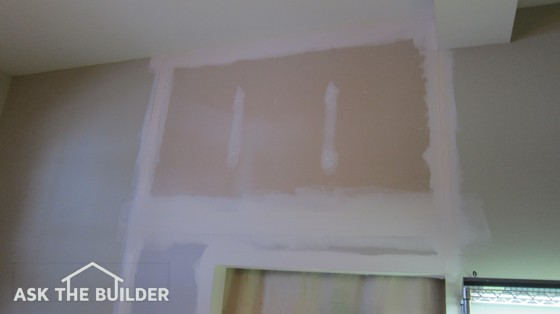
Always let the compound dry between coats. Professionals finish drywall in three stages. They tape on the first coat and apply the first coat on all fasteners. They follow with a generous second coat and hit all corner beads and other trim pieces. This second coat is the hardest. One side of each corner is coated at this point. Apply a second coat to all fasteners and seams. Frequently, it looks a little messy. Swirls and lines may appear in flat and butt seams. The compound may appear a little thick at the seams. It probably is. Often professionals lightly sand all of the seams before they apply the third and final coat. The third coat consists of applying a coat to the remaining side of each corner, skim coating all seams to fill in lines, depressions and swirls, and hitting corner beads and trim pieces. All fasteners are coated for the third and final time.
Drywall Sanding & Drywall Painting
If all has gone well, when you sand you will have a very smooth job. The paint job will make or break a drywall job. Frequently, people do not apply the proper primer. Make sure that you do. Read the paint can label and make sure that it says the primer is intended for new drywall. Don't let anyone tell you that regular paint will do. Only believe the manufacturer. Check it yourself. The primer coat is the most important layer. All other subsequent coats of paint depend on it. Don't underestimate its importance.
Some drywall manufacturers make a special drywall primer paint. This paint eliminates common decorating problems referred to as 'joint banding or photographing'. Because the porosity of the finishing compounds is different from that of the drywall paper, painting problems can occur if you use inferior primers. Drywall manufacturers have developed high quality primers which are very compatible with their drywall products. These primers will ensure an excellent base coat for high quality finish coat paints.
Don't let unsightly drywall happen to you! Learn the secrets to great drywall installation in this Drywall / Plaster Installation Checklist. I offer a 100% Money Back Guarantee.
Always apply a minimum of two coats of paint. Apply it properly. Many homeowners have a tendency to over-roll and put it on too thinly. Avoid semi-gloss or high gloss paints. These paints will highlight every imperfection in the drywall. They are extremely unforgiving. New washable flat paints are now available. Use them if you are concerned about washability.
Related Column: Drywall Finishing Requires Skill
Column B19
Making Paint Last
Other Tips for a Long Lasting Paint Job
For previously painted surfaces, thoroughly wash the surfaces with soap and water. Many paint manufacturers recommend the use of a 'powdered commercial cleanser'. Spic & Span, Soilex, and TSP(trisodium phosphate) are examples. However, be careful with TSP. It can be very harsh for your eyes and skin and the phosphates are somewhat harmful to the environment. Wash the areas with a sponge or brush and pole similar to what billboard hangers use. Rinse thoroughly and let dry. The surface must be dry before painting. Also, beware of damp wood. Do not paint it until it has completely dried.
Have you picked out the paint color but don't have the time to paint? Find the professional painters by using my Exterior Painting & Staining Checklist. I offer a 100% Money Back Guarantee.
New Wood
Take the time to prime all sides and edges of the wood prior to installation. This in some ways can be faster, since you can roll the paint on working off of saw horses. When the wood is cut during installation, prime the freshly cut edge (usually end grain) as it is being installed. The end grain of wood is where water can easily enter the wood. You do not want water in the wood. Heat causes it to 'boil' to the surface and push (blister / peel) the paint from the wood. If you take the time to completely seal each piece of wood, your paint job will last for many years to come. This process takes more time in the beginning, however, it will pay dividends far into the future.
Always, always use recommended primers. Primers generally have a high resin content so that they 'stick' to the surface to be painted. They are also formulated so that the finish coat sticks to them.
READ AND FOLLOW THE DIRECTIONS ON THE PAINT CAN! -- This effort will be rewarded.
Column B13
Drywall Installation Tips – #1 Dusty and Heavy!

Drywall Installation | Large sheets of drywall are very heavy. Drywall requires muscle for sure. You can rent machines that hold the sheets up against the ceiling. (C) Copyright 2021 Tim Carter
Drywall Installation - It's Dusty and Dirty
Drywall installation and finishing is not as easy as it looks. Don't be fooled by those cheesy cable-TV home improvement shows. Just wait until you have to lift and hold a 4x12 piece of 1/2-inch drywall over your head and try to find a joist!
CLICK or TAP HERE to get FREE BIDS from local contractors who will install drywall for you.
What is the Best Temperature to Install Drywall?
Drywall and gypsum finishing products should be installed when the temperature is 55 F degrees or higher. As the temperature goes over 80 F, you'll start to suffer, especially if it's humid.
Does Drywall Expand?
Drywall expands as the temperature goes up. Drywall installed at 28 degrees F will expand 1/2 inch over 100 feet when the temperature rises to 72 degrees F.
Should I Leave a Gap When Installing Drywall?
Be sure to leave a 1/8" gap between sheets to account for this expansion if the drywall is cold and the room temperature is below freezing when hanging the material.
What is the Minimum Temperature to Finish Drywall?
Drywall finishing materials perform poorly in temperatures below 55 degrees. Never allow drywall finishing materials to freeze before they are completely dry. Frozen finish compounds can lose their strength and possibly lose their bonding qualities as well.
Will Humidity Cause Drywall to Expand?
Humidity can also cause expansion and contraction problems in drywall. Drywall can expand 1/2 inch per 100 feet when the relative humidity goes from 13 percent to 90 percent. This expansion can cause the boards to become wavy due to the expansion. Excessive humidity can also cause ceiling drywall to sag between framing members. In the event this happens, it cannot be corrected. The force of gravity pulls the drywall down and it will retain this bowed shape.
What Should I Do About Damaged Panel Edges?
Damaged drywall panel edges should be cut out. Don't try to fasten crushed or fractured drywall.
Often during delivery or installation, the edge of the drywall panels may get bumped. The result of this is a fractured edge. The gypsum core becomes fractured while the paper covering may or may not be intact. Often the result looks like a blister. These areas should be cut out and any fractured core material should be removed. Do not try to install fasteners through a damaged area. The fractured area will have little ability to hold a fastener. The board or panel may sag in this area at a later date.
Should Walls be Straight?
Wall studs should be straight. All crowns in the lumber should face the same direction.
For a top-notch job, make sure that framing members are in alignment. Bowed or twisted walls studs will cause wavy walls. Misaligned framing members can also result in nail pops. Nailheads will frequently puncture the paper covering the core.
How Long Should Drywall Nails & Screws Be?
For the best advice, look at USG's Gypsum Construction Handbook. You'll discover they almost always recommend 1 and 1/4-inch screws for 1/2-inch-thick drywall and 1 and 5/8-inch screws for 5/8-inch-thick drywall.

This is the Bible of hanging and finishing drywall. I recommend you buy this and read the section on drywall. CLICK THE IMAGE to have a copy delivered to your home.
Nails and screws should be the proper length. Nails that are too long can cause nail pops if lumber shrinkage occurs. One half inch drywall works best with 1 1/4 inch annular ring shanked drywall nails. The same goes for screws. Always use nails and screws approved for drywall. They have specially shaped heads that are formed so as not to tear the paper when slightly recessed. This is extremely important. Driving a nail or screw too deep will also tear the paper around the fastener. If this occurs, the holding power of that nail or screw is greatly diminished. Screws and nails should be driven approximately 1/32 inch below the surface. Always apply pressure to the board with your hand, just before the screw or nail begins to recess. The board must be tightly pressed against the framing members when driving fasteners.
What is the Proper Spacing for Nails and Screws?
Ceilings should have fasteners every 12 inches. Walls can have fasteners every 16 inches on center.
Screws and nails should be put in a sufficient quantity so as to hold the drywall in place. The maximum spacing for screws and nails in ceilings attached to wood is 12 inches on center. For a four foot wide piece of drywall, that means one at each edge and three fasteners equally spaced between the two edge fasteners. For walls, you need one at each edge and two others between the edge, or 16 inches on center. This spacing is extremely important.
Remember, if the drywall pieces are not properly attached, you will in all likelihood experience problems at a later date. The amount of time and mess that goes into finishing the drywall dictates that you should spend the extra time to properly install the panels. All too often, people hanging drywall spend too little time, thinking that the finisher will tend to their mistakes. Don't let this happen on your job!
Column B19
USG Corporation Drywall Book

This is the Bible of hanging and finishing drywall. I recommend you buy this and read the section on drywall. CLICK THE IMAGE to have a copy delivered to your home.
USG Corporation Drywall Book - Inexpensive and Remarkable
The Gypsum Construction Handbook is a plaster and drywall book by USG Corporation. It's is loaded with numerous photographs and diagrams. I highly recommend that you read it if you want to learn more about drywall. The name of the book is:
- THE GYPSUM CONSTRUCTION HANDBOOK
Published by The United States Gypsum Corporation, Centennial Edition, 2000 (http://www.usg.com)
The United States Gypsum Corporation also has lots of great installation guides.
CLICK HERE and use their search engine to locate what you need.
Column B19
Secret of Chalk Resistant Paint
Secret to Selecting a Chalk Resistant Paint
Paint chalk is nothing more than broken down resin and pigment. A film of paint is basically like a very thick double decker sandwich (resin - pigment- resin - pigment - resin - pigment.......). A freshly painted surface has resin at the surface. You can prove this easily. After the paint dries, rub your finger across it. You will not have any pigment on your finger, it will be clean. However, do this same thing to a painted surface that has weathered outside for several years. Generally, you will get a film of pigment on your finger. The industry calls this chalk. The protective resin has broken down and left the pigment exposed. Thus, the key to chalk resistant paints is to purchase one that has quality resins and a high content of these resins. Since we already know that the resins are one of the most expensive ingredients in paint, you will probably pay a higher price for a chalk resistant paint. Beware of inexpensive paints and the claims they make!
To select a chalk resistant paint, you will need some very basic math skills. Most paint manufacturers list the contents of the paint on the side of each can. The contents are generally shown as two categories: PIGMENTS & VEHICLE. They are generally expressed as a percentage of the total volume. These categories are usually broken down again. The PIGMENTS will list various compounds which make up the pigments. The VEHICLE will list the amount of resin, any additives, and amount of solvent. Your mission is actually quite simple. To begin with, look for a paint that has a high vehicle percentage. Then, look to see if the resins comprise approximately 30 -35% of the total of the VEHICLE. If both of these values are high, you will be selecting a paint that has a very high total resin content. That is the secret.
Remember, the resin in the paint holds everything together. A high quality resin will resist breakdown. Also, the higher the ratio is between resin to pigment means that the pigment particles will be surrounded by that much more resin. This will make it harder for the pigment to get to the surface, where it appears as 'chalk'.
Column B13
Paint Characteristics
Chalk Resistant Paint Characteristics
Many people take paint for granted. They feel that it is a simple product which requires little understanding or training to work with. This is a misconception. Paints are highly sophisticated products. There are many, many different types all with specific formulations. Most paint manufacturers have chemists with PhD's that constantly work with the ingredients of paint in an effort to improve them. The chemistry of paint is not as simple as you or I might think. In fact, some paint formulas are highly guarded secrets.
The paints that you or I use on our houses naturally breakdown. The sun, water, chemicals found in rain water, etc. can cause paint to deteriorate. It is a natural process, as many objects exposed to the elements naturally deteriorate. Because of this, it becomes a challenge to locate, purchase and apply a paint which will not readily breakdown. In order to accomplish this, I feel it would be beneficial for you to understand what characteristics make paint long lasting and chalk resistant.
Most paints are made up of three primary ingredients. These ingredients are pigments, resins, and vehicle. Some individuals prefer to express the vehicle as a combination of two ingredients, solvents and additives.
The pigments are the ingredients which give paint its hiding ability. They also give it its color. A paint without pigment would be very similar to varnish or urethane, basically it would be clear. Pigments can also help to block the corrosive effects of liquids or vapors. They can also be formulated to minimize the effects of ultraviolet radiation (the sun's rays).
Resins for the most part are the most important ingredient of paint. These materials give the paint its ability to 'stick or adhere' to things. The resins also surround the pigments and enable them to stick together as well. Remember, for the most part, resins are formulated to be clear, so you can't really see them. That is why they can surround the pigment and give a uniform color or appearance when dry. The resins can be formulated from many different compounds. Oil based paints have alkyd resins. Latex paints have acrylic resins. Epoxy paints have epoxy resins. So, as you can see, there are different resins, all with different levels of quality. For the most part, resins are the most expensive ingredient in paint. So, if you were a paint manufacturer and you wanted to make more money, what would be the first ingredient that you would try to minimize??? Are you starting to get the picture?
The vehicle is that part of the paint which enables it to be a liquid. If paints didn't have vehicle, they would be solid chunks in the paint can. How would you apply them? Paint manufacturers figured this out a long time ago. They knew that they wouldn't sell much paint if people couldn't use them. For the most part, the vehicle in paint evaporates shortly after you apply paint. This part of the vehicle is called a solvent. The solids (pigments, resins, additives) are left behind on the object you painted. Different paints have different solvents. Oil based paints usually have mineral spirits or turpentine as their solvent. Latex paints consider water as their solvent. Some paints have alcohol as a solvent. The solvents in most oil based paints are considered to be volatile organic compounds (hydro-carbons). These compounds cause air pollution when they evaporate. In liquid form (paint thinner or mineral spirits) they can pollute soil or water. Some states limit the use of these compounds in paint. In the future, it may be almost impossible to purchase 'oil' based paints. Paint manufacturers are responding to this challenge. They are attempting to formulate latex or acrylic paints that have the same durability as oil paints.
Related Articles: Tips, Chalk Resistant Paint, Peeling Paint
Column B13
Painting Technique – Backpriming
Painting Technique - Backpriming / Sources of Water & Water Vapor
Water is a very interesting compound. It is a basic necessity for life, yet it can be one of the most destructive forces that we encounter as homeowners. Water can shorten the lifespan of many building materials and finishes. Paint is very susceptible to damage caused by water and water vapor. Water vapor can cause a paint job to fail in as little as a week. Homeowners who have had encounters with water's destructive force quickly gain respect for it.
Backpriming is a simple painting technique which is frequently eliminated during the construction process. Because backpriming of exterior wood siding and trim can only be performed before wood products are installed, homeowners and builders should give serious consideration to this very helpful step in the painting process.
Backpriming involves the process of coating all surfaces of a piece of wood with paint or any other coating which will inhibit water or water vapor from soaking into the wood. Backpriming requires the use of slightly more paint and a little additional labor. However, the money invested in this process will pay huge dividends as long as the wood is in place. The paint or other coating which is applied to the 'back' side of the wood and other hidden edges will, for the most part, last indefinitely. Backpriming will significantly extend the performance of the initial and all subsequent paint jobs.
Paint is a coating which 'sticks' to wood or other surfaces which are painted. However, water vapor pressure can easily cause paint to lose its grip on wood. Water vapor pressure develops because of evaporation. Water, which enters wood through any number of ways, naturally wants to evaporate or turn into water vapor. You see this happen virtually every day. Laundry dries, water evaporates from your driveway, soil, hair, etc.
The evaporation process, if inhibited, causes pressure to build. Eventually the pressure becomes great enough to overcome the adhesive properties of the paint film. Bingo, you have a blister or an area which peels and flakes. The water or water vapor which causes this to happen can originate from various sources. Several are as follows:
Bath & Kitchen Exhaust Fans
These fans have the ability to concentrate and discharge massive quantities of water vapor. Cooking and bathing activities generate large amounts of water vapor, especially if the water is warm or hot. The ductwork which connects the fan to the outside discharge point can be a problem area. If this ductwork is loosely fit, moist air can escape into a wall or ceiling cavity. This water vapor, in its attempt to escape into the atmosphere, quite possibly will encounter a piece of painted wood. If the wood is not backprimed, you will have a problem.
Clothes Dryer Vents
Clothes dryers also produce large amounts of water vapor. This water vapor must not be allowed to vent inside of a house or attic area. The dryer vent must be a sealed ductwork connection straight from the dryer to the outside of your house. Also, attempt to locate the dryer discharge vent in such a way that the exhaust air can get away from your house as quickly as possible. Avoid putting these vents in attics in cold climates. The smallest leak in the ductwork can cause tremendous condensation problems.
Air Conditioner Condensate
Air conditioners, through the cooling process, extract water vapor from the air. This water then drains from the air conditioning unit. Window air conditioners are the biggest problem. The water can drip onto wood siding or windowsills. This water can find its way into a crack or bare spot and then soak into the wood. Eventually large areas of paint are peeling or blistering. Try to pipe this water away from painted surfaces.
Interior Humidifiers
Houses which have humidifiers attached to their heating systems can have serious paint peeling problems. If the humidifier is set too high, the water vapor which is in the air inside of the house can find its way outside. If you have wood siding, the water vapor may condense back to a liquid on the back side of the wood. If the wood hasn't been painted, the water will soak into the wood and come out on the other side, just beneath your paint. Set the humidifier so that just enough moisture is in the air which makes you feel comfortable.
Crawl Spaces
Crawl spaces which are unvented or lack vapor barriers can be problem areas. Water constantly is evaporating from the soil beneath your living space. That water vapor wants to get into the air outside of your house. It will push the paint off your house if it gets in the way. Install a good vapor barrier (minimum 6 mil plastic) over the soil in the crawl space. Make sure that there are vents in the foundation to let moist air out before it gets to any painted wood.
Surface Water
Surface water is any water which hits the outside of your house. Some you can control and some you can't. For example, it is next to impossible to stop rain from hitting your house. However, you can control or adjust lawn sprinklers, hoses, etc. from spraying water onto your painted surfaces. If there is the slightest break in the paint film, water will find its way into the wood. If enough water gets into the wood, peeling and blistering will result.
Column B30
Paint Before Installing – Backpriming
Backpriming Tips
Backpriming is really easy to do. It just require a little more paint and some space to stack the wood pieces while they dry. The effort which you invest will be worth it, trust me.
I have found that applying the paint with a paint roller works extremely well. I usually set up a painting table on sawhorses. The table can be made from scrap pieces of wood or pieces of plywood. It can simply be a long (16 foot) 2 x 12. You want something rigid, because the pieces of wood which you will paint are flimsy. Simply place the wood siding or trim piece on the table and roll the back side first. Just after painting this, paint all the edges. The only remaining area left to be painted should be the finished side which will show after the siding or trim is installed. Pick up the piece of wood and lay it somewhere to dry or lean it against the exterior of the house. If you use a quick drying latex primer it can often dry in as little as an hour. Consider using latex surgical gloves, as you will be getting paint on your hands.
The next step is to paint the unfinished side. Do this in the same manner as the first, however add one final step. Roller textures are fine for inside house walls. However, if you are using smooth siding and trim, brush texture looks better. I apply the paint with a roller and then glide a brush over the paint to make it look as if it was applied with a brush. It's quick and easy. Make sure you leave the brush in the paint can or roller pan when you are not using it. The primer will dry on the brush and cause problems.
Consider applying the second finish coat of paint before the wood is installed. This will eliminate ladders and scaffolding from being set twice or three times by the painters. This should save some money.
Also, don't forget to paint the ends of the wood. This is where 'end grain' is visible. These ends must be painted. This is where water can most easily enter wood!!! The carpenters who install the wood must be instructed to paint each edge in the event that they cut a piece of siding or trim. They will probably cut every piece! This effort is a must. The carpenters will grumble, but explain to them the importance of this very critical step.
Always make sure that you use the correct primer. Do not use top coat or finish coat paint as a primer!!!!! Primers are formulated to be more sticky. They will adhere better to unpainted wood, and finish coats will adhere better to primers. If you are not sure, ask the paint supplier. Ask for bulletins or manuals to read. The paint companies want you to use the right products. They don't want the paint to peel either! They want you to buy their paint in the future. Ask them for help and advice.
Column B30
Fiberglass Door Manufacturers
I have had the pleasure to visit two great companies both of whom make awesome fiberglass exterior doors. It is an amazing experience to be able to walk through a manufacturing plant and see each step of how a door is made. The machinery and the processes are astounding.
To cut to the chase there are two major players in the fiberglass door market:
-
- Therma-Tru
- Stanley
There are other players, but these doors - and especially those made by Therma-Tru - are the the only ones I would consider for my own home.
Therma-Tru has been making fiberglass doors for nearly 20 years. They have perfected the process and refuse to cheapen their door. They are constantly fighting off cheap knock-offs of their styles and patterns, but these cheap impostors made overseas are no match for the real deal made right here in Ohio!
Their Own Stain
Therma-Tru also has developed their own proprietary stain system for their doors. Years ago the original stains were just ones made by traditional paint and stain companies and they did not hold up very well. So Therma-Tru decided to make their own. You can really tell the difference. Their stains are long-lasting and if you simply maintain the clear coat, you rarely have to restain the outside of your door.
Here are some other fiberglass door manufacturers. I have not used their products and cannot vouch for their quality.
- Beveled Glass Designs
- Hayfield Windows and Doors
- Jeld Wen
- Kaylien Doors
- Kolbe & Kolbe Millwork
- Masonite Intl. Corp
- Peachtree Doors and Windows
- Pella Corporation
- Plastpro
- Precision Entry
- Target Windows & Doors
- Taylor Building Products
- Trinity Glass International
Related Articles: fiberglass door makers, entry doors, fiberglass doors
Column B533