Construction – Get Organized

Nine months ago a neighbor's house suffered from a devastating electrical fire. No one was injured or killed but the house was ravaged by the fire. I helped the neighbor's locate possibly the best builder in town - Amy Christian - to reconstruct the home. Amy is very well organized and spent lots of time going over exactly what she was going to do. Back in the spring Amy outlined the product selections that needed to be made to keep the job on schedule. Everything seemed to be on track.

Ho Hum

The neighbors did their job and picked out materials. Amy began to install them. But once installed, the wife decided to change her mind about certain things. As you might expect this created a flood of expensive change orders and the delays that all too often are part of a change order.

What's more, the homeowners started to select materials that didn't work well with the existing construction. For example, they recently decided to install lots of large sized ceramic floor tile. The thickness of the tile plus the required cement board underlayment created problems at a pair of swinging doors and where the tile butts up against existing hardwood flooring. The long and short of it is that the homeowners drifted from the outline provided by the builder. As you can imagine there is some finger pointing and lots of unnecessary stress.

Servants? I Think Not

Don't take decision making lightly. The builder and all of the sub contractors have other jobs to go to. It is unreasonable for you to think that they are your servants. As such, when you make a product selection, expect to live with it or pay a hefty price to make a change. Certain materials that you like may be custom ordered. It can take months to get some items. If you decide too late or change your mind, the job will undoubtedly grind to a halt. Trust me, as I write this my neighbor's house is vacant and no one is working there today. The wife changed her mind on several items and the builder is waiting for the material to arrive.

Avoiding the Slowdown

You can avoid lots of hassle if you make all of your decisions before you start the job. This is done all the time on commercial work. Certain materials are specified and called for in the original plans. This is one reason why commercial projects often run much more smoothly than residential ones. It is also why they often are completed at a more rapid pace. The architects and building owners don't dilly dally around. They make decisions and move on.

Making a Binder

Organizing your selections is important. I have found that a large sized 3 ring binder works well for this. Create a section or tab for each room. In that section store all of the technical cut sheets for the products that will be in that room. If you are really detail oriented you will have a color chip for each paint that will be used in that room as well as samples of fabrics, carpet, and window shades, etc. These are very important in case the wrong items get delivered to the jobsite. A worker can look at the binder and cross check the item before he starts to install it.

Don't Wait

It is going to take time to build the binder. You will visit many stores and walk out with brochures, samples, etc. It can take weeks and weeks to finally put it all together. The upside? Well, if you do your homework and the builder approves all of your choices, you get to sit back and make leisurely visits to the jobsite to check on the progress.

Column B376

Tips on Paying Contractors

Tips on Paying Contractors

1. Demand itemized bids from your contractors. Ask who will work on your job. Will the individuals be employees or subcontractors? Obtain a list of all subcontractors and suppliers who intend to work on or deliver materials to your property. The effort will be worth it.

2. Negotiate with your contractor one of two things: #1- Obtain signed, notarized affidavits from each sub and the contractor himself at each payment period. Get materialman's certificates at the same time. The totals of the affidavits and materialman's certificates should EQUAL the amount of your payment!!! If not, you have a problem. #2- Negotiate the right to pay each individual yourself. If you do this, you must also receive the same affidavits and materialman's certificates.

3. Resist paying for goods and services not rendered. Often contractors ask for money up front. This is an extremely dangerous thing for you to do. Deposits should only be forwarded for special order non-returnable items that a contractor may have to purchase for your job, or where state law requires it. If possible, only pay the minimum amount required by state law. Monies for anything else are a sign that the contractor is either financially weak, or possibly doesn't trust you. Trust in a building relationship is a two-way street. You are entrusting your most prized possession to the contractor. You are trusting him or her that they will not harm your property. You are trusting that they will start and finish the job in a timely fashion. Etc., etc., etc. Surely they should trust you!!!!

4. Demand itemized bills from the contractor at each payment period. Compare these bills with the amount of work performed and the itemized bid you received at the beginning of the job. If there is a discrepancy, investigate what is wrong. Do not pay the bill unless you feel it is correct. If you pay too much money as the job progresses, quite possibly you will have, for example, $10,000 worth of work yet to complete, but only $2,000 of your money left to pay. Thousands of homeowners have found themselves in this precarious position.

5. Do not issue final payment to a contractor until you are satisfied with the work. However, do not abuse this practice. For example, if there is a tiny $100 scratch on a cabinet, it is unfair for you to withhold a $10,000 payment. Hold back $200 and release the rest. Be reasonable. Treat the contractor as you would like to be treated. Remember, if you pay a contractor before all work is complete, you will be relying on HOPE alone with respect to the uncompleted work. Never rely on hope.

Column B32

Specialized Drywall Primer & Drywall Sealer Products

Drywall Primer & Drywall Sealers

Drywall, and the compounds which are used to hide the nails and joints, are a witch's brew of different textures and porosities.

If you are fortunate to have either good eyesight or powerful bifocals like me, take a close look at a piece of drywall. I mean a really close look. Use a magnifying glass if necessary.

You should quickly notice that the paper surface of the drywall is not smooth. In fact, it is actually quite rough. This is intentional. The paper must be rough so the joint compound treatments stick to it.

On the other hand, the joint compound treatments, when sanded, are quite smooth. To make matters worse, the paper is not as porous as the joint compound.

This means that if you want a perfectly good looking paint job, you need to use a primer that will fill in the rough areas and a sealer which will address the different porosities.

Wouldn't it be great if you could get one paint which would do both? You can!

Manufacturers of Specialized Drywall Primer & Sealer Paints

  • Behr
  • Benjamin Moore & Company
  • Duron Paints
  • Gardner-Gibson
  • Martin Senour Paints
  • Pratt & Lambert, Inc.
  • Sherwin Williams Company
  • USG Corporation

Each of these manufacturers makes a specialized primer/sealer for new drywall work. If your drywall has already been painted with the wrong product, it is not a problem. As long as you apply these specialized products to a clean, dry surface, you should obtain spectacular results. Be sure to apply the primer/sealers at the recommended rate. Do not thin the products or spread too thinly.

Column B49

Drywall Decorating Tips

Drywall Decorating Tips

Always, always use a specialized primer/sealer for new drywall work. As long as you have finished and sanded the drywall properly, these paints will ensure that you achieve the highest quality finish in direct or downlighting situations.

If you are going to wallpaper your drywall, be sure to apply a second coat of a semi-gloss acrylic enamel paint. Tint this paint the exact color of the background of the wallpaper. In the event a seam opens between two pieces of paper, it will probably not show.

The extra coat of paint will also help you in the event you decide to remove the wallpaper. Some wallpaper adhesives are so strong that when removing the wallpaper, they take the paper face off of the drywall as well! If this occurs, it is virtually impossible to repair. Take the time to apply the second coat of paint.

Column B49

Affidavit, Mechanic’s Lien, & Materialman’s Certificate

Affidavits & Materialman's Certificates

Affidavits are simply sworn statements almost always made in the presence of a notary public or other officer of the court. They have serious implications. Affidavits are used in construction and remodeling to protect the individuals who are paying for the work.

When executed properly, they are 'legal' receipts which will stand up in a court of law. Affidavits, when used in building and remodeling, are sworn statements concerning who worked at a certain location, what they did, who they contracted with, how much money is owed as of a specific date, and what material was used.

Frequently, each state has a specific form which is used to compile all of this information.The individual who is presenting this affidavit almost always has to sign it in the presence of a notary public.

CLICK HERE to get FREE & FAST BIDS from local builders who can complete your addition or remodeling project.

Materialman's certificates are similar to affidavits. However, they often are not witnessed by a notary public. The supply houses, from which you or your contractor purchase materials, can easily prepare this document.

The certificate is somewhat similar to a monthly statement. The certificate states the dollar amount of material which has been shipped to your house up to and including a specific date. Should you pay that amount in full, the supply house usually cannot make a future claim for unpaid debt up to the date on the certificate. They are very precise 'receipts'. Insist on obtaining them every time you hire a contractor.

The importance of affidavits and materialman's certificates should not be overlooked. Often, homeowners feel that their canceled check is good enough. This isn't always the case. Affidavits are the documents which can protect you from mechanic's liens.

Contractors' & Homeowners' Guide to Mechanics' Liens

Stressed because of liens? CLICK THE IMAGE to get a book that will help you find relief.

If you have legitimate affidavits and materialman's certificates from all workers and suppliers, it will be virtually impossible for those individuals to file a valid lien against your property. You should obtain affidavits and materialman's certificates on all work performed at your house.

Professional contractors will not hesitate to supply you with these forms. They do it on a regular basis with all of their other clients. If a contractor raises an objection concerning these forms, BEWARE!

Mechanic's Liens

Mechanic's liens are specific legal instruments meant to protect the interests of individuals who work for or supply goods to an owner of a piece of real estate. A lien can be attached to a piece of real estate by a contractor, a subcontractor, an employee of a contractor or sub, and/or a material supply company.

This lien, in many states, actually becomes public record and becomes a 'cloud' on the title of the real estate. In many states, if you have a lien on your property, refinancing, or selling (title transfer) the property cannot proceed until the lien is paid off or bonded. Liens have extremely serious implications. They should never be treated lightly.

Lien law is basically a good law. Dishonest homeowners, years ago, led to this law. They would contract work to be done on their houses with no intention of paying the contractor. Liens enable a contractor to announce publicly that a debt is unsatisfied.

Because liens can be filed against your property by so many different individuals, you must be aware of how they work and just how they are filed. Once again, I strongly recommend that you consult with a competent real estate attorney in your state to find out what you must do to protect your interests. Do this prior to starting your next project. Do not wait until it is too late!!!!

The problem that many homeowners experience with liens is often the same. In many cases, the homeowner pays a builder or contractor money. The builder or contractor then is supposed to pay all of the workers, subcontractors and material suppliers.

All too often the builder or contractor decides that it is time for a change of address and he or she leaves the area without paying the people who are rightfully owed money. These unpaid people then become your worst nightmare!!!! I have heard this story time and time again from hundreds of homeowners. This is exactly why you need affidavits and material man's certificates! DON'T LET THIS HAPPEN TO YOU!!!!!!!

CLICK HERE to get FREE & FAST BIDS from local builders who can complete your addition or remodeling project.

Column B32

Drywall Primers vs. Drywall Sealers

drywall primer sealer

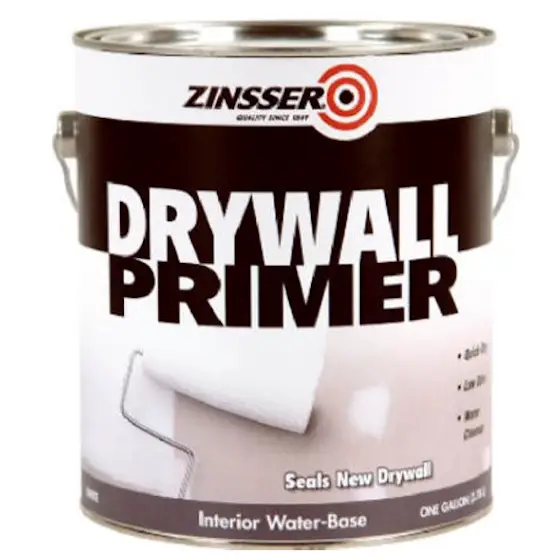
This is a special drywall primer that will make your new drywall look perfect. Don't skip this step. CLICK THE IMAGE to have this paint delivered to your home.

"Primers are specially formulated paints that are used to smooth out the surface you're painting. They have great filling capabilities."

Drywall Primer Checklist

  • Unprimed drywall will look bad under artificial light
  • Primer evens out texture and porosity
  • Drywall primer is low cost and easy to apply
  • Name-brand drywall primer makes new drywall look like real plaster

This column was the Mystery Link in the February 5, 2016 AsktheBuilder Weekend Warrior Update.

What Causes Drywall Imperfections?

Frequently, the cause may be poor or unskilled workmanship. Often the imperfections can be traced to lumber shrinkage. High humidity and large temperature swings during installation and finishing can cause problems.

Poor carpentry techniques also can be to blame. However, did you ever think that a problem could arise in the paint that you use?

Related Links

Secret Drywall Paper Repair Tips - DO NOT SHARE!

Special Gray Primers - Old Master Painter Trick

Free & Fast Bids

CLICK HERE to get FREE & FAST BIDS from local painters who can apply drywall primer.

What Ingredients are In Primer Paints?

Paints are a combination of ingredients. No two paints are exactly alike. Chemically speaking, paints are almost identical to adhesives. Paints primarily have three ingredients:

  • resin (glue)
  • vehicle (liquids that evaporate as the paint dries)
  • pigment (finely ground colorants and powdered fillers)

What is Paint Primer Resin?

The resin in a paint is the glue that allows it to stick to a surface. The resins are usually clear and almost always encapsulate or surround each pigment particle.

What is Paint Vehicle?

The vehicle is the ingredient which allows paint to be a liquid in the can. I often refer to it as a temporary ingredient, for once you apply the paint to a surface, the vehicle evaporates into the air.

That is why you must ventilate a room when using a paint that contains hydrocarbons or flammable solvents. These liquids turn into a vapor and can either make you sick or, if ignited, explode.

What Are Paint Primer Pigments?

Pigments are the ingredients which impart color. They're solid particles comprised of many ingredients. The pigments adhere to the surface you paint because of the resin. Pigments will wash off an exterior wall surface if the sun damages the resin.

This happens with exterior paints that chalk. The resin which is exposed to the weather breaks down and releases the pigment particles. The pigment then washes down onto your brick, foundation or driveway.

CLICK HERE to get FREE & FAST BIDS from local painters who can apply drywall primer.

Are Drywall Primers Also Sealers?

Not all drywall primers are sealers. A primer has one job to do and a sealer has a different one to do on the new drywall surface.

Just about everyone who has painted something has heard of primers. Some of us have also heard of sealers. Did you know that there is a big difference? These two foundation paints have entirely different qualities.

What Is a Drywall Primer?

Primers are specially formulated paints that are used to smooth out the surface you are painting. They have great filling capabilities. Because they have a high solid (pigment) content, these solids can fill in any microscopic valleys, depressions, etc.

Primers are usually somewhat low in resin so that when they dry, the surface of the primer film is coarse. This coarse, or rough, surface provides the finish paint an excellent surface to grab onto.

What is a Drywall Sealer?

Drywall sealers, on the other hand, are exactly the opposite of primers. They have a high resin content and a low solid (pigment) content.

Sealers are formulated to even out the rate of absorption of the finish paint. This quality is achieved by the high resin content. The resin, when dry, creates a barrier. Finish paints cannot easily soak through sealers.

Why Do You Need a Sealer On New Drywall?

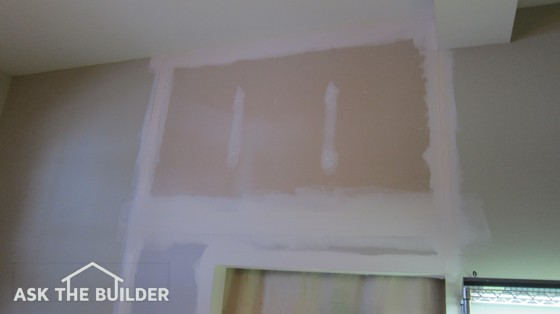
You need a sealer on new drywall because the white joint compound on the seams and in the corners absorbs paint faster than the paper surfaces of the drywall that don't have joint compound on them.

drwall finishing

The white areas have joint compound on them. You can see the off-white area that's the drywall paper from the factory. A drywall primer/sealer will even out the texture and porosity in minutes once it dries. Copyright 2018 Tim Carter

Different materials absorb liquids at different rates. Materials such as these are said to have different porosities. Finish paint which is applied to a surface that has several different porosities will not dry at equal rates.

Those areas of the surface which absorb the paint quickly will pull the paint (and paint particles) deeper into the surface. The sheen of the paint will appear uneven, even though the surface which was painted is smooth!

CLICK HERE to get FREE & FAST BIDS from local painters who can apply drywall primer.

Column B49

Affidavits and Liens

Affidavits, Mechanic's Liens, & Materialman's Certificates

Building or remodeling on a piece of real estate has legal implications. Etched deep into our legal system is a set of laws designed to protect homeowners, workers and companies that supply material to job sites.

These laws were enacted to create a formal procedure by which a homeowner could receive a 'legal' receipt for work done (affidavit & materialman's certificate.)

CLICK HERE to get FREE & FAST BIDS from local builders who can complete your addition or remodeling project.

The laws also enable workers and businesses to attach a formal debt against a piece of real estate in the event they do not receive payment for goods and services provided to the owner of the real estate (mechanic's lien.)

These laws vary from state to state. They can be extremely complicated. Sometimes these laws are powerful and sometimes they are not. The laws are often dynamic; they change from time to time. It depends upon your state.

Contractors' & Homeowners' Guide to Mechanics' Liens

Stressed because of liens? CLICK THE IMAGE to get a book that will help you find relief.

Often there are very specific time limitations with respect to taking action. The forms which are used can be very complicated to fill out. I recommend that you always consult a competent real estate attorney concerning these matters. The money you spend on the services of an attorney before a problem occurs will afford you great peace of mind.


For even more information on this topic CLICK HERE.


CLICK HERE to get FREE & FAST BIDS from local builders who can complete your addition or remodeling project.

Column B32

Repairing Plaster Walls

Restoring Plaster Walls - Setting Type Joint Compounds

If you have ever owned an older home, you must surely be aware of the pluses and minuses of plaster walls. Their durability, smoothness, sound deadening qualities and sheer mass make them very attractive. Plasters only negative, as I see it, is that it tends to react like glass when subjected to stress. In other words, plaster cracks.

Random or Systematic?

Cracks in plaster happen for a variety of reasons. Lumber shrinkage, seasonal moisture changes, wind forces, foundation movement, expansive clay soil movement, excessive loading, etc. all can cause cracks in plaster. Some cracks can be traced directly to a certain cause while some are tougher to diagnose.

It is important to try to determine the cause of cracking prior to repair. The reason being that if your house, wall or ceiling is mobile or in a state of motion, the crack will undoubtedly reappear. Certain cracks are very interesting. These are the ones that plague many houses in climates that experience wide humidity changes from summer to winter.

Wood - Like a Sponge...

Wood expands and contracts in response to changes in the humidity of the air that surrounds it. In other words, wood is a hygroscopic material. Plaster, on the other hand, is very stable. It is very strong if you try to squeeze it, however it is very weak if you try to bend or stretch it.

Thus, if the wood framing members of your house begin to stretch or expand, the plaster can and will pop. There is very little you can do to prevent this, other than trying to maintain a constant indoor humidity level.

Plaster and Old Age

Remember your body and skin when you were 10 years old? I'll bet it was smooth and virtually blemish free. What do you think your skin will look like when you are 70 or 80 years old? Well, a house is not much different.

Houses develop joints just like your elbows and knees where they bend to relieve stresses. Walls and ceilings also react to the force of gravity over time, just as our skin. Thus, it is not unreasonable for an older house to exhibit wrinkles, cracks, and other blemishes.

Fixing the Cracks

OK, so now that the plaster is cracked it is time to fix it. Time after time I have seen homeowners struggle to fix a crack using spackling compound. They are told to chisel the crack into a V shape and fill away! Well the patch looks fine until the house or wall moves the next time. The crack reappears.

The most long lasting repairs are made when you bridge the crack with a material that can absorb the periodic movement that most cracks experience. This is achieved by using either a standard drywall paper tape or a fiberglass mesh tape. The crack is coated with a compound that adheres to the plaster and coats the tape at the same time.

In all but the worst cases, cracks repaired with tape remain smooth for a long period of time.

The Gop

One of the first jobs I did after I got married was the rehabilitation of an old farm house. I was helping some friends. Marcy was helping me apply some premixed drywall joint compounds onto new drywall. She used to call the material Gop. I feel it is a very fitting name as it sounds much like the product appears and reacts when dropped. Premixed joint compounds are wonderful products. For all intents and purposes, they are simply water soluble glues mixed with fillers. These premixed compounds work fine for drywall. However, for serious plaster repair you need to use either real plaster or a product that has the properties of both plaster and premixed joint compounds.

The Stuff

You can purchase some wonderful plaster patching compounds that come in 25 pound bags. They are powdered setting type joint compounds. These products actually grow tiny crystals as they dry. These crystals lock into the coarse texture of the plaster base and/or the smooth white or top coat plaster. You can even add sand to these mixtures if you wish to create a textured look.

These compounds come dry because when they are mixed with water they begin to harden. Some of these products contain higher amounts of gypsum. These tend to set up or get hard within 30 minutes of mixing. You can buy mixes that take up to two hours to harden.

An additional advantage of using these products is that in one day repairs are possible. Premixed joint compounds can take a day or more to dry. Repairs can stretch out. I have used the setting type joint compounds and repaired a plaster hole from start to finish in as little as two hours!

Where Do You Get Them?

That is one of the most frequently asked questions. Homeowners miss out on tons of great products. These special dry setting joint compounds are found at drywall supply houses or building supply houses that sell plaster supplies. Only on one occasion have I seen them in a giant home center store.

If you want to get some of these great compounds, you will have to find out where your local builder or remodeler buys drywall.

This column was shared with my readers in the April 4, 2013 AsktheBuilder Newsletter.

Column B133

Setting Joint Compounds Avoid Dust

Setting Joint Compounds Avoid Dust

Real plaster work involves minimal dust. The plasterer trowels the wet, white plaster until it is as smooth as glass. There is no sanding.

You can do the same with setting type joint compounds. As they get hard, you can work with them and trowel them just like real plaster. A rubber ceramic tile grout float works best. The joint compound needs to be very hard to achieve the best results.

Wet the compound slightly. Glide the rubber float across the patch with just the trailing edge of the trowel touching the compound. You do not want the entire bottom surface touching the plaster. If you make successive strokes much like you would squeegee glass, it will work. Trust me, it takes practice.

If you can't get the hang of it, you will have to sand. You may be able to rent some new wonderful sanding vacuum tools at your local tool rental shop. These tools have a sanding pad attached to a shop vac. They really eliminate 95 percent of the dust in most situations. The key is keeping the filter clean.

Makers of Joint Compound

Want to know more about these powdered setting plaster repair products? Just check out the websites of these manufacturers.

All of these products perform well. The key is to mix only the amount you can comfortably use in 15 - 20 minutes. If they start to get hard in your bucket or mud pan, do not add additional water. It will weaken the mix and fall from the wall or ceiling. Clean your tools well, as the compounds can stick like concrete!

  • CTS Cement RapidSet
  • DAP
  • National Gypsum
  • USG Corporation

Column B133