Column B42
Setting Joint Compounds Avoid Dust
Setting Joint Compounds Avoid Dust
Real plaster work involves minimal dust. The plasterer trowels the wet, white plaster until it is as smooth as glass. There is no sanding.
You can do the same with setting type joint compounds. As they get hard, you can work with them and trowel them just like real plaster. A rubber ceramic tile grout float works best. The joint compound needs to be very hard to achieve the best results.
Wet the compound slightly. Glide the rubber float across the patch with just the trailing edge of the trowel touching the compound. You do not want the entire bottom surface touching the plaster. If you make successive strokes much like you would squeegee glass, it will work. Trust me, it takes practice.
If you can't get the hang of it, you will have to sand. You may be able to rent some new wonderful sanding vacuum tools at your local tool rental shop. These tools have a sanding pad attached to a shop vac. They really eliminate 95 percent of the dust in most situations. The key is keeping the filter clean.
Makers of Joint Compound
Want to know more about these powdered setting plaster repair products? Just check out the websites of these manufacturers.
All of these products perform well. The key is to mix only the amount you can comfortably use in 15 - 20 minutes. If they start to get hard in your bucket or mud pan, do not add additional water. It will weaken the mix and fall from the wall or ceiling. Clean your tools well, as the compounds can stick like concrete!
- CTS Cement RapidSet
- DAP
- National Gypsum
- USG Corporation
Column B133
Time and Material Job Bid
Tips on Obtaining Bids
Many homeowners have expressed difficulties in obtaining bids for work. Often, they have trouble comparing bids. This process alone creates vast amounts of anxiety for some people.
This anxiety is frequently based upon a lack of confidence. Homeowners feel they are operating at a disadvantage when talking about home remodeling or repair. There is no need for this anxiety.
I suggest that you try to take a few hours and read up a little bit on the project about which you are ready to tackle. Visit a local bookstore or library.
There are hundreds of recent books talking about virtually every aspect of home remodeling and repair. Become informed! You will be able to ask better questions of each contractor.
Develop a plan, if possible. There is no substitute for written plans. They act as an excellent tool for you to be able to communicate your wants to each contractor. With plans, each contractor should bid the same thing. Modifications or suggestions from each contractor should be kept to a minimum.
If you can't have a plan drawn, write down a simple verbal description of what you want done. Try to be as specific as possible. List product selections, if possible. Have this document copied and distribute one to each bidding contractor.
You will only be able to compare bids or quotes if the contractors are bidding the same thing. Widely spaced bids or quotations usually result from contractors who have no guidance from the homeowner. They are bidding the job the way they want it, not how you always want it! Avoid falling into this trap.
Time & Material Job Suggestions
Many homeowners have been approached by contractors who wish to work 'by the hour' or what is often called "time and material". Some homeowners take this approach hoping that they will maximize their remodeling or repair dollars.
This reasoning is often based on the belief that building and remodeling contractors frequently make huge profits on each and every job. Nothing could be farther from the truth. Contracting is a tough business and very few contractors that I know of drive fancy cars and live in big homes.
Thousands of homeowners who have, in fact, traveled this path will gladly tell you of their misfortunes. Time and material jobs can easily turn into financial time bombs. People often base their construction decisions on hope and trust and become disillusioned when they become victims of dishonesty.
Fixed price quotations have many advantages over time and material jobs. Homeowners have excellent cost control. They know exactly what the work is going to cost.
The contractor, on the other hand, has a goal or objective. Productivity will be constantly in the minds of the project managers or company owners. The contractor will make attempts to minimize material waste.
Professional contractors frequently try to avoid time and material jobs. These require vast amounts of paperwork. Relationships between the homeowner and contractor often become strained.
Speaking from personal experience, I never enjoyed working under these conditions. I felt that I could never take a break or stop and tell a joke with workers and sub-contractors. It always seemed (and rightfully so!) as if the customer was counting minutes. After all, it was their money. They had every right to expect 100 percent value for their money.
Determine the Need
If a contractor suggests working 'time and material', stop and ask some questions. Determine just why he or she feels that 'time and material' is advantageous for you, the homeowner.
Ask why the job cannot be approached as a fixed price job. What hidden or unknown conditions are prohibiting the contractor from giving you a fixed price?
If you have any doubt whatsoever about the necessity of the 'time and material' approach, obtain three to four other opinions. Talk with other building or remodeling contractors. Ask them for fixed price quotations.
Do not even bring up the subject of 'time and material'. Only discuss this alternative if the second, third or fourth contractor injects it into the conversation.
Taking the Plunge
Assuming that your job, or certain aspects of your job, require a 'time and material' approach, let's talk about some ways you should approach the subject. First, determine just what aspects need to be done on a time and material basis.
Often, only those parts of a job which have hidden or concealed conditions qualify for the 'time and material' approach. Experienced professionals know how long it takes to perform tasks.
Based upon past experiences, they can accurately quote how long it takes to do certain things. However, sometimes certain conditions, new materials, untried techniques, etc. require the 'time and material' approach. Do whatever is necessary to limit these conditions.
Obtain from the contractor a "not-to-exceed" figure. This is the worst case scenario. This is the maximum amount of money you will have to spend in the event everything goes wrong. If a contractor is hesitant to give you this number, beware. A professional will not hesitate to give you a not-to-exceed number.
Before the job starts, ask who will be working on the job and how much per hour each specific person will be paid. Make every attempt possible to get a fixed price quotation on the materials required.
Often, it is very simple to estimate material quantities. At the very least, a maximum quantity of material can be determined. Square footages, volumes, etc. can be quickly calculated. This way, when you eventually begin to pay for materials, you can check the quantities to ensure that they were not exceeded.
The opportunity for fraud is extremely high. Materials have a strange way of ending up on different jobs! You must protect yourself from dishonesty.
Agree with your contractor on weekly itemized reports showing who worked when and on what. Have the contractor produce a separate, specific, detailed report on materials used. By doing this on a weekly basis, you should be able to monitor the accuracy of the reports.
Don't wait until the end of the job for your bill. You may need to call 911 in the event you go into cardiac arrest!!!
Finally, ask the contractor you choose to work with for a minimum of three references of customers who have also had 'time and material' work performed. Call these individuals and ask them if they were satisfied with the 'time and material' arrangement.
Ask if they encountered any problems. Were they treated fairly? Is there anything they would do differently? These questions are important. Don't try to reinvent the wheel. Use these customers as a resource to save you money. Don't feel embarrassed to call them.
Column B42
Drywall Finishing Techniques
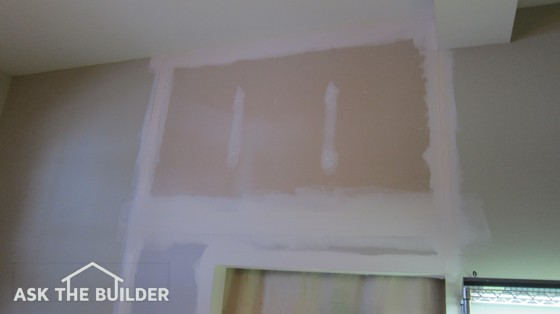
This small section of wall has just about every drywall finish challenge in it: flat and tapered seams, inside and outside corners and an archway! Photo credit: Tim Carter
Surely you have seen a miserable drywall finishing job. One of the first places to look is in a corner. Typically, you will see holes and lift marks where the finishing blade was pulled away from the wall. For some reason, finishers seem to get tired as they sand in or near the corners!
I have seen home improvement television shows that tell people how easy it is to finish drywall. Well, it is easy if you know all of the tricks and have had considerable practice. If you don't, you struggle. Drywall finishing is not as simple as driving a nail or cutting a piece of wood. It takes lots of skill to get professional results.
Wipe It Off
One of the neat things about finishing drywall is that if you goof up applying the mud you can immediately erase your mistake and start over. All you do is wipe off the mud from the seam. The only aspect of the process that is critical is the actual taping. Too much or too little mud under the tape can cause all sorts of finishing problems later in the job.
Think Snowplow
Have you ever seen how a bulldozer or a snow plow works? The blade is angled to throw the dirt or snow to one side. This is an efficient way to work. Removing the excess mud from beneath drywall tape uses the same technique. The trick is to make several repeated passes with the taping knife instead of trying to do it all at once.
Learn the secrets to a great drywall finishing job in this Drywall / Plaster Installation Checklist. I offer a 100% Money Back Guarantee.
Professionals tape drywall in any number of ways. They can use a device called a banjo that applies mud to the underside of the tape as it is pulled from the simple hand held machine. Even more complex machines can apply tape and a coat of mud to a wall in one operation. But if a pro is doing it like you will be, they apply the mud smoothly and at a thickness of approximately 1/4 inch. The tape is then pressed lightly to the wet mud. When you glide your knife over this relatively smooth assembly, the excess mud flows easily out from beneath the tape.
Drying Time
The joint compound or mud you use to finish drywall is water based. It dries fairly quickly if the humidity is low and the temperature is high. Keep in mind that this compound is simply a glue with lots of filler. The color of the compound tells you, to some degree, if it is dry. When wet, the compound is a light gray. As it dries it turns white. You can see this transformation very clearly halfway through the drying process as the edges of the joint will be snow white while the center of the seam is still gray. Do not attempt to sand if you see any gray coloration.
Patching a Hole
Let's say you have a hole in a piece of drywall that is about the size of a golf ball. It is too small to cut a patch yet too big just to fill with joint compound. There is a cool trick that really works well. All you do is take a piece of paper drywall tape and coat the underside of it with a 1/8th inch coating of wet compound. You then flip the tape over and center it over the hole. Gently scrape a little of the mud out from the tape. Once the mud dries in a day, the area over the hole is very stiff. If you want to make it even better, apply a second layer of tape over the first one. Align the second piece of tape at a 90 degree angle to the first one.
Nails and Screws
Professionals do not apply a little dab of mud to each and every screw or nail. They coat three or four at a time with one quick motion. The end result is a stripe of mud on the surface of the drywall. If you see dried polka dots of white on a sheet of drywall, you know a rookie is finishing it!
Column B387
Hanging Drywall Direction on Steel Studs
Drywall Hanging Direction on Steel Studs
Reader email:
Tim,
How do you lay out drywall on steel studs? Should it be vertical across the studs or horizontal across the studs, and should I stagger the drywall?
This is for a basement that is studded with steel and I'm very confuuuuuused!!! Thanks,
Holley
My Reply:
Holley,
The best way to install drywall is horizontally. You should also stagger the seams. Installing it vertically requires that the spacing of the studs must be perfect and they are perfectly plumb. This is much harder to achieve that you might think.
Then wait until you are bending down to tape all of those vertical seams every 4 feet. With 12 foot drywall, you only have to do it every 12 feet. Since you rarely have wall runs longer than twelve feet without an inside or outside corner interrupting it, you might never have that flat seam in a wall run.
Tim
Column B387
Veneer Plaster – Overview and Repair Techniques
The Big Sheets
Conventional plaster application changed radically in the 1960s and 1970s. Veneer plaster systems were developed at that time. Drywall was being substituted for plaster at that time as well.
Drywall offered a different approach to quickly achieve a finished wall surface. The 4' x 8' and 4' x 12' panels of drywall could be rapidly applied to framing members. A standard sized room could be ready for finishing in an hour or two.
During the 1950s, conventional plaster systems required the installation of "gypsum lath." These were smaller (16" x 48") pieces of material which looked, at first blush, like typical drywall.
However, these smaller pieces of gypsum plaster lath actually were covered with a special paper which absorbed the water in a special manner so as not to harm the inner gypsum core. The paper was also manufactured in such a way as to provide an excellent surface for the plaster to grab on to.
CLICK HERE to get FREE & FAST BIDS from local Contractors who can install your new plaster wall.
The traditional two coat plaster system (brown coat/white coat) was applied over this gypsum plaster lath system. However, it was quite labor intensive to nail on these smaller pieces of gypsum lath. It made sense to switch to larger pieces of gypsum lath and develop a one coat plaster system.
Veneer Plaster Systems
Although drywall was rapidly becoming popular, drywall did not have the overall performance characteristics of conventional plaster. Plaster surfaces offered better joint concealment, fewer nail pops, a hard monolithic surface which could be easily decorated, and plaster was more quickly finished than drywall.
Also, the joint compounds used to finish drywall, even after they dried, could be easily dissolved by water. Water applied to the surface of a traditional plaster wall for short lengths of time did not harm the plaster in any way. Veneer plaster systems changed this. They took the best qualities of the two systems and combined them.
Veneer plaster systems use a gypsum core panel as the base for the plaster coat. This panel has a gypsum core very similar to drywall. However, the paper used to cover the gypsum core is different from regular drywall.
It is a special multi-ply paper. The top ply has the capability to readily absorb water and provide a good bonding surface for the plaster coat. The bottom ply, however, is water resistant. This ply protects the inner gypsum core from being softened by the water in the wet plaster.
Some manufacturers use a special blue paper on this gypsum panel. Plasterers often refer to it as "blue board." Special plasters were developed which allowed a one step finishing process. This plaster is applied in a thin coat directly over the gypsum panel.
The plaster thickness usually ranges between 1/16th to 3/32nd of an inch. Conventional plasters were often 1/2 inch thick.
Advantages of Veneer Plaster
Veneer plaster finishes offer two distinct advantages over drywall - dust and money. Dust is kept to a minimum with these products. The veneer plaster is applied in a wet state and troweled to a smooth surface. No sanding is required.
A one step veneer plaster can cut up to 75 percent off of a similar drywall finishing production time. After the gypsum wall panels are hung, a one coat veneer system requires one step.
A similar drywall job requires four finishing processes. The last step of a drywall job, as many people know, involves the creation of massive quantities of dust.
Certain plasters offer tremendous durability. Some achieve compressive strengths of up to 3,000 pounds per square inch. This strength rivals that of some concrete mixtures! Drywall can not make similar claims.
Plaster wall systems offer greater decorating flexibility as well. Wall coverings can be applied to plaster as easily as they can be applied to drywall. However, plaster systems allow you to readily remove the wall coverings in the future without damaging the wall surface.
The paper covering of drywall is often damaged, or partially removed when wall coverings are stripped from drywall.
Veneer plaster is affordable. Often it costs just 25 percent more than a drywall finish. While this may seem like a large differential, it is, in fact, not.
This upgrade may only add one-half of one percent to the overall cost of a construction project. When you consider the long term durability that veneer plaster systems offer, it is a tremendous value.
Tips on Residential Plaster Patching
Plaster is a hydration product, just like concrete. When you add water to dry plaster mix, you begin an irreversible chemical and crystallization process.The water and air content of the mix is critical. Timing is important, as the plaster has to be "finished" at just the right time. It is not a job for the rookie.
However, several manufacturers have developed different plaster products. They are fast setting plaster compounds. These products are dry powders. You add water to them and they begin to crystallize or "set" just like plaster.
They are available with different "set" times. Some of these compounds, however, are sandable. They allow you to do quick repairs to surfaces in a one-step operation similar to plaster. You can teach yourself some basic plastering techniques by working with these materials.
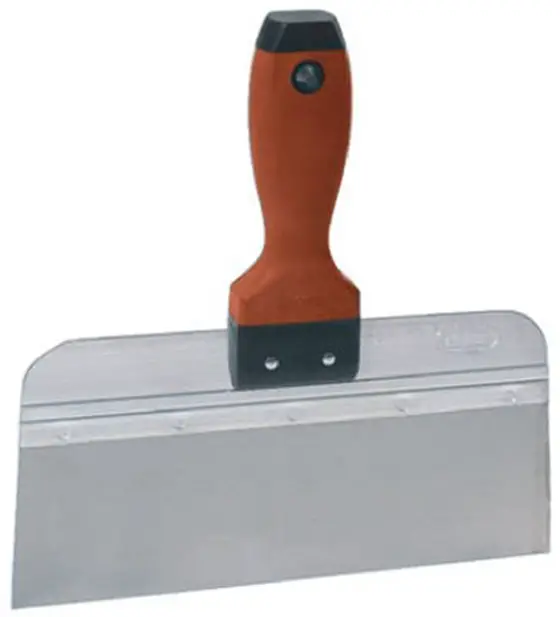
CLICK THE IMAGE to get a Durable Taping Knife for Drywall and Plaster projects.
As they begin to 'set' or crystallize, you can trowel them to a smooth finish, just as you would plaster. Or, if you are unable to achieve a smooth finish, you can sand them after they dry completely (assuming you used a sandable compound!).
If you live in an older home with a conventional plaster wall and ceiling system, you should consider using these compounds to patch your plaster. Premixed vinyl joint compounds do not always bond well to the sandy plaster base coats.
The quick set joint compounds, because of the crystallization process, actually grab to the old plaster much better. As the crystals in these compounds begin to grow, they interlock in the rough, sandy texture of the fractured plaster.
Once you have applied the quick set joint compound, you can always skim over the patched area and existing plaster with a ready mixed compound to fill any small nicks or scratches.
CLICK HERE to get FREE & FAST BIDS from local Plaster Contractors who can repair your plaster wall.
Plaster Crack Failed Repairs
Most older homes that have cracked plaster are constructed using wood framing materials. In certain climates, these framing members react seasonally to changes in humidity. During warmer more humid months, the framing members absorb moisture from the air and expand.
During winter months, the wood dries out and contracts. The houses actually develop stress points or joints where the energy of this movement is released in a visual form that we see. This same movement can also be a result of soils which expand and contract due to changes in moisture.
Repairing these cracks, which move on a regular basis, is somewhat difficult. You must tape over these cracks with a paper or mesh tape. Simply filling the crack with patching plaster will not work. As long as the cracks move even a small amount, the paper tape in most cases will hide the movement of the crack.
Patching the cracks is just like taping a regular drywall joint. You need to feather the joint to hide the tape as in a standard drywall butt joint.
Fixing Plaster Cracks
Cracks are simple to repair. You will need a four, six and 10 inch flexible drywall taping knife and/or broad knife. A drywall mud pan or flat plaster's hawk will be necessary as well. These two things hold the plaster so you can work with it.
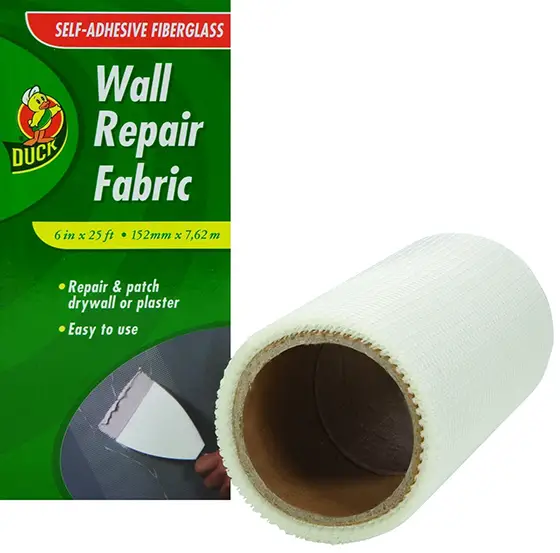
CLICK THE IMAGE to get a fiberglass repair fabric that will help eliminate cracks in your plaster walls.
Start the repair process by removing all loose plaster. Mix up some joint compound. Mix until all lumps have disappeared. Precut pieces of paper or fiberglass tape to cover the cracks. If the crack is curved (many are!), then you will need several smaller pieces to make the curve.
Apply a 1/8 inch thick layer of joint compound over the crack with your four inch knife. Embed the tape into the wet compound. Drag the knife across the tape and remove half of the compound you applied. If you remove too much, the tape will blister on the second coat! If you leave too much, you will have a giant hump!
Once the compound has set up (becomes hard), you can apply a second coat to hide the tape. I like to use the six inch knife for this job. I also use the 10 inch knife as well. You are trying to add just an additional 1/16th inch over the top of the tape. The larger length knife allows you to taper the compound so the hump is disguised.
When this coat hardens, you can apply the third and final coat. Before you do this, it may pay to scrape off any high spots or use a ceramic tile rubber grout float to smooth out high and low spots. Slightly wet the dried or hardened joint compound and glide the rubber float over the patch. With just the right touch, you will get ultra smooth results.
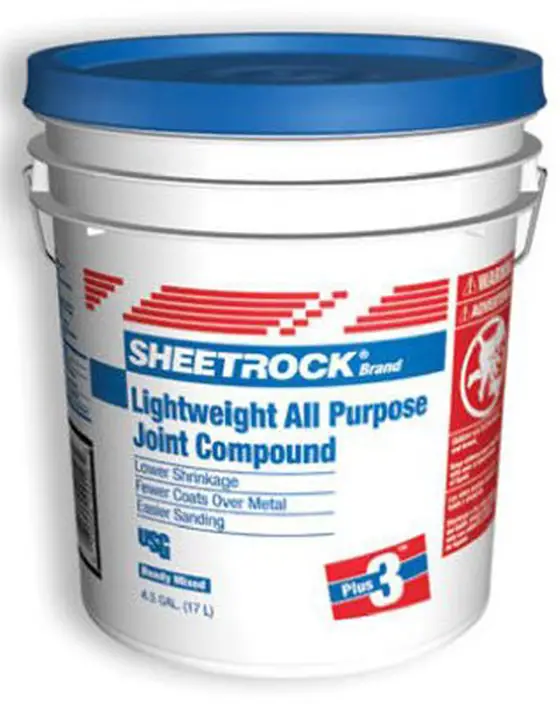
An essential part of finishing your repair on cracked plaster or drywall CLICK THE IMAGE to get All Purpose Joint Compound.
Patching Plaster Holes
If the lath board is still in place behind the hole, your repair is easy. Simply remove loose plaster and dust, wet the area to be repaired and fill with the setting joint compound. Do not use premixed joint compound for these repairs. These simply do not bond well to the sandy base plaster or wood lath.
If there is nothing behind the hole but air, you need to create a base for the plaster to stick to. There are many ways to do this. Let's say the hole is two inches in diameter. I would cut a one inch wide piece of wood that is six inches long. I would then tie a 16 inch long piece of string around the middle.
Apply a liberal amount of construction adhesive to each end of the stick. Smear the glue on the wide face. Insert the stick into the hole so that the glued side faces you. Position the stick so it spans the hole equally.
Pull on it with the string so that it comes into contact with the back of the wall that is being repaired. Use the string to hold it in place. The glue should readily stick. After several hours, you should be able to proceed with the patching process.
Manufacturers of Veneer Plaster Products
- Flexi-Wall Systems
- Georgia-Pacific Gypsum
- National Gypsum Company
- USG Corporation
Veneer Plaster Technical Information
If you would really like to find out more about the different veneer plaster systems which are available and which one might work best for you, contact USG Corporation (http://www.usg.com). They have an excellent book which is loaded with information about plaster and drywall systems. The book is actually geared to the construction industry, however, it is very understandable for the average homeowner. It is called the Gypsum Construction Handbook.
CLICK HERE to get FREE & FAST BIDS from local Contractors who can install your new plaster wall.
Column B38
Veneer Plaster Manufacturers & Information
Do It Yourself Plastering Techniques for Patching
Plaster Repair – Cracks & Holes
Drywall Finishing Tips
Mixing the Compound
Probably the biggest mistake I see amateurs make is applying the joint compound straight from the bucket. Professionals always add a slight amount of water and use a drill or hand operated mixing tool to whip the compound into a creamy mix. It should have the consistency of cake icing. It should be very smooth. Often the easiest way to mix is to have a spare five gallon bucket. Open the new container and scoop half of the unblended compound into the spare clean bucket. This will make mixing very easy. Only mix half at a time, in case you add too much water. The addition of too much water will cause serious problems. The compound will lose its strength and durability characteristics.
Drywall Taping
When taping, do not scrape too much compound from beneath the tape. Blisters will develop if you do this. Believe me, you will know when you put on your second coat. Common sense tells you not to put on too much. Before you even begin to tape, take a straight edge and put it across the tapered joints where two pieces of drywall meet. There is not that much space. Imagine this space filled with joint compound and tape after you are finished. The tape should be in the middle of two layers of compound! It is not as easy as it looks. Too little mud and you get blisters. Too much mud and you will have a hump. Try a little area and practice. Some people can do it and some cannot. I had one helper who worked for me for six years and he never was able to develop the touch. Good luck!
Always let the compound dry between coats. Professionals finish drywall in three stages. They tape on the first coat and apply the first coat on all fasteners. They follow with a generous second coat and hit all corner beads and other trim pieces. This second coat is the hardest. One side of each corner is coated at this point. Apply a second coat to all fasteners and seams. Frequently, it looks a little messy. Swirls and lines may appear in flat and butt seams. The compound may appear a little thick at the seams. It probably is. Often professionals lightly sand all of the seams before they apply the third and final coat. The third coat consists of applying a coat to the remaining side of each corner, skim coating all seams to fill in lines, depressions and swirls, and hitting corner beads and trim pieces. All fasteners are coated for the third and final time.
Drywall Sanding & Drywall Painting
If all has gone well, when you sand you will have a very smooth job. The paint job will make or break a drywall job. Frequently, people do not apply the proper primer. Make sure that you do. Read the paint can label and make sure that it says the primer is intended for new drywall. Don't let anyone tell you that regular paint will do. Only believe the manufacturer. Check it yourself. The primer coat is the most important layer. All other subsequent coats of paint depend on it. Don't underestimate its importance.
Some drywall manufacturers make a special drywall primer paint. This paint eliminates common decorating problems referred to as 'joint banding or photographing'. Because the porosity of the finishing compounds is different from that of the drywall paper, painting problems can occur if you use inferior primers. Drywall manufacturers have developed high quality primers which are very compatible with their drywall products. These primers will ensure an excellent base coat for high quality finish coat paints.
Don't let unsightly drywall happen to you! Learn the secrets to great drywall installation in this Drywall / Plaster Installation Checklist. I offer a 100% Money Back Guarantee.
Always apply a minimum of two coats of paint. Apply it properly. Many homeowners have a tendency to over-roll and put it on too thinly. Avoid semi-gloss or high gloss paints. These paints will highlight every imperfection in the drywall. They are extremely unforgiving. New washable flat paints are now available. Use them if you are concerned about washability.
Related Column: Drywall Finishing Requires Skill
Column B19