Painting Technique - Backpriming / Sources of Water & Water Vapor
Water is a very interesting compound. It is a basic necessity for life, yet it can be one of the most destructive forces that we encounter as homeowners. Water can shorten the lifespan of many building materials and finishes. Paint is very susceptible to damage caused by water and water vapor. Water vapor can cause a paint job to fail in as little as a week. Homeowners who have had encounters with water's destructive force quickly gain respect for it.
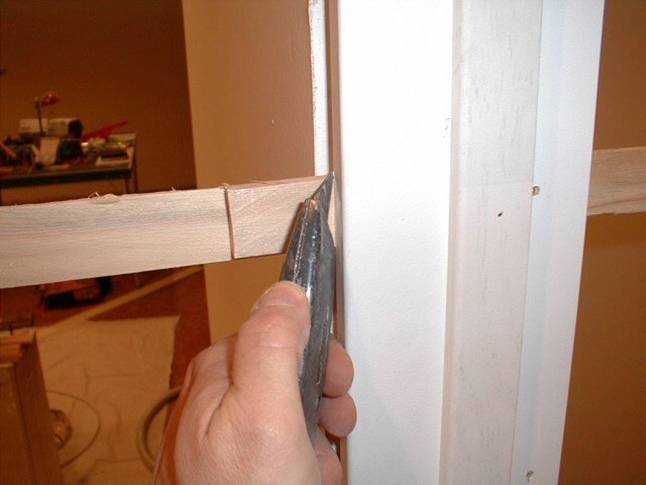
Backpriming is a simple painting technique which is frequently eliminated during the construction process. Because backpriming of exterior wood siding and trim can only be performed before wood products are installed, homeowners and builders should give serious consideration to this very helpful step in the painting process.
Backpriming involves the process of coating all surfaces of a piece of wood with paint or any other coating which will inhibit water or water vapor from soaking into the wood. Backpriming requires the use of slightly more paint and a little additional labor. However, the money invested in this process will pay huge dividends as long as the wood is in place. The paint or other coating which is applied to the 'back' side of the wood and other hidden edges will, for the most part, last indefinitely. Backpriming will significantly extend the performance of the initial and all subsequent paint jobs.
Paint is a coating which 'sticks' to wood or other surfaces which are painted. However, water vapor pressure can easily cause paint to lose its grip on wood. Water vapor pressure develops because of evaporation. Water, which enters wood through any number of ways, naturally wants to evaporate or turn into water vapor. You see this happen virtually every day. Laundry dries, water evaporates from your driveway, soil, hair, etc.
The evaporation process, if inhibited, causes pressure to build. Eventually the pressure becomes great enough to overcome the adhesive properties of the paint film. Bingo, you have a blister or an area which peels and flakes. The water or water vapor which causes this to happen can originate from various sources. Several are as follows:
Bath & Kitchen Exhaust Fans
These fans have the ability to concentrate and discharge massive quantities of water vapor. Cooking and bathing activities generate large amounts of water vapor, especially if the water is warm or hot. The ductwork which connects the fan to the outside discharge point can be a problem area. If this ductwork is loosely fit, moist air can escape into a wall or ceiling cavity. This water vapor, in its attempt to escape into the atmosphere, quite possibly will encounter a piece of painted wood. If the wood is not backprimed, you will have a problem.
Clothes Dryer Vents
Clothes dryers also produce large amounts of water vapor. This water vapor must not be allowed to vent inside of a house or attic area. The dryer vent must be a sealed ductwork connection straight from the dryer to the outside of your house. Also, attempt to locate the dryer discharge vent in such a way that the exhaust air can get away from your house as quickly as possible. Avoid putting these vents in attics in cold climates. The smallest leak in the ductwork can cause tremendous condensation problems.
Air Conditioner Condensate
Air conditioners, through the cooling process, extract water vapor from the air. This water then drains from the air conditioning unit. Window air conditioners are the biggest problem. The water can drip onto wood siding or windowsills. This water can find its way into a crack or bare spot and then soak into the wood. Eventually large areas of paint are peeling or blistering. Try to pipe this water away from painted surfaces.
Interior Humidifiers
Houses which have humidifiers attached to their heating systems can have serious paint peeling problems. If the humidifier is set too high, the water vapor which is in the air inside of the house can find its way outside. If you have wood siding, the water vapor may condense back to a liquid on the back side of the wood. If the wood hasn't been painted, the water will soak into the wood and come out on the other side, just beneath your paint. Set the humidifier so that just enough moisture is in the air which makes you feel comfortable.
Crawl Spaces
Crawl spaces which are unvented or lack vapor barriers can be problem areas. Water constantly is evaporating from the soil beneath your living space. That water vapor wants to get into the air outside of your house. It will push the paint off your house if it gets in the way. Install a good vapor barrier (minimum 6 mil plastic) over the soil in the crawl space. Make sure that there are vents in the foundation to let moist air out before it gets to any painted wood.
Surface Water
Surface water is any water which hits the outside of your house. Some you can control and some you can't. For example, it is next to impossible to stop rain from hitting your house. However, you can control or adjust lawn sprinklers, hoses, etc. from spraying water onto your painted surfaces. If there is the slightest break in the paint film, water will find its way into the wood. If enough water gets into the wood, peeling and blistering will result.
Column B30