Deck Cleaners, Brighteners, Sealants & Finishes
Nothing looks worse than a treated lumber deck that has been abused by the sun, wind and rain. Especially if the deck is less than one year old! Lumber prices have soared during the past two years. Deck installation often represents a major financial investment. It is not quite unlike a new car purchase. Just as you periodically wash and wax a new car to protect the investment, treated lumber decks require similar treatment.
The Misconception
I have been installing treated lumber for approximately 20 years. When I first purchased it, it was sold as a lifetime product that required no care. There were virtually no deck care products on the market in the 1970's. It is my opinion that the producers of treated lumber felt that the chemical treatment protected the wood from the effects of water and sunlight. They were wrong!
Treated lumber, after it was installed, often misbehaved. It was the subject of many customer complaints. Homeowners objected to the warping, cupping, twisting, splitting and checking that would occur in short order. For many years the lumber companies simply dealt with these complaints by saying, "All wood shrinks and swells when exposed to the weather."
Homeowners also became disenchanted with the color change that decks experienced. Treated lumber would often turn an unsightly grey color. Algae and mildew would introduce green and black from the color palette. Something had to be done to relieve the situation.
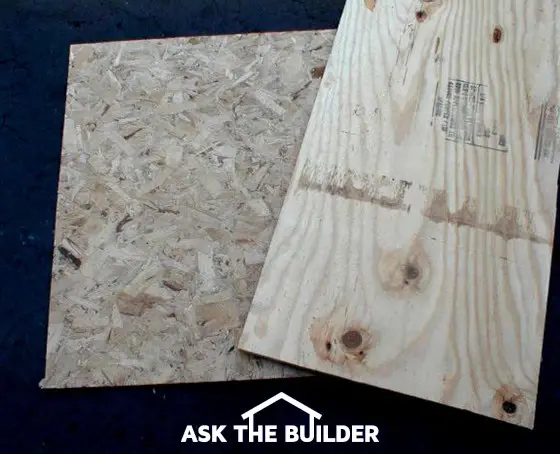
Deck Lumber at 1000x
 Perhaps if you could see just what a piece of lumber looks like up close and personal, you would understand the need for sealing wood that is exposed to the elements.
Imagine a 70 foot tall oak tree (or any species for that matter) in your front yard. If you made a clean cut through the tree with a saw and looked at the end of the cut through a microscope, you would be amazed. The view though the microscope would look like a hat box packed solid with drinking straws standing up straight. You would be looking down thousands of little tubes.
When logs are cut up for deck lumber, they are almost always flat sawn. This method allows the lumber mills to maximize the amount of timber from any given log. But flat sawing carries with it a price tag. Remember the hat box full of straws? If you sanded flat or cut flat a surface of the side of the hat box, you would end up with numerous straws that are now open to the weather.
The long tubes at the surface of the piece of flat sawn wood become half rounded channels that can collect, dirt, water, bacteria, etc.
Coatings to the Rescue!
Because of the problems and complaints that we discussed earlier, the coatings (paint) industry developed products to seal treated lumber. This industry has long known that unprotected wood can suffer immensely from sunlight and repeated cycles of wetting and drying.
The new deck sealers are coatings. Some of them penetrate the wood and others form a film on top of the wood surface. In either case, the performance of the product is directly related to how well the coating can bond or soak into the wood. Excellent bonding can only be achieved when wood is clean and free from all debris.
Cleaners & Brighteners
Ultraviolet (UV) light from the sun damages and breaks down wood fibers that are at the surface of a piece of wood. The sunlight also causes these fibers to discolor as they decay. This discoloration usually results in a grey cast to the wood. Certain deck cleaners and brighteners are designed to remove these decayed and discolored fibers. This process exposes the next layer of fibers that have the original color of the wood. That is why your deck looks good immediately after using certain deck cleaning products.
There are four basic forms of cleaners and brighteners. One type contains forms of chlorine bleach (sodium hypochlorite or calcium hypochlorite.) These products do a good job of killing and removing mildew. However, these products often do not have great cleaning powers, nor do they do much to remove sun damaged wood fibers. In fact, chlorine bleaches are such a strong oxidizing agent, they can actually weaken the freshly exposed wood tubes (cells.) Chlorine bleaches remove colors. They do this in your laundry very effectively. They also remove the natural colors in wood! Chlorine bleach, when used in strong enough concentrations, can actually corrode iron fasteners (nails, nuts and bolts) that hold a deck together. These bleaches can also cause harm to vegetation surrounding your deck.
Another type of cleaner/brightener contains sodium percarbonate. This chemical does not harm vegetation. It does a good job of removing dirt, mildew, algae and sun damaged wood fibers. Sodium percarbonate dissolves easily in water and is a great oxidizing type cleaner. It will not discolor the wood on your deck, unless you use it on new redwood. In this instance it can darken new redwood substantially. Sodium percarbonate is very environmentally friendly. When this chemical is dissolved in water, all you get is hydrogen peroxide (used in toothpaste and as an antiseptic for wounds), soda ash and water. The only caution in using products that contain sodium percarbonate: KEEP THEM AWAY FROM YOUR EYES! They can cause severe irritation.
The final two cleaners that can be used are trisodium phosphate and oxalic acid. Trisodium phosphate and oxalic acid are recommended by the California Redwood Association for cleaning redwood. Oxalic acid is great for removing rust stains, but that's about it. It really doesn't work that well on dirt and mildew.
Some deck cleaners say on their labels that they merely need to be sprayed on - wait so many minutes - and hose or rinse off . This is not a great idea. In my opinion, it is merely a sales tactic to make you feel like you have less work to do.
The best cleaning results are achieved by applying these cleaners, letting them soak for the required time and scrubbing the surface with a stiff brush before rinsing. The scrubbing or brushing is very important!
Oxidizing cleaners like sodium percarbonate work best when the temperature is warm. As such, mix these chemicals with warm water and try to apply them to wood that is also warm. Be sure to follow the directions on the product label for best results.
Repellents & Sealers
Water repellents and sealers are terms that are used interchangeably. For all intents and purposes they are the same. These basic products simply protect wood from all forms of water (rain, snow, ice, dew, high humidity.)
Beware of all-purpose sealers that say they can treat wood, masonry and brick. These products may not be the best thing for your treated lumber.
If you want the highest level of protection against water, look for a federal specification on the product label. The product should say that it meets or exceeds federal water repellency specification "TT-W-572B, p. 3.7". If it doesn't, find another product that does pass this test.
Sealers and repellents are available with or without mildew and algae protection agents. These are often called mildewcides and algaecides. Unless you live in a desert climate, purchase products that do contain these extra chemicals.
Wood Finishes
These products are almost always one step better than simple sealers or repellents. They often contain extra ingredients (pigments, resins and oils) that allow them to effectively block UV light. The important thing to realize is that these finishes are formulated to be applied on horizontal surfaces. Flat, horizontal surfaces are the toughest things to protect from sun and water. They directly absorb the intense noon sunlight. Water from rain, dew, etc. just sits on a flat board until it evaporates.
The better products will not peel or blister. They also are designed to breathe and let excess water escape from the wood.
When to Apply?
Let's assume you just had a new deck constructed. There are two types of wood that could have been used: one without factory sealers and one with. If you plan to use treated lumber which does not have a factory applied sealer, you must seal it as soon as the wood is dry to touch. This may be immediately, or it may take several days if the lumber is really saturated with the preservative chemicals from the treating plant. Just one to two weeks exposure to sunlight and the drying effects of wind and sun can cause massive problems.
If you purchase treated lumber that has been sealed at the factory, it will say so on a label that is usually attached to the end of each board. Don't necessarily trust verbal words from the salesperson at the lumberyard or home center store. Also, most treated lumber manufacturers have literature telling you how to care for their products. Ask for it.
These factory treated sealants can last for up to one year. They are not meant to be permanent sealers.
Application
Often, I see homeowners get too aggressive with sealers and wood finishes. They flood the surface of the wood and leave way too much product on the wood. This is a mistake.
If too much wood finish is applied, it will fail. The finish will quite possibly peel, blister, check or crack. Remember, the products need to dry at a certain rate in order to achieve their designed hardness. If too much finish is on the surface, uneven drying results will lead to the problems listed above.
Be sure to follow the directions on the label of whichever product you purchase. All too often I find out that people pop the lid and just start spraying and brushing. What a mistake!
Related Articles: Treated Lumber, Deck Product Manufacturers
Column B75