Building a Trellis or Arbor

Arbor redwood shade shelter

Building a trellis or arbor for your yard is a great way to get introduced to some basic construction techniques and principles. Even the most basic trellis or shade structure involves columns (posts), beams, rafters, ledger boards, etc. Some of these terms may seem foreign to you. Don't worry or be intimidated! A small lightweight trellis can be built in as little as two hours. Even if it collapses, I doubt that it would do more than cause a minor scratch or bruise. In other words, relax!

Work with Components

If you have ever built a trellis or a shade structure you know that when completed they are somewhat flimsy. Knowing this, imagine how hard it would be to keep several posts straight and firm while you are banging nails into them! The structure will shake and wobble the entire time.

I have found it is much easier to build the side panels and the "roof" as separate components. You can build these on a garage floor or workbench. With a helper, you can actually attach the pieces together on level ground with removable bolts. Once you are satisfied that it is going to work, you can transport it to the spot in your yard already assembled. Set it right next to where it will be installed so that you can get the spacing and locations of the post holes right the first time.

Assembly Hardware

If you decide to spend the time to create a beautiful trellis or arbor, I urge you to spend the extra $10 - 20 for stain resistant hardware connectors. Nothing will make a trellis or arbor look worse than rusting nails or bolts in 2 - 4 years.

Black stains can also result if you use redwood or cedar as your trellis material. These wood species contain natural chemicals that preserve the wood against rot. However, these chemicals react with iron and water to form an ugly black stain.

You can prevent stains and rust forever by simply using stainless steel nails and bolts. These are readily available in many hardware stores and the big box home centers. You will pay more, but it will be worth it. Don't be fooled by the shiny zinc chromate finish on the regular nuts and bolts. This is a very thin electroplated coating that can wear off in as little as 18 months.

Pretreat for Best Results

Does the paint peel readily on your house? Do you know that most paint failure can be traced to moisture penetration into the wood?

A trellis or an arbor is subjected to the worst possible conditions. It is out in the open with no protection from rain. Water can easily get into the overlapping pieces of wood. This water then enters the wood, creates expansion and elevated vapor pressure. Then end results are usually blisters and peeling.

You can minimize blisters and peeling if you seal the wood material before you start to cut it up to build the trellis sections. If you decide to paint, I would prime the wood first and then apply one finish coat. As you cut and assemble the individual pieces of wood, always apply some paint or sealer to the exposed end grain after the cut is complete. This is where water enters wood with the greatest of ease.

If you decide to use a clear or semi-transparent sealer you must use a synthetic resin water repellent.  Quite possible the best product currently available is Defy. You can get it by calling 800-860-6327.

Regular nationally advertised wood sealers and protectants often contain natural oils for the resin. These compounds are FOOD for mildew and algae! That is why your deck turns black and green....... Don't let it happen to your beautiful redwood or cedar trellis. It would be a crime.

What Wood Should I Use?

That is a great question. I intend to use redwood for my trellises. Redwood is easy to work with, is rot resistant, and simply gorgeous. A close second in my opinion is Western Red Cedar. It is a very attractive wood as well. Personally I would never paint these woods. A pigmented coat of Defy is what I intend to use.

You can also use CCA treated pine. However, if you do this, I would not recommend painting your trellis or arbor. Why? Because during the treating process, massive amounts of water is injected into the lumber. If you paint the wood before all of this water escapes from the lumber, you will have massive paint peeling problems within a matter of years. Treated lumber can be painted, but only after it dries out.

The problem with this, is that as it dries in the sun, it often warps, twists, checks, splits, etc.! If you have enormous patience, let it air dry inside your garage for 2 years and then get ready to build. I think you see why I intend to use redwood......

Related Column: Arbor

Column B191

Trellis and Arbor Plans/Kits

Trellis and Arbor Plans / Kits

If you want a specialized topic, then try trellises and arbors! You would think that there would be an enormous amount of variety, sources of plans, etc. about these cool patio and garden structures. There aren't as many as you might think.

Fortunately, the sources that are out there have some fine designs. The neat thing about a trellis is that you can create just about anything and it will suffice. The trellis is simply a light-weight structure that is used to filter sunlight. Of course curved brackets, diagonal or crossing lattice work, and mixing different species of wood can really add a wonderful finishing touch.

If you are serious about building a trellis, I suggest you visit a local garden center or bookstore. Page through landscaping and garden books. Often there are photos of gardens that contain a trellis or arbor. The article may be about something else entirely. However, you may get an idea from the photo that you can adapt and modify for your trellis. You know the old saying, "Why re-invent the wheel!"

Here is where to start your trellis / arbor plan search:

  • California Redwood Association
    Department TR7
    405 Enfrente Drive
    Suite 200
    Novato, CA 94949

Send $1.00 to this address and you are going to get the most magnificent 12 page color idea book, Redwood Landscape Architecture, you have ever seen. In addition, they will send you a very cool trellis/shade shelter pamphlet plan, Redwood Shade Shelter. It has 3D drawings, details, material list, and instructions. You can't beat this deal for $1.00!

What I like about this plan is that it will stimulate your ideas. You can easily see how you can modify, expand, elaborate a trellis or shade shelter for yourself after you look at this pamphlet. The color booklet has no less than 5 awesome photos of trellises and arbors that will also help you create your own structure. Send for these items today. don't forget to tell them you want both publications.

Trellis and Arbor Kits and Ideas:

The following sources offer trellis and arbor kits. I suggest that you call them immediately and ask for a color catalogue or pamphlet. You will get some very swell ideas.


  • Wood Magazine
    800-848-0213

    They have an awesome Victorian Arbor. It evidently disassembles for winter storage.


  • Smith & Hawken
    800-776-3336

    They have a trellis / arbor kit.


  • Gardener's Eden
    800-822-9600
    They also have a trellis / arbor kit.


  • Jackson & Perkins
    800-292-4769

    They tell me that they have an arbor kit as well. I couldn't get a picture before this Bulletin went to print.


  • Southern Serenity
    888-226-4075


  • Your Public Library
    If you have a large public library there is a great chance that they have back issues of Popular Mechanics or similar DIY magazines. I know that I have seen trellis plans in these in the past 5 years. As with all things, invest the time and you will get great results!


An Alternative to Wood

If you don't want the maintenance of wood, you can purchase a vinyl trellis. I know of one company that makes a variety of products. The vinyl products are available in different colors, styles, and designs.

Call this company to get the scoop on maintenance free vinyl trellises.


  • Tuff-Bilt Trellis
    800-394-6679

Column B191

Grades of Lumber

Lumber Grade Specifications

Just like any other product, lumber is graded. Different species have different systems but they are basically the same in many respects. The lumber is graded from the worst quality to the best. The grades will take into account the size and frequency of knots and the location of where the lumber comes from the tree. Grades often take into account the grain of the lumber as well.

Grain of lumber is called either vertical or flat. Flat grained lumber is generally considered lower quality. It has a greater tendency to cup or curl. You can easily spot a flat grained piece of lumber when you look at the cut end. If the growth bands are slightly curved or somewhat parallel with the width of the piece of lumber it is flat grained.

If the growth bands are parallel with the thickness the lumber is considered vertical grained.

Flat grained lumber should be used for the decking surface and stair treads. Always install it so the growth bands hump upwards towards the sky.

Vertical grained lumber is excellent for trellises and other things where warpage will cause appearance problems.

Redwood Lumber Grades

Construction Heart
This lumber is taken from the center of the tree (heart) and can contain knots. It is great for trellis posts or beams. The knots are usually small and tight.

Construction Common
This grade contains knots and can be taken from both the center or the outer fringes of the tree. If it is from the outer edges, it will be lighter (blond) and it is called sapwood. This grade should not be used where it might come into contact with the ground.

Merchantable Heart
This is an economical grade of heartwood. It can contain larger knots and knot holes.

Clear All Heart
This is is the second best grade. It contains no knots and is taken from the heart of the tree. This lumber has the highest amount of natural preservatives.

Architectural Grade
This is the absolute best grade. It is unequaled in beauty. If you want a piece of wood that has exquisite graining, will be warp and twist resistant, this is the one to purchase. It is expensive - don't waste it!

Column B191

Drain Your Crawl Space

! ! ! See Author's Notes at Bottom of Column ! ! !

DEAR TIM: My husband and I are interested in buying a new home, but we found out that the lot the house was built on has two natural springs located on either side of the lot. The contractor had two French drains installed to divert the water from the springs as well as directing the down spouts from the roof into these drains.

We decided to investigate the crawl space. The walls of the foundation were dry, but my husband found several spots of water in the crawl space on top of the plastic sheeting. However, there was not water under the plastic sheeting where he found the water. The amount of water was around a tablespoon.

What, if any, problems might we experience if we decide to purchase this property? What suggestions do you have for us? We plan to go back to the property if and when a hard rain occurs.

Betty R.

DEAR BETTY: You might have all sorts of problems and then again you may have none. The first thing to determine is whether or not there are surface water issues in addition to the subsurface water problems you already know about. Read my past column about Lots - Important Features to get a handle on the overall grade of the lot.

The liquid water on the vapor retarder concerns me as I wonder how it got there. Was it just condensation that had formed under the retarder and then flowed out on to the membrane at a nearby seam? Or, did water somehow enter the crawlspace and run over the membrane and this small amount of water was the last to evaporate?

I would also ask exactly how the existing French drains were installed. It would be ideal if they were nearly identical to the method I have used for years. Read my past column about Linear French Drains to see a great 3D diagram of how they are constructed.


Author's Notes:

You may wonder if my advice is worth anything. Well, read what Jim Sanders wrote to me when he was at the end of his rope:

"Hi, I just wanted to write to give you the results of my "Trench Drain". I have had a wet crawlspace for 15 years. Water would fill the crawlspace at times, so we actually had to drill weep holes at the base so that it would enter the basement and eventually, the sump pump.

I have tried everything. Several contractors said that the only thing we could do was to bring the water into the house via drainage tile and let it enter the sump pump. That would work, but because I live on a 6' elevation, there is no reason that I should have water problems. It became like clockwork...when it rained, we would rush home from the lake or wherever we were vacationing so that we could be prepared to start the backup generator, in case the power failed. We even had our alarm company put a sump alarm on our system, so they could notify us if we had a power failure. Battery backup was not an option, because sometimes we lose power for days and during any rain, our sump would run every 7 minutes...just like clockwork.

I found your site and read the article on the trench or French drain. At first, it sounded a bit like "holistic healing" to me. I failed to understand why a 2 ft. deep trench, 4 ft. away from the house would do any good. How could this simple thing correct an extreme water problem that has plagued me for years, cracked my foundation, settled my garage floor and ruined almost every vacation?

The Linear French Drain trench running from the house. PHOTO CREDIT: Jim Sanders

The Linear French Drain trench running from the house. PHOTO CREDIT: Jim Sanders

I decided "what the heck". I had to dig by hand using a trenching spade and a pick-ax, because the builder back-filled our property with brick and blacktop. It took quite a bit of time. Because the ground level varies so much on that side of the house, I was not able to achieve exactly 2 ft. deep. It varied from 18" to 30" in spots, but the slope was downhill. The trench is about 80 ft. long. At times, I thought about filling it all in, because I just didn’t believe that it would work.

I stoned it, put tile in, and filled it with #1 round stone. I socked the pipe just for safety measure and I also used geotextile fabric on top, so I could cover with dirt and grass. I also ordered some clay and pitched from the house to the drain.

After a short rain, water is running away from the house. PHOTO CREDIT: Jim Sanders

After a short rain, water is running away from the house. PHOTO CREDIT: Jim Sanders

Result? For the last month, we have had 7 or 8 torrential rains, the worst of which was last night. It rained so hard, that our lawn washed out in spots because of the high clay content. Our sump pump, that normally ran every 7 minutes during and after rain, has not turned on for 4 weeks. The silt at the bottom of the sump well is now dry and cracking. Our crawlspace has not shown a trace of water or even moisture.

Since I couldn’t see correcting the foundation cracks or the garage floor settling and tilting until I corrected the problem's source, I waited to see if the trench drain worked first.

This week, I had a company come in and perform sort of a "mud-jacking" technique on the garage floor, which worked perfectly. Also, during the past few weeks, I parged the cracks in the foundation.

A dry sump pump. PHOTO CREDIT: Jim Sanders

A dry sump pump. PHOTO CREDIT: Jim Sanders

I just wanted you to know how this worked. I stressed for many years over this issue and the solution was nowhere near as difficult as I thought it would be.

As a side note, I went to the end of the drain tile during a hard rain to see what was happening. Water was running out of the drain tile in about the same exact volume that it previously ran out of the weep holes in my crawlspace. This winter will be interesting, because last year, the ground next to the house was so saturated that during a thaw, my sump would run constantly. I'm guessing that the ground between the trench and the house will probably be drier now going into this winter."

- Jim Sanders, Upstate area - New York

CLICK HERE to get FREE & FAST BIDS from local drainage expert contractors.

Column QA

AsktheBuilder mp3 Radio Show March 9 2005

Each title below is a direct link to a downloadable mp3 file. Just click the title if you want to listen. Right click if you want to download into your computer to save and play at a later date.

The Copyright to all radio segments is owned by Tim Carter. I would love to know what you think of these radio segments.  Do you like them? Do they help you? Have they saved you money and/or time?  Let me know by sending me an email: [email protected]


Crown Molding DVD is Available

Old Tape Measure Tips

Bev, Ft. Wright, KY - Driveway Popouts

Barbara, Princeton, NJ - Wet Toilet Base

Kay, Sharonville, OH - Preventing Icicles on Gutters

George, West Chester, OH - Stopped up Vent Pipe

Tom, Lebanon, OH - Bird Bath Repair

Tom - Cork Flooring

Paul, Delhi, OH - Leaking Gutter

AsktheBuilder mp3 Radio Show March 3 2005

Each title below is a direct link to a downloadable mp3 file. Just click the title if you want to listen. Right click if you want to download into your computer to save and play at a later date.

The Copyright to all radio segments is owned by Tim Carter. I would love to know what you think of these radio segments.  Do you like them? Do they help you? Have they saved you money and/or time?  Let me know by sending me an email: [email protected]


Home and Garden Show Today - Visit Tim in McCabe Lumber Booth

Crown Molding DVD, Special Numbered Release

Mike, Lexington, KY - Sagging Floor Repair

Jim, Morning View, KY - Crown Molding Cracks in Bathroom

John, Cincinnati, OH - Dirty/Worn Fiberglass Insert Tub

Elva - Dark Spots on Granite

Don, Columbus, OH - Composite Decking

Don - Shower Valve Anti-Scalding Adjustment

Marion - Work Area in Basement with Kitchen Cabinets

AsktheBuilder mp3 Radio Show April 2 2005

Each title below is a direct link to a downloadable mp3 file. Just click the title if you want to listen. Right click if you want to download into your computer to save and play at a later date.

The Copyright to all radio segments is owned by Tim Carter. I would love to know what you think of these radio segments. Do you like them? Do they help you? Have they saved you money and/or time? Let me know by sending me an email: [email protected]


Interview with Steve Moore from American Historical Paints

Larry - Preserving Outdoor Furnace Tank with Paint

Jean - Deck Sealer: Epoxy Defy

Steve Moore's Tips: Preparing for Painting Exterior Surfaces

Janet - Washing Grooved Siding

Jim - Painting Vinyl Siding

Brick Barbeque Design

Brick & Stone Barbecues

Constructing a traditional brick or stone barbecue complete with chimney, doors, mortar and the whole shebang is a daunting task. If you have not built anything from brick or stone using mortar, levels, string, etc., you will be in for a surprise. Now I'm not saying that you can't do it - I'm just trying to get you prepared for some severe hand/eye co-ordination competition!

Elements of a Great Design

Traditional backyard barbecues that function well have several things in common. The cooking surface should end up very near the same height of your bathroom sink. For many people this is between 28 and 30 inches. If you are a tall person, you may want the surface at 34 inches or so.

These barbecues also mimic your kitchen cooking area. There should be a flat surface at least 16 inches wide on one or both sides of the cooking area. This surface permits you to set down your cooking utensils, plates, spices, etc. If you can spare the extra room, it would be ideal if the area on either side of the cooking surface was 24 to 30 inches wide.

Perhaps the biggest challenge in barbecues is controlling the fire heat. You want to make sure the fire does not burn the food or yourself while you are standing in front of the barbecue. The fire control aspect of the barbecue is accomplished by installing doors. These are similar to the swinging doors you see on old fashioned steam locomotives. The two doors are stacked upon one another. The seam between the two doors is at or near the location of the grate that holds the charcoal. The bottom door controls the amount of air that feeds the fire, When the door is open, air can flow up and through the glowing charcoal. The more air you supply, the hotter the fire will burn. The second set of doors is directly in front of the fire. These doors act as a shield so that the direct heat from the fire will be blocked from hitting you. The metal doors also reflect the heat back into the fire and eventually to the food you are cooking.

Finding these specialty doors will be no easy chore. You can sometimes obtain cast iron doors that we builders use in fireplace cleanouts. They are available in different sizes. The smallest door is 8 x 8 inches. I would recommend that you try to find a door that is a minimum of 12 inches by 12 inches.

The Quick and Easy Barbecue

A simple, efficient and sleek brick barbecue can be constructed within two days. It will serve well for many years and requires not one trowel of mortar! You stack it together like toy blocks. All you need are two grates - one for the charcoal and one for the food. These are available at any retailer that sells kitchen appliances, utensils and cooking supplies. If you can afford it, try to get stainless steel grates. Keep reading to see how to build this simple and functional barbecue. If you have to put together a little grill in a matter of minutes, I have a solution for that as well. Check out my simple hibachi setup!

Column B181

Brick & Stone Barbeque Design Elements

Brick & Stone Barbecues

Constructing a traditional brick or stone barbecue complete with chimney, doors, mortar and the whole shebang is a daunting task. If you have not built anything from brick or stone using mortar, levels, string, etc., you will be in for a surprise. Now I'm not saying that you can't do it - I'm just trying to get you prepared for some severe hand/eye co-ordination competition!

Elements of a Great Design

Traditional backyard barbecues that function well have several things in common. The cooking surface should end up very near the same height of your bathroom sink. For many people this is between 28 and 30 inches. If you are a tall person, you may want the surface at 34 inches or so.

These barbecues also mimic your kitchen cooking area. There should be a flat surface at least 16 inches wide on one or both sides of the cooking area. This surface permits you to set down your cooking utensils, plates, spices, etc. If you can spare the extra room, it would be ideal if the area on either side of the cooking surface was 24 to 30 inches wide.

Perhaps the biggest challenge in barbecues is controlling the fire heat. You want to make sure the fire does not burn the food or yourself while you are standing in front of the barbecue. The fire control aspect of the barbecue is accomplished by installing doors. These are similar to the swinging doors you see on old fashioned steam locomotives. The two doors are stacked upon one another. The seam between the two doors is at or near the location of the grate that holds the charcoal.

The bottom door controls the amount of air that feeds the fire, When the door is open, air can flow up and through the glowing charcoal. The more air you supply, the hotter the fire will burn.

The second set of doors is directly in front of the fire. These doors act as a shield so that the direct heat from the fire will be blocked from hitting you.  The metal doors also reflect the heat back into the fire and eventually to the food you are cooking.

Finding these specialty doors will be no easy chore. You can sometimes obtain cast iron doors that we builders use in fireplace cleanouts. They are available in different sizes. The smallest door is 8 x 8 inches.  I would recommend that you try to find a door that is a minimum of 12 inches by 12 inches.

The Quick and Easy Barbecue

A simple, efficient and sleek brick barbecue can be constructed within two days. It will serve well for many years and requires not one trowel of mortar! You stack it together like toy blocks. All you need are two grates - one for the charcoal and one for the food. These are available at any retailer that sells kitchen appliances, utensils and cooking supplies. If you can afford it, try to get stainless steel grates.

Keep reading to see how to build this simple and functional barbecue. If you have to put together a little grill in a matter of minutes, I have a solution for that as well. Check out my simple hibachi setup!

Portable Grills

Maintaining Portable Grills

Do you currently own a propane gas grill that you leave outside? Most of these contain painted or chrome plated steel parts. They are very susceptible to rusting. The heat from the fire can open up the paint film and allow water to contact the steel. The chrome plating can be thin.

It is virtually impossible to stop all of the rusting. The vinyl barbecue covers go a very long way to stop rainwater from getting your grill wet. But, they can trap moisture like a hot air balloon if left on during hot, humid weather. Moisture that seeps from the soil can float up under the vinyl covers. The sun makes the vinyl tent a steam bath.  I recommend that you remove the cover during sunny days and recover the grill at night. You want to protect the grill from the morning dew.

If you do not use your grill during the winter months, try to bring it into your garage out of the weather. Even still, it can rust in the garage. The grill will get very cold. If you get a quick warm-up, the water will actually condense like a fog on the cool metal. It happens to my shovels every winter!

NEVER take the propane canister inside your house over the winter months. If a leak develops for any reason, your house may explode. If you want to put your grill in your warm basement, that is fine. Leave the propane outside.

Natural Gas

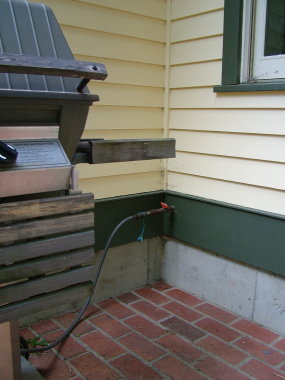
If your house has natural gas, make every attempt to run it to your brick grill or portable grill. Existing grills that burn propane can be retrofitted to burn natural gas. It may cost several hundred dollars, but will pay off over time.