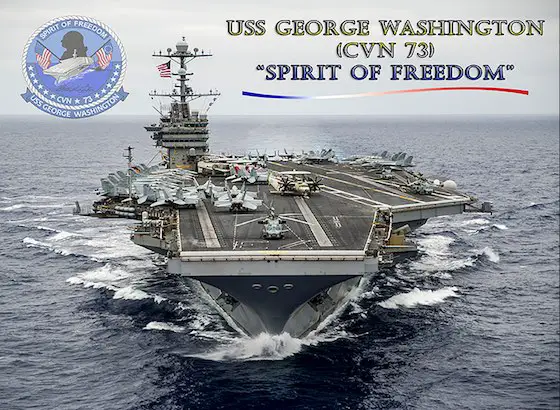
USS George Washington (CVN 73)
USS George Washington CVN-73 Sleepover
The plane taking me to my latest adventure telegraphed that I was going someplace special - very special. Not only did the seats face backward, but the cabin was also hot and poorly lit. There were no overhead luggage bins, just life rafts hanging from the bare metal ceiling.
The inflatable life vest I was wearing that was equipped with a dye pack, whistle, and strobe-light as well as the weird cranial helmet equipped with high-performance ear muffs were also a hint that this was to be no ordinary plane ride. My destination was the flight deck of the aircraft carrier USS George Washington CVN-73. She was busy carving a crescent-shaped course dictated by the wind 200 miles off the North Carolina coast as I was climbing up the rear freight ramp of the special carrier onboard delivery (COD) turbo-prop plane that is used to ferry people and supplies to carriers.
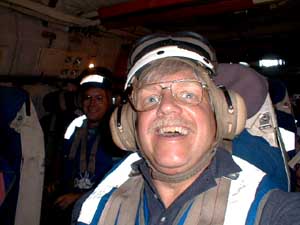
I'm in the "Carrier Onboard Delivery" transport plane. It was noisy, hot,I and exciting. SELF-PHOTO BY: Tim Carter
Chief Petty Officer Eric Sesit
"The USS George Washington is not your everyday cruise ship," said Chief Petty Officer Eric Sesit. Chief Sesit was preparing five other journalists and myself at the US Naval Air Station in Norfolk, Virginia 90 minutes before we were to fly to the carrier. "Keep your head on a swivel. You're going to see what a cruise ship looks like before she gets carpeting and paneling," remarked Chief Sesit. He wasn't kidding as pipes, valves, cables, brackets, fire hoses, and metal cabinets protruded from the ceilings and walls of just about every passageway on the ship.
Chief Sesit is currently a land-based sailor. He works for Commander Roxie Thomsen Merritt who happens to be in charge of public affairs for the U.S. Naval Air Force Atlantic Fleet. During the first week of June, 1999 I had the pleasure of meeting Commander Merritt and many of the officers of the USS George Washington. Approximately 30 journalists and I were attending a Sears Editors Conference and were invited by the US Navy and the US Navy League to spend several hours aboard the USS George Washington while she was in port.
Sleepover Invitation - You Can't Be Serious?
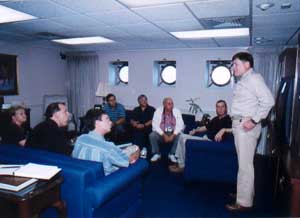
Captain Rutherford is giving us our initial briefing. PHOTO BY: Chief Eric Sesit
Commander Merritt circulated among the different journalists, and those of us who could not restrain our enthusiasm were challenged to a two day stay aboard the ship while it was performing routine carrier qualifications. A civilian aboard an operating aircraft carrier at sea? Surely she was teasing us.
"The aircraft carrier distinguished visitor program is designed to embark individuals who are influential in their community, business or government," stated Commander Merritt in her invitation letter to me. "These embarks provide unique opportunities to foster citizen awareness and understanding of Naval aviation and the carrier training required to keep our forces ready for any contingency," she also wrote. After completing the trip, I would say that this is the biggest understatement I've ever heard. The word unique should have been followed by awesome, once-in-a-lifetime, incredible, unbelievable, etc.!
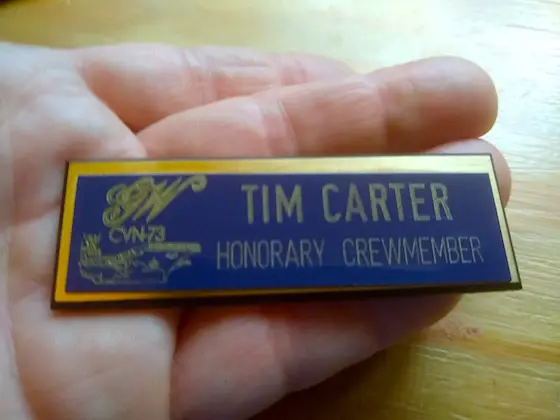
This is my official name tag I had to wear while on the ship.
High Anxiety and Surreal
"When you get off the plane, do not take photographs. The flight deck of the carrier is a dangerous place and you will most likely be a little disoriented," said Chief Sesit. Moments after the arresting cables stopped us from plunging into the sea, the rear door of the aircraft opened. I actually thought I was in another world.
The people on the flight deck wore different colored shirts (green, yellow, brown, white, and purple) and everyone was wearing special helmets and goggles to protect themselves from the extreme noise, wind blasts, and fumes from the roaring jet exhaust.
I was first to exit the aircraft and the person who escorted me looked straight into my eyes and communicated with his hands and body language to walk to a specific location and not to move. He had nothing to worry about, as I was not only disoriented but also scared to death. Chief Sesit was right. Standing on the flight deck of an active aircraft carrier is highly dangerous. More importantly, he failed to mention that it's also surreal.
Briefing From the Captain Rutherford
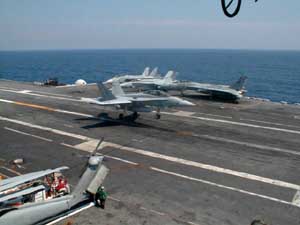
An F-18 pilot tailhooks the #3 wire! PHOTO BY: Tim Carter
Once aboard the ship, we entered Captain L. G. "Yank" Rutherford's quarters. We unwound from the 0ne-hour flight and abrupt landing in a spacious and smartly appointed dining and living area adjacent to his office and cabin area. Captain Rutherford extended a warm welcome to our group and introduced us to several key officers as well as our on-board tour guide Aviation Boatswain Mate Fuels Chief (Aviation Warfare Specialist) John Laurenti. The captain knew we were anxious to see the ship and he instructed Chief Laurenti to begin the tour.
Air Traffic Control
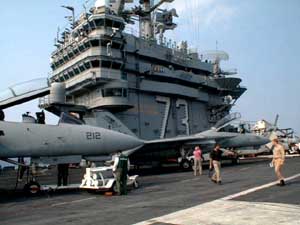
Here is the island on the USS George Washington. Think of it as an air traffic control tower at a regular airport. PHOTO BY: Tim Carter
One of the first places we visited was the Primary Flight Control. This is the air traffic control tower of the carrier. This part of the ship is the highest enclosed work platform above the flight deck. It is where you find the Air Boss and his immediate subordinate, the Mini-Boss. These two individuals communicate with the pilots, the captain, and other officers on board the carrier while planes are landing at taking off.
The Air Boss and Mini-Boss, with the help of many other courageous crew members, can launch an array of aircraft every 30 seconds and retrieve them 90 minutes later at 45-second intervals. To say the very least it is a demanding and high-pressure environment.
Chutes and Ladders - Lots of Ladders
The USS George Washington is not only long, but it is also tall - 244 feet to be exact. There are elevators onboard, but they are only used by aircraft, explosives, and supplies. All vertical movement by the crew between decks from the captain down to the lowest ranking enlisted crew member happens via steep ship's ladders. I didn't see an overweight person on the ship and I now know why.
"So, how do you like our $4 billion dollar StairMaster?" Lt. JG Bill Hewitt asked as we settled into the Combat Direction Center. After climbing up and down the ship for nearly three hours his air-conditioned space filled with countless computer screens, monitors, and control panels was exactly what we needed.
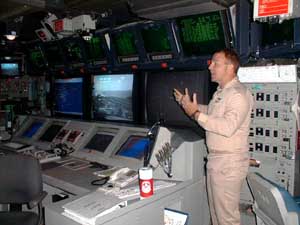
The Combat Direction Center bristles with technology to defend the ship. PHOTO BY: Tim Carter
The lack of overhead lighting and the multi-colored monitors and displays made it appear like a video arcade. Lt. JG Hewitt's description of the vital function of this area of the ship made it clear to me that any resemblance to a video game palace was merely skin deep. "We defend the ship," he said. Decisions made in this compartment during a conflict affect real lives, not two-dimensional action figures on a TV monitor.
Crowns, Casts, and Spectacles
If you closed your eyes when you walked into the ship's dental compartment, you would swear you were at your own dentist's office. The scent of dental cleaners and compounds was unmistakable. The ship offers full dental services to the entire crew. The staff can make crowns, fill cavities, and even perform oral surgery if necessary.
The hospital and medical compartments were equally impressive. If it were not for the steel floors, walls, and ceilings, you would think you were at your local doctor's office or hospital. Advanced technology allows the onboard doctors to communicate with land-based specialists. For example, x-rays are digitized and transmitted in real-time back to a radiologist who helps the onboard doctors with diagnoses. Surgical procedures can be televised via satellite so that land-based doctors and surgeons can assist during a procedure. It is absolutely amazing.
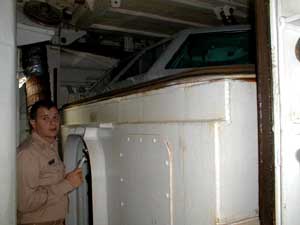
Chief John Laurenti is going to be a professional island tour guide when he retires from the US Navy! PHOTO BY: Tim Carter
Our tour of the medical area was conducted by an old salt of a sailor, Chief Bankard. We finished up the tour in the optical department where they administer full-blown eye exams and make eyeglasses. I was amazed at the variety of frames that were available. "Sure, we have all sorts of glasses, even birth-control glasses," said Chief Bankard as he pointed to a traditional pair of thick black horned-rimmed glasses.
Chief Laurenti - A Pro
Throughout our tour Chief Laurenti protected and guided us as would any mother hen. "....four, five, six. Looks like you are all here. Let's keep moving," he would say as we went up and down multiple ladders and rounded corners of passageways that all looked the same. It was obvious to me that he was a true pro and had guided civilians around the ship before. Chief Laurenti also knew exactly how to work the crowd. He saved the best for last.
Just before it was time to retire to our staterooms that were immediately below and adjacent to the noisy flight deck, Chief Laurenti took us out onto Vulture's Row. This is a narrow balcony up on the carrier's island superstructure that overlooks the flight deck. It was pitch black outside. The flight deck was illuminated by a soft sodium-vapor light, small colored runway lights, and tens of thousands of stars. It was a magnificent sight to behold.
The flight deck was a busy place that night. Some young pilots were attempting and completing their first-ever nighttime landings on a carrier. Once they landed, they were immediately repositioned and catapulted off the ship for another try. The bluish-white glow of the jet exhaust afterburners was intoxicating. Combined with the noise and the waves of heat and fumes created by the roaring jet engines, Vulture's Row at night was the place to be on the carrier. Chief Laurenti just smiled. He didn't have to say a thing.
The Shirts
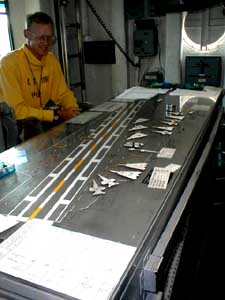
ABH1 Swanson's valet parking lot diagram. PHOTO BY: Tim Carter
Because the flight deck is so dangerous and you can't hear over the noise, the crew members who work there wear different colored shirts and helmets that communicate their responsibilities. An observer can simply look onto the flight deck and see if the right person is in the right place.
"With 22 aircraft moving at any given time, it gets hectic out there," said Aviation Boatswain Mate First Class (ABH1) Swanson. ABH1 Swanson and other people he works with are responsible for moving the aircraft around on the flight deck.
They do this by using a scale model of the flight deck, the hanger deck below, and scale model foam cutouts of the different planes that are on-board. The layout is referred to as the Ouija board. "I'm valet parking," said ABH1 Swanson. Everyone involved with the flight deck operations has a tough and dangerous job to be sure, however, Swanson concluded that, "The hardest workin' folks is not us yellow shirts, not the purple shirts. It's the green shirts."
The primary duty of the green shirt crew members is to assist with the launching and recovery of aircraft from the flight deck. These are the brave young people you see closest to the jet afterburners when the planes leave the deck!
The Catapult Shot - Time to Go Home
All good things must come to an end. So true with this wonderful voyage. Just before exiting the ship, Captain Rutherford met with us one final time. He thanked our group for coming and commented on the spirit of the USS George Washington. In his opinion, the heart and soul of the ship lie in its young - average age 21 years old - crew members. "We have high expectations and they live up to them," said Captain Rutherford. Commenting on the switch from civilian life to that of a sailor entrusted with enormous amounts of responsibility, Captain Rutherford summed it up by saying, "The transformation is remarkable. We are pleased with it!"
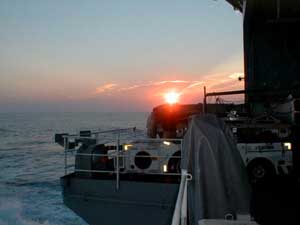
Sunset from the fantail. Can life be any better? PHOTO BY: Tim Carter
Moments after the catapult hurled me off the ship in the belly of the transport plane, I reflected on Captain Rutherford's words.
He was right on target. For two days I was surrounded by enthusiastic young people who gushed with determination, discipline, and diligence. They had jobs to do and they did them. These young adults and the officers who train them protected me while on board. By performing these jobs each and every day, they are an important part of our splendid national defense system that allows all of us to be free and enjoy liberties that no one else in the world can rival. All of us need to thank them for their service to our great nation every chance we get!
I received this wonderful email from one of the hundreds of thousands of individuals who have had the pleasure, honor and courage to serve aboard one of our mighty aircraft carriers:
"Mr. Carter,
I am a RETIRED CHIEF AVIATION BOATSWAIN Mate, GREEN shirt Catapult and Arresting gear. Your article above inspired me to email you.
Your article brought back 34-years worth of memories as I was on four carriers from five-hundred feet to one-thousand-fifty feet long.
I experienced lots of hard, enjoyable work with PRIDE. I retired in 1971, taught in vocational school for 19 years and often wish I had continued in the NAVY.
But the thing back then was to give back, so I did, not bad. I was touched by a lot of young people. Thank you for old memories. There is nothing like the NAVY for 22 years. I am now retired to Paradise - Pensacola, FL - the birthplace of Naval Aviation.
Thank you." - Chief Cochran USN Ret.
This adventure was so thrilling I decided to share it with the 31,000 subscribers who read my March 1, 2016 and my October 11, 2020 FREE newsletters. You should subscribe too. Read about a real tail hooker in my November 10, 2015 Newsletter.