Skylights and Skylight Leaks

skylight

A leak in this skylight could quickly ruin the beautiful wood interior. The rain falling on this skylight stays outdoors because this skylight has a superb flashing system. PHOTO BY: Tim Carter

DEAR TIM: I have three skylights in my house. They don't seem to leak during rain or the summer months but during the winter I get a drip in the family room and bathroom. It is damaging the drywall. I'm not sure if it's from condensation, ice or an actual leak. Due to the locations on the roof, I don't feel safe doing the work myself. If I call a contractor what should I ask or be looking for? How do I know they can actually correct the problem? Should I call a roofer or other type of contractor? Bev A., Sylvania, OH

DEAR BEV: It sounds to me as if you have spent some time in my kitchen and in my wife Kathy's sunroom. The five skylights in those two rooms are awash in natural light each day, even on overcast days. One wall of the sunroom faces east. When the sun is out and streaming through the single east-facing skylight, you feel like you are in paradise with the plants and brilliant sunshine.

Are skylights a good idea?

I am a big fan of skylights for any number of reasons. I can clearly remember back in the 1970's when the plastic bubble skylights were the rage. I installed many and never had a problem with leaks from rain, ice or snow. But condensation was indeed the bane of these older-technology windows to the sky.

Those who installed them near kitchens, bathrooms or other rooms that had lots of live plants suffered as the invisible warm, humid air from these rooms floated up into the skylight tunnel. There the cool surface of the skylight caused the water vapor in the air to rapidly condense.

High-quality skylights that come from the factory with insulated glass as well as pre-engineered roof flashing systems are your best defense against leaks from external water sources as well as interior water vapor. But extreme exterior temperatures combined with abnormally high interior relative humidity can tax the limits of this technology. Even my skylights will drip when the exterior temperature drops below -10F .

How do I know if my skylight is leaking or condensation?

Based upon your description, I don't feel you have a true roof or flashing leak. If the skylight is dry during severe summer rainstorms that often create lots of wind-driven rain, then the flashing system must be doing its job. Ice damming can indeed defeat most flashings that were not installed over the top of ice-dam membranes. These pliable membranes are applied in direct contact with the roof deck and the sides of the exterior of the skylight before the flashings are installed. They create a fantastic barrier to ice dam water that backs up under shingles and flashings. However, if your skylight drips when there is no snow on the roof, I think it is safe to assume the source of the annoying water is condensation.

skylight flashing

The problem may not be with the insulated glass. My instincts tell me the source of the water is quite possibly condensation that is forming on the underside of the metal flashings as warm, moist air from your house escapes around the rough opening that was created for the skylight. The resulting liquid water probably is running down the underside of the flashing much like water runs down the mirror in your steamy bathroom. But once at the bottom of the flashing system, it is finding a pathway back into your home.

How do you stop the condensation from leaking into the house?

I have solved similar leaks with a two-fold approach. The first step is to remove the flashing system on the exterior of the skylight so that an ice-dam membrane can be installed between the wood roof deck and the sides of the skylight. These membranes often are a combination of asphalt and rubber compounds and are very sticky. When carefully lapped and folded, the membranes completely block the pathways between the skylight and the rough framing of the roof. This ensures no water that gets past the flashing will run into your home.

The second step is slightly more painful because the drywall must be removed from the sides of the skylight tunnel all the way up to the underside of the skylight. Dust and debris is often created during this process and it can spread throughout your home. Once exposed, the gap between the rough framing lumber and the skylight can be carefully filled with a spray-urethane insulation.

Once the foam has cured, trim away any excess foam, extend a vapor retarder film over the sides of the skylight tunnel or roof framing and then bend this film over the foam-filled gap so the vapor retarder stops right at the finished edge of the drywall or finished wall material. This interior vapor retarder will stop or hinder the water vapor from working its way to the colder surfaces of the skylight where it can condense and cause chaos.

To do this work I would hire an experienced remodeling contractor. He will undoubtedly have as part of his team an experienced roofer and drywall repair person who will do a majority of the work. If the remodeler is good, he will know how to work with the urethane foam insulation.

CLICK or TAP HERE to get FREE QUOTES from local companies that can solve your skylight problems.

Never underestimate the sources of water vapor in your home. Large numbers of live plants can significantly contribute to elevated levels of indoor humidity as they transpire water from roots to the leaves. Cooking pasta and boiling water for just about any purpose liberates vast amounts of water into the air. Steamy baths and showers produce clouds of water vapor. Hanging wet laundry inside homes produces water vapor as well. Crawlspaces that do not have vapor retarders over the soil can also be condensation culprits.

Authors' Notes: After this column was posted to the website, I received an email from the owner of a company in Colorado that specializes in skylight repairs and installation. Here is part of the email:

"...... When asked where to search for a skylight repair person you failed to inform your patrons that the best choice is to look for a skylight specialists. These expert skylight repair technicians can be found in the yellow pages under Skylights ...."

Well, consider yourself informed. I always appreciate these nuggets of helpful information and encourage people to send them to me as often as possible.

Column 559

Load Bearing Walls

load bearing wall

Unless you have lots of experience in replacing bearing walls with beams, hire a residential structural engineer to design the solution. This innocent-looking wall has tons of weight bearing upon it. PHOTO BY: Tim Carter

DEAR TIM: I want to remove a load bearing wall between my living room and family room. This wall is 17.5 feet long. My wife desires a continuous smooth ceiling once the repair is complete. How is that accomplished? How do I size the beam and what should it be made from, steel or wood? What is the best way to support the beam at each end? Geoff D., Woodland Hills, CA

DEAR GEOFF: If my memory serves me right, you are at ground zero for seismic and earthquake activity. I distinctly remember the Northridge earthquake of 1994. To cut to the chase, the structural modification you are planning must be designed by a professional who knows exactly how to specify the correct materials and how they will be connected to the existing structure. I would give this same advice to a person who lived in a non-seismic area. Structural modifications are serious and require sound plans that will work.

Is it easy to remove a load bearing wall?

The length of the wall you are removing is substantial. Depending upon what is above the wall and loads that may be concentrated on the wall, you need to know that this job is not for the faint of heart. Furthermore, the smooth ceiling your wife prefers adds an additional degree of difficulty to the job. I have installed hidden beams to achieve this goal, but it is not as easy as it might seem.

The beam you need to install must end up flush with the bottom of the overhead existing floor or ceiling joists that are in the two rooms. There is a very good chance these floor joists overlap on top of the wall and you have to cut through these to make space for the new beam.

load bearing wall

This load bearing wall separates my family room from my breakfast room. You would be shocked to discover the enormous loads concentrated in this wall, even with the doorway and large opening. © 2017 Tim Carter

But it gets even more complicated. If your home is a one-story home and the roof is framed conventionally without pre-fabricated trusses, the ceiling joists that overlap and connect to one another may very well be a vital part of the roof support system. These horizontal framing members form the bottom part of a large triangle while the sloping rafters make up the other two legs of the triangle. If you cut the bottom joists without first making a structural modification to the roof, parts of the roof could collapse.

What type of load bearing beam will be needed?

The beam that will be installed might end up being made from steel, wood or a combination of the two materials. I have installed many a wood beam that had a flat steel plate sandwiched between the pieces of wood. The steel plate gave the beam enormous strength. There are several types of superb engineered lumber beam products, all of which should be known to the residential structural engineer you will hire. If a steel I-beam is called for, you may have to have holes bored in the flat flanges and vertical web so that wood can be bolted to the steel. This wood will allow you to easily connect metal joist hangers to the beam. These joist hangers will carry the weight of the existing ceiling or floor joists.

Sizing the beam is a science. You just don't pick one out of a catalog as you would a new pair of shoes. An engineer must study the structure and determine exactly how much weight is currently being supported by the existing bearing wall. This same person will also make recommendations as to what might have to be done at each end of the wall to ensure the weight from the new beam is redirected to parts of the house that can support the load.

CLICK or TAP HERE to get FREE QUOTES from local structural engineering companies that can assist you with your replacement beam.

The columns that support each end of the beam are very important. They will be supporting enormous weight and this load will often be concentrated on just 12 or 16 square inches at the base of each column. The connection between the columns and the beam is extremely critical as is the connection of the columns to the floor or foundation. More importantly, the columns must rest upon solid material that can take the concentrated load without any sort of settlement or compression failure.

Temporary Resupport is critical!

A critical aspect of removing a bearing wall is the temporary resupport of the house components the bearing wall is supporting. All of the loads must be supported before you start to remove the wall.

Often the actual beam must be placed next to the wall that will be replaced before the resupport walls are constructed. If you build the temporary walls first, it may be impossible to get the new beam into position between the two sets of walls.

A good residential structural engineer will also draw up a plan for the temporary resupport walls. The construction of these walls must be done with great care. Be sure you have enough room to work so that the new beam and support columns can be installed with minimal effort.

If a contractor is hired to do the job, you must insist upon referrals for similar jobs. Installing large beams should be performed by seasoned professionals. Your house should not be a lab rat for some start-up contractor who thinks he can install the beam.

Column 558

AsktheBuilder.com Advertising

AsktheBuilder.com Advertising Information

Did you know that...

  • AsktheBuilder.com can send highly targeted and motivated customers to your website using text and digital photo advertising?

  • Tim Carter's columns act as a highly effective subliminal sales platform. His words and credibility combine to convince people to use your product or process. Once they click the gorgeous photos of your products that are published in AsktheBuilder.com columns, they are whisked away to your website where you do your part to convert them into a booming profit center?

  • AsktheBuilder.com receives over 40,000+ visitors EVERY DAY?

  • Your company can buy relevant placements of specific products in columns and channels?

  • Photo ads can produce response rates up to 5X higher than normal banner or graphical ads?

  • AsktheBuilder.com offers exclusive ownership of specific columns and channels?

  • AsktheBuilder.com can put your product or brand on specific columns and channels -- or -- on the most frequently visited columns and channels to maximize product exposure?

  • AsktheBuilder.com ads really work!

    "The American Plywood Association (APA) has been on board with AsktheBuilder.com for five fruitful years. The partnership has proven valuable not only in terms of driving traffic to our site, but also through increased exposure in Tim's other media avenues such as radio and magazines. We have measurable results in hand."

    - Kevin Hayes, Ad & Publicity Mgr., APA - The Engineered Wood Association


Click Here for Ad Rates and Programs

Contact ATB Advertising Sales at results @ askthebuilder.com (remove the spaces around the "@") today!


What is AsktheBuilder (ATB)?

Tim Carter, a national award winning builder and remodeler launched the syndicated ATB newspaper column on October 2, 1993. After working 20 years in the residential building and remodeling industry, he was selected as one of the top 50 remodelers in the U.S. by Remodeling magazine in May, 1993. Tim's archived newspaper columns are the core content of the ATB website.

Tim has now expanded ATB into all major media. The "AsktheBuilder" nationally-syndicated newspaper column is distributed by Tribune Media Services. Tim produced a weekly one-hour radio show on WGRR 103.5 FM in Cincinnati, OH. He also produces 90 second home improvement vignettes for WLWT-TV, the NBC affiliate in Cincinnati, OH. Tim has served as the Editor-at-Large of Extreme How-To magazine. Tim appeared as a craftsmanship judge on a reality TV show in the fall of 2004 produced by Turner Broadcasting System.

Because 78 percent of Americans hire professionals to do their work, Tim's slant in all media is simply to show people the right way to do things. This unique approach automatically captures the DIY market as well!

ATB is the leader in accurate home-improvement content on the Internet. There simply is no other website that offers the actual hands-on experience of the personality behind the content. There are other media personalities, but none have the 20 years of hands-on experience across all trades that Tim has under his belt.

Tim is a master carpenter, a licensed master plumber and a master roof cutter. He is an expert drywall finisher, tile, marble and granite installer, roofer, painter, concrete finisher, etc. In other words, Tim has done all of these task and more for twenty years before starting to write and talk about it. Be sure to ask for a detailed work history from some of the other media personalities out in the marketplace. You might be shocked at how little work they have actually done before stepping into the limelight.

Contact AsktheBuilder.com Advertising Sales at results @ askthebuilder.com (remove the spaces around the "@") today!

Black Mold Eats Almost Anything – How to STOP It

mold mildew lumber rafters

Black mold can grow just about anywhere. Here it is on framing lumber that got wet during construction. Why is the black mold on just the one collar tie and not the others? Simple, silly! It's all about food. Keep reading and you'll discover what might be on that 2x10.

"To stop black mold growth, all you have to do is keep surfaces inside your home dry."

DEAR TIM: We accepted a contract to sell our home. After the home inspector discovered some mold, a mold expert was brought in. The two areas of mold, each one measuring about 3 foot by 3 foot, were caused by a burst water pipe that was immediately fixed and the water dried up within 48 hours. Do I have to have the mold professionally cleaned? What about the chronic mold in my bathroom? Barbara S., Lancaster, PA

DEAR BARBARA: To a large degree, I think this mold hysteria has gotten a little bit out of hand. Don't get me wrong, there are molds that are highly toxic and other common molds that can produce life-threatening allergic reactions in highly sensitive people. But everyone needs to understand that mold is a part of the food chain and we actually need it. Mold is just about everywhere outside your home and in many foods we eat. It's just not a good idea to have mold growing on things inside your home.

How Many Types of Mold Are There?

There are over 30,000 known types of molds so you can see that even professional microbiologists could spend a lifetime and not be an expert about each one. But the rest of us who do not actively study mold on a professional level need to know that mold growth, for the most part, can be easily stopped in a home. To stop black mold growth, all you have to do is keep surfaces inside your home dry.

Where Can I Find Mold Spores?

Mold spores are already in everyone's home unless you happen to live in a house built like the sterile rooms at the Centers for Disease Control and Prevention where scientists wear special moon suits. Mold spores are invisible to our eyes as they often are only 3 microns across. The smallest object the average person can see with the naked eye is often 50 microns or larger in size. The spores are actual seeds that sprout and grow into microscopic plants when they come into contact with water. They are everywhere in the average home just waiting for water.

CLICK or TAP HERE to get FREE BIDS from local Mold Experts

Black mold such as this can blossom in days under the right conditions. PHOTO BY: Tim Carter

Black mold such as this can blossom in days under the right conditions. PHOTO BY: Tim Carter

What Does Mold Eat?

The mold spores in your home must be in contact with an organic substance like food, dust, paper, cardboard, dirt, leather, etc. in order to grow. Surfaces such as ceramic tile and even stainless steel can have mold on them, but the mold is growing in and on a thin invisible layer of dirt, grease, oils, body skin cells, etc.

Sugars of any type are delicious food for mold. Deciduous trees often broadcast microscopic aerosol sprays of sugar that can land on a deck or stick to siding on a home. Spilled sugary soda will become coated with mold in just days given the right conditions. That's what happened to the roof-framing collar tie in the photo at the top of this page.

Is Water Necessary For Mold Growth?

As soon as the spores come into contact with water, the outer surface of the spore dissolves and starts to soften the organic material. Small roots grow out of the spore much like a regular plant into the softened organic food source.

Some molds need very little moisture to flourish while other molds need lots of water to quench their thirst. But when you consider how small the mold spores are, you can see it doesn't take much water to get them to grow. In fact, the water needed to start and support the mold's life cycle can be an invisible fog of tiny water droplets that are also invisible to your eyes.

Why Do Bathrooms Have Mold?

This is one reason people have so much trouble controlling mold growth in bathrooms such as yours. When you take a steamy shower you see the mirror fog up. This same fog covers the ceiling and walls as well and is the water needed to fuel the growth of the pesky mold. This is why bathrooms must have powerful fans that duct the humid air to the exterior of your home, not up into your attic.

After you have bathed, tub and shower walls and shower doors should be squeegeed down to direct as much liquid water as possible to the drain. Bathroom shower curtains need to be shaken to remove as much water as possible. Leave your shower door, shower curtain and bathroom door open when you leave the room. You want all surfaces to dry out as rapidly as possible.

Are Pros Required to Remove All Mold?

The mold the inspector found does not have to be professionally cleaned. Since each area is less than 10 square feet, it falls within the guidelines of do-it-yourself cleanup as stated by the Environmental Protection Agency. When surface areas get larger than 10 square feet, it might be necessary to call in a professional that works with special protective clothing and breathing apparatus and is able to minimize or eliminate the spread of mold spores throughout the rest of the house.

What Type of Respirator Should I Wear?

It is very wise to wear an N-95 respirator when cleaning mold. The cleaning process can liberate additional mold spores into the air that can cause mold to spread and more importantly, create health risks to those people who are allergic to that particular mold.

n95 respirator mask

CLICK or TAP HERE to have N-95 respirators on your face in a day.

It's a good idea to lightly mist the area to be cleaned with a biocide solution such as regular chlorine bleach and water before you start to clean it. Wear rubber gloves and goggles that do not have ventilation holes. You want to avoid getting mold on your skin and in your eyes.

Does Oxygen Bleach Work to Clean Black Mold?

Yes, oxygen bleach is a fantastic black mold cleaner. There's no odor like stinky chlorine bleach, and a product like Stain Solver is certified organic. Just mix the powder with water and saturate the black mold for 20 or 30 minutes, scrub, and rinse.

Stain Solver black background yellow scoop

Stain Solver is MADE in the USA with USA ingredients that are food-grade quality. CLICK or TAP HERE to order Stain Solver.

Can a Fan Blow Spores Outdoors?

If possible, try to place a large fan in a window in the room you are cleaning to exhaust mold spores outdoors. Imagine the air being filled with smoke. The air will be filled with mold spores as you disturb the surface you are cleaning, so try to exhaust as many spores as possible outdoors.

Should I Wash Everything?

Be sure to rinse well all cleaning tools, rags, etc. immediately after cleaning. Wash all clothes immediately so they do not grow mold in the clothes basket or hamper. Dry all cleaned surfaces with rags, paper towels or a fan. Remember, the key to stopping mold growth in its tracks is to prevent water from getting on any interior surfaces of your home.

Column 556

Tail Hook the USS George Washington Aircraft Carrier

cvn 73 uss george washington

USS George Washington (CVN 73)

USS George Washington  CVN-73 Sleepover

The plane taking me to my latest adventure telegraphed that I was going someplace special - very special. Not only did the seats face backward, but the cabin was also hot and poorly lit. There were no overhead luggage bins, just life rafts hanging from the bare metal ceiling.

The inflatable life vest I was wearing that was equipped with a dye pack, whistle, and strobe-light as well as the weird cranial helmet equipped with high-performance ear muffs were also a hint that this was to be no ordinary plane ride. My destination was the flight deck of the aircraft carrier USS George Washington CVN-73. She was busy carving a crescent-shaped course dictated by the wind 200 miles off the North Carolina coast as I was climbing up the rear freight ramp of the special carrier onboard delivery (COD) turbo-prop plane that is used to ferry people and supplies to carriers.

Tim in transport plane

I'm in the "Carrier Onboard Delivery" transport plane. It was noisy, hot,I and exciting. SELF-PHOTO BY: Tim Carter

Chief Petty Officer Eric Sesit

"The USS George Washington is not your everyday cruise ship," said Chief Petty Officer Eric Sesit. Chief Sesit was preparing five other journalists and myself at the US Naval Air Station in Norfolk, Virginia 90 minutes before we were to fly to the carrier. "Keep your head on a swivel. You're going to see what a cruise ship looks like before she gets carpeting and paneling," remarked Chief Sesit. He wasn't kidding as pipes, valves, cables, brackets, fire hoses, and metal cabinets protruded from the ceilings and walls of just about every passageway on the ship.

Chief Sesit is currently a land-based sailor. He works for Commander Roxie Thomsen Merritt who happens to be in charge of public affairs for the U.S. Naval Air Force Atlantic Fleet. During the first week of June, 1999 I had the pleasure of meeting Commander Merritt and many of the officers of the USS George Washington. Approximately 30 journalists and I were attending a Sears Editors Conference and were invited by the US Navy and the US Navy League to spend several hours aboard the USS George Washington while she was in port.

Sleepover Invitation - You Can't Be Serious?

Captain Rutherford is giving us our initial briefing. PHOTO BY: Chief Eric Sesit

Captain Rutherford is giving us our initial briefing. PHOTO BY: Chief Eric Sesit

Commander Merritt circulated among the different journalists, and those of us who could not restrain our enthusiasm were challenged to a two day stay aboard the ship while it was performing routine carrier qualifications. A civilian aboard an operating aircraft carrier at sea? Surely she was teasing us.

"The aircraft carrier distinguished visitor program is designed to embark individuals who are influential in their community, business or government," stated Commander Merritt in her invitation letter to me. "These embarks provide unique opportunities to foster citizen awareness and understanding of Naval aviation and the carrier training required to keep our forces ready for any contingency," she also wrote. After completing the trip, I would say that this is the biggest understatement I've ever heard. The word unique should have been followed by awesome, once-in-a-lifetime, incredible, unbelievable, etc.!

tim carter cvn 73 name tag

This is my official name tag I had to wear while on the ship.

High Anxiety and Surreal

"When you get off the plane, do not take photographs. The flight deck of the carrier is a dangerous place and you will most likely be a little disoriented," said Chief Sesit. Moments after the arresting cables stopped us from plunging into the sea, the rear door of the aircraft opened. I actually thought I was in another world.

The people on the flight deck wore different colored shirts (green, yellow, brown, white, and purple) and everyone was wearing special helmets and goggles to protect themselves from the extreme noise, wind blasts, and fumes from the roaring jet exhaust.

I was first to exit the aircraft and the person who escorted me looked straight into my eyes and communicated with his hands and body language to walk to a specific location and not to move. He had nothing to worry about, as I was not only disoriented but also scared to death. Chief Sesit was right. Standing on the flight deck of an active aircraft carrier is highly dangerous. More importantly, he failed to mention that it's also surreal.

Briefing From the Captain Rutherford

An F-18 pilot tailhooks the #3 wire! PHOTO BY: Tim Carter

An F-18 pilot tailhooks the #3 wire! PHOTO BY: Tim Carter

Once aboard the ship, we entered Captain L. G. "Yank" Rutherford's quarters. We unwound from the 0ne-hour flight and abrupt landing in a spacious and smartly appointed dining and living area adjacent to his office and cabin area. Captain Rutherford extended a warm welcome to our group and introduced us to several key officers as well as our on-board tour guide Aviation Boatswain Mate Fuels Chief (Aviation Warfare Specialist) John Laurenti. The captain knew we were anxious to see the ship and he instructed Chief Laurenti to begin the tour.

Air Traffic Control

Here is the island on the USS George Washington. Think of it as an air traffic control tower at a regular airport. PHOTO BY: Tim Carter

Here is the island on the USS George Washington. Think of it as an air traffic control tower at a regular airport. PHOTO BY: Tim Carter

One of the first places we visited was the Primary Flight Control. This is the air traffic control tower of the carrier. This part of the ship is the highest enclosed work platform above the flight deck. It is where you find the Air Boss and his immediate subordinate, the Mini-Boss. These two individuals communicate with the pilots, the captain, and other officers on board the carrier while planes are landing at taking off.

The Air Boss and Mini-Boss, with the help of many other courageous crew members, can launch an array of aircraft every 30 seconds and retrieve them 90 minutes later at 45-second intervals. To say the very least it is a demanding and high-pressure environment.

Chutes and Ladders - Lots of Ladders

The USS George Washington is not only long, but it is also tall - 244 feet to be exact. There are elevators onboard, but they are only used by aircraft, explosives, and supplies. All vertical movement by the crew between decks from the captain down to the lowest ranking enlisted crew member happens via steep ship's ladders. I didn't see an overweight person on the ship and I now know why.

"So, how do you like our $4 billion dollar StairMaster?" Lt. JG Bill Hewitt asked as we settled into the Combat Direction Center. After climbing up and down the ship for nearly three hours his air-conditioned space filled with countless computer screens, monitors, and control panels was exactly what we needed.

The Combat Direction Center bristles with technology to defend the ship. PHOTO BY: Tim Carter

The Combat Direction Center bristles with technology to defend the ship. PHOTO BY: Tim Carter

The lack of overhead lighting and the multi-colored monitors and displays made it appear like a video arcade. Lt. JG Hewitt's description of the vital function of this area of the ship made it clear to me that any resemblance to a video game palace was merely skin deep. "We defend the ship," he said. Decisions made in this compartment during a conflict affect real lives, not two-dimensional action figures on a TV monitor.

Crowns, Casts, and Spectacles

If you closed your eyes when you walked into the ship's dental compartment, you would swear you were at your own dentist's office. The scent of dental cleaners and compounds was unmistakable. The ship offers full dental services to the entire crew. The staff can make crowns, fill cavities, and even perform oral surgery if necessary.

The hospital and medical compartments were equally impressive. If it were not for the steel floors, walls, and ceilings, you would think you were at your local doctor's office or hospital. Advanced technology allows the onboard doctors to communicate with land-based specialists. For example, x-rays are digitized and transmitted in real-time back to a radiologist who helps the onboard doctors with diagnoses. Surgical procedures can be televised via satellite so that land-based doctors and surgeons can assist during a procedure. It is absolutely amazing.

Chief John Laurenti is going to be a professional island tour guide when he retires from the US Navy! PHOTO BY: Tim Carter

Chief John Laurenti is going to be a professional island tour guide when he retires from the US Navy! PHOTO BY: Tim Carter

Our tour of the medical area was conducted by an old salt of a sailor, Chief Bankard. We finished up the tour in the optical department where they administer full-blown eye exams and make eyeglasses. I was amazed at the variety of frames that were available. "Sure, we have all sorts of glasses, even birth-control glasses," said Chief Bankard as he pointed to a traditional pair of thick black horned-rimmed glasses.

Chief Laurenti - A Pro

Throughout our tour Chief Laurenti protected and guided us as would any mother hen. "....four, five, six. Looks like you are all here. Let's keep moving," he would say as we went up and down multiple ladders and rounded corners of passageways that all looked the same. It was obvious to me that he was a true pro and had guided civilians around the ship before. Chief Laurenti also knew exactly how to work the crowd. He saved the best for last.

Just before it was time to retire to our staterooms that were immediately below and adjacent to the noisy flight deck, Chief Laurenti took us out onto Vulture's Row. This is a narrow balcony up on the carrier's island superstructure that overlooks the flight deck. It was pitch black outside. The flight deck was illuminated by a soft sodium-vapor light, small colored runway lights, and tens of thousands of stars. It was a magnificent sight to behold.

The flight deck was a busy place that night. Some young pilots were attempting and completing their first-ever nighttime landings on a carrier. Once they landed, they were immediately repositioned and catapulted off the ship for another try. The bluish-white glow of the jet exhaust afterburners was intoxicating. Combined with the noise and the waves of heat and fumes created by the roaring jet engines, Vulture's Row at night was the place to be on the carrier. Chief Laurenti just smiled. He didn't have to say a thing.

The Shirts
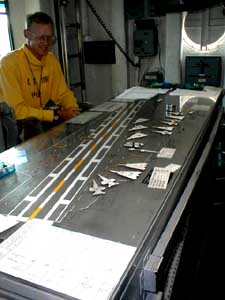
ABH1 Swanson's valet parking lot diagram. PHOTO BY: Tim Carter

ABH1 Swanson's valet parking lot diagram. PHOTO BY: Tim Carter

Because the flight deck is so dangerous and you can't hear over the noise, the crew members who work there wear different colored shirts and helmets that communicate their responsibilities. An observer can simply look onto the flight deck and see if the right person is in the right place.

"With 22 aircraft moving at any given time, it gets hectic out there," said Aviation Boatswain Mate First Class (ABH1) Swanson. ABH1 Swanson and other people he works with are responsible for moving the aircraft around on the flight deck.

They do this by using a scale model of the flight deck, the hanger deck below, and scale model foam cutouts of the different planes that are on-board. The layout is referred to as the Ouija board. "I'm valet parking," said ABH1 Swanson. Everyone involved with the flight deck operations has a tough and dangerous job to be sure, however, Swanson concluded that, "The hardest workin' folks is not us yellow shirts, not the purple shirts. It's the green shirts."

The primary duty of the green shirt crew members is to assist with the launching and recovery of aircraft from the flight deck. These are the brave young people you see closest to the jet afterburners when the planes leave the deck!

The Catapult Shot - Time to Go Home

All good things must come to an end. So true with this wonderful voyage. Just before exiting the ship, Captain Rutherford met with us one final time. He thanked our group for coming and commented on the spirit of the USS George Washington. In his opinion, the heart and soul of the ship lie in its young - average age 21 years old - crew members. "We have high expectations and they live up to them," said Captain Rutherford. Commenting on the switch from civilian life to that of a sailor entrusted with enormous amounts of responsibility, Captain Rutherford summed it up by saying, "The transformation is remarkable. We are pleased with it!"

Sunset from the fantail. Can life be any better? PHOTO BY: Tim Carter

Sunset from the fantail. Can life be any better? PHOTO BY: Tim Carter

Moments after the catapult hurled me off the ship in the belly of the transport plane, I reflected on Captain Rutherford's words.

He was right on target. For two days I was surrounded by enthusiastic young people who gushed with determination, discipline, and diligence. They had jobs to do and they did them. These young adults and the officers who train them protected me while on board. By performing these jobs each and every day, they are an important part of our splendid national defense system that allows all of us to be free and enjoy liberties that no one else in the world can rival. All of us need to thank them for their service to our great nation every chance we get!


I received this wonderful email from one of the hundreds of thousands of individuals who have had the pleasure, honor and courage to serve aboard one of our mighty aircraft carriers:

"Mr. Carter,

I am a RETIRED CHIEF AVIATION BOATSWAIN Mate, GREEN shirt Catapult and Arresting gear. Your article above inspired me to email you.

Your article brought back 34-years worth of memories as I was on four carriers from five-hundred feet to one-thousand-fifty feet long.

I experienced lots of hard, enjoyable work with PRIDE. I retired in 1971, taught in vocational school for 19 years and often wish I had continued in the NAVY.

But the thing back then was to give back, so I did, not bad. I was touched by a lot of young people. Thank you for old memories. There is nothing like the NAVY for 22 years. I am now retired to Paradise - Pensacola, FL - the birthplace of Naval Aviation.

Thank you." - Chief Cochran USN Ret.

This adventure was so thrilling I decided to share it with the 31,000 subscribers who read my March 1, 2016 and my October 11, 2020 FREE newsletters. You should subscribe too. Read about a real tail hooker in my November 10, 2015 Newsletter.
Installing Fancy Crown Molding Corners

DEAR TIM: I am going to be installing some crown molding soon. I think I know how to make the needed cuts, but the regular inside and outside corners once cut and installed look fairly standard to me. Is there a way to make the corners look more interesting? Also, is it necessary to cope the miter joints when doing inside corner cuts? Maggie P., Terre Haute, IN

DEAR MAGGIE: I'll tell you what, in my opinion nothing seems to put that needed finishing touch on a room like crown molding. I am not a designer by any means, but I think crown molding has the same visual effect as does pinstripping on clothes and cars. Our eyes are drawn to those lines and crown molding absolutely creates a distinctive break point where walls meet a ceiling.

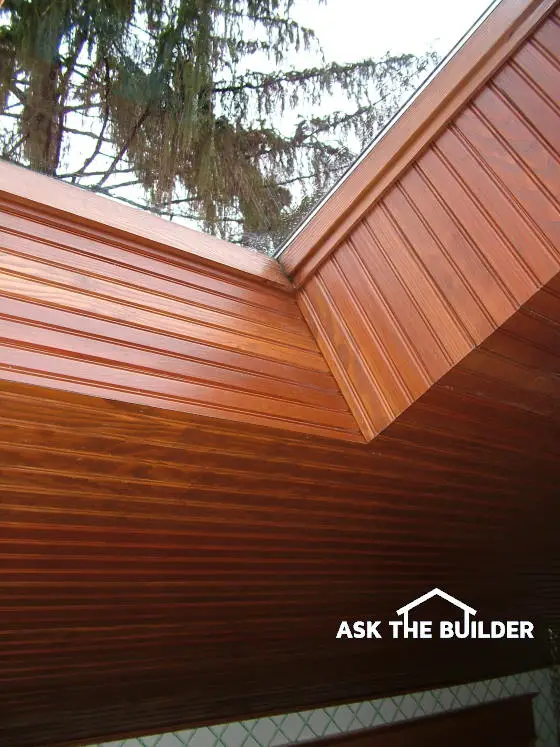
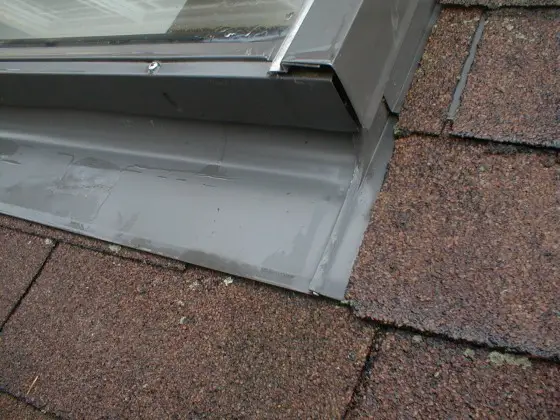
The light-colored triangular piece of crown molding on the outside corner makes all of the difference. You can also see one in the inside corner as well. It only took 10 more minutes to make these extra cuts. PHOTO CREDIT: Tim Carter

The light-colored triangular piece of crown molding on the outside corner makes all of the difference. You can also see one in the inside corner as well. It only took 10 more minutes to make these extra cuts. PHOTO CREDIT: Tim Carter

I sure hope you do know how to position the molding in your saw to make the necessary cuts. All too often people waste many linear feet of crown molding trying to get the wood to fit perfectly up on the wall.

When my wife Kathy and I got married 30 years ago, we went to New England for our honeymoon. One day, we toured five magnificent houses in Newport, RI. These were mansions built by very wealthy people, and each house had ornate crown moldings in every room. I was just getting into the construction business at that time, but knew enough to recognize the inside and outside corners in those houses were very different from the regular crown molding I had seen back home.

The next time I had to install crown molding, I took some scrap pieces at the end of the day and quickly figured out what those carpenters and master craftsmen had done. The inside and outside corners of the rooms were indeed 90 degree angles, but they didn't turn the corner with two pieces of trim each cut at a 45 degree angle.


Would you like step-by-step photos and instructions that show you how I install crown molding anywhere in a home? If so, you might want my Instant Download Crown Molding eBook.

But, if you want to actually see me install crown molding in all the same places while watching an action-packed interactive DVD that was filmed in High Definition, then you may want my Crown Molding DVD.


There was a third piece of crown molding that cut across the inside and outside corners. Ask my retired geometry teacher and he will tell you I was not the sharpest arrow in the quiver, but I learned enough to know that the sum of the angles of all the cuts in a regular inside or outside corner must equal 90 degrees. Since there are four cuts needed when you use this third piece of trim, this means the saw gets set at 22.5 degrees for each cut.

The only trick you need to know is the small third piece of crown molding is a perfect triangle. The intersection of the two cuts on this small piece of crown molding meets at a perfect point at the bottom on an outside corner and at the top of inside corners. These cuts are very easy to accomplish with a power miter box saw.

On inside corners, you will have to add a second small flat triangular piece of wood that fills the triangular gap created by the crown molding as it cuts across the corner where the two walls meet. This small piece is cut from flat stock of matching lumber.

As for coped crown molding joints, I used to cope regular inside corner cuts years ago when I installed crown molding. I thought it would make for a better fit instead of trying to get the traditional miter joints to fit perfectly. But I quickly discovered that it takes quite a bit of time to cope a perfect joint that looks better than a miter joint. What's more, you still have to cut the actual miter joint on the end of the crown molding to create the line the coping saw follows.

Since you are already making the miter cut, why not just cut the wood at the right angle and eliminate the need to carefully cut the coped joint? In fact, I can now cut and install the four pieces crown molding in an average room in the amount of time it takes another carpenter to install one straight piece of crown and cope the next corner.

Click here to watch the video on easily working with crown molding.


The trick is to go around the room and figure out the exact angle cuts at the ends of the pieces of crown molding. I do this with test pieces of crown molding I have cut at different saw angle settings. The test pieces for both sides of inside corners are cut respectively at 43, 44 and 45 degrees. I then mix and match the pieces until two of them meet perfectly in the corner. It is common to have one side of the corner be a 43 degree cut while the other side is a 44 or 45 degree cut. The same principal works on outside corners but you cut the test pieces at 45, 46 and 47 degrees.


Take my Crown Molding Installation Quiz to see if you really need my Crown Molding Installation eBook. It is an Instant Download product in case you need help right now!


The elegant corners produced by inserting a third small triangular piece of crown molding are well worth it. The extra time needed to produce the pieces is maybe just 5 minutes per corner. Once you cut and assemble the first corner, you will stand back and shake your head in amazement.

Inside corners require you to assemble the pieces in order. You can't install the two long pieces that come into each corner and then expect to cut and install the small triangular piece last. Because the back edges of the cut piece are longer than the front edges, this piece must be put in after the first long piece of crown molding is installed. Outside corners are different. If you so choose, you can install the small triangular piece last.

Crown Molding Test Sell Page

Take this quick quiz to see how you score on the
DIY Crown Molding Installation Scale

Crown Molding Installation Quiz


1. Are there 20 or more scrap pieces of crown molding scattered around your miter saw? Yes No

2. Is your spouse still talking to you? Are You Kidding Me? Does Growling Count?

3. Are the joints between your miters big enough for a 747 to taxi through? Yes No

4. Do you want your friends and neighbors to be impressed with your carpentry skills? YesNo

Rules for Funny Home Improvement Story Contest

These are the Rules for the Funny Story Contest:

  • Your story must be original and written by you. It must not be copied from some other person, another publication or another website.
  • Enter as often as you like, but each entry must be a different story.
  • The story length should be between 500 - 1,000 words.
  • The story should be rated G for General Audiences. As you write, imagine that your local pastor, rabbi or priest will read it aloud in your church, temple or other place of worship.
  • After submitting it below, you can give your story to anyone else or even publish it yourself as you see fit.
  • But, once you submit your story here, it becomes my property. By submitting your story below, you grant me permission to use it forever without any compensation whatsoever. This allows me to publish the story on my website without creating any hassles between you and me.
  • You fully understand that I may also republish your story at a future date in some other publication.
  • I need you to give me your full name, city and state where you live and a valid email address so I can contact you to see if you want an EBook or a pass into my Premium website. All of your information will be private and I promise to never reveal it to anyone for any reason. Your name will not be used in the story unless you tell me to include it.  I respect your privacy!

Home Improvement Stories

Submit Your Story and Win!

Have you ever had a funny thing happen as you work on one of your do-it-yourself projects? Maybe you have a story about a crazy contractor. Or perhaps you have some unbelievable tale to tell that happened as your new home was being built. Enter it below and I will give you your choice of one of my EBooks or a Monthly Pass into my Premium AsktheBuilder.com website.

Your story needs to be true, original and at least 500 words in length.  It also needs to be written in proper English much like you see in newspapers and magazines. The stories need to be written so they need little or no editing.  So what does that mean?  Well, here is what I am *not* looking for:

if you rite lik this i will not accept it. dont bother wastingyourtime if u write like this and don't no how to use the key that makes capital letters.  ALSO DON"T SCREAM AT ME AND USE ALL CAPITAL LETTERS.

But before you start writing, you need to know the rules.

Helpful Writing Tips:

  • You can type your story below in the large box or you can paste it into the box in case you created it using Microsoft Word, WordPerfect or some other word processing program. If you use one of these programs, be sure spell checking and grammar checking are turned on. Spelling, grammar and punctuation need to be perfect or nearly perfect. Typographical errors need to be fixed as well. Just use common sense.
  • Do not use bold type, italics, colored text, etc. as you write. All of that formatting will get lost when you copy it from your word processing program and paste it in the large box below.
  • Write as if you are talking to a friend over the fence.
  • Be sure your story makes sense. That just means you need to explain things clearly, since the rest of us were not there to see and hear what happened.

Good Luck! I can't wait to hear about your experiences. If you have any questions, feel free to email me at tim @ askthebuilder.com (remove the spaces around the "@"). 

Collect your thoughts and start writing now. Fill out the following fields below to enter. Remember, by clicking the Submit button below, you agree that you have read the rules, understand them and agree to all conditions. 


E-mail Address:
First and Last Name:
City and State:
Type Article Here:

November 6, 2004 Radio Show Tim Answers Barb’s Email Question About Drywall and Wallpaper

Tim:  Okay, really quickly before I got off the air, I got a
really neat email from Barb, who delivers the paper every
morning. Barb, I sure hope you're still out there. She says
she's `wondering if the plaster on the walls is the real
stuff in my house with lath strips behind it. The walls are
falling apart and need to be replaced. My question: Can I
put regular drywall board on the walls? How do I determine
the thickness of the board? After I get the walls up, what
do I need to do to paint them or wallpaper them?'

Here's what you do, Barb. You would actually tear out where
the plaster's loose. You actually kind of square it up, and
after you take that loose plaster off (I wouldn't take it
all off), you're going to find out how thick the plaster is
in different areas. And you're going to find out pretty
quickly that it's different thicknesses. Okay?

You can get 1/4 inch drywall, 3/8 and even 1/2 inch. You're
probably going to end up using 1/4 inch or 3/8 inch drywall.
You're going to screw it to the wood studs of the lath board
and you're going to tape the seams with a dry setting type
joint compound. It comes in bags. You mix it with water.
It's called Durabond. It's made by USG and it's sold any
place where they sell USG products. I've seen it at the home
centers, and it works just like the stuff out of the
buckets. But here's the difference. Once you mix it with
water, in so many minutes it starts to get hard. And that's
the best thing to use to stick to old plaster. If you try to
use regular joint compound on old plaster, it doesn't stick
very well. That's why you've got to use the joint setting
type. Once it's done, then you've got to seal it with a
really good product for wallpaper, and that's at my website
askthebuilder.com. Go the wallpaper section.