The Walk Through Inspection

Walk Through Inspection tools

The Walk Through Inspection

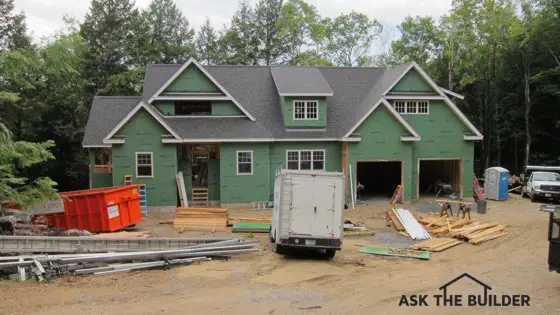
Before you close the deal on your new home, you should perform a walk through inspection. This is not much different from inspecting anything you might buy. You smell and squeeze fruit at the grocery, you walk around a new car in the dealership lot to look for blemishes in the finish, so why not go over your new home with a fine-toothed comb to see if you are getting what you bargained for?

How long will a walk-through inspection take?

The biggest problem is that many people underestimate the amount of time an inspection such as this might take. It can and should take hours, depending upon the size of the home and the number of appliances, doors, and other mechanical things that must be checked to see if they work properly.

Rushing through a walk through inspection can cost you tens of thousands of dollars. The written report that results from the inspection represents an extremely important benchmark. Not only does the report indicate things that are defective or not completed, but it also should state all of the things that are in perfect or good condition at the time of the inspection. Don't forget that this walk through inspection is one of several. You will probably do another one six months after you have been living in the house, and a final one just before your one-year anniversary.

The signature of the builder or his representative as well as your signature will stifle or stop any and all arguments at a later date. Neither party will be able to say, "Well, that crack in the floor was there before you moved in." Can you imagine trying to prove whether or not a foundation wall was cracked, or a floor didn't squeak during the initial walk through inspection?

How important is the walk through inspection?

Do not underestimate the power of a thorough inspection report, especially if defects start to happen after you have moved in to the new home. Imagine, if the first report showed the foundation to be crack-free at the first walk through before your move-in day. Then six months later, you have three cracks in the foundation and one year later, one of these cracks is one-half inch wide. Your written, signed reports clearly show a defect that is getting worse by the day.

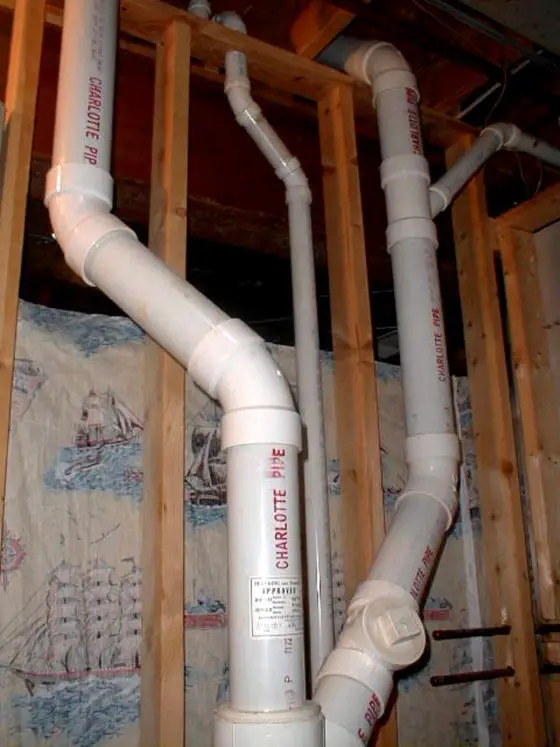
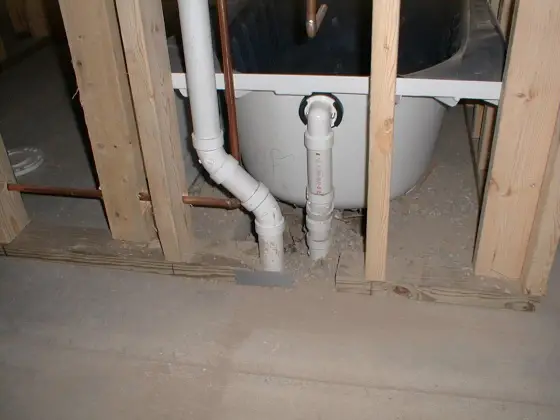
The actual inspection process is not too complicated. Certain things are obvious. Run water in all sinks, tubs and showers. See if the valves deliver a proper flow of water. After this, flush all of the toilets. Make sure the flush is complete and you hear no gurgling sounds from nearby sink and tub drains. If you do, the plumber may have forgotten to remove test caps from the roof plumbing vent pipes.

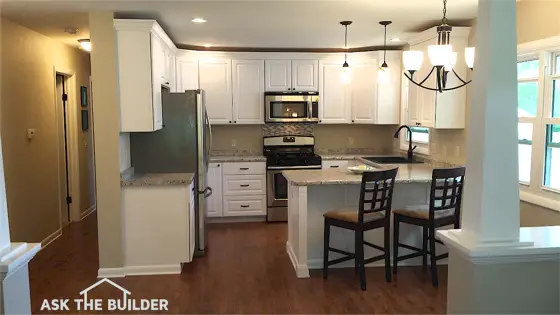
Do all doors open and close easily? Do the keys open and close all locksets? Do deadbolt locks work with ease? Are the tops and bottoms of all wood doors painted and sealed? You will need a small compact mirror to do this part of the inspection. Do all lights work? What about all appliances? Is your new refrigerator making ice? Do all burners work on your stove? What about the oven timer?

Do all window locks work? Do all windows open and close with the same amount of ease? What about the garage door opener? Does it work well? Is it adjusted correctly as the owner's manual indicates? Do the remote controls for the garage door work well out into the driveway?


Don't try to do your own walk through inspection unless you are armed to the teeth with my 100% Satisfaction Guaranteed Walk Through Inspection Checklist!


What about all of the inspection labels from the various building inspectors? Where are they? Will you remember to get them or ask for the Certificate of Occupancy from the final building inspection? Can you imagine the hundreds of other things to look at as you walk through your new home?

Finally, if you think this will be overwhelming, consider hiring a professional home inspector. They do these inspections on a routine basis. If you do find defects, make sure they are corrected to your satisfaction before the actual closing. If this is not possible, be sure you talk to the bank or lending institution and arrange to hold money in escrow. This money can be released to the builder at a later date once the defects have been cured.

CLICK or TAP HERE to get FREE quotes from local inspection companies.

Column NH049

Home Building Costs

House under construction

Home Building Costs. Photo Credit: Tim Carter

Those of you who are headed down the pathway of custom building, be aware it can be slippery and financially dangerous. There are all sorts of briers and brambles that can slow you and your builder down as the job moves towards completion. Delays cost money, hidden upcharges, burst budgets, etc. all can contribute to a bitter building experience.

Detailed plans need to be done early in the planning stage

But wait, you can build a new home, enjoy the experience and be left with some change in your pockets. The key to having a smile on your face from the planning stage until move-in day is do your homework early in the process.

What is the biggest common denominator is building overruns?

When I perform autopsies on building experiences that have crashed and burned, the most common denominator is rush to action. All too often homeowners and builders alike want to get the job moving even though many decisions have been pushed aside. For example, who cares what kind of light fixture is going to hang next to the mirror in the bathroom? You have months to decide that, right? Wrong.

To get a firm and iron-clad grip around the true cost of your new home, you and your builder must know exactly what your house will look like when complete. But to do this, you must cooperate by making hundreds of decisions and product choices before the plans are completed.

The need to do this should be apparent in these following examples. Let's say you don't give much thought to your front door lock. A set of door hardware is a set of door hardware you think. Well, what happens if you finally decide to install a top-of-the line full-mortise lockset that costs hundreds of dollars and requires a skilled carpenter hours of labor to carefully install it? Imagine what the upcharge is going to be when you discover your builder has figured a standard tubular model that installs in less than an hour. The extra cost to you might be $400.00 or $600.00 for this one item.

How can you prevent delays in construction?

What happens when you go out to choose light fixtures five weeks before you need them? Imagine your displeasure when you are told the ones you like are special order and will be at the jobsite in ten weeks. Waiting to make decisions can significantly limit the available choices.

The other budget breaking scenario is the rough-in nightmare. If you haven't decided upon the exact light fixtures for your bathroom at the time the electrician is roughing in the wiring, the electrician mounts a box at a given location hoping it will work. When the fixture finally is installed and is either too close or too far away from the mirror, hangs too low, etc. and the box behind the finished wall surface must be moved, who do you think pays for this mistake? Yes, you do.

But the trouble is, many people are unaware of these potential financial booby traps. Many builders don't always discuss them. But rest assured there are builders who understand the problems and they will try to get you to select all things before they break ground.

sample blueprint

sample blueprint

How do you make sure each bid is quoting on the same items?

There is another huge advantage in making all of your selections before you put your job out to bid. If you tell all builders exactly what cabinets, countertops, wallpaper, locksets, etc. you want, then the bids coming back will be a true apples to apples comparison. House plans and specifications that contain lots of allowances (because decisions have been delayed) create bidding confusion.

How do you avoid overcharges?

The other hidden trap in bidding with allowances comes after you sign the contract. Once you finally decide upon a particular faucet, wallpaper, even simple woodwork, the builder can say that it is going to cost more to install what you picked out. He may say that he only figured installing a simple faucet, not one that is more complex. In all fairness, he may be right.

If you do have all product selections made before the bids are submitted and the builder comes back later asking for more money because something is harder to do than anticipated, you can say, "Look it says right here in the specifications this is what I wanted. You knew the job was dangerous when you took it."

Column NH047

Home Exterior Custom Options

brick and rock house

Home Exterior Custom Options | Here’s a very unique and tasteful use of brick and rock on the exterior of a house. Photo Credit: Tim Carter

People who have the opportunity to provide lots of input on options that might be able to be included on the exterior of their new home should speak up early and often during the design phase of the home. Over the years, I have compiled a list of things I think work well on the exterior of a home. Many of these items are just things I have observed and used on older homes but seem to be ignored on a widespread basis by many of today's builders.

What are the advantages of overhangs?

Overhangs are a functional architectural element that seem to be disappearing. Production builders know they add cost to a home, but buyers know they add character and help shield the walls and widows of a house from all but the extremes of weather. The generous overhangs on my home allow me to keep my windows open during rain showers. These same overhangs help keep second floor rooms cooler, because they act as effective awnings. Only early and late afternoon direct sunlight can sneak into the rooms.

Can a foundation be too deep into the ground?

Raised foundations seem to be a thing of the past. Virtually every new home I see today has its foundation too deep into the ground. This defect can cause enormous drainage problems and possible building code violations. It is also the source of a common complaint of homeowners who wonder why garden hose bibs are 4 inches off the soil line. In many situations, a foundation can extend two feet out of the ground and a builder can still provide a walk-in entrance by creating wide gently sloping ramps for sidewalks, drives and patios.

These sloped yard features are often dream canvases for landscape designers. They allow the landscaper to create layers of plantings that naturally show themselves off.

Use plastic conduit pipes for future outdoor electrical needs

Plan ahead for future electrical projects. You may not know exactly what you want but you may know something is going to happen. Place two or three-inch diameter plastic conduit pipes in strategic locations under driveways, patios, sidewalks and heavily landscaped areas. Map the locations of these tunnels so you can easily get both high and low voltage wires to where you need them in a hurry. These same blank pipes will work well for irrigation piping and radio fences for pets.

How do you get soft water to wash your car?

Many people love to hand wash their own cars. But the hard water found in many municipalities can leave water spots on cars. If your plumber invests perhaps 30 minutes of extra time, a special hose bib can be installed near your driveway apron that connects back to your water softener. Using soft water to rinse a car eliminates water spotting.

Try to incorporate a porch or generous overhang at your front door. This structure provides needed shade for those doors that face south or west. Without this protection from the sun and elements, gorgeous front doors tend to require more frequent episodes of painstaking maintenance. Harsh ultraviolet rays from the sun can quickly degrade finishes on natural wood doors and those that try to mimic wood.

These porch enclosures are also appreciated by guests who visit your home during inclement weather. If you have a clever builder or architect they can incorporate into the design a weatherproof hidden storage area for parcels delivered while you are away. All delivery people will use it if you simply instruct them of its presence.

Use roof turbines to cool your attic

Go retro on your roof. Many older homes used spinning turbine vents to keep attic temperatures down so second floor rooms might be cooler at night. These same turbine vents are still available and they still work well to lower attic temperatures. They save money because they help lower the amount of time your air conditioner will have to run to keep your home comfortable.

roof vent turbine vent

CLICK this IMAGE to get the turbine vents that I put on all my jobs. Great great quality and Made in the USA! Image credit: Lomanco

Column NH046

Lighting Options

Kitchen make over

Lighting Options in the kitchen

I love to watch people walk through new model homes, especially ones that have been professionally decorated. The potential home buyers Oooo and Ahhh over the striking wall colors, window treatments, furnishings and floor coverings, but rarely do I hear them say anything about the lighting. What many of these people do not realize is the things they are drooling over often look good because they are showcased with excellent lighting both natural and artificial.

Which direction should your house face?

Talk to a top-flight architect with 10 or more years experience and they should be able to give you plenty of examples of how to leverage natural light in certain rooms to produce certain effects. The really great architects know how to position a house to extract sunlight for certain rooms at specific times of the year.

As the sun increases its arc in the sky from winter to summer here in the northern hemisphere, all sorts of opportunities open up to get light into rooms. This can be done with windows placed at strategic heights or through clever placement of skylights with flared light shafts.

How can you get natural light to an interior room?

Mirrors can also be employed to bounce natural light from room to room. This takes an enormous amount of talent and the interior architecture of the home must lend itself to the presence of large expanses of glass. If mirrors are not to your liking, you can get natural light from one room to the next using large archways or pass-through openings where the top half of a wall is open to the adjacent room.

built in bookcases full room dramatic lighting

There is special indirect lighting about the bookcases, and plenty of natural lighting in this room. © 2017 Jay Helms

What about indirect lighting?

The lighting possibilities with artificial lighting are probably infinite. There are thousands of different light fixtures that have hundreds of different applications. One of the most underused lighting techniques in residential housing in my opinion, is indirect lighting. I love indirect lighting as it is not harsh and it can be used as one of several different layers of light in a room or space.

A friend of mine took my advice and incorporated indirect lighting in a small kitchen remodeling job. As it turned out, this one aspect of the total job got the most compliments from friends who would visit for an evening party. As the natural light stopped pouring in the windows, the kitchen ceiling was transformed into a warm yellow-orange canopy. The incandescent bulbs producing the light were hidden in a trayed ceiling detail I had drawn for him.

kitchen with 3 levels of lights

There are three levels of light in this kitchen, four if you count the bright lights under the stove hood! Photo credit: Tim Carter

Combining recessed lighting with traditional surface mount fixtures allows you to light certain parts of a room. My own kitchen is lit in this fashion. We have a hanging fixture over our center island that has three 75 watt bulbs in it. This one fixture produce ample light in our 17 x 20 foot kitchen. But when we need additional task lighting or desire to have the kitchen as bright as day, I flip one switch that powers 10 recessed lights. This adds another 750 watts of light and makes the kitchen a bright and inviting space.

If you want to maximize the lighting possibilities in your new home, I suggest you spend an afternoon with a lighting professional. You can often find these trained pros in stores that just sell lighting fixtures. Take your floor plans with you and let them show you any number of options for lighting in each and every room.

CLICK or TAP HERE to get FREE quotes from local lighting professionals that can brighten up your house.

Hopefully you will have some extra money in your budget for outdoor landscaping lighting. You don't have to do the entire house at one time and you may start by just highlighting a few important features. If you do have larger wants than your budget and plan to add lights in the future, discuss this with the professional so you get the correct lighting center to power the lights.

Column NH045

Painting

roller painting yellow wall

Painting

Anyone can paint you might think. The truth is you are right. I would agree that anyone who can fog a mirror and is able to move their arms and hold a brush can apply finishes. They may not do it very well, but they can do it.

Talk with a seasoned and experienced painting professional and you will quickly discover there are many techniques and special materials that professionals use on a daily basis to create satin smooth walls and gorgeous wood trim that radiates all of the natural warmth that Mother Nature intended for it to have.

Using a light before painting

Great painters have a keen knowledge of light and what it does. Light rays radiate in a straight line from their source and can bounce off of reflective objects such as mirrors and high-gloss surfaces such as counter tops, glass and polished floors. Walls that look smooth as silk in daylight might begin to look like the surface of the moon at night when artificial light washes over a wall or a ceiling. Light rays striking walls and ceilings at a low angle highlight bumps and depressions in a wall.

Before you or your builder paints a wall or ceiling, use a hand-held lamp or light and place it close to the surface. The harsh light streaking nearly parallel across the surface should reveal each and every imperfection. Use a wide thin-bladed scraper to knock off any small nibs or particles that might be encapsulated in previous coats of paint or simply stuck to the surface. Use a fine pencil to gently circle any depressions or other imperfections. Once the inspection is complete, use spackling compound or other patching material to cure the defects.

Should you use a primer on new drywall?

New drywall or plaster, as well as repaired surfaces, need to be primed with a special primer-sealer paint. These products contain special resins that seal surfaces so the porosity is uniform. They also contain larger pigment particles that help to even out the texture of the surface. When you apply the second coat of finish paint, you truly end up with a uniform surface that shows up well under any light.


Do your walls need painting? Find the most professional painters by using my Interior Painting & Staining Checklist. I offer a 100% Money Back Guarantee.


If you are going to paint woodwork or walls with a semi or high-gloss paint, eliminating surface imperfections is even more critical. The gloss surfaces of the dried paint accentuate surface imperfections. This once again is a light issue as the light rays striking a glossy surface will reflect away in different directions when they hit imperfections. This is why dimples and door dings in automobile car door surfaces show up so easily.

How can you extend paint drying time?

Because the chemistry of many paints is different, they dry at different rates. Paints that dry or flash quickly, can create headaches as your eyes can see brush strokes or overlap marks left by even the best brushes and paint rollers. This problem can be minimized if the paint manufacturer allows you to add an extender liquid to the paint. These products retard the drying time allowing you to always maintain a wet edge unless you are working in a region with extremely low humidity.

It is important to realize that the variance in quality of wall and woodwork paints is as wide as mouth of the Mississippi River. Be aware that your builder's painting subcontractor might be applying a low-quality paint in an effort to save money or produce a more competitive bid. This may not be in your best interests as low-quality paints do not wear well, they are nearly impossible to clean and they may peel at a later date.

If at all possible, visit several paints stores and discover what the top product is in each paint line. Make a list of these paints and submit them to your builder when you are working together to determine the cost of your new home. Ask if one of the high-quality paints can be used on your job. Make sure the language in your contract clearly states which paint is to be used on all interior and exterior surfaces. As your home is painted, stop by frequently and make sure you see those paint cans open and being used.

Column NH044

Ceramic Tile

fancy ceramic tile shower

If you can stretch your budget, you can have fancy ceramic tile in a shower. © 2016 Tim Carter Builder

Ceramic wall and floor tile continues to grab the attention of people who build new homes. It is not surprising when you take the time to visit a real business that sells nothing but ceramic tile. The seemingly unlimited colors, patterns, textures and sizes of ceramic tile allow just about anyone to incorporate this man-made stone product into just about any room of their home.

Are all ceramic tiles made the same?

Although ceramic tile is durable in many respects, keep in mind that all ceramic tile is not created equal. Virtually every ceramic tile product is simply refined clay that has been baked in a kiln. A kiln is a large oven that bakes the soft clay tiles at a high temperature for a given amount of time. Depending upon the chemical composition of the clay, the amount of baking time and the baking temperature, you can have tiles that can withstand countless days outdoors in freezing weather or tiles that are relatively soft.

tile step trim

These outdoor steps make a bold statement with small pieces of trim tile. ©2017 Tim Carter

Can ceramic tile be used outdoors?

Knowing this, don't limit yourself to thinking that tile can just be used indoors. It is an ideal patio covering. I have used it for decorative front porch stoops. You can permanently adhere tile to pre-cast concrete walking pads to create stunning garden stepping stones.

But if you do decide to use ceramic tile outdoors, be sure these tiles also meet slip-resistance minimum requirements. Super-smooth glazed tile that gets wet from dew or rainfall can be dangerously slippery. Top-quality tile manufactures make special outdoor tile that has a very slightly gritty surface even though the tile is glazed. The invisible grit provides superb traction when tiles become wet for any reason. When you start to decide upon outdoor tile, talk to the salesperson and compare the slip resistance of tiles in the store when they are wet.


If you're putting ceramic tile in your home, check out my Ceramic Tile Installation Checklist to learn exactly what you should know about the process. Avoid making costly mistakes with the help of this document. I offer a 100% Money Back Guarantee.


Not only is the correct tile important, but so is the substrate to which it is applied. When applying tile indoors, you need to make sure it is attached to surfaces that will not move nor flex. Tile is very strong when you squeeze or compress it, but it is weak if you attempt to bend or pull it. Concrete is an excellent tile substrate if done right as it can be very strong and crack resistant.

CLICK or TAP HERE to get FREE quotes from local companies that can install your ceramic tile.

Installing Cement Backer Board

Installing concrete backer board

Years ago, ceramic tile craftsman applied tile directly to concrete substrate they created by applying cement stucco to a wire mesh fabric nailed to the wall studs. This is very labor intensive so now it makes better sense to nail or screw concrete board to wall studs. Concrete board is an excellent material as it does not deteriorate when it gets wet. If you use a substitute material, make sure it is 100 percent waterproof. Moisture resistant drywall (green board) is not waterproof, it is water resistant.

Floor tile years ago was also applied over concrete. Tile setters would chisel off the edges of floor joists to create a point. Blocking and small wood pieces would be then added in between the floor joists so the tile setters could pour a solid concrete base that was three inches thick in between joists and perhaps three quarters to one inch thick as it passed over the point of the joists. This solid base created a large bed of concrete that simply did not flex.

You can nail or screw cement board to wood subflooring, but you must be sure the floor joists are stiff enough not to flex. If they have too much flex, the tile will crack and the grout between tiles will crumble in a short amount of time.

Outdoor tile needs to be installed over concrete slabs that will not crack or separate. This can be easily achieved if the concrete slabs are a minimum of five inches thick and reinforced with one half inch thick steel reinforcing bars that are placed two feet on center in both directions. These steel rods should be in the middle of the slab so they are completely surrounded by the wet concrete.


Restore the "clean" to your grout. Just go to STAIN-SOLVER to see the beautiful, quick results.


Permanently bonding the tile to the substrate is vital. I prefer to use thinset for this task. Thinset is powdered cement with some fine silica sand mixed in. It can also contain powdered acrylic resins that increase the bonding characteristics of the thinset. Mix only as much thinset as you can trowel onto the substrate in 45 minutes. Once troweled onto the substrate, the tile should be placed in the wet thinset within five minutes. If you wait much longer, the thinset develops a skin that interferes with the bonding.

Column NH043

Eliminate Future Plumbing Problems

polyvinyl chloride (PVC) plastic piping

When you move into a new home, the last thing you might be expecting are problems of any type. After all, you did buy or build a new home. But problems do raise their ugly heads over time and some of the most troublesome seem to be plumbing hassles. Your builder and plumber can do a few things now that will minimize just about every imaginable plumbing problem.

PVC or Cast Iron Piping?

Let's first talk about drain lines. The material used by many builders and plumbers today is polyvinyl chloride (PVC) plastic piping. It is easy to work with, has a smooth interior surface that virtually eliminates clogs, but it is not a dense material. As such it can be noisy. Flush a second floor toilet and those on the first floor can often hear the water rushing down a wall or across a ceiling. If you request new easy-to-install cast iron drain lines that handle water, noise will not be a problem in the future.

PVC piping also expands dramatically as the temperature of the pipe increases. Drain water from a sink or tub and you might hear all sorts of snaps, pops and crackles in your walls as the pipes heat and expand and as they subsequently cool and contract. The noise comes from the piping rubbing up against wood framing members. Careful installation can minimize these contact points, but using cast iron piping eliminates the problem altogether.

bath tub pipes exposed wall

For some reason access panels behind tubs and showers have seemed to suffer the same fate as the mythical city of Atlantis. You rarely find these useful things in new homes. An access panel allows a plumber to gain quick access to all of the plumbing, both drainage and water supply lines, to almost all tubs and showers. Intelligent planning will hide these panels inside an adjacent bedroom or linen closet. These panels can save you hundreds of dollars in repair bills should a faucet have to be replaced in the future.

When should you buy replace faucet cartridges?

Be sure to buy replacement faucet cartridges for each faucet as soon as you move in. I prefer to place these in a ziplock plastic bag that is attached to the inside of all sink cabinets. Place them up and out of the way, but know that when and if a faucet starts to drip, you have the needed part on hand and ready to install. These parts are inexpensive and will rarely go bad when stored in their original packing material.

Does your water heater need an expansion tank?

Water heaters are often overlooked. Your local plumbing code may force the plumber to install an expansion tank with your water heater. These devices absorb the extra pressure and volume of water that occurs when cold water is heated. These tanks can extend the life of a water heater.

tank water heater expansion

Ask your builder or plumber to install a secondary anode rod in the cold water inlet. This relatively inexpensive anode rod can frequently double the life of the water heater. It is indeed a wise investment.

CLICK or TAP HERE to get FREE quotes from local plumbing companies that can install these plumbing features.

Ball Valves or Stem Valves?

Be sure each and every shut off valve in the house is a ball valve. These valves offer the least trouble over time and when they are needed they usually work. Traditional stem valves can be difficult or impossible to turn years down the road because of sediment buildup in the valve body. Ball valves rarely are harmed by sediment and furthermore their internal design allows full unimpeded flow of water through the valve.

Carefully plan the location of exterior hose bibs. All too often newer frost-proof hoses are installed low to the ground as they pass through the floor cavity to the outside wall. These hose bibs can be placed higher up on exterior walls if they are piped through an interior wall that intersects with an exterior wall. I would also have your plumber install an accessible ball valve on the branch water line that feeds each hose bib. In case of a future leak or problem, you can quickly shut down the water at this hose bib.

outdoor hose bib

If your main water line enters the basement through a foundation wall, be sure the plumber install an inexpensive boiler drain just past the house shut-off valve. This boiler drain is equipped with standard garden hose threads. By attaching a hose to the drain and extending the other end of the hose to a floor drain, you can quickly drain the entire water supply lines in the hose allowing you to work on them with ease. This simple boiler drain may come in very handy if a future extended power outage during the winter forces you to quickly drain all water to prevent burst pipes.

Column NH042

Hire an Expert to Review House Plans

SamplePlan Shed Plans Tim's

Several days ago, Bob and Vicky, friends of my wife Kathy and mine, asked me if I would be kind enough to review the plans for their new custom home. Bob and Vicky had labored many hours perfecting the design. They wanted to hire me to make sure the best building practices, materials and methods were being specified. But once my wife and I started to look at the plans, we discovered there were other, more serious, flaws in the basic design of the home.

Over the years, I have built unique custom homes. Some have had very special floor plans and rooms that serve very special purposes. But my friend's plan had the most unusual layout. The house had two levels both of which had ground level access because of a sloped lot. This is a very good thing if you can work it into a plan.

When Bob and Vicky's home is constructed and you walk up onto the front porch and peer in the windows of the room just to the right of the door, you will see a washer and dryer. Yes, the laundry room is where you might typically find a living room, dining room or a front study. Vicky wanted the laundry room adjacent to the kitchen and this, in her opinion, apparently was the best place to put it.

What about room sizes?

Many of the rooms in the house were small. I have no trouble with small rooms and Bob and Vicky's current home is an older one with cozy rooms. But the dining room screamed at me. It was only 11 feet 7 inches wide and 15 feet 6 inches long.

Three out of the four walls had huge archways leading to other rooms. The remaining wall had a giant window centered on the wall. Not only was there no wall space to place buffets or china cabinets, but the narrow width would barely accommodate a 48-inch-wide table with chairs. To comfortably navigate around a table filled with guests whose chairs are not pulled in all of the way, a room needs to be a minimum of 12 feet wide.

My eyes were then drawn to a powder room on the lower level. This room was 6 feet by 6 feet. On one wall, Bob and Vicky had located a sink and toilet next to one another. I quickly determined there was plenty of room to put the toilet on the wall immediately opposite the door and lengthen the sink top to the full 6 foot dimension of the wall. This would allow the person standing at the sink to not feel so cramped.

Pocket door in hallway

Pocket doors will save space.

Should you consider pocket doors?

Because many of the rooms needed every square foot of usable space, I noted that 70 percent of the regular hinged doors needed to be converted to pocket doors that disappear into the wall when open. Modern pocket door frames and suspension systems provide generations of trouble-free service. Pocket doors allow you to make full use of floor space on all walls immediately adjacent to the door opening.

The house sported a fairly steep-pitched roof. The ceiling above the Great Room on the upper level was to be constructed with scissors trusses. These framing members allow a vaulted ceiling that has half the pitch of the actual roof. All of the remaining roof trusses were common ones that create a spider web of lumber and a vast area of unusable attic space.

Can using different attic trusses allow for extra room?

I made a quick note to install eight or ten attic trusses in place of some of the standard trusses. Attic trusses create an automatic bonus room when more than six are installed next to one another. The center of the truss contains a box that is 8 feet tall and perhaps 10 or more feet wide. The room's length is simply a function of how many trusses are built with this configuration.

attic truss design creating roof room

This is an attic space in a new home. Most builders would have used standard trusses and wasted all this space. (C) Copyright 2019 Tim Carter


How would you like me to build your new home? It's probably impossible for me to fit your job into my schedule, but I will gladly share hundreds of my tricks and building secrets with you and your builder. Check out my New House Specifications.


How do you size the garage?

The two-car attached garage was also a collection of oversights. One side of the garage formed the left front wall of the house. To provide an interesting staggered look, a partial offset was created that extend halfway down the garage wall. But when a car pulls into the garage and the passenger tries to open their door, they will discover they only have maybe 30 inches of space between the side of the car and the wall. This tight space is barely tolerable in a parking lot and I can only imagine the amount of long-term frustration it will create in a custom home.

The actual floor space in the garage available to store garbage cans, yard tools, mowers, bikes, etc. was next to nothing. I did not see any outdoor storage building on the site plan. Some zoning codes and subdivision rules prohibit or severely limit what one can do with these accessory structures.

Need help with your house plans? CLICK or TAP HERE to get FREE quotes from local Architects that can create or review your blueprints.

Kathy and I discovered at least 25 other mistakes that might cause future frustration. We presented all of our ideas to Bob and Vicky in a friendly manner and Bob was happy to get the input. Before you attend your ground-breaking ceremony be sure you have someone with experience look over your plans. The fee you will pay may prevent years of agony. It is best to do this in two phases: The first phase should occur as soon as the preliminary layout is established. The second phase should happen during the final plan review when detailed working drawings are commonly available.

Column NH041

High Quality Drywall

drywall papered stack end view

I can't even imagine a volume builder's salesperson talking to you about options with respect to drywall. Even a custom builder might skip over the subject of drywall. A vast majority of consumers and builders consider it a commodity item. The truth be told, it is.

You have all sorts of possibilities when it comes to the walls in your new home. If you are a baby boomer moving into an empty-nester home, there is a great chance you grew up in a home that had real plaster. Plaster, when painted, looks identical to most drywall surfaces. Both are smooth and both accept paint or wallpaper very well.

What are the differences between plaster and drywall?

However, there are two major differences between plaster and drywall. Plaster is a product not much different than concrete. Once dry and cured, plaster can develop a compressive strength of more than 2,000 pounds per square inch. Drywall does not even come close to this number. Try to push a thumb or fingernail into the white coat of a plaster job and you will bend or crack your nail. Do the same in drywall and I guarantee you will make a mark in the tender face of the drywall surface.

Older homes built with plaster walls are typically more soundproof than those built today with the common one-half inch drywall surface on each face of a stud wall. The old plaster was heavier and denser and as such, required more sound energy to get it to vibrate.


Learn the secrets to great drywall installation in this Drywall / Plaster Installation Checklist. I offer a 100% Money Back Guarantee.


Can you still get a veneer-plaster finish?

The good news is that plaster surfaces are still available in residential construction. Veneer-coat plaster is spread out and finished over large sheets of drywall. This drywall is very similar to regular drywall but it is covered with a special blue paper. This paper contains additives that inhibit the water in the wet plaster from damaging the drywall's inner gypsum core. Yes, it costs more to have a veneer-plaster finish. But if you intend to stay in your new home for a long time, it may be well worth the investment.

If you can't afford plaster, you or your builder should call your local drywall distribution business. You will be shocked to discover there are different types of drywall available. Some institutional and commercial drywalls have characteristics that make them act like plaster. These special drywalls might be in order in certain rooms that you suspect might get more abuse than others.

CLICK or TAP HERE to get FREE quotes from local companies that can install or repair your drywall projects.

Will thicker drywall take more abuse from the kids?

Ultra-tough drywalls might be a great idea in a small child's room where toy trucks and planes routinely crash into the wall. Maybe your husband is like me and regularly starts mass rumbles with the kids during which bodies playfully roll into walls.

Another option may be to install a thicker drywall. The most common drywall used in new homes is one-half inch thick. Your builder can just as easily order 5/8 inch thick drywall. It is slightly more difficult to hang because of its weight, but once hung and screwed to the studs, all other things are equal. This thicker drywall will take a little more abuse than one-half inch thick drywall. Your builder will have to order custom door and window jambs if you decide to go this route.

You can also have your drywall finisher apply very unique acrylic plaster compounds over regular drywall. The actual style and texture of the finish is only limited by your imagination and the skill level of the finisher. Old brooms, ragged sponges, random trowel strokes, etc. can be combined to create a unique distressed look in several rooms. If these walls and ceilings are then painted with a colored base coat of paint and then coated with a complimentary color of glaze, the look is breathtaking.

Talk to your builder and give some thought to how those flat wall and ceiling surfaces in your new home can be upgraded to provide you with benefits you may have overlooked. I can assure you my next new home will have veneer coat plaster. Since my kids will be too old to rumble, I will not have to worry about damaging the wall - or separating a shoulder. On second thought, I may have to worry about my grandkids!

Column NH040

Choose the Right Garbage Disposal

Garbage Disposal

Choose the Right Garbage Disposal

People who are in the market to build a new home often spend weekends touring model homes. A typical model home has been professionally decorated and furnished. In fact, some contain down-sized furniture that make rooms appear larger than they actually are. But that is not the purpose of this column. The flashy and attractive decorating schemes often prove to be distracting when it comes to some of the functional aspects of a new home. For example, when was the last time you opened up a kitchen sink base cabinet to inspect the size and type of garbage disposer?

Are you guilty of garbage disposer disdain?

Many people are guilty of garbage disposer disdain. After all, think of the horrible job relegated to the lowly disposer. It grinds up garbage. Many people look at the gaping black hole in their kitchen sink and wonder what lurks in that forbidding cavern. To make matters worse, many homeowners have never been trained how to properly operate garbage disposers.

Are all garbage disposals the same?

The first thing you should realize is that disposers come in all different sizes with many different features. The strainer basket you see in the bottom of the sink is perhaps the only thing disposers have in common. The actual disposer connects to the strainer underneath the sink. During your next model home tour, open up the sink base cabinet and take a peek. You might be surprised by what you see.

garbage disposer disposal

What size motor should you get?

Many builders install a low-cost builder grade disposer that has a 1/3 horsepower motor. The disposer works and works well, but it is not one meant to last for many years. Deluxe disposers come equipped with 1 horsepower motors and stainless steel inner components. Stainless steel is a perfect choice when it comes to plumbing drain equipment as it will never rust. Some of these disposers are equipped with an auto-reverse function that dislodges jams and extends the life of the motor by preventing armature overheating.

There are many disposers in between the entry level 1/3 horsepower model and the deluxe stainless steel model that is rocket propelled. If you plan to build in the country and your drain lines will connect to a septic tank, you can purchase a special disposer that squirts an enzyme solution into the disposer to help break down the waste in the septic tank.

What does a disposer do when turned on?

In my opinion, people have problems with disposers because they don't understand what happens during and after the disposer is being used. When you insert garbage into the disposer and turn it on, the motor begins to grind up the waste. The grinding action is aided by running water into the disposer as it operates. The disposer creates a slug of sludge in your disposer and the drain lines and the running water starts to transport this sludge into the drain lines.

When should you turn off the water?

Most people listen to the sound of the motor to tell them when the waste has been completely ground up. The pitch of the spinning motor tends to increase as the garbage is ground up. All too often people will turn off the switch to the disposer and then immediately turn off the running water in the sink. This is not a good thing to do. Some of the sludge the disposer created moments before may still be in the drain line leading from the disposer to the fixture trap beneath the sink.

A much better plumbing practice is to let the water in the sink run for at least 15 seconds after you turn off the disposer. This allows an additional 16 to 32 ounces of water to flow into and out of the disposer to help push the sludge towards the city sewer or the septic tank.

When is the best time to use the garbage disposal?

The best thing to do is to time the use of the disposer just before you fill the sink with water to clean pots and pans. If you are able to fill the sink with water, even just half-full, and quickly pull the sink stopper out so the water rushes into the disposer all at once, you will get a flush similar to what happens when you trip the flush handle on a toilet.

This vast amount of water rushing into the disposer does several things. It fills the disposer with water and helps to flush the sides of the machine. The drain line leaving the disposer is also filled completely with rushing water. This moving water scours the sides of the drain pipe removing any of the sludge that was created moments earlier.

Disposers can provide years of trouble-free service if you just buy the right one and use a little common sense when operating it. Always try to create a mental picture of what the garbage looks like when you flip the switch. On second thought, don't do that!

Column NH038