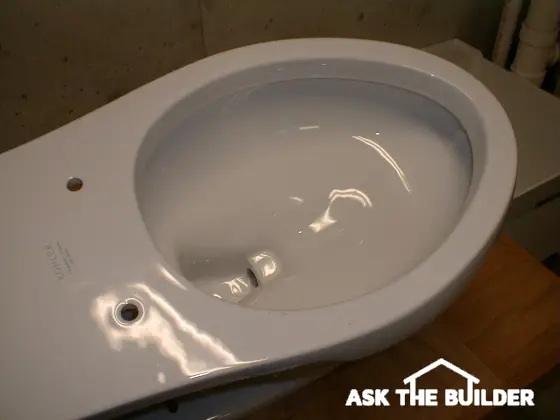
DEAR TIM: My house has old galvanized iron water pipes. The water pressure is bad at many faucets and down to almost nothing in the kitchen. The volume of hot water that comes out of any faucet is especially low. I would love to replace the piping with copper, but I feel that would be far too expensive. I also don't have a clue how to solder copper pipes. Can I clean the pipes out? Should I use another material? What would you do? Tracy P., St. Joseph, MO
DEAR TRACY: Among other things, I happen to be a licensed master plumber and have had more than my fair share of encounters with old galvanized iron water lines. They were an acceptable building material back one hundred years ago. The plumber who installed those lines many years ago could have used threaded brass piping and fittings, but those materials were more expensive. Your pipes have reached the end of their useful life span and must be replaced.
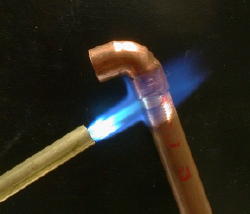
Soldering copper is not as hard as you might think.
As galvanized iron water lines age the interior of the pipe gets clogged with mineral deposits. Hot water temperatures seem to accelerate the growth of these deposits. The mineral buildup does not affect the water quality, but it indeed has an impact on the quantity of water the pipes can deliver. I have removed one half inch diameter galvanized water lines that run horizontally across basement ceilings only to discover an opening not much bigger than a cocktail straw - perhaps 1/8 inch diameter. Vertical galvanized iron water lines that run between different floors of a home do not accumulate sediment as quickly as water lines that lay flat.
I think your fear of the high cost for copper tubing is unfounded. I did a very quick calculation and I estimate that you would spend not much more than $250 for the copper tubing, fittings and valves and no more than $40 in tools to cut and solder the copper.
The task of cutting copper tubing and soldering is not as challenging as you might think. In fact, you can purchase cool copper fittings that already have the lead-free solder built-in to the fitting. You simply clean the ends of the cut tubing with an abrasive cloth, clean the inside of the special fittings with a round wire brush and then apply a thin coat of soldering flux to the cleaned surfaces. After inserting the tubing into the fitting, you apply heat from a torch for several seconds and you will actually see the solder appear at the tip of the fitting signaling to you the solder joint is complete.
You may wish to use another piping material if copper seems too daunting. Plastic CPVC piping and fittings are approved by just about every model building and plumbing code in the nation. This plastic piping is welded together using special primers and cements. You must follow the directions listed on the labels of these chemicals as the misuse of them can cause problems with water taste if excess cement finds its way inside the pipes as you work.
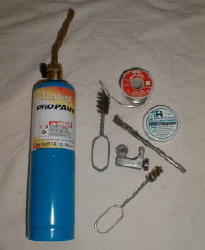
Simple tools to cut & solder copper tubing.
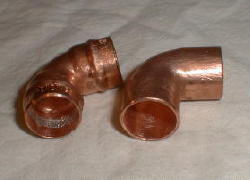
Look closely as these 90 degree elbows are not the same. They are both for half inch copper tubing, but the one on the left comes from the factory with the solder already in it. You simply add some flux and apply the torch to the fitting.
CPVC piping has a very high expansion / contraction coefficient. This piping grows significantly when hot water flows through it. The growth can be nearly 5 inches for every 100 feet of piping if the temperature of the water rises 100 F. Water temperature in regular household piping rarely rises 100 F, but even if the temperature goes up just 50 F, the pipes can expand causing all sorts of noise. If you decide to use CPVC, make sure the pipes are not tightly clamped and they pass through large enough holes in wood framing members so they do not bind.
Forget about cleaning out the old galvanized water lines. It is impractical and you will probably ruin the piping as you take it apart. The old threaded joints may actually be near the point of rust through and rotating them with a pipe wrench may break the pipe. I happen to be a big fan of copper and can assure you it is quite simple to solder copper tubing. There are a few tricks you will need to learn if you use traditional solder. The easiest thing to do is buy an inexpensive propane torch kit, a small tubing cutter and the soldering supplies you need. Be sure to purchase lead-free solder. Practice soldering a few joints in your garage. I am willing to bet tomorrow's lunch money that you will master it in ten minutes or less.
Galvanized iron water lines are easily identified. The outer diameter of the pipe is often 7/8 inch. The pipe is gray in color if it has never been painted. Where a pipe enters a fitting, you will see threads on the end of the pipe as you might on a standard threaded screw or bolt. Be careful! It is easy to confuse a threaded galvanized water line with threaded black iron natural gas piping. Do NOT cut into a piping system unless you know for sure what is in the pipes.
It is also not a good idea to mix and match metallic materials. I have seen many plumbers take out clogged galvanized water lines and install copper in their place. But they don't take out all of the galvanized iron piping. At some point the plumbers install a copper adapter that makes a transition between the iron and the copper. This creates a corrosive chemical reaction that causes the galvanized iron piping to begin to rust and break down. Once the corrosion gets bad, you develop a leak.


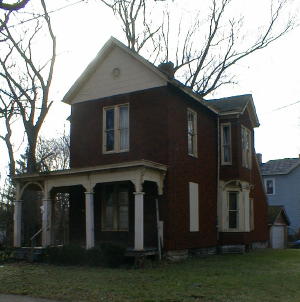
 What is the Wood around the Windows and Doors?