Hardwood Flooring and Cabinetry Installation

hardwood flooring cabinery installation

Cabinetry Installation and Hardwood Flooring

DEAR TIM: I have decided to use solid 3/4 inch thick hardwood flooring in my new kitchen. The flooring contractor wants to install the wood before the cabinets are installed. My builder prefers to install the cabinets first and then the floor. He also says it is cheaper. Which is the better way? Are urethane finishes applied at the job site adequate or should I consider using factory applied urethane? How long should a urethane finish last in a kitchen? Carl S., Cleveland, TN

DEAR CARL: Your builder must be a baseball fan. He is way out in left field on this one. Installing hardwood flooring around cabinets can be done but I couldn't think of a harder way to do the job. If you ask the flooring contractor for a quote to install the flooring after the cabinets are installed I think you will be shocked to find out it might be more expensive!


Installing a new hardwood floor? Use my Hardwood Flooring Installation / Refinishing Checklist to avoid costly mistakes. I offer a 100% Money Back Guarantee.


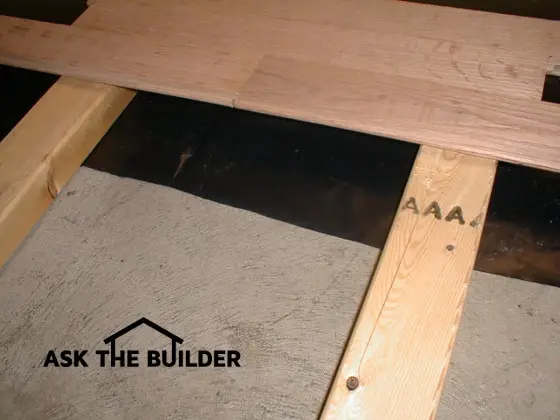
The hardwood flooring installation can proceed much faster when the cabinets are not in place. Aside from the normal doorways and wall offsets there is nothing to cut around. The flooring that is hidden under cabinets gives you or a future homeowner lots of options should they wish to change the cabinet layout. Keep in mind that the flooring contractor is just going to install the hardwood and not apply any finish. The finishing will happen after all cabinets and tops are in place. This prevents scratches or imperfections in the finish.

AsktheBuilder Podcast

CLICK this image and listen to the first call on the podcast. I talked to Jill about how to repair wood kitchen flooring, and possibly installing an inlay border as an option. Copyright 2018 Tim Carter

Several things happen if you install flooring after the cabinets are in place. Built-in appliances can become trapped for life. These appliances come with leveling legs. When the legs are adjusted so that the appliance is at its minimum height, it may not slide out of its opening because it is blocked by the flooring. What happens if you need a new dishwasher or ice maker?

When cabinets are in place the flooring installer needs to exercise extreme caution while working. There is a great chance of scratching a cabinet or two. Some pieces of hardwood flooring that go under the cabinet toe kicks are impossible to nail and must be glued in place. The installation is slow and tedious.


For detailed information about what you should do for your next kitchen remodel project, use my Kitchen Remodeling Checklist. I offer a 100% Money Back Guarantee.


If you look at the raw cost numbers you might think you are saving money. Most kitchens have approximately twenty five linear feet of cabinets. Base cabinets extend approximately twenty inches out from the wall before they end at the toe kick area. A kitchen with this cabinetry would produce a forty one and one half square foot savings of hardwood flooring. The average cost savings might be $291.00. Keep in mind that your builder might not actually save this much money. Because of the hassle of working around the cabinets, the flooring contractor may actually charge more.

There are big differences in urethane. Talk to the flooring contractor and ask him what has given him the best results. No matter which type you choose to use, I would install a minimum of 4 coats in a kitchen. Factory applied urethane limits you to using a pre-finished floor. Installing a pre-finished floor before cabinets and tops is a recipe for disaster. No matter how careful the finish carpenters are, there is a very good chance that the flooring will get scratched. This is why I always use job site applied urethane after the cabinets are in place. It is a superb idea to install two coats of urethane under the cabinets and built-in appliances before they are installed.

Remember that you walk on the urethane finish and not the hardwood. The biggest mistake people make is that they let the urethane wear through in spots. This often requires that the entire floor needs to be sanded and refinished. The better option is to apply a fresh coat of urethane every 18 months. A professional can do this in less than four hours or you can purchase kits that allow you to re-coat the floor in a single day.

Column 351

Modifying a Model Home Plan to Save Money

Modifying a Model Home Plan to Save Money

Modifying a Model Home Plan to Save Money

DEAR TIM: My wife and I are working with a builder to modify a model home plan in an effort to lower the price as much as possible. The first thing we did was eliminate unnecessary upgrades. Our thought is to upgrade the house after we move in trying to do the upgrades ourselves. We don't want to be penny wise and pound foolish. What is the best strategy? Where can you save money on a new home? How much can we expect to save overall by downgrading the interior and exterior finishes? Tim Oritz, Pinehurst, NC

DEAR TIM: Before you spend too much time trying to figure out where to pinch pennies, you need to do one simple math problem. Based upon my experience in both building and bidding substitute products, I have found that the most you can lower the price of a home is five to seven percent. Multiply the current base price of the model home by six percent. Subtract this amount from the base price. If the calculation shows that you still are over budget, you simply need to shrink the size of the project to lower the price significantly.

I have no problem with people who want to do things themselves. When I work on my own home I actually don't think of it as work. It tends to be creative energy that flows through my hands and arms. Like most people, I find it to be a very gratifying feeling to see a completed job well done. But don't fall into the trap of thinking you can do all things well. Many tasks that craftspeople do while building homes look easy but they are not. What's more, to get professional results you often need some fancy tools that you may not possess.

Time also becomes a factor. Try to keep in mind that you will not be as productive at interior carpentry as a craftsperson who does it on a daily basis. A project that you think will take one day might take a weekend. A weekend project may take two when you suddenly realize you need to go to a soccer game or the weather doesn't co-operate. Large projects can easily stretch over several months.

Try to save money on things that can be changed easily. If you have plumbing skills, consider entry level faucets at each sink. As long as the plumber installs ball type shut off valves below each sink, you can count on being able to easily cut off the water supply to these fixtures in the future. Interior doors can be switched out at a future date if you possess moderate carpentry skills. These two jobs requires few specialized tools.

You can possibly save quite a bit of money in your flooring. Vinyl tile flooring is very affordable and some new styles are very attractive. Interior door knobs might be another cost savings item. Some very affordable ones are available. Asphalt shingles with the least amount of warranty will often perform well. You may be able to save some money here. If your local zoning or association laws permit it, consider an asphalt driveway instead of poured concrete.


How would you like me to build your new home? It's probably impossible for me to fit your job into my schedule, but I will gladly share hundreds of my tricks and building secrets with you and your builder. Check out my New House Specifications.


It is important to know where not to cut corners. Do not eliminate air infiltration and water barriers on the exterior of your home. These can not be added easily in the future. Never downgrade your heating and air conditioning system. If you do, you will seriously compromise your comfort. Do not install low quality windows or doors. These items are the weakest link in your defenses against extreme outdoor temperatures and wind. Always try to buy windows and doors that are certified by independent testing associations.

Be careful about cutting corners with inferior substitute products. For example, do not use low quality paints. You or your painter may actually have to apply more paint to get adequate coverage. This means you might spend more on materials and labor. This same thing is true with built-in appliances. The front end savings may seem attractive but if you have to replace a poor performing dishwasher or oven in three to five years, you might not think you saved much at all.

Column 352

Installing Automatic Ice Maker

shutoff valve for ice maker

In my opinion, the best way to install an ice maker supply line is to treat it like any other fixture branch. Install a standard tee fitting and a ball valve that will allow you to shut off the water supply to the ice maker without disrupting water to any other fixture in the house.

DEAR TIM: My new refrigerator has an automatic ice maker. I need to run a water line to it. The salesperson at the appliance store sold me a kit that clamps onto a regular water pipe. Is this acceptable? Also, I have heard that hot water freezes faster than cold water. Should I connect the line to a hot water line? What is the best way to protect the floor beneath the refrigerator in case a leak happens? Paul S., Louisville, KY

DEAR PAUL: I'll never forget the first week I had an automatic ice maker. I thought I had died and gone to heaven. The slow tightrope walks from the sink to the freezer while balancing flimsy ice cube trays will be a dim memory in just a few days my friend. To insure trouble free performance for the life of the refrigerator, there are a few important things you should do when installing an automatic ice maker.

The first thing I would do is take the clamp-on valve kit back to the store. Many plumbing codes and inspectors frown on those devices. Some refrigerator manufacturers also state in their installation instructions not to use them. It is not uncommon for those tiny valves to deliver inadequate water supply to the ice maker. This causes all sorts of problems and headaches.

In my opinion the best way to install an ice maker supply line is to treat it like any other fixture branch. Install a standard tee fitting and a ball valve that will allow you to shut off the water supply to the ice maker without disrupting water to any other fixture in the house. Ball valves are superior shut off valves. They have a stainless steel ball inside the valve body that has a one half inch hole drilled through its center. When you rotate the valve handle 90 degrees to the full open position, the water flows through the valve unobstructed. There are no washers to replace. The best part is that they only cost on average $1.75 more than a traditional valve!

Most water supply lines in a typical home are one half inch in size. The ice makers typically require a small soft copper water supply tube whose outer diameter is only one quarter inch. You can buy a brass reducing fitting that will solder onto the one half inch pipe leaving the ball valve and uses either a compression or flare fitting to adapt the smaller one quarter inch tubing to the one half inch pipe. These fittings are readily available at plumbing supply stores, hardware stores, or home centers.

I have also heard that hot water freezes faster than cold water. But I have always doubted it to be true. So I ran a controlled experiment on your behalf. I filled three identical glasses with three ounces of water. One glass had cold tap water, the other had room temperature water and the final glass had steaming hot tap water. Guess what? The cold tap water and the room temperature water froze at virtually the same time. The hot water was very cold but not yet frozen.


I received an email from Matt, the Orion Hunter, and he showed me where I made a mistake in my crude experiment:

"This is correct. However, I wanted to point out that this urban legend is indeed derived from fact. If one were to boil water and let it cool back to room temperature, and then put it in the freezer at the same time as room-temp water fresh from the tap, the boiled water would indeed freeze first. This is because in the process of boiling, you are evolving a lot of air out of the water. So, the boiled water, which has less air in it, freezes faster."


It is really a moot point. Even if you do connect the ice maker supply line to a hot water line, the hot water would never make it to the cube tray. The volume of water inside the coiled length of one quarter inch tubing behind or under the refrigerator has been at room temperature for hours. This water is often a sufficient volume to fill the tray. Even if hot water was better, just as it got to the refrigerator the automatic ice maker valve would stop the water flow.

However, according to an EPA report (EPA 810-F-93-001), it is recommended that only cold tap water be used for drinking, cooking and making baby formula. The report indicates that hot water is likely to contain higher levels of lead from the plumbing in your house.

Prevention of water leaks beneath a refrigerator is important. Many a floor has been ruined by a slow water line drip. If possible, see if the connection at the refrigerator can be converted to a one quarter inch flare fitting. Flare connections are much more leak resistant than the commonly used compression type fitting that contains the small brass o-ring. If you can't use a flare fitting you must carefully install the one quarter inch tubing and inspect the refrigerator every 10 minutes or so after it has been rolled back into position. If no leak is present within an hour or two, you should be in the clear.

Be sure to completely flush out the quarter inch tubing before you connect it to the refrigerator. I would have someone turn on the ball valve to its full open position while you hold the quarter inch tube in a five gallon bucket. This high velocity water running through the small tube will remove copper pipe burrs, solder flux, small bits of solder and any other foreign material. Failure to do this critical step can damage the ice maker and cause all sorts of taste problems with your ice cubes.

Column 353

Salvage Ceramic Tile

Salvage Ceramic Tile

Remove the grout around the tile you are trying to save. Then tap a stiff putty knife at a low angle under the tile.

DEAR TIM: I need your help in a hurry. My mother is going to throw away a ceramic tile countertop. The top has four inch square tiles that are of great sentimental value to me. The tiles are glued to a piece of plywood . I tried to get one tile off but I cracked it. Is there a way to safely remove the tile or am I wasting my time? Ginger B., Sweetwater Oaks, FL

DEAR GINGER: Ouch! This is a job that requires a delicate touch, lots of patience and a large dose of luck. It is possible to remove ceramic tile from some surfaces, but in certain cases you can indeed waste vast amounts of time. The fact that the tile was glued directly to a wood substrate is a good sign. You must be living well!

Ceramic tile is a brittle material. In many respects it resembles concrete. Both have high compressive strength. This means you can squeeze or compress them and they will often will not break. But tile and concrete have low tensile strength, often as little as ten percent of their compressive strength. Bending or twisting a material subjects it to tension. You cracked the first tile because as you were prying it up from the wood, you bent it a little too much.

The first thing that needs to be done to even have the slightest chance of success is to remove the grout between each tile. The grout connects all of the tiles into one large sheet. If you stress one tile with the grout in place, you transfer this stress to adjacent tiles. Once the grout is removed, you can work on each tile independently without fear.

Grout removal can be done by hand with an old flathead screwdriver or with any number of rotary electrical tools. No matter which way you decide to go, you need to proceed slowly. If you select a screwdriver, use a hammer to gently tap the screwdriver into the grout. Once you have created a small void, orient the screwdriver so you are chipping grout towards this void. Take small 1/8 inch bites with the screwdriver. Watch the edges of the tile as they are very susceptible to chipping and scratching.

You have to be cautious with the rotary power tools. The rapidly spinning bit can get out of control and gouge a tile or produce a scratch across the surface. If possible, practice using this tool on some other grouted tile. Once you feel comfortable, proceed to the tiles you wish to save.


Restore the "clean" to your grout. Just go to STAIN SOLVER to see the beautiful, quick results.


With the grout out of the way, you need to remove any wood or ceramic trim that might be hiding the edges of the tile. This is a critical step because you must be able to slide a thin putty knife under a full tile at a flat or very low angle to pop it loose from the wood substrate. If the tile is held in place with an organic mastic, you should have a relatively easy time of popping the tiles from the wood. If cement based thinset was used, expect to spend more time.

Use a hammer to gently tap the handle of the thin putty knife. Orient the knife at an angle so that one corner of the knife starts to slide between the tile and the wood. Start at one corner and move along the entire edge of the tile. Do not try to drive the knife under the tile at just one spot. Keep the knife flat if possible. As you increase the angle you increase the bending forces on the tile.

Continue to tap the knife deeper and deeper under the tile. Once you are halfway, you may be able to apply gentle but firm upward pressure and the tile should pop off the wood. Take your time and go slowly. If the tile has not yet cracked, you will eventually be able to get it off.

Once the tiles are removed you can use semi-paste adhesive removers to soften and eliminate the dried organic mastic. If the adhesive was thinset, you will need to carefully grind this material off. The backs of the tile must be smooth so that they lay flat when you reinstall them.

Column 355

Custom Wine Cellars

wine cellar

A Custom Wine Cellar

DEAR TIM: My new wine collecting hobby is getting a tad out of hand. My hall closet simply will not handle my growing wine collection and my wife has instructed me to build a wine storage room. I am wondering how to calculate the size of the space that is required and what is the best way to build the racks to store the wine. Can you build a storage room in a garage if you don't have a basement? How important is temperature and humidity in the room? Dick D., Sun City West, AZ

DEAR DICK: If you imbibe wine on a somewhat frequent basis and like a variety of wines, I can see why the closet no longer works. Simple closet storage can also be dangerous. It is not uncommon for boxes to shift and a bottle to break. That may be acceptable with inexpensive mass produced wines, but to do so with more expensive wines is considered a sacrilege for those people who respect what is inside many wine bottles.

There are many things you need to consider when designing and building a custom wine cellar. For hundreds of years, wine was stored in wine cellars deep underground. This environment provided by Mother Nature happens to be nearly perfect for wine storage. Wines age perfectly at temperatures that are 55-58 F and relative humidity levels anywhere from 55 - 75 percent. Storing wine outside of these temperature and humidity parameters can rapidly affect the taste and quality of the wine.

Your challenge is to create this artificial environment whether it is in a garage, basement or even a room within a house. You can build regular walls but you absolutely must install a continuous high performance vapor barrier on the warm side of the walls and the ceiling of the storage room. The warm side of these walls is the outside of the room, not inside. Be sure to insulate the walls and the ceiling after the vapor barrier is installed. The door that opens into this room should be an insulated exterior grade door that has an excellent threshold seal and continuous weatherstripping around all of the edges of the door.

Lighting within the room is important but should not be overdone. Light can also affect the quality and taste of wines. You may want to install a timer switch on the storage room lights in case you close the door and leave it on by mistake.

Tile flooring works great in wine storage areas because it is easy to clean in case of an unfortunate accident. Hardwood will work but you must leave a one half inch gap around all edges to account for expansion once the wood swells in response to the elevated humidity.

Wine storage racks can be tough to construct from scratch if you are not an experienced carpenter. An inferior homemade design can put a wine collection at grave risk. The average bottle of wine weighs three pounds. It is not uncommon to have 24 bottles in a vertical stack on an eight foot high wall. Most high quality factory made storage systems will have just under 3 vertical columns per lineal foot of wall space. This means you can have about 200 pounds of wine for every lineal foot of storage. That is a lot of weight!

Redwood is an excellent wood for wine storage systems. It is moisture resistant, strong, colorful and non-aromatic. Do not use woods like cedar that have an aroma. Never stain the wood in a storage room. These odors can penetrate the corks and ruin the flavor of wine.

If it were me, I would build the room myself but purchase the wine storage kits or wall systems. They are affordable and the simple ones can be put together with ease. If you want a deluxe wine storage room that includes hand painted floor tile, wall murals, custom etched glass doors, stained glass, wood ceilings, and high efficiency refrigeration and humidity control you can have that as well. If your hobby leads down this path, you will quickly attain the distinctive title of cellar master!

Column 356

Avoid Annual Deck Cleaning

cleaning wood deck

Cleaning pressure treated lumber is not rocket science. Just use common sense.

DEAR TIM: My husband and I have a problem with our condominium deck. Last summer, I pressure washed the cedar wood because it had turned gray. Although the wood was rough after the washing, it looked superb after we applied a sealer. But this spring the sealer has started to peel. I fully expected the sealer to last at least two years possibly three. What went wrong? Is there a way to avoid the annual deck cleaning/sealing ritual? Marge G. Oaklawn, IL

DEAR MARGE: Welcome to the club! There are tens of thousands, perhaps hundreds of thousands, of people just like you who get very frustrated each spring. Just like you, they worked their fingers to the bone cleaning and sealing wood decks, playsets, boat docks, fishing piers, etc. and achieved spectacular short term results. But Mother Nature, and her good friend Old Man Winter, flexed their muscles and over a period of just a few months wreaked havoc. The good news is that there are deck cleaning and care products that will allow you to take a year or two off.

Your deck sealer is peeling because you unfortunately selected a film forming product. Not all deck sealers or water repellents are created equal. Film forming deck finishes contain clear resins that soak into the wood but they also lay at the surface. A film on any horizontal wood deck or railing is the kiss of death. Penetrating water repellents are a better choice. They soak deeply into wood and stop water penetration.

Intense ultraviolet (UV) rays in sunlight blast away at horizontal deck surfaces during the mid part of the day. These same rays glance off vertical railing pickets. This is why your flat surfaces always look worse than the railings. Add to this the fact that rain and snow puddle and stand on the horizontal decking and hand rail tops. The UV rays and water vigorously attack the film finish. The net result is that the weakened film finish peels off rapidly and readily.

To add insult to injury, you made another mistake using a pressure washer. These devices work great to get paint off of metal, but I have seen hundreds of decks ruined by these devices. The light colored wood bands in any piece of lumber are the growth rings created each spring and early summer. This wood is not as dense as the dark colored grain bands that grow as the tree hardens off for the upcoming winter. Power washers can easily erode the soft spring wood leaving your deck looking like a 30 year old fishing pier.

EB015 Cleaning & Sealing Deck eBoo CoverUnfortunately, you are going to have to strip off the film forming finish you applied last year. The elements will continue to do it for you if you wish to wait, but that is not a good idea. Decks that are neglected suffer continued UV damage and water seeps into unprotected wood. This water causes continued expansion and contraction as the wood swells when it gets wet and then shrinks as the water dries out. This movement creates small cracks or checks. These cracks allow the next rainfall to penetrate even deeper into the wood.

Once the wood finish is stripped off, use oxygen bleach to safely clean the wood. Avoid deck cleaning products that contain sodium hypochlorite. This is the primary ingredient in household chlorine bleach. Chlorine bleach is toxic to nearby vegetation, it removes the color from wood, it destroys the lignin that holds wood fibers together, and it accelerates corrosion of the metal deck nails and hardware. Oxygen bleach does none of these things. It simply forms a froth on the deck and the millions of oxygen bubbles deep clean the wood while you watch.

Once the deck is clean, purchase a penetrating water repellent that is made with synthetic resins. Many of the common deck sealers you see are made with natural oils and waxes. These products are the very food that mildew and algae love to eat. The manufacturers add mildewcides and fungicides to the sealers in an attempt to keep your deck from turning black and green, but these chemicals are often dissolved quickly by rain and snow. Synthetic resin water repellents are not mildew and algae food.

Purchase a synthetic resin water repellent that has colored pigments in it. The pigments help to block damage from UV rays. These rays turn the wood gray. If you apply the water repellent according to instructions, there is a good chance you will get two and possibly three years of protection. These same products work as long as five to seven years on log cabins or any other vertical wood surface.

Message from Tim:

Years ago while researching a column about cleaning decks, I discovered the wonders of Oxygen Bleach. It is perhaps the 'greenest' cleaner I know of as it uses oxygen ions to break apart stains, dirt and odor molecules. There are no harsh chemicals, and it works on just about anything that is water washable.

I decided to create my own special blend using ingredients made in the USA. In fact, the raw materials in the active ingredient are food-grade quality registered with the FDA. I call my product Stain Solver. I urge you to use it to help with your deck cleaning needs. You will be amazed at the results!

Column 357

Wood Wall Covered in Artificial Stone

wood fence artificial stone

Artificial Stone on a Wood Fence | This is my neighbor's wood fence. It has a smooth face to which you could attach artificial stone. The challenge is to make sure the fence sections are securely attached to the posts as the weight of the stone can be significant. Faux stone on wood walls is possible.

DEAR TIM: I want to build an exterior wall around my pool area. My dream wall would be made from stone. But my skills are heavily weighted to carpentry. Therefore, I think a masonry wall might be out of the question. I am not looking forward to wood because I realize it will need periodic maintenance. Is there an easy no-maintenance material I can use? What do you suggest? Gerry M., Malone, NY

DEAR GERRY: This is indeed an ambitious project and one that will look good once completed. A stone wall would be very attractive and I think you should not abandon this idea. You need to think outside the box. What if I told you that you could build a wood wall and cover it with artificial stone that is so realistic it would fool even a geologist?

Should I Check My Zoning Laws?

Before you proceed to the lumber yard and stone center, you need to stop by your local government zoning office. Many cities, towns and villages have strict zoning laws that control yard walls and fences. These laws even control walls and fences surrounding pools. You need to pay particular attention to the minimum and maximum heights of the wall and the appearance. Some zoning laws regulate the materials you must use and the appearance of the surface that faces your neighbors.

CLICK or TAP HERE to get FREE BIDS from local stone masons who can install faux stone.

Is Artificial Stone Affordable?

You can purchase affordable artificial stone that can be applied directly to a wood wall substrate. This stone is made using colorful iron oxide pigments, cement and special small lightweight aggregates that are poured into highly specialized molds. The molds are vibrated so that the face of the concrete stones picks up every detail of the molds. The resulting texture and color of the artificial stones is incredible. They come in all different colors, textures and sizes. The color is solid throughout and they weather just like traditional stone.

Is it Easy to Install Artificial Stone?

It is easy to install the stones. They are simply pushed into a bed of mortar that has been troweled over a layer of galvanized wire lath. The stones are generally easy to fit and you are supplied with special corner stones that allow you to finish off any outside corners.

What are the Important Installation Steps?

There are several important steps you need to consider if you want a wall that will not deteriorate or crack. The combined weight of the lumber and the artificial stone and setting mortar will be considerable. If you build the wood wall like a traditional fence, all of the weight will be concentrated upon the vertical posts. These posts must be placed on eight inch thick by 30 inch diameter footers that extend below the frost line in your area.

What is the Best Lumber to Use?

I would consider using treated lumber for all of the posts, beams, and plywood for the sub-wall that acts as the hidden support system for the artificial stone. The beams need to be securely fastened to the posts with either a mortised recessed joint in each post or by using structural framing connectors that are readily available at most lumber yards or hardware stores. Simply nailing the horizontal beams into the posts is a recipe for disaster. All fasteners must be galvanized.

CLICK or TAP HERE to get FREE BIDS from local stone masons who can install faux stone.

How Long Should the Wood Weather?

After the wood wall is constructed, it should weather for a period of 30 to 60 days. This will allow it to shrink. Treated lumber often contains lots of moisture. If you construct the wood wall and immediately cover it with the artificial stone, you may get random cracks in the joints between stones as the wood member shrink and contract.

Should I Use Tar Paper over the Wood?

It is also a great idea to place tar paper over the entire wood structure just before you nail on the galvanized wire lath. Because water can soak through the mortar that holds the stones onto the wall, this tar paper will keep the wood dry. If the wood were to get wet at a later time, then it might swell. This swelling could also create random cracks.

The shop that sells the artificial stone will very likely give you numerous building tips. This product is used all over the USA for garden walls and privacy walls. You will by no means be the first person to use this artificial stone to create a paradise around a pool!

Column 358

Fixing Toilet Drainage Problems

toilet ring and flange

Fixing Toilet Drainage Problems

DEAR TIM: My toilet leaks at the floor level. I am convinced it has something to do with the fact that it rocks side to side each time it is used. Upon removing the toilet I noticed the metal ring is rusted and the toilet bolts have nothing to grab onto. I would prefer not to cut into the drain lines if possible. What is the best way to fix this? Steve W., Lawton, OK

DEAR STEVE: Toilets are not supposed to act like rocking horses, that's for sure! It is vital that toilets are securely attached to the drainage system and that there is a seal in place between the toilet and the drain system. The seal prevents sewer gas from invading your home and it insures that all toilet waste goes down the drain and not into your home. Toilet seal problems are significant health hazards and require immediate attention.

Plumbing drainage systems have special fittings that make the transition from the pipes to fixtures. Beneath sinks plumbers use a fitting called a "desanko". This fitting has a nut and a washer on it that allows you to connect the P trap pipe to the drainage system. As you tighten the nut, the washer compresses around the P trap pipe and creates a waterproof and airtight seal. Unfortunately, we can't do the same thing with toilets.

Toilets are connected to the drainage system using a toilet flange. The flange fitting should be set so that the top of the flange is about one quarter inch above the finished floor surface. The flange contains several holes that allow you to securely fasten it to the wood or concrete floor beneath the flange. It is very important that the rim of the flange is supported by the floor. The weight of the toilet and anyone using it should never be transferred to the drainage pipes.

This flange fitting has special slots in it that toilet bolts fit into. The toilet bolts extend vertically through the flange and pass through the holes in the base of your toilet bowl. Using nuts and special washers you then tighten the bowl to this flange.

You can purchase a flange extender ring that simply fits over your rusted metal flange. These extenders usually come with a special paste gasket seal. You must use this sealant or silicone caulk between the new flange extender and the old rusted ring. This joint absolutely must be water and gas proof. Visit a traditional plumbing supply house to obtain this flange extender.

Once your new flange is in place, you must make the connection between the toilet and the flange water and gas proof. This is accomplished by installing a wax ring on top of the flange. Wax rings come with or without a horn. A horn is a plastic diverter that directs water into the drain pipe. I prefer wax rings that have this horn. The wax is very sticky and works very well as long as the toilet does not move once the bowl is in place. This is where many rookie plumbers and homeowners make a critical mistake. They move the toilet to some degree after it is in position.

toilet flange thumbnail for videoClick here to watch a toilet flange installation tip video.


Toilet bowls should be installed so that they are level side to side and front to back. The trouble is most bathroom floors are not level. Once your flange extender is in place I want you to set the toilet on top of the flange without the wax ring in place. Use wood shims and a two foot long level to get the toilet so that it is indeed level. Gently lift the toilet off the flange without disturbing the wood shims.

Place the wax ring onto the flange with the horn pointing down into the drain pipe. Be sure the toilet bolts are sticking up through the special slots in the flange. The wax ring often will hold these bolts in place. Slowly and carefully position the toilet onto the wax ring. A helper is handy at this stage and will make sure the bolts make it through the holes in the base of the bowl. Lower the toilet slowly until it contacts the wood shims. Tighten the toilet bolts and grout the space between the floor and the base of the toilet. When the grout sets carefully remove the wood shims and fill these holes with the same grout. You will enjoy years of leak free performance!

Column 359

Watch this video to see how Tim SOLVED a problem in minutes!

CLICK here to learn more on how Tim can help solve your problems.

Creating Brick Patios

brick patio

I feel one of the most important aspects of creating a brick patio is to make sure the patio is sized properly. You can download amazing how-to instructions to build this patio. Go here to get the instructions.

Building a Brick Patio - Use Clay Paving Brick

DEAR TIM: I have a perfect spot in the back of my house for a patio. The look of real brick is very appealing to me. Is it possible for an average person to install a brick patio? What is the easiest method and what is the most permanent method? What do you think the materials would cost? Pamela S., Overland Park, KS

DEAR PAMELA: Patios can be created using all sorts of materials including, but not limited to, concrete, Patterned Concrete®, stone, ceramic tile, traditional clay brick and concrete brick. I have worked with all of these materials but I must admit that the traditional red clay paving brick has always received the most glowing compliments from customers and people who walk on my own brick patios.

Not all brick are created equal. People who live in cold climates need brick that can withstand years of freezing weather. You live in an area that does indeed get cold so be sure that the brick you purchase is graded and rated for severe weather. This brick is made with high quality clay and is fired in the kiln for an extended period. These conditions create a hard brick that is very durable.

The Size of the Patio Must Be Correct

I feel one of the most important aspects of the job is to make sure the patio is sized properly. All too often people make patios and decks too small. I would purchase the patio furniture you intend to use. Place it exactly where it will be used. Use spray paint or string to outline the edges of the patio allowing sufficient room for grills, side tables, flower pots, etc. Using this outline you will be able to estimate the total square footage of the patio.

DIY-Friendly Job

An average person can install a brick patio. If you work alone, it will take many days of work. All too often people think they can do jobs like this on a weekend. I find that rarely to be the case. Be conservative in your time estimate so that you do not rush and cut corners. An average-sized patio that measures 15 by 20 feet may consume 100 to 150 man-hours of labor.

The Two Brick Patio Methods

Clay paving brick can be set in a sand base that is supported by a crushed gravel base. They can also be permanently attached to a poured concrete base. I have tried both methods and I can tell you that the brick over sand method is by no means permanent. Moles can push up bricks, ants love to bring sand to the surface between the joints and this sand is often tracked back into the house. Weed control is a constant problem as well. Installing the brick with cement mortar over concrete eliminates all of these problems.

PC1450 PDF cover page

Download my step-by-step instructions to build a patio using brick. These instructions come with videos, illustrations, links to top tools, and SECRET formulas for both mortar and cement paint. You can get the step-by-step instructions here. It includes a rare secret recipe for the mortar!

How Much Work Does it Require?

The amount of work to do both methods is quite different. In both instances, you will need to excavate and remove soil to create the area for the gravel or concrete base. Transporting the gravel or concrete via wheelbarrow to the patio site is the same amount of work. Installing the base materials is also very similar. Moving brick to the patio and placing each one is the same. The biggest difference is the time spent carefully placing bricks in a cement mortar and then grouting the joints the next day. Comparing the time for both methods I would estimate that you will spend an additional 40-60 hours to get a permanent installation. This is a bargain for a surface that will give you years of beauty and trouble-free service.

How Much Does A Brick Patio Cost?

The cost to install a traditional brick patio is affordable. I prefer to use the one and one half-inch thick solid paving brick. These measure four inches wide by eight inches long and currently cost forty cents each in my city. Each square foot of patio surface requires approximately 3.7 bricks. The concrete required for this job will cost about eighty cents a square foot. Miscellaneous materials like sand, cement, and saw blades needed to cut the brick may add another fifty cents per square foot to your cost. The total cost of materials for your patio should be in the neighborhood of $2.80 per square foot or $840.00 if you do go with a 15 by 20-foot patio (The year 2000 costs!).

Column 360

Wood Flooring

wood flooring

DEAR TIM: I really would like to have a solid hardwood floor but my existing house has a concrete slab. Is it possible to install a hardwood floor on top of concrete? How in the world do you attach the strips of hardwood to the concrete? What needs to be done to insure that the floor looks as good as one installed on a wood sub-floor? Stacey C., Boulder, CO

DEAR STACEY: If your slab surface is level with the outside earth or is an elevated concrete slab you can install traditional hardwood flooring over it. Concrete slabs that are below ground level are not candidates for solid hardwood flooring. If you have such a slab, I would consider installing an engineered hardwood flooring. This material is made by taking different plys or layers of wood and gluing them together to make a wood product that is more stable when subjected to elevated levels of humidity often found in basements or below grade slabs.

Wood is a hygroscopic material. In other words, wood changes its shape in response to changes in relative humidity or the presence of liquid water. As the humidity goes up or if wood gets wet, it swells. As the wood dries it shrinks or contracts. This type of movement can cause all sorts of problems with finished wood floors or even wood furniture. For this reason, it is important that the hardwood stays dry and at or near constant humidity levels before, during and after installation.

To successfully install your hardwood floor over the concrete, you need to make sure the concrete is dry. If the slab is new, it usually takes a minimum of 60 days for it to release sufficient moisture before you can proceed with the hardwood installation. If you are building a new home, be sure the contractor installs a high performance cross laminated vapor barrier under the concrete. These vapor barriers are often used in high end commercial jobs and are very nearly impervious to any vapor transmission. They are also very puncture resistant.

To test any slab for excess moisture, simply vacuum a small area first. Then tape a 15 inch square piece of clear polyethylene film to the slab using two strips of duct tape along each of the four edges. If no condensation or fog develops under the plastic after 48 hours, the slab is sufficiently dry. If the slab is wet, then heat the space and open windows or use a dehumidifier to draw moisture from the slab. Retest the floor for moisture content once you think it has dried.

The hardwood flooring is fastened to plywood or 2x4 strips that are securely attached to the concrete. Keep in mind that the height of your finished floor will end up at least one and one half to two and one quarter inches above the slab height depending upon which wood subfloor you decide to use. This raised floor can be a problem at doorways if you or the builder do not plan for this.


Installing a new hardwood floor? Use my Hardwood Flooring Installation / Refinishing Checklist to avoid costly mistakes. I offer a 100% Money Back Guarantee.


Before the plywood or 2x4 sleeper strips are attached to the floor, an additional vapor barrier must be installed on top of the dry concrete. Use the same high performance plastic that should have been used below the slab. The concrete floor needs to be level or in the same plane. Use a 6 foot long straightedge to check for high and low spots. Standard asphalt shingles make excellent shims to fill in low spots. The vapor barrier can be installed over the shingles and then the wood on top of that.

Fastening the plywood or 2x4 strips to the concrete can be done one of several ways. You can buy special hardened concrete screws that can bite into the sides of a pre-drilled hole in the concrete slab. Driving these screws requires a powerful screw gun to accomplish the task. A simple yet effective method is to drill a 1/4 inch hole through the wood and then directly into the concrete. The depth of the hole should be 3.5 inches. Take two 16 penny sinker nails and drive them side by side at the same time into the hole. Use a 20 ounce or larger hammer to drive the nails and strike them squarely. Believe it or not, the nails will bite into the concrete and hold the wood securely to the slab.

Before you actually install the hardwood flooring, make sure the room has been heated to room temperature for at least five days before the flooring is delivered. Once the wood is delivered, remove any packaging so it can acclimate. The wood needs to be exposed to the room temperature and humidity for at least an additional five days before you actually begin to install it.

Column 361