Secret Hiding Places

kitchen pantry secret door

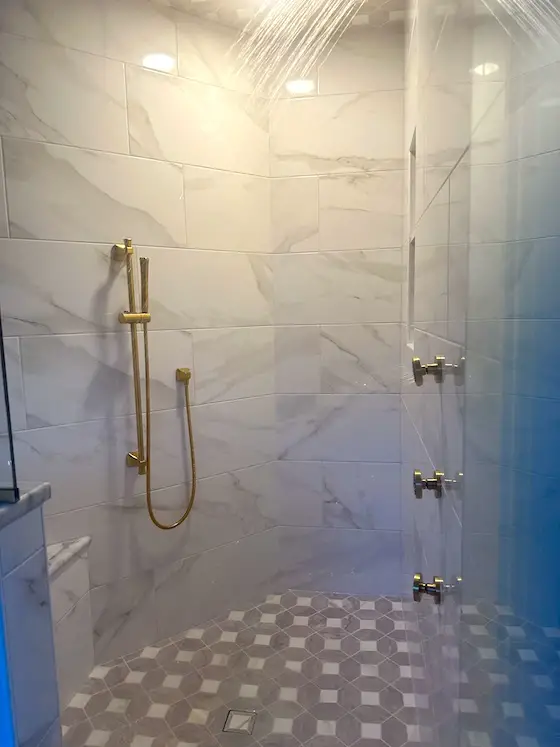
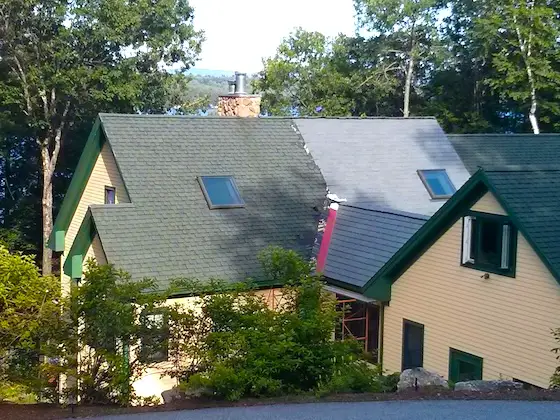
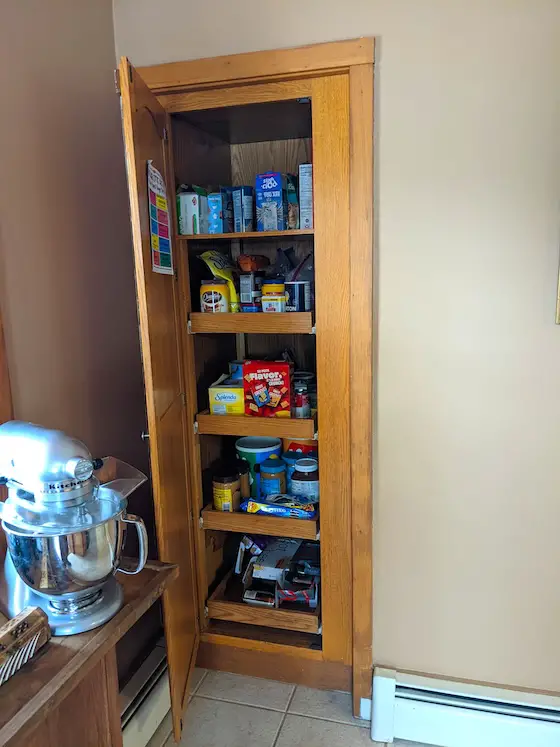
Secret Hiding Places - Is this just a small pantry or do all the shelves roll out and rotate to the right giving you access to a tiny room behind the wall? Use your imagination. Copyright 2024 Tim Carter

Secret Hiding Places in Your Home are Everywhere

I’m in the final stages of writing a book that contains hundreds of hacks that you might want to incorporate into your existing home or a new one you’re building. I got lots of help from many of my newsletter subscribers, who shared some of their best ideas. It’s been a fun project.

The two categories that received the most response were electrical and secret storage. Thousands of homeowners need help with electrical outlets and switches they feel are in the wrong place. The original electrician didn't consider the best locations for outlets and switches. You, or a more clever electrician, can rectify some mistakes.

Hidden Staircases and Secret Passages

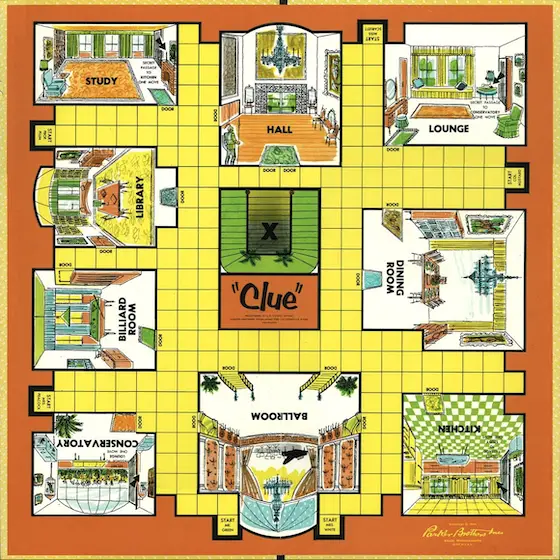
You may be a homeowner who desires to hide small and large things in your home. You may even take it to another level altogether and be like me. I dream of having at least one secret staircase and any number of hidden passages in the next home I build. Think of the game of Clue™. If you’re in the kitchen, you can magically be across the board in the study. Yes, it’s possible to incorporate secret passages in houses, but that’s a column for another day.

clue game board

Here's a real-life secret passage in a kitchen.

kitchen countertop

There's a better way to disguise the seam on the countertop. This, done by an expert, would fool 999 people out of 1,000.

I’ll share with you a few of the ideas that my subscribers sent to me. The best ideas, of course, will be in the pages of my book. I think you’ll enjoy what I’m about to reveal. It’s important to note that you need to get in the mindset of a magician to conjure up the most creative secret places.

Void Space Between Walls

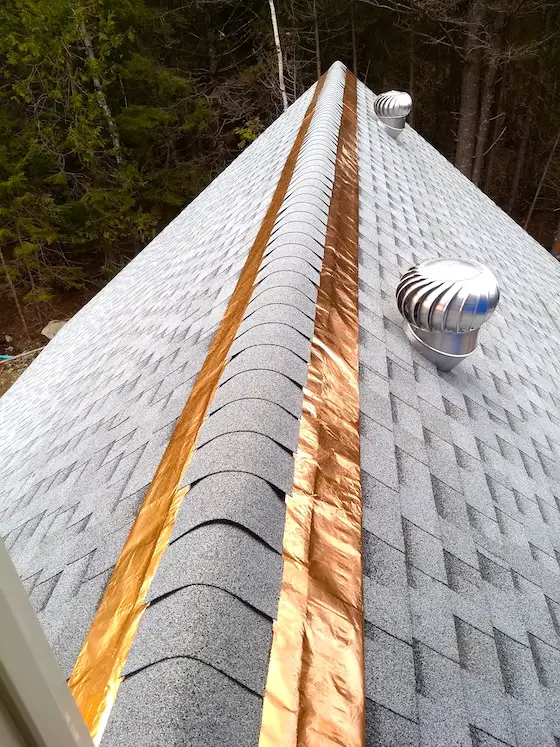
One of the easiest ways to create a small hidden space is to create a void between two walls. This needs to be done so that when you’re in each room, you think the wall you’re looking at is a common wall with the room next door. I have this situation in my own home now, where two large metal chimneys pass through the second floor up to the roof.

One of the walls is the back wall of the second-floor bathroom. The other wall is inside a closet in the bedroom next to the bathroom. You automatically think the two rooms share a wall. You’d be wrong. There’s a space about 24 inches wide between the two walls! The builder could have created a cutout in the hallway to this space. You could cover this opening with a large wall hanging or picture. A French cleat is best for holding the artwork against the wall.

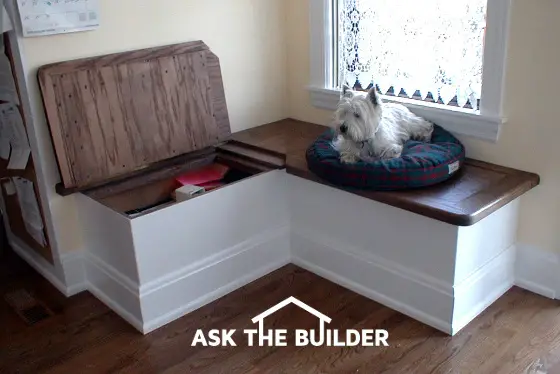
False Bottom in a Window Seat

Window seats are an ingenious way to conceal long items that might only be 3 inches tall lying on their side. You can create a false bottom in the seat. Imagine flipping up the hinged window seat and seeing the bottom. Who’s to say there’s not another six or eight inches of space under this bottom? There are many ways to hinge the false bottom so it flips up when you need access.

small corner window seat dog

Mayonnaise Safe

Do you need to hide some cash, jewelry, or other bibelots that have sentimental value? You can store them in your refrigerator. Did you know you can get a small can of latex paint the same color as mayonnaise? Carefully clean an empty jar. Be sure you don’t ruin the label. Let it dry, and then pour some paint into the jar. Roll it around to coat the inside. Let it dry well, and alakazam, you can store valuables in the last place someone might look.

WorkBench Drawer

Do you have a workbench in your garage or basement? Is the top supported by a ring of 2x6s? If so, transform the front or side piece of lumber into a drawer front. Think of how the drawers work in the metal tool cabinets mechanics use. That same heavy-duty hardware can support the weight of a vast amount of thin, heavy items.

build a workbench

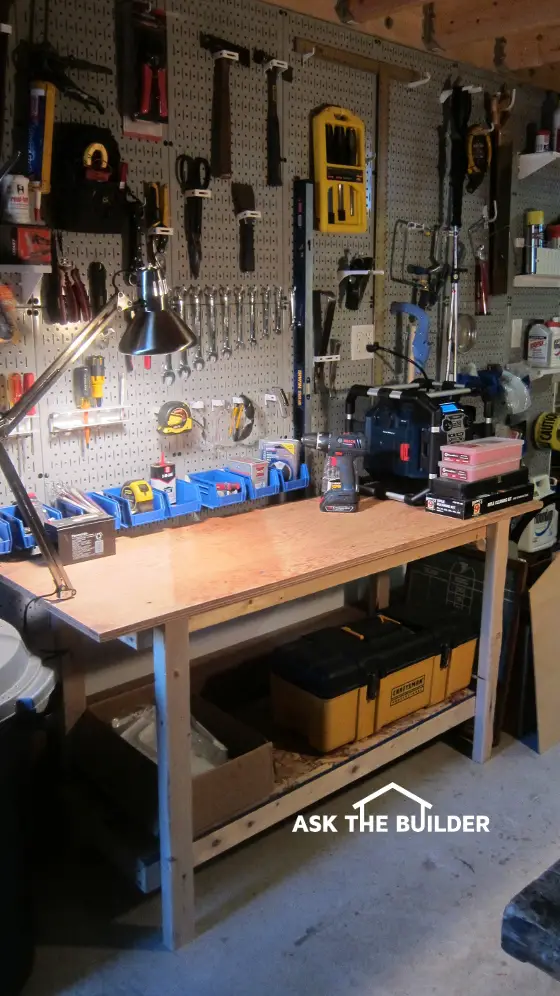
This simple, yet sturdy workbench was cut and assembled in less than 30 minutes! Photo Credit: Tim Carter

Paint Roller Safe

Here’s one of my favorite ways to hide small items of value in plain sight. Purchase a cheap paint roller with a 3/8-inch nap. Get a crappy roller frame and paint pan while you’re at it. Pour some paint into the pan and roll it around as if you had painted a room. Get paint on the roller frame handle. Create the illusion that you used the tools.

Brush out any paint from the pan as you would if you were going to clean it. Remove the roller cover from the frame. Stand it up on end and allow everything to dry for days or a week or two. Start to slide the roller cover back on the frame and look at how you have a tube to hide rings, small jewelry, cash, etc. Just be sure no one throws away the roller and cover that you now place on a shelf and throw other crap on it to hide it.

The Old Book Trick

Go to library book sales. You can often get thick hardback books for a dollar or less. Do what you’ve seen in the movies. Glue the pages together and cut out the book's center to create a void space. Complete the illusion by stacking this book with 30 or 40 others you purchased at the sale. I have a stack like this out in my garage on a shelf.

I challenge you to come up with some creative ideas. If you want to share them to help others, I can include your idea in my book and give you credit. Just share it via the Ask Tim page on my website. Happy Hiding to you!

Column 1554

Wood Shrinks and Expands

buckled wood top of vaulted ceiling

Wood shrinks and swells - This sunroom ceiling is suffering from expansion issues. Copyright 2024 Tim Carter

Wood Shrinks and Swells Unequally - Not Like Fine Leather Gloves

Wood is a true gift from God. It’s not much different than tomatoes, wheat, or corn in that wood is really a crop. Any farmer that’s lucky enough to have a stand, or bush, of maple trees on his farm will tell you that his first crop of the year is maple syrup. Trees are routinely harvested here in my great state of New Hampshire, but the growing season is not 120 days like most fruits and vegetables, it’s decades.

We are lucky enough here in the USA to have countless trees. The lumber harvested from them allows us to build durable homes, outdoor decks, pergolas, play sets, forts, furniture, and countless other indoor and outdoor projects.

While wood has many positive attributes, it also has one negative quality that causes homeowners like you enormous frustration, pain, and money. Wood happens to be hygroscopic. This means it can absorb liquid water or water vapor. It can also release both much like you squeeze water from a sponge.

The issue with wood is that when it absorbs or releases water in either state, it can swell or shrink. As if this movement is not bad enough, the swelling or shrinkage is not at all equal across the length, thickness, and width of any given piece of lumber.

Lumber Shrinkage Illustration

Imagine this is a 2x4 or a 2x12. It's a crude 3D drawing I made, but I think you can make sense of it. (C) Copyright 2024 Tim Carter

I’ll share two stories to drive home this point. Almost forty years ago I built a stunning three-story Queen Anne Victorian replica home for my family. The joists used for the first and second-story floors were 2x12s cut from Southern Yellow Pine trees. The third-story floor was framed with 2x10s.

I also had two very tall chimneys that extended all the way from the basement up through the roof. When we roofed the house, I had to install tin-coated steel flashing to prevent leaks. Some of this metal was embedded into the mortar joints of the chimney and the rest of the flashing was attached to the wooden roof sheathing.

The metal counter flashings attached to the chimney were cut so a 1/4-inch gap remained above the step flashings on the roof. Ten years later I was up on the roof installing a solar-powered attic fan that ended up being a waste of time and effort. I happened to look at the chimney flashing and was stunned.

Horizontal Crack in a New Chimney

Metal counter-flashing can be seen in the far corner of my chimney.

The gap between the two flashings was now 2 inches! This meant that the chimney grew taller or the house dropped. Builders and remodelers blame cracks in houses all the time on settlement making you think your entire house is sinking into the soil.

If this were the case at my home, there would have been no gap as the chimney footing and the house footing would have both dropped into the soil. Yes, I know as a college-trained geologist, some houses can sink into the soil, but that’s not the cause of most cracks and it most certainly was not the cause of the huge gap between my roof flashing!

The cause was lumber shrinkage. My 2x12 and 2x10 floor joists from the lumber mill were no longer as wide as they were when I nailed them all together. It turns out lumber shrinks or swells the most across the width, or face, of a board. It shrinks the least along its length.

Just days ago I employed this knowledge to help a woman in Ohio. She purchased one of my phone coaching calls. It turns out her new beautiful room sun room addition had a serious issue with the ceiling made from real wood. It was tongue-in-groove maple beadboard. It’s important to realize this room had a steep vaulted ceiling.

She sent me photos of the buckled wood up near the peak of the vaulted ceiling. It was a huge mess. I requested a photo of the floor of the room. I suspected this woman was like my wife. My hunch was right as the room was filled with many large plants.

I asked about the roof ventilation and the insulation used in the ceiling. It turns out the builder made two huge mistakes. First, he used closed-cell spray insulation. This product does not allow water vapor to pass through it. Second, he didn’t create a pathway at the peak of the roof for air to escape out to the roof ridge vent.

The house plants in the room were belching water vapor into the air. This water was concentrated in a layer of very warm air at the top of the vaulted ceiling. I’m sure you remember from your high school physics class that warm air can hold more moisture.

The wood at the top of the ceiling was absorbing all of this water and expanding. It’s easy to solve the problem. She just has to remove the last row of beadboard on each side of the vaulted ceiling. To hide this gap, she can nail the same stained beadboard to a piece of plywood that will form a flat surface up at the peak of the ceiling.

This flat piece will have beveled edges and it will be secured to the roof ridge board. It’s vital this flat board not be secured to the beadboard. The beadboard ceiling will now have a generous 3-inch space on each side of the ceiling to expand and contract as the seasons change.

Column 1553

Install Exterior Ceramic Tile

exterior ceramic tile popping off concrete step

Exterior Ceramic Tile - Freezing water under the tile caused the tile to lift off the concrete. The tile setter made one, or more, mistakes. Copyright 2024 Tim Carter

Exterior Ceramic Tile - Best Way to Install It

A fellow amateur radio operator reached out to me several days ago. My vanity call sign was coined after my Ask the Builder business. It’s W3ATB. The W3 stands for www for my AsktheBuilder.com website. This operator knew I’d be able to answer his question.

He lives in Coeur d’Alene, Idaho. Thirty years ago a tile contractor installed ceramic tile outside this man’s house. Some of the tile is protected by a generous roof overhang, but some of it is exposed to every drop of falling rain. Many pieces of this tile are no longer attached to the concrete. This man needed to know how to re-attach them so they will not pop off again.

Northern Idaho experiences bitter cold weather in the winter months. It’s not uncommon for the outside temperature to drop below zero for days at a time. My radio friend told me that he guesstimates they have at least ninety days a year when the temperature drops to 27 F.

You may or may not know that water expands by about nine percent when it freezes. This expansion is so powerful it can split apart metal water pipes. Ice can lift entire buildings. This is why foundation footings must be placed deep in the soil where the local frost doesn’t penetrate. Knowing this, I think you can see how it’s child’s play for ice to pop tile off a concrete slab.

I had a few back-and-forth emails with the homeowner as I wanted to get as much background information as I could about the original installation. It turns out the tile contractor had great intentions, but he very likely made a few critical mistakes.

The Tile Council of America (TCA) publishes an in-depth handbook that shares exactly how tile should be installed. If you intend to invest lots of money in ceramic tile in your home, it would be very prudent to purchase this handbook and discover exactly what questions to ask your tile contractor before you sign a contract. You want to probe the depths of his ignorance as my historical geology professor would exclaim before handing out test papers.

Cement Paint - The Magic Adhesive

Allow me to share what I would have done had I been the tile contractor in Idaho all those years ago. I happen to have a very unfair advantage because I had the good fortune back fifty years ago to talk with an old retired concrete mason. He decided to share a secret tip and not take it to his grave. Cement paint. I’ll bet you’ve never heard of that.

Exterior tile is installed on concrete using Portland cement. Modern tile setters and manufacturers call it thinset mortar. In its most basic form, it’s just Portland cement and fine silica sand. Some thinset manufacturers add dry boding agents to their products to enhance adhesion.

Fortunately, I’m old enough to have seen exterior tile installations on the door stoops of old buildings in Cincinnati, Ohio. All of this tile had experienced many decades of exposure to harsh winter weather. I remember the tile looking as good as the day it was installed. The tile setters back then didn’t have access to fancy modern thinset. So how did they prevent their tile from popping off the concrete below?

It’s simple. They used cement paint and lots of cement in their mortars. When you add water to Portland cement, you start an irreversible chemical reaction. Countless tiny microscopic crystals start to grow. These crystals lock onto anything the cement paste touches. It's why the stones and sand in concrete are transformed into a solid artificial rock.

Think of the worst burr you’ve ever gotten on your pants when hiking. Think of brand new Velcro™ and how hard it is to pull the two pieces of fabric apart. This is how strong a bond cement can make to things if you do everything right.

Installing Exterior Tile

The first step is to make sure the concrete substrate is clean and dust-free. This is just common sense, but often it’s in short supply around job sites. Older concrete should be pressure washed to ensure it’s free of all debris. It’s important to realize the tile you use must be rated for your climate. Refer to the TCA handbook for guidance.

If you’re going to use a modern thinset, consider adding an additional amount of pure Portland cement to the mix. I’d blend three parts of the bagged thinset into one part of Portland cement. You want as many crystals to grow as possible.

The tile needs to be set in a solid bed of mortar. You can’t have any air spaces between the tile and the mortar. Liquid water passes through the grout in between tiles. This water can collect in any void spaces. When it freezes, it will act like a giant hydraulic ram and either lift the tile or crack it.

The secret cement paint is made by mixing clean water with Portland cement. Apply this to the concrete and immediately cover it with the thinset mortar. Never allow the cement paint to air dry. Brush it on and cover it within seconds with the bedding mortar the tile will rest on. For extra holding power, have a helper brush on a thin coat of cement paint on the underside of the tile before you set it in the mortar.

Once the grout has cured after 30 days, apply a silane-siloxane water repellant to minimize water getting down into the thinset. Do all of this and your exterior tile should never come up except when the building is demolished.

Column 1552

Water Ponding Against Foundation

water ponding next to house foundation

This ponding water in front of the house foundation can cause many problems. There’s an easy way to prevent it. Copyright 2024 Tim Carter

Water Ponding Against Foundation - It Doesn't Always Cause Wood Rot

Two days before writing this column I saved an Ohio homeowner $30,000.00. Fortunately, he stumbled across my website and found out that he could talk to me on the phone. He was suffering from water ponding against his foundation and was considering signing a contract with a waterproofing company for the above amount.

Once I studied the photographs he sent me, I said, “Are you sitting down? That ponding water is NOT causing the problem you’re having. If you would have signed that contract, you would have wasted all that money.”

There was stunned silence at the other end of the phone. I discovered moments later I was hearing the sound of relief! This man had been suffering angst about the huge cost for over a year! A wave of gratefulness was washing over him knowing I had helped bolster his retirement income.

It’s important to realize that ponding water is not a good thing. I’ll deal with that in a moment sharing how to prevent it or deal with it should you have the same problem. For now, let’s talk about the problem he had.

The man shared he had discovered, quite by accident, the bandboard that caps the ends of his floor joists was rotting. I could see from his photographs the bandboard was at least 16 inches above the soil around his foundation. The ponding water was not able to leak into his house and contact these boards.

I asked if he had any signs of water leaking into his basement. His answer was “No.” After asking a few other questions I said, “The wood rot you’re experiencing is caused by condensation that’s forming in the winter months on the cold wood. The moisture can’t easily evaporate because of the 6-inch-thick pieces of fiberglass insulation that are placed in contact with the wood.”

My advice was to remove all the fiberglass allowing the wood to dry. I then shared a few ways to repair any severe rot. Once the wood was dry and all repairs were complete, I instructed him to install 4 10inches of closed-cell foam insulation. This rigid material must be custom cut and fit tight between the floor joists, subfloor, and sill plate. Once in place, a spray can of expanding foam should be used to fill any small cracks between the wood and the foam. The closed-cell foam will prevent water vapor from contacting the band board in the future.

We then discussed why the water was ponding against his house. He admitted he caused part of the problem at the front by installing raised landscape beds. I told him this was not a good idea. Unfortunately, many landscapers don’t understand the minimum requirements set forth in the uniform building code.

The minimum grading standards in the code state that the ground must slope down and away from each foundation wall at least six inches in the first ten horizontal feet of distance away from the foundation wall. What’s more, the code states that a minimum of 6 inches of foundation must extend above the ground that touches the foundation.

Do the math. This means the top of a foundation wall should be a minimum of 12 inches higher than the ground that’s 10 feet away from the foundation. Houses built on hillsides have a difficult time meeting this requirement on the uphill side of the house.

More fall is better. Try for nine or twelve inches of fall instead of six. Remember, the building code is a set of MINIMUM standards of building. When you build your home to code, it’s like getting a 70 percent on a test. You just barely pass. You can always build better than the building code.

My suggestion to him was to install one of the linear french drains I’ve talked about for over thirty years. My college degree was in geology with a focus on hydrogeology. That’s the study of groundwater.

french drain pipe cross section

Cross-section of a Linear French Drain including the all-important perforated french drain pipe. Copyright 2017 Tim Carter ALL RIGHTS RESERVED - Do NOT COPY this graphic.

This man’s house is located in a region where the subsoil is a dense clay. Rainwater enters the top soil and then only goes down about four inches before it encounters this clay. The water then starts to move along sideways across the top of the clay.

A linear french drain is like a gutter in the ground. It’s a narrow 6-inch-wide trench that only needs to be 24 inches deep. In some cases, it can be less, and in other cases more. Most of the time 24 inches is plenty.

You install two inches of clean gravel the size of white grapes in the bottom of the trench. Then you install a perforated pipe on top of this gravel. The pipe acts like a high-speed highway transporting the water to the lowest part of the lot. Once the pipe is installed, you fill the trench to the top with the same grape-sized gravel. Never use gravel with sand in it. Do not line the trench with filter fabric. Do not install a filter sock on the pipe.

I have videos and in-depth columns on my www.AsktheBuilder.com website all about linear french drains, downspout drain lines, and getting foundation heights correct. I suggest you immerse yourself in all of them.

Column 1551

Bad DIY Videos on YouTube

new house framing 2x6s engineered lumber beam

Bad DIY Videos - This new home in central New Hampshire has 2x6 exterior walls. Minimize air leakage and your heating bills will be very reasonable. Copyright 2024 Tim Carter

Bad DIY Videos on YouTube Can Cost You Thousands of Dollars

You may think that YouTube is an oasis of helpful home improvement videos. After all, anyone with a smartphone can upload a video in seconds. Each week I scour YouTube for videos I feel may help you save time and money. With each passing day, I’m convinced that YouTube is a cesspool of bad advice. For every decent video that contains good information, I see twenty or thirty bad DIY videos that are created by fools.

Here's a screenshot from a YouTube Short. This worker is applying a treated 2x4 under the metal threshold of an exterior door.

youtube short treated lumber under door threshold

CLICK HERE to watch this 15-second video. Note there is no flashing under the door as it sits on a slab. Rain will come off the door, travel down the threshold, travel back across the 2x4 and very likely flow UNDER the door. This is wrong on so many levels.

1/2-Inch Threaded Rod vs Huge Tree

Here's a second example of what NOT TO DO. Look at these two screenshots from this YouTube Short:

man drilling through tree

Here's a man boring a hole between the two massive trunks of a tree.

1/2 inch threaded rod in tree

This is the finished installation. Do you really think those tiny washers and the small amount of metal on the rod threads can resist the tens of thousands of pounds of leverage the tree can exert?

You may not be old enough to remember the Kansas City Skywalk Collapse that killed 114 people. An inferior design just like what you see above caused the collapse.

Talk to any seasoned arborist and she/he will tell you the BEST way to prevent the tree from cracking is to cable it up about 15 or 20 feet in the air.

More Examples of Bad Videos

Allow me to share a few examples. There are a disturbing number of videos showing an easy way to create concrete walkways, sidewalks, and door stoops. The uninformed folks on the video purchase bags of dry concrete mix from a local hardware store, lumber yard, or big box store.

Do NOT Do Dry Mix Concrete

They pour this dry concrete mix into forms and drag a board across the forms to make the top surface smooth. Some folks do fancy imprints or designs in the dry powder. They then lightly mist the surface of the powder to start the chemical hydration reaction. This reaction causes microscopic crystals to form that act like Velcro™. These crystals, when allowed to completely coat each individual piece of sand and stone, are the glue that holds the aggregate in concrete.

After an hour or so, the uninformed video hosts start to flood the top surface with water. It begins to soak into the dry powder just below the surface. My guess is the video hosts never took a geology course. The heavy water grabs onto the ultra-fine cement powder and starts to transport it down into the mix.

Have you ever seen what happens in a rainstorm that falls on dry dusty soil? The heavy rainwater captures the ultra-fine silt and begins to move it down and through the soil. This is why creek water turns muddy just after the storm. Go to the creek hours after the storm and the water is magically clear.

Think about it. How do you know if you’ve added enough water to the concrete mix? How do you know if you added too much? How strong is the concrete just under the surface where most/all of the cement powder has been carried away by the water?

I’m currently working with the Portland Cement Association and the National Ready Mix Concrete Association and their scientists to prove that this method of pouring concrete is perhaps the worst way to do it. Mixing concrete the traditional way with the proper amount of water coats the sand and stone with the cement paste. This is the best way to pour concrete hands down.

2x6 vs Double 2x4 Exterior Walls

Perhaps the worst videos are those I see that tell you how to create thicker wood-framed walls when building a home or room addition. Many pooh-pooh 2x6 walls and urge you to build two separate 2x4 walls separated by an inch or so. These super-insulated walls are supposed to save you big money on your heating bills. Not one of the videos I’ve watched bothers to do the math for you.

If you follow the advice in these videos without doing the math, you’ll be in for a huge surprise. It’s all about payback. Whenever you spend money on something that claims will lower your utility bills, you must determine how many months/years it will take to claw back in fuel costs what you spent up front on the improvement. Only after you get back all this money do you then start to finally save money.

I decided to do the math on this double-wall method of construction. My imaginary two-story house was 50 feet wide and 26 feet deep. It had standard 8-foot ceilings on both floors.

My calculations showed you would need 228 extra 2x4 studs, 40 2x4x16s for the top and bottom plates for the extra walls, clear pine for the window and door extension jambs, and 50 rolls of 6-inch fiberglass. The total cost of these materials in 2024 here in New Hampshire, with no sales tax, was $6,125.00.

It’s safe to say the extra labor, overhead, and profit to install all of these things might be around $10,000.00. The total upcharge for the super-insulated exterior walls would be about $16,000.00.

Look online and you’ll discover the 2023 average heating cost in the USA for homeowners was the following: $931 for natural gas, $2,354 for heating oil, and $1,359 for electricity.

The heat loss through the windows, doors, attic, and floor will be the same. You’ll reduce your heat loss only through the walls. A twenty-percent savings projection would be generous. This means you might save $186 per year if you heat with natural gas, $420 if you heat with oil, and $271 if you heat with electricity. If you use air-conditioning, you’ll save maybe an extra $150 per year.

It’s your turn to do the rest of the math. Tell me how many years it would take you to break even. If you heat with natural gas, it would only take you 86 years to break even. The break-even calculation is much more complex because of interest and investment income you could have achieved had you not spent the money. The bottom line is BEWARE of what you see on YouTube.

Column 1550

Egotistical and Closed-Minded Contractors

copper preserves asphalt shingles

Egotistical and Closed-Minded Contractors - What would you say about a roofer who looked at this photo and denied that copper ions washing off the cupola roof extend the life of asphalt shingles? Would you trust or hire him? Just below is a close-up photo of the worn shingles on the right. CLICK HERE for a high-resolution copy of the above photo. Copyright 2024 Tim Carter

Beware Egotistical and Closed-Minded Contractors -Nothing But Bad Happens

Just three weeks ago, I shared a true story with you about my failed asphalt shingle roof. If you remember, it had a thirty-year warranty and after just twelve years, it began to experience catastrophic failure. Looking back now, I shared the wrong photograph with you. I showed you a picture of my daughter’s new roof with copper strips on it. I should have shown you the photo of the Tilton, NH, post office roof. That photo should be just above.

Just two days ago, I received an email from a man who runs a roofing company in a suburb of a large Midwestern city. He was quick to point out his credentials. “Tim, I run a roofing company in (fill in the blank) and have been in this industry for over twenty-eight years. I was reading through the local paper and noticed an interesting segment on ‘Copper Strips Help Keep Asphalt Shingles Young’.” This man said, “Please keep in mind this is from pure hands-on experience, and I’m not looking to start anything. I don’t agree to say the least.”

It’s important to realize I returned a lengthy reply to the roofer. I shared with him an online file folder filled with photos proving that copper ions react with asphalt molecules.

worn asphalt shingles

Look at how most of the colored granules are missing on the shingles. They are now unprotected from the photons in the ultraviolet light. How can one deny that copper ions extend the life of asphalt shingles after seeing this photo? This is but one of the photos the roofer was able to view. Even still, his ego prohibited him from accepting new facts. You may be like the roofer when it comes to other issues in your own life. Copyright 2024 Tim Carter ALL RIGHTS RESERVED

The copper washing over the shingles with each rainfall acted like the Fountain of Youth. I also shared that three intelligent physical chemists confirmed my theory. The roofer rejected all of this evidence. I go into detail about all of this and more in my Roofing Ripoff exposé book. I recommend you read it.

roofing ripoff book cover

This is the cover of my Roofing Ripoff book. CLICK THE IMAGE NOW TO ORDER IT.

The roofer painted himself into an ego corner that only Spiderman might escape. Think back on all your interactions in the past with contractors. How would you rate their egos? These individuals tend to reject new ideas and data contradicting all they have been exposed to. In fact, how would you rate yourself on this scale when presented with new facts that challenge your core beliefs?

Jordan Peterson has sage advice should you be in the same situation as the chest-pounding roofer. Jordan says, "Always assume the person you're talking with knows more about the topic than you do."

A Humble and Open-Minded Contractor

Five years ago, I was lucky enough to meet a rare insulation contractor with a generous amount of humility and reasoning power. I shared his story in a past column you may have missed. My interaction with this man was so remarkable and life-changing for him, that I devoted an entire column to it. You can dip yourself in the magic waters of this fantastic story by clicking here.

One day, while working at my daughter’s new home, the insulation contractor showed up with his crew. He was about the same age as the roofer that emailed me a few days ago. It turns out, the insulation contractor had been installing insulation wrong his entire career. That morning, I taught him the correct way to install it beneath radiant heating tubes.

At first, he didn’t say anything. Realize he was in shock. I’m sure you would be, too, after discovering something you thought was true for thirty years was false. Several hours later, the insulation contractor told my son-in-law he was eternally grateful for meeting me that day. I had enlightened him about his craft, and now his work would be perfect.

If I had to guess what you’re thinking at this point, it would be, “Tim, those are two fascinating stories, but what do they have to do with me getting my new concrete sidewalk installed or my house painted? I’m not quite sure what your message is.”

STOP Trusting Contractors

My message is you need to stop trusting contractors. Stop thinking they know the right way to do things. Often they don’t. Unfortunately, many contractors have egos bigger than the Empire State Building. These contractors will almost always reject your input when you challenge their myopic work experience.

Years ago I saw an older concrete mason adding gallons of water to ready-mixed concrete. He did this to make it easier to install. When I shared the added water dilutes the amount of cement paste in the mix, making the concrete weaker, he replied, “Well, I’ve been doing it this way for over thirty years.” His ignorance created untold suffering and unnecessary financial loss for hundreds of homeowners like you.

I know you don’t want to hear this, but the onus is all on you regarding getting things done right at your home. You must invest the time reading the installation instructions provided by the manufacturers of products used at your home. Think about it. When was the last time you read the label on a paint can? Do you, or your painter, do all the things it says to do?

Do You Really Know What Clean Means?

For example, do you know what clean means? Have you ever taken your filthy car to a self-car wash where you spray it with a high-pressure wand? You get the wand as close to the paint as possible, applying the soapy water. Moments later, you rinse it with clear water and pull out of the bay. If you just let your car air dry for a few moments, you’ll discover it’s not clean. There is still a thin, stubborn film of dirt bonding to the paint. Yet, thousands of painters feel pressure washing your home gets it clean.

I could go on and on and on. It’s your job to discover precisely how things should be installed the right way. You then treat each conversation with a bidding contractor like a job interview. You own the frame, not them. You tell them exactly what needs to be done. I know it’s not going to be easy. At the end of the day, it’s only about money. Perhaps you have an unlimited supply.

Column 1549

Low Water Flow in Luxury Shower

luxury shower with body sprays

There's water flowing from the large shower head. However, as soon as you turn on the three body sprays water dribbles out of every orifice in this luxury shower. The East Coast plumber was a dunce. Copyright 2024 Tim Carter

Low Water Flow in Luxury Shower - Pipe Size is Too Small

Each week, I extract quite a few homeowners like you from wretched remodeling or home-building quagmires. I do it with a phone or video call. Feel free to set up a phone call with me here. In almost all cases, the root causes of the dilemmas are poor plans, sketchy or non-existent specifications, and misplaced trust.

A week ago, a middle-aged woman was lamenting about her luxury master shower remodel. The walls were covered in breathtaking marble. Step into this private oasis, and you will see a large rain shower head, three body sprays, and a hand shower wand.

What the woman didn’t have was water flow. A somewhat decent flow would come out of the shower head on its own, but if you turned on any of the other accessories while water was flowing from the shower head, the water flow and pressure would drop. It was pathetic and unacceptable. Sadly, she didn’t discover this until after the entire shower was complete. When she entered the shower to enjoy it for the first time, she exited the shower wet and disgruntled.

rain shower head

Low Water Flow - Luxury shower heads, body sprays, and hand showers gulp water faster than thirsty horses. Plumbers who fail to do water-flow calculations might be paying a tile contractor big money to re-install the marble or tile. Copyright 2024 Tim Carter

Low Water Flow Excuses by the Contractor

As you might imagine, she complained to the remodeling contractor. The project superintendent and the plumber immediately said the water pressure in the house was too low. They were sure a booster pump would solve the problem.

Perform a Pressure Test When Bidding

Just like doctors order scans, x-rays, and other tests before performing surgery, the plumber should have performed a pressure test before he cut open the walls. It was his professional obligation to determine if the existing conditions would support the new fixtures that have an insatiable appetite for water. You can purchase an accurate pressure gauge that connects to a hose bib or laundry-tray faucet to see what the pressure is in your home. The luxury showers work best with a pressure of about 70 PSI. Any pressure below 50 PSI will produce less than vigorous water flow. Keep reading how to test to see if you get the desired result.

water pressure gauge

This gauge cost lest than $10 in 2024. Get one now. CLICK THE PHOTO

Low Water Flow Usually Means Pipes are Too Small

I’ve been a master plumber for over four decades and knew immediately what was causing the low-pressure and volume issues.

tim carter master plumber

Yes, it's me, Tim Carter! I'm taking a break from installing a garage floor drain in my daughter's home on Mt. Desert Island in Downeast Maine. Go HERE NOW if you need to hire me to solve your low water pressure and flow problems.

The woman was smart enough to take photos of the job's progress. Several photos showed the plumber installed 1/2-inch PEX water lines with flow-restricting hard 90-degree fittings. This PEX fed water to all the accessories.

It’s important to realize before the work began the water pressure and flow in the original tub and shower was fine. An independent inspector verified the incoming water pressure was 70 pounds per square inch (PSI). The woman shared that prior to the remodeling, she could take a wonderful shower with plenty of water. Her tub spigot gushed water if she wanted to soak in a bath. The tub and shower were piped with 1/2-inch copper tubing.

If you don’t want to be frustrated with your new fancy shower, please pay attention. All of the pain the woman has endured could have been avoided with a pencil, paper, and ten minutes of time. The plumber failed to do the simple calculations that would have shown him the correct pipe size to feed the bathroom and the size of the pipes that extended to each accessory. Low water pressure can be caused by many things.

You can view the Uniform Plumbing Code online. Within this large document, you’ll discover a table showing load values for all the common fixtures in your home. The load values are stated in water supply fixture units (WSFU). It just so happens that one WSFU equals one gallon of water a minute of flow.

Calculating Water Supply Fixture Units a Must

A normal residential bathroom like the woman had before the remodeler showed up has 2.7 WSFU of cold and 1.5 WSFU of hot water. Since you don’t use all the fixtures at the same time while in the bathroom, the blended total is 3.6 WSFU. A normal shower head has 1.4 WSFU. A seasoned plumber would almost always run a 3/4-inch diameter cold and hot water line to this bathroom. He’d branch off this larger pipe with a 1/2-inch pipe to each fixture. It’s quite possible the woman’s shower, once the calculations were run, might require 1-inch hot and cold water lines to be extended from the basement up to the second-floor bathroom.

All five of the new fixtures in the shower consume 11 gallons of water per minute if you turn them all on at the same time. That’s just about ten times the water flow the original shower head consumed! The gallon-per-minute (GPM) flow of each accessory can be found in seconds in the product brochure or online specification sheet.

It doesn’t end there. A diligent plumber will also calculate the pressure loss from the height of the bathroom above the water meter, the pressure loss through the water meter, a backflow preventer, and any other pressure regulators.

PEX Tubing Has a Smaller Inner Diameter

Here’s another factor the woman’s plumber probably didn’t take into consideration. He replaced the copper tubing with plastic PEX. One-half-inch PEX tubing has a slightly smaller inner diameter than one-half-inch copper. The plumber made the situation worse by using the smaller diameter PEX.

Get on a Bathing Suit

Here’s what you should do when you get ready to install a luxury water sports arena in your home. Include in your contract with the builder or remodeling contractor the plumber must produce all the pipe-sizing calculations. You can easily find webpages that allow you to determine pipe size once you know the total WSFU load in your job.

All that said, don’t hope it’s all going to work. Put it in your contract that you get to test the new shower before the marble or tile is installed. It would take just a few hours for the plumber or remodeling contractor to cover the walls with 6-mil plastic that’s taped to the shower drain. Be sure to put down a rubber mat or two because wet plastic is as slippery as wet ice. Give the new shower a test drive before the expensive tile and marble is installed. You should only hope for things you can’t control, like the weather and lottery numbers.

Column 1548

LVP Flooring Installation Tips

lvp flooring and red area rug

LVP Flooring Installation - This is a new luxury vinyl plank floor that looks like travertine stone. The area rug adds a delightful splash of color and helps to absorb sound. Don’t be afraid to introduce bold colors or patterns. Copyright 2024 Tim Carter

LVP Flooring Installation Tips & Area Rugs

By: Tim Carter

Several months ago, I shared a story about my first experience with luxury vinyl plank (LVP) flooring. I installed the LVP in a basement room that experienced water damage caused by a leaking water pipe. The product was affordable, it was easy to install, and after six months, it looks as good as the day it was put down.

My son saw the floor and was amazed. He purchased a new home two years ago. For some odd reason, the builder installed wall-to-wall carpeting in a sunroom at the rear of the house. An exterior door leading to the backyard is in this room. Keeping the carpeting clean had become a constant battle. LVP flooring installation was in his immediate future.

“Dad, let’s rip up the carpeting and install some of the LVP like you did at your home. What do you think would be a good look for this room?”

“Well, your mom and I were torn between the walnut plank we have and a large-format beige travertine product. I vote for the travertine one for your sunroom because you’ve got two walls of windows. The sunlight streaming into the room will enhance the lighter LVP. The large format and light color should make the room feel bigger too.”

Area Rugs Add Accents

My wife agreed 100 percent and offered up a suggestion that took this room to the next level. She said, “Once you guys install the new LVP, put down a colorful area rug that leaves about a two-foot border around the room. You’ll still see the LVP, but the area rug will add texture, absorb sound, and look spectacular.”

We jumped into the project on a Saturday morning. It took just a few minutes to cut the carpeting into strips about 3 feet wide. We rolled them up like sausage links, wrapped a strip of painter’s tape around them, and pitched them into the back of my truck. An hour after that we had the tackless strip up, all the carpet pad staples removed, and the floor was vacuumed clean. We were ready to install the LVP in the room that measured 12 feet by 12 feet.

Install Underlayment

The manufacturer recommended installing a thin foam underlayment. We did this. Unfortunately, the installation instructions for the LVP were sub-standard. The video skipped a few very important steps.

We had to use my vibrating multi-tool that works just like a barber’s hair clippers. This tool has a very thin blade that allowed me to undercut the door trim that extended down to the subfloor. We wanted a clean look where the LVP slid under the wood trim. I placed a piece of the LVP upside down next to the wood casing, and the thin blade cut just enough off so the LVP slid under the trim creating a professional look.

My LVP flooring had interlocking ends. In my case, you placed the next piece of flooring tight to the previously installed piece and then whacked it with a rubber mallet to snap the two pieces together.

Not All LVP Installs the Same

My son’s LVP was different. It’s important to realize his LVP panels measured 1 foot wide by 2 feet long. I discovered you had to lock in the long edge first. The trick was to keep the short edge about 1/16th inch away from the previously installed piece. Once you had the long edge tight and flat on the underlayment, you then used a special block to tap the short edge into place.

It’s mission-critical that you maintain a 1/4-inch space around the outer edge of the LVP. This is required for expansion and contraction. The best way to do this is to purchase innovative spacers that are shaped like the letter T.

The spacer has hard plastic squares 1/4-inch thick at the end of a longer thin strip. One of the squares disappears when you place the first piece of a row against the wall or a baseboard. The spacers prevent the LVP from moving when you start to tap the short edge with the hammer to get the second piece to interlock with the first piece. Without the spacers, you’ll end up tapping the entire row tight to the wall or baseboard.

We installed all the LVP in just four hours. The first and last rows consumed 80 percent of the time because of the required cuts. Each full piece that required no cutting was installed in a minute or less. You only need minimal skills and a few tools to install LVP.

The subfloor needs to be in the same plane so the LVP interlocks and stays locked when you walk on it. Low spots can be filled in with floor leveling compound.

Cutting LVP can be done with a sharp razor knife. Once you cut about 1/4 of the way through the material with repeated strokes, you flip it over and snap it the same way you break a piece of drywall.

Once the LVP was installed, we installed a discreet toe strip around the room to hide the required 1/4-inch gap. It was now time to unroll the stunning red and gold area rug. Once again, my wife’s advice was stellar. The area rug made all the difference. I never doubt her wisdom! Maybe that’s why we’re about to celebrate our 50th wedding anniversary in six months!

Column 1547

Asphalt Shingles Curling and Crumbling


copper strips on roof ridge

I applied these copper strips on my daughter’s new home five years ago. You must have a minimum of 10 inches of solid copper above every 25 linear feet of shingles below the copper strip. The copper weighs 3 ounces per square foot. You can purchase it here. It's VITAL you blind nail the copper strips. If you don't know how to do this, CLICK HERE and SET UP A PHONE CALL WITH ME. Invisible atoms of copper wash down onto the shingles each time it rains. This can add 40 or more years' worth of service life to the roof. The bright copper changes to a dull nut brown within a year. You can't even see it from the ground. Copyright 2024 Tim Carter

Here is the proof the copper works. Look at this photo I shot of the vacant Tilton, NH post office:

copper preserves asphalt shingles

What would you say about a roofer who looked at this photo and denied that copper ions washing off the cupola roof extend the life of asphalt shingles? Would you trust or hire him? Copyright 2024 Tim Carter

Asphalt Shingles Curling and Crumbling - How to Prevent

This is a true story about asphalt shingles curling. I live in central New Hampshire, and my house was built in 2001. I didn’t build it. The plan was for me to live in this home for just two years while I built our dream home on a tract of land we own just six miles west of here. All of this was put into motion in May of 2008 when the real estate bubble was as big as a bulbous hot-air balloon.

I moved from Cincinnati to New Hampshire in July of 2008 with my oldest daughter. My wife and youngest daughter remained in Cincinnati until August of 2010. By then, I was supposed to have the new home ready for occupancy. But then things went south in September of 2008. You, like me, took a huge financial hit as the real estate market collapsed. The new home never happened because we lost too much equity in the Cincinnati home.

30-Year IKO Shingles Fail in 12 Years

I share this with you because when I inspected my New Hampshire home, I just gave the roof a cursory look. The original homeowner had the shingle brochure, and it clearly showed the roof had a 30-year warranty. At that point, there were at least twenty-three years worth of life left in them. I didn’t care as I only planned to be here for 24 months.

Several years after the economic collapse, I knew this house was going to be my home for quite some time. One day, while sitting out on the deck, I noticed the shingles were starting to develop a slight curl. I also noticed more and more green ceramic granules on the ground and deck after each rain. My roof was on the glide path of going bad long before it should. Does this sound familiar? Do you see premature wear on your asphalt shingles?

defective shingles on Tim's house

These are the defective IKO shingles on my own home. Photo by: Tim Carter - Founder - AsktheBuilder.com

Photons in UV Light Blast Apart Asphalt

Soon the wear started to accelerate. I could see bare patches of asphalt mat where the protective granules no longer existed. The purpose of the granules is to stop the sun’s ultraviolet (UV) light from hitting the asphalt. Some UV light rays contain active photons. These are like invisible cruise missiles. When they strike an object, they blast apart the molecules. This is why fabrics become weak and tear easily if left in the sun. It’s why the color fades on many things left out in the sun.

UV light was destroying my shingles. Several years ago it got so bad I had to replace my roof. Before it happened, I noticed advertisements in our local weekly newspaper. A roofer was advertising his services to help homeowners file warranty claims for defective shingles. This caught my attention. The problem must be widespread here in New Hampshire. It was way worse. It was a nationwide problem.

I bit the bullet and started to replace my roof. There was no way I was going to install asphalt shingles again. I decided to use a virgin vinyl product that looked exactly like real slate. It’s a stunning product. Two companies in the USA produce this roofing material: DaVinci and Brava.

brava slate shingle and davinci roofscapes slate shingle

Here's an interesting photo. The shingle on the left is made by Brava. This company is the primary competitor to DaVinci Roofscapes. The Brava shingle is their Washington model. The dark streaks on the DaVinci shingle are caused by melting snow. Copyright 2024 Tim Carter

One particular blazing hot day I was working and became agitated. I was furious that I was suffering from the heat and financial loss when the shingles should not have been going bad. I did get a very small settlement from my shingle manufacturer, but it didn’t even cover three percent of the cost of installing the new roof.

DaVinci Roofscapes Color Fade - Why It Happens and How Bad Is It?

I decided to find out what was causing the problem. I wanted to know why my shingles, and those of hundreds of thousands of other homeowners, were failing. With the help of a deep-throat source within the asphalt shingle industry who was ethically challenged, I discovered the root cause. Too much air was being blown into the asphalt in the manufacturing process. The air caused the shingles to think they were twenty years old before they were even installed!

roofing ripoff cover

This is the cover of my Roofing Ripoff book. CLICK THE IMAGE NOW TO ORDER IT.

I continued my research and then wrote a small book about all that was happening. It’s called Roofing Ripoff - Why Your Asphalt Shingles are Falling Apart and What You Can Do About It. You can purchase a PDF version from me or get a paperback version on Amazon.com.

As I was finishing the book, by chance, one day, I discovered how to extend the life of asphalt shingles by 40 or more years. Exiting a restaurant, I looked across the street to the empty Tilton, NH, post office. I saw a strip of asphalt shingles under a cupola that had a copper roof. The shingles under the cupola looked brand new. The rest of the roof was the worst I’d ever seen. All the shingles were curled and missing most of their granules.

Tilton Post Office

Look at how the 8-foot-wide strip of asphalt shingles looks nearly perfect. The other shingles on either side have lost their granules and are curled as can be. The copper ions washing off the cupola roof STOP the oxidation of the asphalt. When asphalt oxidizes, the molecules cross-link and become brittle. CLICK THE PHOTO NOW TO ORDER AFFORDABLE COPPER STRIPS THAT WILL SAVE YOUR ROOF.

I knew the copper washing off the cupola roof was protecting the shingles, but didn’t know why. I reached out to the tens of thousands of subscribers on my free newsletter, trying to locate a physical chemist. Three subscribers got back to me. Once I shared what I saw, they all agreed on what was happening.

The shingles degrade because the UV rays break apart the asphalt molecules. The broken molecules grab oxygen from the air and begin to cross-link with one another. When there are too many cross-linked molecules, the asphalt becomes brittle. This is why the curl you see can’t relax and lay flat. The brittle asphalt can’t hold onto the ceramic granules.

The copper prevents cross-linking. The UV rays blast copper ions off the copper, and these wash onto the shingles. The copper bonds to the asphalt and prevents cross-linking. When this happens, your roof thinks the rain is the fountain of youth. Put copper strips on top of your roof to slow the aging process to a crawl. Be sure to blind-nail the strips.

Column 1546

DaVinci Roofscapes Color Fade

Davinci Roofscapes Color Fade - Looks More Like Slate

I installed Davinci Roofscapes Single-Width Slate shingles on my home during the summer of 2015. I did this just before I wrote my exposé book Roofing Ripoff.

I created this post at the bequest of one of my newsletter subscribers who is considering purchasing DaVinci Roofscapes for her home. She asked me about color fade, cracks, wear, etc. She also wanted to know if there were any other companies that made shingles like DaVinci.

Fortunately, I ordered extra shingles when I re-roofed my home in 2015. I've stored these shingles in the original packaging and under a cover. The extra shingles have never been exposed to sunlight. I was stunned at the color fade.

house being re-roofed with davinci roofscapes slate

The old wretched green asphalt shingles are on the left. The new DaVinci Roofscapes Slate is on the right. I had to do the roof in manageable sections since I was working alone. Copyright 2024 Tim Carter

Why I Switched to DaVinci Roofscapes

My 30-year warranty IKO asphalt shingle roof started to experience catastrophic failure after just 12 years.

defective IKO on Tim Carter's house

These are the defective IKO shingles on my own home. Copyright 2024 Tim Carter - Founder - AsktheBuilder.com

Never again would I use asphalt shingles. I decided to use a material that I knew would outlast me and perhaps not need replacement for 75 years. High-quality plastic meets this requirement. That's why I decided to use DaVinci Roofscapes single-width slate. You can see my roof in the following video:

Do DaVinci Roofscapes Slate Shingles Fade in Color?

My slate shingles have experienced significant color fade. Active photons in ultraviolet light cause the color change. The photons are tiny invisible missiles that blast apart the molecules of the pigments in the virgin vinyl shingles. Fabrics, house paint, plastics, fiberglass, wood, etc. all suffer from color changes caused by UV light. It's normal.

How Powerful are UV Photons?

The photons are so powerful they can blast atoms from metal. Zinc coatings on metal roofs are destroyed by UV photons. This is why you see rusty metal roofs on barns, warehouses, and other utility buildings that often use zinc-coated metal panels.

Zinc atoms are blasted from the roof surface much like dirt and mud files through the air when an artillery shell explodes after hitting the ground. The zinc atoms are lying dazed and confused on the roofing.  Rainfall washes the dislodged zinc atoms to the ground. After a decade or two of attack, enough zinc has washed off now exposing the steel to the elements.

Copper and lead flashings surrender atoms to the relentless photon attack. You often see a roof very clean beneath these metal flashings. Copper ions that wash across a roof act as a natural biocide to kill the ugly black roof algae you often see on roofs that have no copper on them.

Can Copper Extend the Life of Asphalt Shingles?

Copper can also extend the life of asphalt shingles. I was the first person in the world to make this discovery. I go into great detail about this in my Roofing Ripoff exposé book.

davinci roofscapes slate color fade

My finger is touching a Davinci Roofscapes slate shingle that has been hidden from the sun since it was manufactured in 2015. I did nothing to enhance or color-correct this photo. I shot the photo on February 7, 2024. The Davinci shingles to the right of my finger were installed in August of 2015. This roof surface gets intense sun after Noon each day. By 4 PM, this roof surface is in the shade created by huge oak trees just 40 feet to the west. Copyright 2024 Tim Carter

My Original Davinci Color Was Gray/Green

My original DaVinci shingles had a darker gray-green color. Now they've changed to a medium gray color like real slate. The roof now has a rich patina; each season it looks more and more like real slate.

davinci roofscapes slate shingle color fade

Here's the full DaVinci Roofscapes shingle surrounded by others from the same manufacturing batch. I slid the darker shingle up under the row above so it wouldn't slide to the ground. The shingles show no other signs of visible wear. They're not cracked, curled, or brittle. No color correction was done to this photo. The photo was taken on February 7, 2024. Copyright 2024 Tim Carter

Brava vs DaVinci

You may have been considering installing DaVinci Roofscapes on your home. That's why you're here on this page.

After reading this, you may be saying, "Jeesh, with the color fade I don't know. Maybe I'll consider a different synthetic slate." If that's you, your attention may be drawn to Brava. To the best of my knowledge, they're the only real competitor to DaVinci.

The issue is since the Brava product is also made from plastic with pigments like DaVinci, it will undoubtedly fade under the relentless attack of the photons in UV light.

I'll repeat myself once more: My DaVinci roof looks stunning after eight years. I can't see any signs of wear. I'd reinstall it again, no doubt about it. That said, if you're looking at DaVinci, you may want to look at Brava just as you'd compare any other products with a competitor.

brava slate shingle and davinci roofscapes slate shingle

Here's an interesting photo. The shingle on the left is made by Brava. This company is the primary competitor to DaVinci Roofscapes. The Brava shingle is their Washington model. Keep in mind the Brava shingles will experience color loss, as did my DaVinci shingles. The photons in the UV light are powerful. What we don't know is at what rate it will happen. The dark streaks on the DaVinci shingle were caused by light snow that had gotten on the shingle moments before. The snow rapidly melted in the bright New Hampshire sunshine. Copyright 2024 Tim Carter