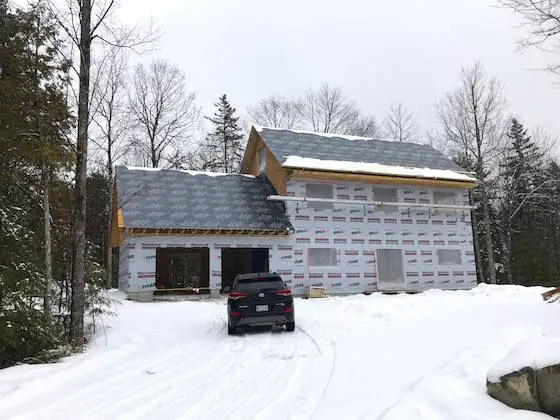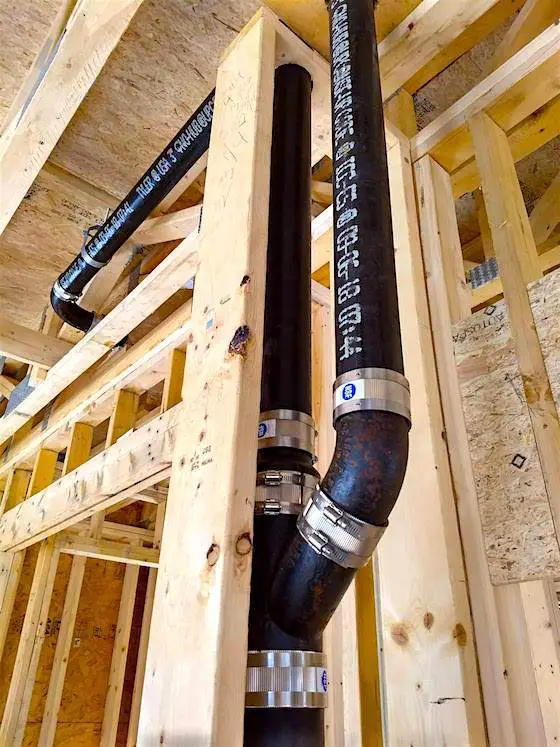
All of the exterior and interior walls of this house were made in a factory. The precision is remarkable. (C) Copyright 2019 Tim Carter
Factory-Built Walls
QUESTION #1: Hello, Tim. A new house being constructed near me was built using wood walls made in a factory. I was astonished that the house was under roof in just two days. What’s better, walls built on the job site by carpenters or those built in a factory? Can you get walls like this for a room addition or a separate outbuilding like a garage? Where do you find the places to order these things? Steve B., Akron, OH
You may have had a similar experience to Steve. Perhaps you’ve passed a huge tractor trailer on the highway that’s loaded with prefabricated walls. You may have seen some other houses get built in hours instead of days. No matter, you need to realize that prefabricated walls, both interior, and exterior, can be used on your next project.
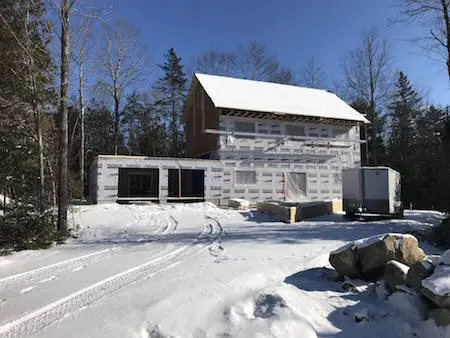
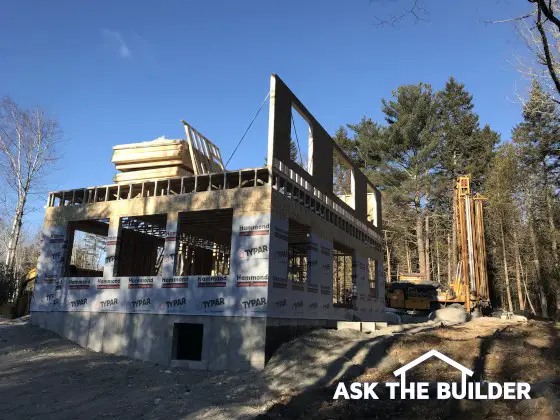
Back when I was building I didn’t have the opportunity to use these magical building components, but they’re being used to construct my daughter’s new home right now. I witnessed the exterior walls of her home be set and secured in just a few hours. A standard carpentry crew could never achieve this task in the same amount of time cutting studs and headers and pounding nails at the job site.
The prefabricated wall panels go together like giant Lego blocks. They’re perfectly square from the factory and the precision is astounding. My daughter’s home was 44 feet long and the dimension was only off 1/16th of an inch. It’s possible that error was in my tape measure, not the wall panels!
There are countless advantages to using prefabricated wall panels. The walls are built in an enclosed factory so the material stays dry. High-tech computer programs are used to create the layouts and assist with the cutting of the material. Nails are driven exactly as engineering specifications call out. The walls can be delivered to the job site in the morning and the walls set by the end of the day.
The factory generates a plan for the carpenters in the field to set the panels. The panels arrive in stacks so the panels only need to be pulled off the pile and put into position. The carpenters don’t have to scratch their heads trying to find a panel. They’re erected in the reverse order that they were stacked on the delivery truck.
Builders and remodeling contractors are having increasing difficulty locating and hiring carpenters that treat what they do as a vocation instead of a job. If quality is important to you, then you’ll do whatever is possible to have prefabricated wall panels on your job.
The builder of my daughter’s home had only dealt with prefabricated panels on one previous job when he was a carpenter. After setting all of the exterior and interior walls that make up my daughter’s two-story home in just a few days he told me that he’ll never again stick build a house again. He was astonished at the amount of time the panels saved him.
Odds are any factory that makes these panels will gladly do smaller jobs for garages or room additions. You can find out for yourself by visiting a new website I discovered back in the fall: BestWayToFrame.com.
Firewood Storage
QUESTION #2: Mr. Tim, I just retired and I’d like to build a small structure to store firewood. My skills are limited as are my tools. What does success look like to you considering I’m going to do the work? Don’t sugarcoat it. If you feel I should hire a pro, just say so. Donna K., Boulder, CO
You might have the ambition that Donna’s exuding. I feel attitude is ninety percent, maybe more, of accomplishing anything including building a simple open shed for firewood.
There are countless designs for these firewood storage shelters out on the Internet. I’d pick one that you like and just replicate it. It’s important to realize that you look at a project like this as a few components. This reduces the mental challenge.
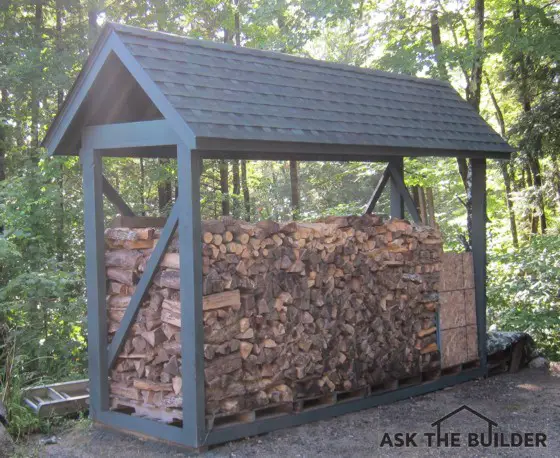
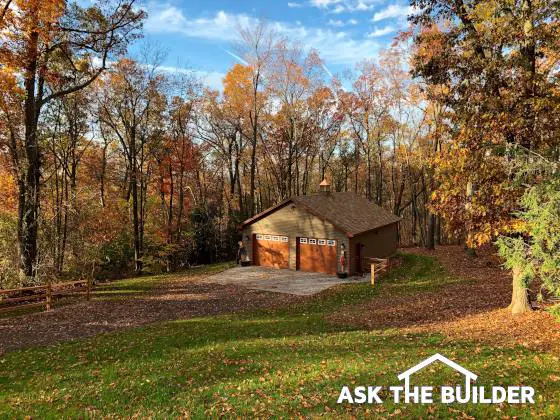
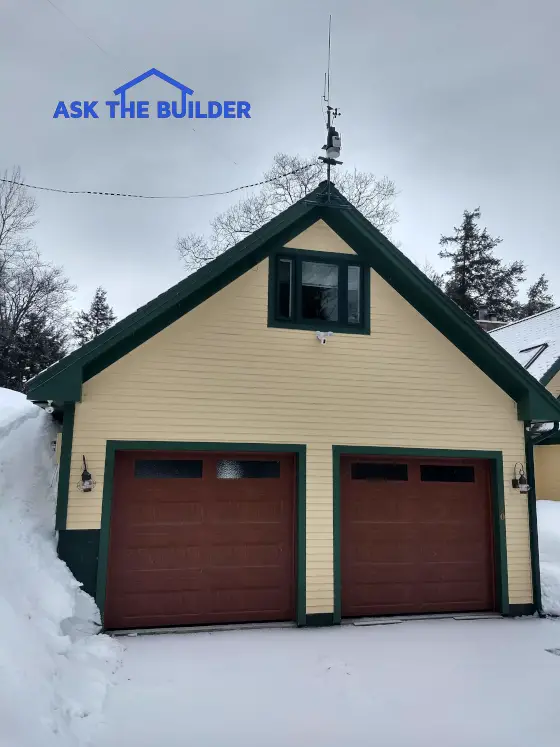
This firewood storage shelter matches the house perfectly. It was constructed in just a couple of days. Copyright 2019 Tim Carter
The simplest shelter might be a shed that’s 4 feet wide by 8 feet long. You can build the floor frame from treated lumber 2x6s that’s covered by a single sheet of treated plywood.
The walls can be built using standard 2x4s. There are countless videos on YouTube showing you how to build a simple wall. Be sure to watch a video that shows how to install a diagonal brace to keep the wall square. You don’t want to cover the sides of the wall completely with siding as you want air to move through the wood to help dry it.
The roof may be the biggest challenge, but once again, there are lots of online videos that will help you through this final challenge. You can get fancy with a gable roof or you can go with a simple low-slope roof that just slopes front to back. The key thing is to just keep the wood dry and it doesn’t take lots of ingenuity to accomplish this.
I can’t wait to see a photo of Donna’s finished wood shelter that she made with her own two hands!
Column 1291