Blasting Ledge | See that mound in the center of the photo? That's a ledge or solid bedrock. There's solid bedrock just under the soil. Please watch this amusing short video with Cary Grant when he discovers ledge on his new-home site. Copyright 2018 Tim Carter
Blasting Ledge - Not DIY - No Way - No How
Blasting ledge was done years ago with hand-held star-bit drills and sledgehammers. Two men would drill down about 18 inches, pack the hole with black powder, light a fuse, and run for their lives. Black powder was very dangerous to use and many workers died or were maimed.
Alfred Nobel changed all this in 1867 with the introduction of the new safer dynamite. This invention made him a fabulously wealthy man. He used much of this wealth to foster scientific work creating the world-famous Nobel prizes.
Is Blasting Ledge Safe?
Yes, blasting ledge is safe when the blaster uses modern safer explosives like TNT and dynamite.
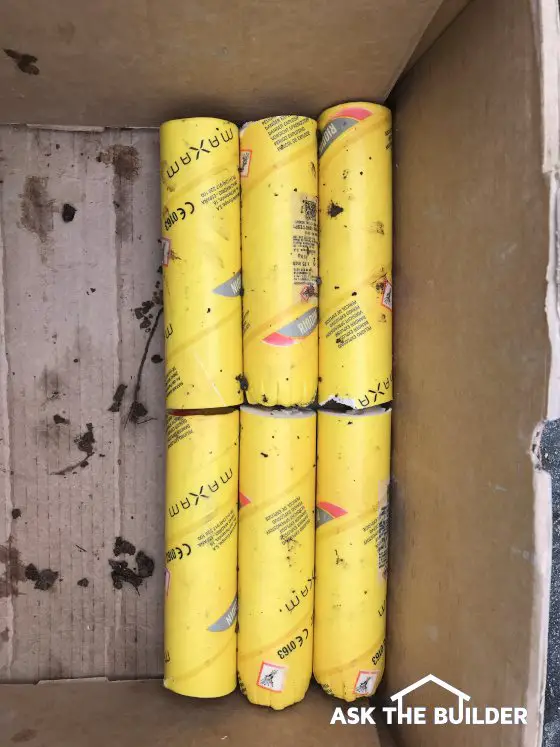
These yellow tubes are the dynamite or TNT that will shatter rock and blow your body to bits. It requires the utmost respect. Copyright 2018 Tim Carter
How Do You Blast Ledge?
The first step in blasting ledge is to drill holes into the rock. Modern machinery can do this in just minutes. The spacing of the holes depends on the hardness of the rock that's being removed. The common spacing for holes in granite is about 6 to 8 feet on center.
How Deep are the Holes Drilled?
The normal depth for the drilled holes ranges from 6 to 8 feet. The holes are about 2 inches in diameter.
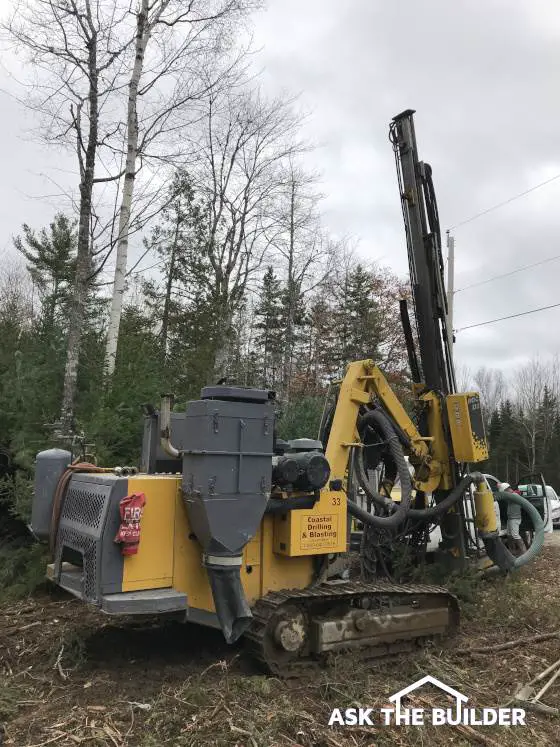
This is a machine that drills holes in rock like you'd drill a hole in soft wood. The machine can drill faster than you can ever imagine. Copyright 2018 Tim Carter
Is Anything Packed into the Holes on Top of the Dynamite?
Yes, small crushed gravel about the size of green peas or mid-sized green grapes is put into the holes on top of each dynamite charge. This material forces the energy of the blast sideways inside the hole. Without the gravel in the hole, most of the energy would shoot up out of the drilled hole into the air.
This is the crushed gravel that's used to fill the drilled holes after the dynamite is placed at the bottom of the hole.
What Prevents Rocks From Flying Through the Air?
Once the TNT or dynamite is packed into the holes, giant mats made with used rubber tires and steel mesh are placed over the rock. These absorb the impact of the exploding rocks so they don't go flying through the neighborhood.