Today is Veterans Day in the USA. It marks the anniversary of the signing of the armistice that ended the Word War I hostilities between Germany and the Allies.
Living veterans, as well as veterans who have passed away after being discharged from active military duty, are also honored on this day.
Today is not to be confused with Memorial Day which happens at the end of May each year. Memorial Day honors those who gave the ultimate sacrifice while in active military service.
If you're reading this and are active or retired military, my family and I THANK YOU for your service to our great nation. We deeply appreciate you putting yourself in harms way so we can live in the greatest nation on Earth.
I wish I could visit my Dad's grave today, but he's just about 1,000 miles away in Spring Grove Cemetery in Cincinnati, OH.
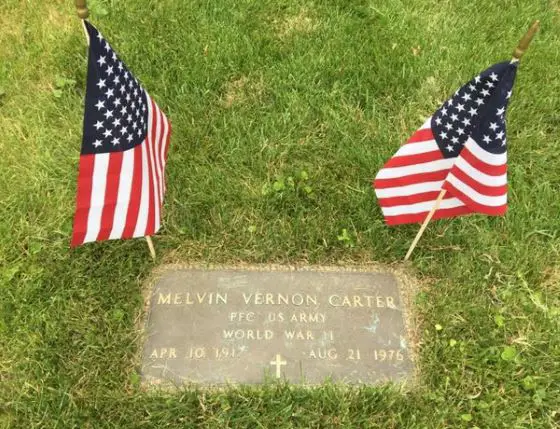
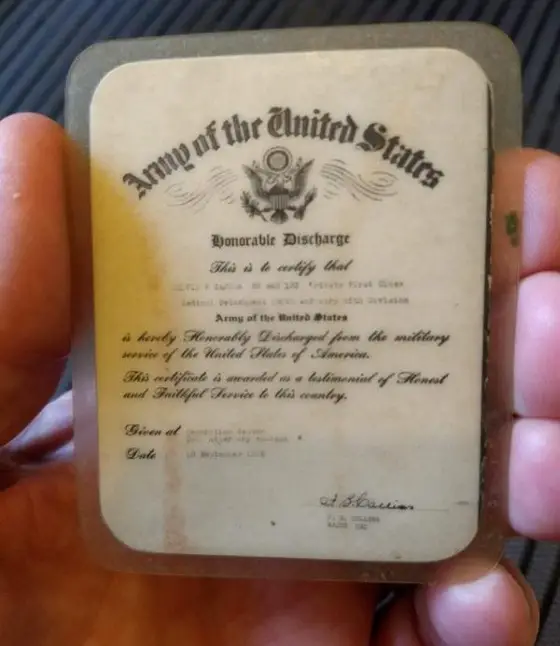
My Dad served in General Bradley's Second Corps or Army as it's sometimes called. My Dad was a medic in Company A, 6th Battalion. He was shipped to North Africa and then was part of the invasion of Italy.
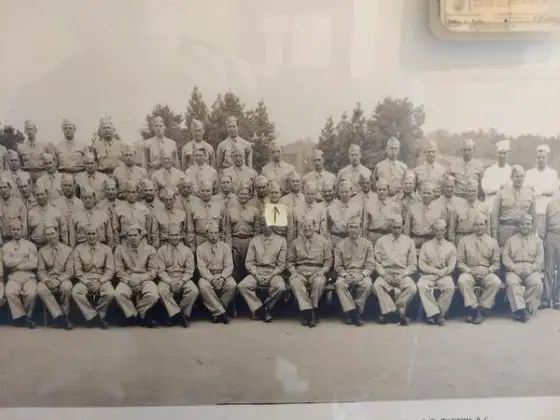
In the late winter of 1944, my dad was captured by the Germans and shipped to a stalag in Poland to grow potatoes for the German Army.
He was a POW for 13 months and was liberated from the POW camp by a Russian tank commander. My Dad told the story about how he woke up one morning and the POW camp was strangely quiet. The guards were gone.
Then soon after he and all the other prisoners heard a rumbling and a tank came and crashed through the prison camp gate. Dad said he and all the prisoners were afraid.
The next thing that happened is the hatch of the turret opened and a Russian peered out over all the prisoners. He then went back into the tank and came back out but with a 5-gallon tin fuel container.
It wasn't filled with diesel fuel. It had vodka in it. The Russians, my Dad, and all the POW's proceeded to have a little party.
But that's perhaps the high point of the story. My Dad came home a broken man. Back then they didn't call it PTSD. He was severely depressed and by the late 1950's he couldn't hold down a job.
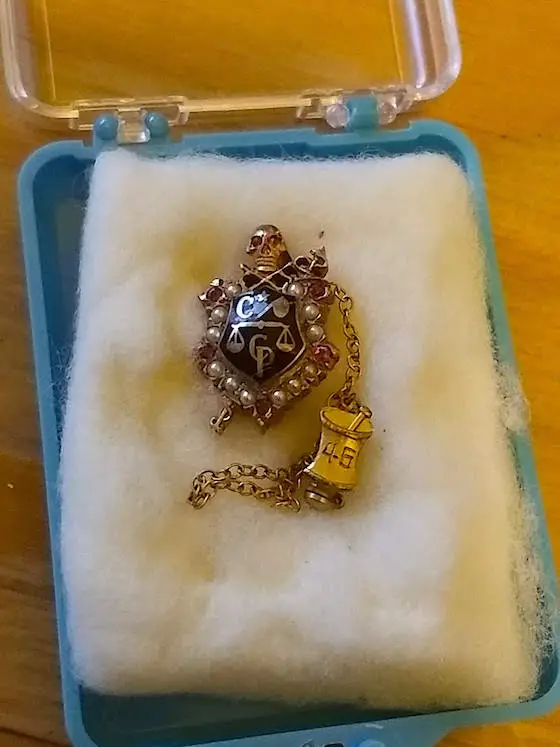
My mom became the breadwinner as a pharmacist, one of the few women pharmacists in the state of Ohio.
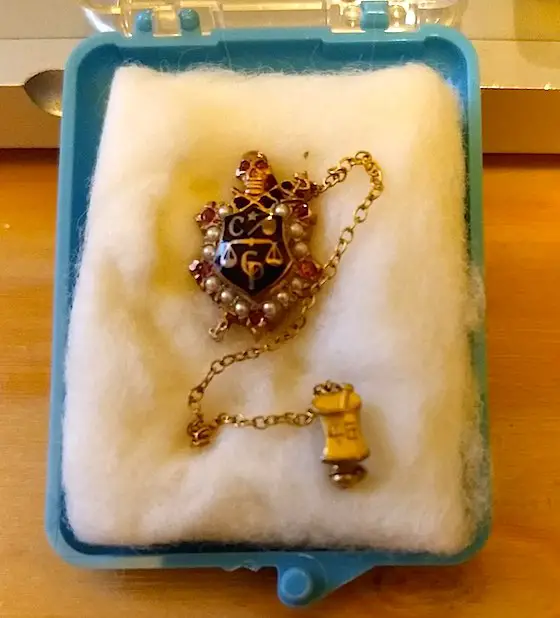
This is my mom's lapel pin. She graduated from pharmacy college in 1946. Copyright 2018 Tim Carter
Back when I was a kid, families didn't talk too much about all this stuff, or if we did, I don't remember.
The point to all this is I have a somewhat unique connection to Veterans Day and a deep appreciation for what you may have gone through if you're a veteran.
I know others suffered far more, but I can tell you my Dad dealt with his demons until the day he died. My mom, my sister, and I also were affected. I know other families have suffered more.
There are millions of stories out there about veterans. Our family is but one.
If you know a veteran, please reach out to her or him today. Thank the individual for their service.
Tim Carter
Founder - www.AsktheBuilder.com
Do It Right, Not Over!