Sandpaper Boot Camp

sheets of sandpaper

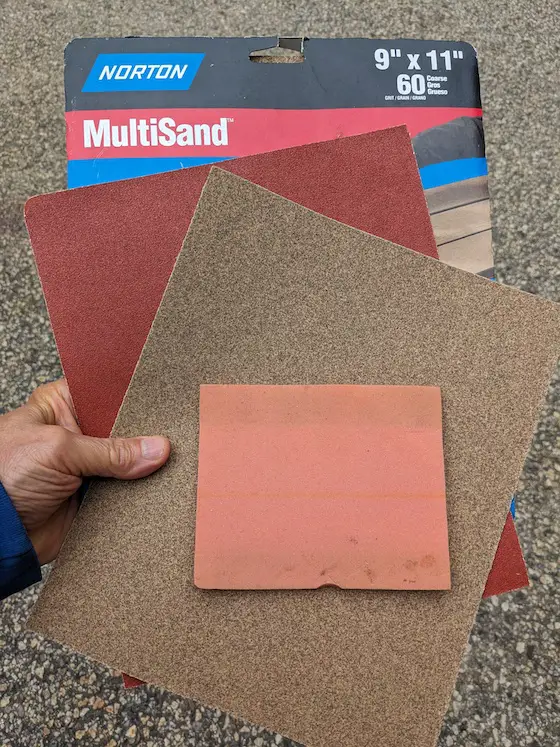
These are just a few samples of the many types of sandpaper in my shop. The small one is a flexible pad made to sand three-dimensional shapes. Copyright 2023 Tim Carter

How Much Do You Know About Sandpaper?

I’m thankful to have had enough trips around the sun that my adult children are finally calling me asking for advice about their projects. I hope you’re blessed to experience this transfer of knowledge. First things first, it’s a real treat to help them avoid mistakes followed closely by the warm feeling I get knowing they reached out to me rather than watch some unknown person on YouTube.

Just days ago my youngest daughter called me from 3,000 miles away. She had just purchased a used chest of drawers she wanted to refinish. She didn’t like the color one bit and was going to sand off the old finish.

“Sweetheart, sanding off an old finish is fine for wood floors where you can use a big drum sander. It’s really hard to do this with furniture. I suggest you use a liquid stripper to remove the finish and some of the stain. Once the wood is dry, then you can start to sand.” She hadn’t even considered stripping off the clear finish with a liquid. I suspect she had never seen it done before. Little did she know I did this fifty years ago with her mother as we used to collect and refinish antiques before we were married.

A second call came a day later asking about what sandpaper to use. My daughter had gone to a big box store and was overwhelmed by the selection of sandpapers. Perhaps this has happened to you. It can be daunting.

Chinese Invented Sandpaper

The origin of sandpaper has been attributed to Chinese craftsmen. They blended natural gum with crushed seashells and sand and applied this paste to parchment paper. While crude, it was an ingenious tool used to make wood quite smooth.

Seashells are simply calcium carbonate which has a hardness of only three on the Mohs hardness scale. While this is low, it’s hard enough to smooth just about any wood those ancient craftsmen were working with. My guess is they discovered that certain types of sand had a hardness much more than the seashells. There’s a good chance they found that quartz sand, with a hardness of seven, did a fantastic job of transforming rough wood surfaces to those that rivaled glazed pottery.

Natural and Man-Made Abrasives

The modern sandpaper you see at hardware and paint stores is made from a combination of natural and man-made abrasives. Red garnet is a natural mineral and a favorite of woodworkers. The tiny garnet particles get rounded off as you use the paper. As they dull, the garnet works to burnish the wood producing a highly polished surface. Red garnet sandpaper has a distinctive reddish-orange color.

Should you want to polish metal, you’d do well to work with emery cloth. The finer grades can polish most metals to a mirror-like finish.

Aluminum Oxide Self Sharpens

In my opinion, the workhorse abrasive is aluminum oxide. Sandpapers made using this material have a light or medium-brown color. They’re extremely common and work well to sand most materials around your home including wood, plastic, drywall, and hardened paint.

Aluminum oxide is the opposite of garnet. As you use aluminum oxide sandpaper, tiny fragments break off creating a new sharpened edge. Think of it as self-sharpening. It’s remarkable when you stop and think about it.

The grit numbers refer to the size of the particles that are doing the sanding. The lower the number the coarser the grit. A sandpaper that is 60 grit might have particles on it the size of table sugar. A 220-grit paper might have pieces that match finely ground pepper. Look at an individual piece of sandpaper and you’ll notice the particles are just about all the same size. This is by design.

The abrasive particles are processed through a sifting machine much like gravel is sorted and sized. When it comes to sandpaper the grit number refers to the number of particles that fit through a certain size screen that measures about 1 inch square.

Ultra-Fine Grit Polishes Wood

Some grit is so fine it resembles baking flour. Fine abrasives are used to create high polishes. The coarse grit is used to remove lots of material quickly. When speaking with my daughter, I suggested she try 120-grit paper first and see if it was too aggressive. My thoughts were the chest of drawers was made from pine. It’s a very soft wood and a coarser sandpaper can scratch it with ease.

I told her once she tried the 120 grit then switch to 220. That grit is considered very fine. That said, my final advice was, “Once you finish with the 220, try a piece of 320-grit red garnet paper. You may discover it makes the pine as smooth as a piece of glass.”

If you’re applying a clear finish to wood, it’s vital you get the wood as smooth as possible. If painting wood, you don’t have to invest as much work as the thicker paint film can fill and bridge fine scratches created by sandpaper. In fact, small scratches can actually help the paint hold onto the wood better.

As with most home improvement projects, you have to know what to do and when.

Column 1520

Why is it Hot in My House

sun filtering tarp on deck blocks 70 percent of the sun

Why is it Hot? - This special inexpensive tarp controls the amount of sunlight that can pass through it. It may look ugly but it keeps the room inside the house 15 degrees cooler. It’s just one way to combat heat inside a home. CLICK HERE to see many of these tarps. Copyright 2023 Tim Carter

Why is it Hot in My House? There are Many Reasons

Are you hot and bothered? It’s been a very hot summer so far with record temperatures in many states. Here where I live in central New Hampshire, we’ve had a long spell of high humidity mixed with higher-than-normal temperatures. Normally you have to sleep with a blanket in the summer with your windows open. Not so this summer!

Fans Cool You Well

There are quite a few things you can do to stay cool in the summer not the least of which is just use any number of fans to blow air across your body. If you remember anything at all from your high school physics class you know that evaporation is a cooling process.

Evaporation is a Cooling Process

When you perspire, the sweat on your skin can pull heat from your body as it evaporates. The issue is in high-humidity situations the evaporation slows down because the air around you is just about filled up with all the moisture it can take. This is why it can be stifling hot and uncomfortable just before a rain shower as the relative humidity approaches 100 percent and no matter how much you sweat, it’s going to have a difficult time leaving your skin.

Insulation Can Keep Your House Hotter!

Let’s discuss insulation. You may fall victim to a salesman who says you need to install much more insulation in your attic to stay cool. Realize that insulation does but one thing - it SLOWS the transfer of heat. That’s all it does. Nothing more.

This means if the inside of your home gets hot then the more insulation you have in the walls and attic, the longer your rooms will stay hot. Insulation does a great job of helping you stay cool if you have air conditioning as the insulation slows the heat from getting to the cooler room temperatures. This is a basic law of thermodynamics - heat moves to where it’s colder.

Solar Attic Fans are a Joke

Did you fall for the sales pitch about solar attic fans? Do you realize they really don’t do much at all to lower your attic temperature? An attic can easily reach temperatures that approach 150F. I have infrared photos of my own roof with the surface temperature reaching close to 160F.

Solar Powered Attic Fan

This is a solar panel supplying free electricity to the attic fan under the silver dome on the rear roof. The fan blades spin, but they don't lower the attic temperature at all. Copyright 2023 Tim Carter

When the shingles get that hot, they transfer that heat to all the lumber that is used to create your roof. All this lumber radiates the heat toward your rooms just like the heat you feel from glowing embers around a campfire. All the tiny solar fan can do is move a minimal amount of air to try to cool down the lumber. The lumber stays hot for hours after the sun goes down and the fan stops spinning.

Don't Buy an Oversized AC Unit

Just yesterday I received an email from a newsletter subscriber of mine. He shared a tale about how he failed to listen to my advice about the size of air conditioners. He needed a new central air conditioner and the correct size was sold out. He decided to get one the next size up.

Never do this. When you oversize an air conditioner it will short cycle. It will blast lots of cold air into your home and tell the thermostat to shut off. Air conditioners need to operate for 10 or 15 minutes at a time to remove the humidity in the air. Doing this is what keeps you comfortable. Short cycling creates a cold clammy environment.

Paddle Fans are Fantastic

Don’t underestimate the ability of simple paddle fans, box fans, and rotating multi-speed fans to do a fantastic job of keeping you cool. They do a magnificent job. You know this to be true because when Mother Nature does it for free with a cooling breeze when you sit outside, you often say out loud how wonderful the air is moving across your body.

Window Films Work Well

You can also purchase clear window films that do a superb job of blocking direct solar radiation into your home. Look for films that also block ultraviolet light as this will prevent rugs, upholstery, artwork, photographs, etc. from fading.

Sun-Blocking Tarps

Just two months ago my wife purchased a very inexpensive tarp that has slots in it. It blocks 70 percent of the sunlight that hits it. We hung it from below a gutter across our deck to protect some indoor plants from the blistering sun. The plants had to be moved to the deck while the hardwood floors were refinished.

The first thing we noticed was the room shaded by the tarp was about 15 degrees cooler than the room next to it. Sunlight used to pour into a large French door that was now shaded by the tarp.

Just engage your God-given critical-thinking skills and you’ll be amazed at how simple it is to beat the heat. And if you get frustrated, head off to a local clear-water lake and jump in!

Column 1519

New Home Budget

new home construction house wrapped

New Home Budget | This new home should have been finished a month ago. If things continue to creep along, my guess is the owners will move in about ten months from now. Copyright 2023 Tim Carter

How to Create a Realistic New Home Building Budget

Are you thinking of building a new home or doing a major remodeling project? If so, I’ve got some sobering news for you. After reading this column you may understand why the moniker my three kids coined for me years ago is spot on. Around the Carter house, I’m known as the Dream Crusher.

First things first. Your new home or remodeling job will happen. The issue is how long will it take for your dreams to come true and at what cost? I’m all about setting realistic goals and managing expectations. I’m going to do my best to ensure you’re not about to embark on a voyage that will lead to financial disaster or have you dashed upon hidden shoals of contractors and subcontractors who suffer from time blindness.

I receive emails each week via my www.AsktheBuilder.com website detailing all sorts of horror stories about building projects that have run off the rails. The trend is increasing, not decreasing. My own daughter just a few years ago was a victim. She built a new house with excellent plans on Mt. Desert Island in Downeast Maine.

My Daughter's New Home

It was a simple rectangular house with an attached garage. In my prime, I would have completed the job on time in about seven months. There would have been no cost overruns. From the time the lot was cleared until the day she moved in, twenty-two months had passed. The project came in $100,000 over budget.

A neighbor of mine just two houses away started a major remodeling job ten months ago. The roof of their garage was demolished to create a second-story one-bedroom apartment. A small addition was added on the first floor to create a bigger kitchen.

I had done quite a few similar jobs just like this years ago. Had I taken longer than four months to complete each one, I’d have gone bankrupt. The dumpster is still in her driveway, a sub-contractor’s trailer is still parked on my street, and I estimate the job will not be finished for months. I can’t tell you how much the job is over budget but my guess is inflation alone is creating a 20 percent overage.

Prevent Financial Stress

Here’s what I would do if I were you. Let’s start with preventing a financial time bomb. It’s mission-critical you are not financially stressed or face the prospect of running out of money sitting with a partially finished project.

How to Create a Realistic Budget

Step one is to create a realistic budget. This requires basic math skills. If you own your own home meet with the top three realtors and discover what your house might sell for. Determine what equity you’ll have after the house would sell. Add this amount to the construction loan you’ve been pre-approved for. This is your not-to-exceed number. Your contract sum with a builder should be approximately 80 percent of this number. This provides for a reasonable amount of dry powder to cover cost overruns.

Step two is to meet with two or three builders. Ask them to show you one or two recently completed houses that are similar to what you want. Have them tell you what the final finished price was. Ask for a set of plans so you can do the math to see what the actual cost per square foot was.

Divide your not-to-exceed number by the square-foot cost average. This tells you how big your new home can be. Will you have enough square footage? Don’t forget to factor in the cost of plans, the purchase price of the land, etc. If after doing this you feel you can move ahead, now is the time to draw plans.

You must have excellent plans and specifications before you go out to bid. All products should be specified on the plans. There should be no allowances. Once you have the green light for the project, purchase as many of the materials and products as you can early in the job. My daughter rented a storage space to store all the cabinets, light and plumbing fixtures, windows, doors, etc. Doing this prevents price increase surprises.

If you’re doing a major remodel, most of the above advice applies to you. To be on the safe side, I’d allow for cost overruns in the 25 to 35-percent range. Who knows what surprises lurk behind your existing walls?

The national labor shortage in many trades is the primary reason jobs are taking longer to complete. This issue is much worse in some cities than others. Add to this the mismanagement of resources by contractors who have never taken a business class in their lives and it’s a recipe for disappointment.

Prepare yourself for delays, countless excuses, and frustration. Think about taking up yoga or deep meditation to help manage any stress you’ll undoubtedly encounter. I wish you the best of luck and realize I do phone construction consulting should you need help.

Column 1518

Clay Paving Brick

clay paving brick mortared to a concrete slab

Clay Paving Brick | You’re looking at spilt clay paving brick I’m installing at my son’s house. These bricks will never change color and can last hundreds of years. They are not inferior like brick pavers made from concrete. Look at the photos here of how concrete pavers change color and erode. Copyright 2023 Tim Carter

Clay Paving Brick are the Best - Forget About Concrete Pavers

If you read my column on a regular basis, then you know about two months ago I touched on the perils of using paving brick made from concrete. That column talked about how those bricks fade in color over time as the thin colored cement paste succumbs to Mother Nature and high-pressure streams of water that rush out of the ends of pressure-washing wands.

I shared at the end of that column a project I’m working on at my son’s new home. Each weekend he and I are bonding while sweating profusely as we install perhaps the best pavers known to man. They’re made from clay and so durable they can be used to construct roadways. The color will never fade, and if one of the bricks gets chipped the color and texture inside the brick are the same as what you see on top. We’re using pavers made from clay and fired in a kiln until they’re as hard as rock.

I’ve used clay paving bricks on the past two homes I occupied in Cincinnati, Ohio. My son learned to walk on the last clay paver patio I built in the rear yard of the stunning Queen Anne Victorian home I built there. Twenty years before that I had installed a similar clay paver patio at the second house my wife and I owned. That patio looks as good today as the day I installed it back in the late 1970s.

clay paving brick patio on top of a concrete slab

It's taken a total of about 40 man hours, me laying the brick and my son mixing mortar, to get this far. All the bricks will be installed in just two more days of work. Then it's time to fill the gaps with high-strength grout. Copyright 2023 Tim Carter

I was introduced to clay paving brick by my future mother-in-law. When I was dating my wife, I noticed one evening two pallets of used salvage pavers sitting in the driveway. I asked about them and soon discovered they were destined to form a wonderful patio in the rear of her house under two magnificent shade trees.

One thing led to another and I volunteered to install the brick under the guidance of my future father-in-law who was far too busy with his medical occupation. Among other things, he taught me how to create a baseline to ensure the brick would be installed in a perfectly straight line.

You should be attracted to clay because it’s an abundant natural resource. Brick technology dates back thousands of years. It’s a time-tested building material. Thousands of miles of roadways have been paved with hard-fired clay brick. Just weeks ago one of my newsletter subscribers sent me one of the thick historic dark-brown clay pavers used to build the famous Brick Road in Florida. That historic brick is now sitting on a shelf in my office. Visit Athens, Ohio, and go downtown. You’ll see hundreds of paving brick that are still in use today in their downtown district.

clay paving brick old brick road florida

This is a real clay paving brick made by the Southern Clay Brick Company. It's 8 and 5/8ths inches long, 4 inches wide, and 3 inches thick. It was salvaged from the Old Brick Road in central Florida. Copyright 2023 Tim Carter

Instead of using the thick traditional clay pavers, I’m using a split paver that measures just under 4 inches wide by just under 8 inches long and is only a little over an inch thick. You can set it in a sand/cement base, but I’m going the extra mile and mortar each brick on top of a steel-reinforced concrete pad. Once complete, you could drive a truck onto my son’s patio and it would not crack.

The remarkable thing about this system is the ease of installation. You might think it’s not DIY friendly. In fact, it’s the opposite. The only really hard thing about the job in my opinion is getting the concrete slab poured correctly.

It’s vital the slab be in the same plane and flat. This means there can’t be any humps or deep furrows in the concrete. Any decent concrete mason can screed the concrete to achieve this goal. I poured my son’s concrete 5 inches thick and put the 1/2-inch steel rebars two feet on center in both directions. The steel looked like a piece of giant graph paper before it was entombed in the wet concrete.

Over the years I’ve discovered the best way to install these bricks is to install the border brick first. This is especially true if your patio or sidewalk is going to have curves. A square or rectangular patio is by far the easiest to build as it will require minimal cuts. We have a mix of straight and curved edges at my son’s house but I made sure that the overall size of the patio will have full-sized brick requiring no cuts. It just so happens that three rows of the brick we’re using equals 12 inches. His patio will end up having 45 rows.

The mortar mix is easy to make. I have my son mixing three parts of fine sand with one part of Portland cement. I have him mix just two or three gallons at a time in a wheelbarrow. Just enough water is added to make the mix resemble wet applesauce.

I lay each brick in enough mortar so it oozes up the sides about one-half inch. The rest of the joint is filled at the end of the job once all the brick are in place. I use a special big bag just like bakers use to decorate a cake. However, I don’t use icing! I blend one part very fine sand to one part Portland cement to make my grout.

tim carter laying clay paving brick on concrete

Here I am using my 45-year-old Marshalltown trowel to install one of the thousands of split clay pavers that will create my son's patio. Copyright 2023 Tim Carter

The grout would probably test out in excess of 12,000 pounds per square inch. It wears like iron and will resist freezing weather for decades. I’m in the process of recording several in-depth videos of the installation process.

Column 1517

WaMa Hemp Underwear

wama hemp mens underwear

These are the three pairs of small clothes I got from WaMa. They would have fit perfectly had they sent them to me back in 1967 when I weighed 175 pounds. Copyright 2023 Tim Carter

WaMa Hemp Underwear - It Squeezes You

Three months ago I began to test WaMa Hemp small clothes. It's not the first time I've tested underwear. Several years ago I tested Duluth Trading Buck Naked U-trousers.

I was approached on April 17, 2023 by Rose. She's a public relations person that works for WaMa.

I knew right out of the gate that this might not be a normal encounter. Rose said in her outreach, "*Note: Our sizing may run smaller than most brands so if you are in-between sizes, we recommend you size up."

I warned Rose that my reviews are honest and that I hold nothing back. She sent me a $100 electronic gift card to order whatever I wanted from their website.

What's that old saying? Be careful what you wish for.

Cloaked Intentions

I did as Rose suggested. But then found out that her advice was not accurate. I should have ordered two sizes up. WaMa Hemp underwear unwashed is tight! If you want all your intimate body parts to be squeezed like you'd hold onto a rope dangling from a skyscraper, then you want WaMa Hemp underwear.

Within a day of my responding to her review request, Rose asked if my review would be posted within 30 days and she ended with, "Also, can I confirm if the backlink will be a do-follow link? "

My my my... What WaMa really wanted was a sip of my SEO tier-one nectar. Not so fast, Rose and do-follow links are valuable. Much more valuable than three pairs of underwear that cost Rose's company about $2 each to manufacture.

As Captain Hook said in the remake of the movie Peter Pan, "Bad form, Rose."

The Squeaky Wheel Gets the Grease

Rose reached out to me again on May 2, 2023. I believe I had just received the three pairs of small clothes a week before. She said, "Hope you are doing well. Just wanted to follow up with you to see when you'd be able to post your review. I'll be sure to share it around on our social media once it is published."

I responded,

"I'm still testing. So far the results are mixed. Please keep in mind I'm truthful to a fault for all the obvious reasons.

I was disappointed on the day I ordered as the colors and styles I wanted were unavailable.

I developed a slight rash the first day I wore one pair. I didn't get the rash with the second pair.

I washed one pair and let them air dry. I never put anything with elastic in the dryer. There was some shrinkage.

I would say the garments run 1.5 sizes SMALL and am mystified how that can happen with all the other brands being out there and they have true sizing.

Rhetorical question: Why is it not possible to copy the exact measurements of the competition and have true sizing?"

wama hemp underwear label

Here's the label from the pair that my Mom would have LOVED to see me wear. I ordered these in her honor as purple was her favorite color. You can see the garment is made in China. China has a robust reputation of stealing technology and copying other things. One would think they'd have a good grasp of how to copy the sizing of clothes. But what do I know? I used to eat lunch for 20+ years sitting on upside-down drywall mud buckets. Copyright 2023 Tim Carter

Testing Halted

I tried wearing the purple and brown small clothes twice but they were so tight and uncomfortable that I gave up. I've consigned the WaMa small clothes to my rag box.

If you order some, go at least two sizes up. Good luck.

I'm sure you've noticed that there's no link to WaMa. Paid links are NOT organic. Paid links litter the Internet and do visitors no favors. That's why I don't do them.

LVP Flooring Installation Story

lvp flooring being installed

LVP Flooring Installation | This is luxury vinyl plank flooring being installed in my own home. It’s very DIY friendly so long as you can read and follow instructions. Copyright 2023 Tim Carter

LVP Flooring Installation - It's a Remarkable DIY Product

Author's WARNING: Read Judy's email to me below about where NOT to install LVP flooring.

Several months ago a pesky mouse caused a small water leak in a PEX water line that supplied water to a second-floor bathroom in my home. A new hump in our master bedroom hardwood floor foreshadowed what I’d discover hours later at dawn.

By then, the water had leaked to a basement bedroom as well. The water ruined the hardwood floor in the first-floor master bedroom and warped a plywood-based tongue and groove floor in the basement my lovely wife uses as a plant conservatory. Suffice it to say both floors had to be replaced.

My wife asked if there was a waterproof floor that looked like real wood that could be used in the basement room. She didn’t want to worry about spilling water as she watered the countless orchids she grows in the room. I told her that we should give luxury vinyl plank (LVP) a serious look. Technology has advanced to such a degree as the average person can’t tell the difference between real wood and high-quality LVP that mimics wood.

lvp flooring over underlayment

This is the LVP I installed. It was called Honeycomb Oak. The average person would never know it's NOT real wood. Copyright 2023 Tim Carter

Vinyl flooring is now approaching its 100th anniversary. I clearly remember helping my Dad install 12-inch squares of vinyl tile in what used to be the garage of my childhood home in 1961. The 1960s time period was the first golden age of vinyl tile as countless millions of square feet of vinyl composition tile (VCT) were installed in houses and businesses all across the world. I believe we’ve entered the second golden period of vinyl flooring with the dazzling LVP flooring choices.

If you start to research LVP, you’ll quickly discover it’s nothing like the VCT tiles of old. Those tiles were solid in color all the way through the product. Modern LVP is more like a layer cake. There are several layers of materials that create the actual plank or tile.

The product my bride and I decided on was a high-quality one that has a 20-mil-thick wear layer. It’s a medium-brown color that is extremely close to the red oak hardwood floors we had in the last home I built for my family.

The wear layer is the thin top surface you walk on. It’s not uncommon for them to range anywhere from 6 to 40 mils. Thicker wear layers are better. As with anything, you can keep the LVP looking like new by keeping it clean and free from grit.

Installing LVP flooring is extremely simple. The one I chose is a floating floor. This means there’s no glue or adhesive required. The planks just lay on the floor and their combined weight and the fact they all interlock prevent them from moving when walked on.

To have a successful long-term installation it’s imperative you read the installation instructions for the LVP you choose to use. I beg you to do this even if you hire a professional to do the job. You want to interview the pro before you sign a contract making sure he will do everything right.

There are several things that must be done when installing LVP. The surface the LVP will lay on needs to be flat. Flat doesn’t mean level. Flat means that the surface is all in the same plane. You can’t have shallow areas or humps. These defects can make it impossible for the pieces to interlock. Hollow spots under the LVP can cause the tongues or grooves to break over time from flexing as you walk on the floor.

concrete floor leveling compound lvp repair

The dark gray area is a cement-based floor leveling compound spread on either side of a crack in the concrete slab. Copyright 2023 Tim Carter ALL RIGHTS RESERVED

You can easily mix and spread floor-leveling compounds to make a floor flat. I used a cement-based product to cure several trouble spots. The product, once mixed with water, resembles cake icing. It’s easy to spread to a feather edge using a drywall broadknife tool.

LVP has a huge expansion/contraction coefficient. This means in gets bigger as it gets warm or hot. As such, you must create a gap around all the edges. Your instructions will tell you how much depending on the size of the room. Do NOT skip this step. If you fail to install the gap, the LVP flooring will buckle when it gets hot.

Your instructions may call for an underlayment. If so, install it. Be sure the subfloor is free of all debris. Vacuum the existing surface to ensure there’s no grit or chips under the new underlayment.

lvp underlayment

This is the fan-fold foam underlayment I installed. The yellow coating is a vapor barrier. Copyright 2023 Tim Carter

With no experience whatsoever installing LVP, I was able to install the planks in the room and a closet in less than six hours with no help. Simple cuts were made with a sharp razor knife.You score the LVP several times just like drywall. and then snap it. I used a simple rubber mallet to pound the side joints so they interlocked.

My wife was astounded at how the new floor looks like real wood. I’m also impressed. Be sure to look at all the different brands to find the most realistic LVP should you want to fool your friends and neighbors!


Here's an email I received from Judy in Redmond, Washington:

"I installed LVP in my laundry room per directions with the gap all along the walls. I regret it now since my front loader washing machine gyrated opening a gap of nearly 1/4".  Aren't these things (LVP) basically plastic and the instructions recycled from floating wood floors? The subfloor is a concrete basement slab."

I replied that vibrating washing machines can absolutely cause LVP panels to UNLOCK. You'd do well to NOT install LVP in your laundry room.

Column 1516

Penetrating Deck Sealer

peeling outdoor wood deck sealer

Best Penetrating Deck Sealer | Just three years ago this cedar decking looked like an exquisite piece of fine furniture. It had just been sealed with a top-quality outdoor sealer. Look at how it’s peeled. Copyright 2023 Tim Carter

Where is the Best Penetrating Deck Sealer?

Do you have a wood deck? How much time do you invest in cleaning and sealing it? How many gallons, currently priced around $55.00 per gallon, of high-quality sealer do you use to make your deck look fantastic? I pretty much know all the answers because I’ve dealt with cleaning and sealing outdoor decks. fences, and other wood for decades.

Deep experience is often coupled with cynicism. I’m acutely susceptible to this because it’s my job to think analytically about building products and tools. I feel a deep responsibility to find the best products and then share that information with you. When it comes to deck and outdoor wood sealers, I’m not certain there is a great product currently on the market.

In the three decades I’ve penned this column I’ve written about all sorts of products telling all the truths that the manufacturers conveniently leave out. I’ve been a master plumber since 1981 and when I saw the big push about the wonders of tankless water heaters I shared that in certain cases you’d never save money with them. Your energy bills would go up because you’d have an endless supply of hot water. I shared that you have to amortize the much higher installation cost. This meant it would take years to break even.

If my claims were wrong, I would have heard instantly from the water heater manufacturers. They would have demanded a retraction or correction column. I never heard a word. The exact same thing happened less than ten years ago when I exposed how asphalt shingles were being pre-aged. This means they don’t last as long as they should on your roof. Did the shingle manufacturers reach out crying foul about all the facts in my Roofing Ripoff book? The answer is no. That means my claims were correct.

roofing ripoff cover

Now let’s see what the deck sealer manufacturers are going to say. Less than thirty years ago deck sealers used to be true stains. They would soak into the wood and not leave a film on the surface. I distinctly remember testing one that use synthetic resin instead of natural oils. Natural oils like tung, linseed, and others are delicious food for mildew and algae. Not so synthetic resins.

That magic sealer penetrated into the wood and would look great for about three years. All you had to do to reseal the deck was to wash it with soap and water or an oxygen bleach solution. You’d then apply a fresh coat. The product never peeled. Back all those years ago many deck sealers were true penetrating stains.

But things started to change in the last two decades. Just about every deck sealer I’ve tested has peeled. In other words, the sealers are more like paint and varnish rather than like a wood stain that soaks into the wood.

The issue is when the film-forming deck sealer fails, it’s a catastrophic failure. Some of the sealer peels and some doesn’t. If you just clean the deck and reseal it not removing the unpeeled sealer and taking the deck to bare wood, you often get an uneven finish that appears blotchy.

To achieve great results when it’s time to reseal your outdoor wood, you have to strip off the old finish or sand it off. That is mind-numbing work, to put it mildly. This fact begs the question: Why would the manufacturers create film-forming products that cause you and millions of others so much agony? Is it to sell more sealer faster?

Realize that when I start to ask penetrating questions about product failures of any type, I often get the silent treatment from the public relations (PR) people who work for the manufacturers. Having done expert witness work for nearly thirty years I believe I know why. The attorneys working for the manufacturers don’t want information out in the public domain that might hurt the manufacturer in a future private or class-action lawsuit. This just happened to me when I started asking tough questions about lithium-ion batteries. No PR person would return my calls or emails.

You and I both have to battle unethical or misleading information on product labels. The most recent deck sealer I used, Cabot Australian Timber Oil, showed great promise when I applied it three years ago to my new cedar dock panels. The label said it was a penetrating finish. I thought for sure it would be like the sealer of old that was truly a penetrating stain.

It turns out it was a film former. Technically I’m sure an expert on the witness stand would or could say that some of the product did penetrate into the top layer of wood fibers. But I feel half-truths are whole lies. The manufacturer of the product I bought could have also added a phrase, “…and once dry a protective surface film stops water from entering the wood.”

Had that description been on the label, I would have instinctively known it was a film former destined to peel. All of the wood leading to my boat dock I treated with this product is looking horrible and if I want it to look fantastic, it’s going to be a huge project to get rid of the old inferior product.

What are your options? Well, you can bite the bullet if you intend to live in your home for many years. You can get a top-quality composite deck material that requires just a simple cleaning each spring to get off any dirt from winter storms. I did that with all my decks and now I’m contemplating doing it with my boat dock. Wish me luck!

Column 1515

Irish Setter Crosby 6 Inch Boot

Irish Setter Crosby 6-Inch Boot #83602 - Style, Comfort & Durable

I had the opportunity to test a pair of Irish Setter Crosby 6-inch boots. Thank you, Red Wing Shoes for sending them!

Irish Setter is part of the Red Wing Shoes brand. Early in my construction career, I bought only Red Wing boots and shoes.

I was not disappointed at all with the Crosby boots.

They were comfortable and offered great support. My weak ankles need all the support I can get!

Here are the primary features:

  • waterproof
  • non-metallic toe
  • electrical shock resistance (ESR)
  • puncture resistant

Check out these photos. As you know, each one is worth at least 1,000 words:

irish setter crosby 6 inch boot

This is a great-looking boot. It comes with the Red Wing legacy. What more could you want?

irish setter crosby 6 inch boot

The black patches add great contrast and the orange stitching really finishes off the look.

irish setter crosby 6 inch boot

Decades ago boots weren't waterproof. Now they are. Your feet now stay dry all through the workday.

irish setter crosby 6 inch boot

When you see these Crosby's coming your way, step aside!

irish setter crosby 6 inch boot

This sole pattern provides amazing traction and slip resistance.

Old Frigidaire Commercial

Old Frigidaire TV Commercial

Advance to 2:55 to see how we've gone BACKWARDS with respect to refrigerators.

A spreadable butter compartment!!!!! This means that part of the box was a little warmer!!!

Check out the removable fruits and vegetables fold-down tray!!!!