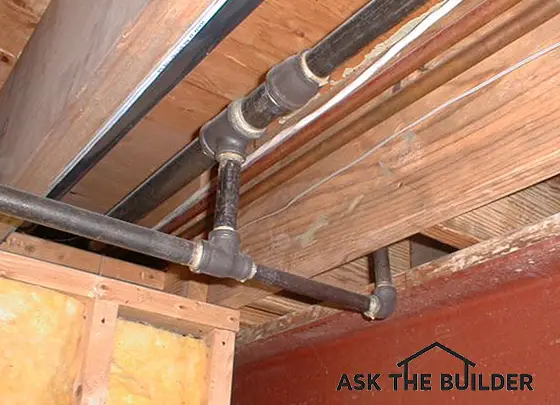
Do your own DIY install of a Linear French Drain with Tim Carter's time-tested methods and materials! CLICK IMAGE TO ORDER NOW!
Simple Trench Drain TIPS
- Water travels downslope sideways through soil
- Watch french drain pipe video below!
- 6-inch-wide trench with perforated drain tile
- Fill to top with rounded gravel
- PURCHASE DIY STREAMING VIDEO for Easy Install! CLICK HERE TO BUY
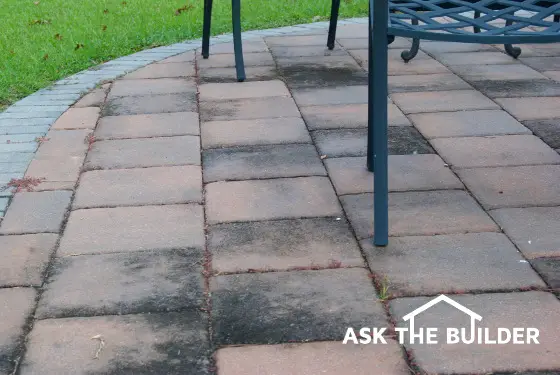
DEAR TIM: Every spring, soggy soil in my yard prohibits me from getting a start on my spring yard chores. During periods of heavy rain, water flows toward my house causing periodic flooding.
em>Can this water be stopped? Is there a way to remove the water and dry out the soil? If so, do you think an average homeowner can complete the project successfully? Betsy, Wyoming, PA
DEAR BETSY: I've got some great news for you. You can prevent basement or crawl space flooding and dry out the soil by installing a simple trench drain.
Your early spring fever problems and flooding concerns can be cured permanently with some simple linear French drains. Some people call these ingenious in-ground gutters trench drains because you dig a trench.
Simple Trench Drain Captures Water
Normal soil makeup consists of small pieces of rock, organic debris, water, and air. In many soils (especially clay soils), the air content is highest in the upper 24 inches. As you go deeper into a soil, the weight of the overlying material compresses the soil and squeezes out the air.
When it rains, water enters the soil and pushes the air to the surface. Gravity then takes over.
CLICK HERE to get FREE & FAST BIDS from local landscapers who can install your linear french drain.
Related Links - Trench & French Drains
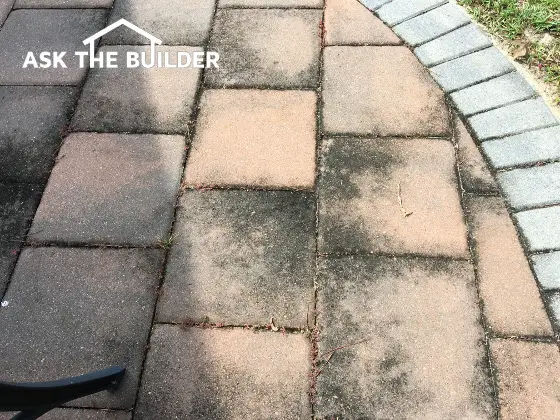
Water Moves Sideways Towards the French Drain Pipe
If your yard slopes and every yard and neighborhood has some slope, the water within the soil actually begins to flow downhill. Level yards suffer as the movement of the water through the soil is minimal.
You can accelerate the movement of water or intercept and re-direct sub-surface water by installing gravel covered perforated drainage pipes in narrow trenches. Water, just like most things, takes the path of least resistance. Subsurface water would much rather travel through gravel and open drain pipes than force its way through the soil.
A Ground Gutter
A linear French drain is simply a "moat", or gutter-in-the-ground, that protects your yard or house from sub-surface or surface water. You construct it by digging a 6-inch wide trench approximately 24 inches deep.
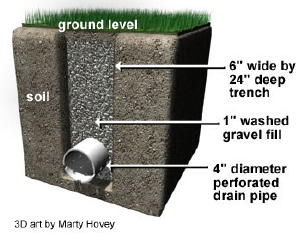
Cross-section of a Linear French Drain including the all-important perforated french drain pipe. Copyright 2017 Tim Carter ALL RIGHTS RESERVED - Do NOT COPY this graphic.
If you want to intercept sub-surface water to dry out your yard, you install the trench along the highest part of your property. Extend the trench to the lowest part of your yard. If your intent is to protect your house from water, you construct the trench approximately 4-6 feet away from the foundation.
In many cases, the trench system is U shaped as it passes around your house.
Create a Lattice
If your yard is nearly level and you wish to drain it, you will probably have to dig a series of trenches and interconnect them. Consider renting a builder's level at a tool rental store to help you determine how deep to dig the trenches
Lots that appear flat often have sufficient slope that allows you to install the pipes so that they will extend to daylight at the lowest portion of your yard. You can use the optical or laser builder's level to tell you the high and low portions of your lot.
The bottom of the trench can be level or it can follow the contour of your yard much like a fence. If you can expose the end of the pipe to daylight at the edge of your property, you will obtain the best drainage results.
French Drain Pipe Video
Watch this video to see water flowing out of a perforated french drain pipe in my own yard! You can't believe how well these work.
CLICK HERE to get FREE & FAST BIDS from local landscapers who can install your linear french drain.
Compact Dirt

Remember, the holes in the perforated pipe point down. If they point up, they get clogged by pieces of gravel. Image (C) Copyright 2017 Tim Carter ALL RIGHTS RESERVED
Once you have the trench completed, compact any loose soil in the bottom of the trench. A 6-foot tall 4x4 works well for this purpose. Wear gloves to avoid getting splinters. Install a 1 or 2-inch layer of washed gravel on top of the compacted soil before you install the perforated piping. Do NOT lay the piping directly on the soil. You want the drainage holes through which water will enter to be up above the soil.
If you choose to use rigid plastic pipe that has two rows of holes along each length, be sure to install it correctly. The holes are supposed to point down, not up towards the sky.
Pipes Holes Down
The reasons the holes should point down are many. Remember that the water table in the soil builds from the bottom to the top of the soil profile. If the holes point down, the water enters the pipe sooner than if the holes pointed up. Also, water droplets or flow is not intelligent. It can't "see" the holes in the pipe and aim for them as it flows down through the gravel. Some water may find its way into a hole pointing up, but most of the water will flow around the pipe and then build up until it can flow into the holes.
Furthermore, holes that point up are perfect targets to get clogged with the rounded gravel. Always keep in mind the pipe is acting as a conduit for the water and the water table in wet periods is already up to the bottom of the holes. If the water table rises higher than the holes, then water squirts vigorously into the holes and is carried away by the pipe just as water charges down a stream bed in nature.
Fill To Top
After the pipe is installed in the trench, cover it with 1 inch or larger washed, rounded gravel. Fill the trench with gravel to within 1 inch of the surface. Place a piece of sod over the gravel to disguise the trench.
If you wish to control surface water that flows over your lot, allow the gravel to extend completely to the surface. If you widen the trench in the upper few inches of the soil, you can disguise the drainage system. Use colored stones, gravel or large stepping stones to create a walkway. To further enhance the illusion, install the trench with gentle curves as it traverses your lot.
CLICK HERE to get FREE & FAST BIDS from local landscapers who can install your linear french drain.
Column 175
Do you wonder if linear French drains really work?
Read an e-mail I received from Pat Jones in Vienna, Virginia:
A year ago last spring, I called your radio show from my home in Vienna, VA. I described my problem with water in my basement. It was very predictable, every time it rained 2" or more in 24 hours I would get water in my basement. Anyway, you advised me that a French drain would solve my problem.
So I rented the ditch witch and got a bunch of friends, following your on-line tips we installed the drain. Your tip about the plywood to have the dirt flow onto was a great labor saver. We did have a lot of trouble with rocks and tree roots stalling the machine but in the end it was a job well done.
Of course our work and your advice caused the drought in the Washington, DC area. We waited almost a year and a half before we got to really test the French drain. However when hurricane Floyd came through and gave us 4" in less than a day and the basement was high and dry I figured it was worth the drought. Now the neighbors are asking my advice, and I point them to your web page.
When we talked you said to let you know how it worked out. It worked out great!!
Thank you very much,
Patrick Jones
The straw layer mentioned in the column above is not necessary if you fill the entire trench with gravel to within one inch of the top. The reason is simple: Silt does not pass sideways through topsoil. The silt that turns stormwater runoff brown is eroded soil particles that are running in overland flow.
Silt particles get trapped and filtered in the upper layers of top soil. The vast amount of water captured by a linear French drain is water traveling sideways through soil. It is generally clear and free of silt. To prove this point, spring water and water taken from underground wells is almost always crystal clear. The silt was left behind at the surface as the water was entering the ground.
Sometimes inventions don't always help to eliminate wet basements. Read my June 27, 2021 Newsletter for one such invention.
Tim Carter
I received this email recently:
Tim,
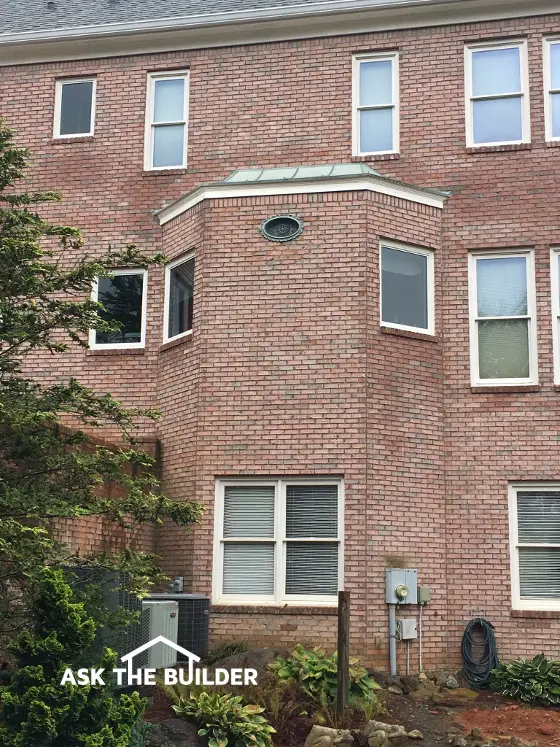
We have a block and beam foundation, clay soil, no gutters and we end up with pools of water right next to the house and sometimes covering most of the back and side yard. In some places the water goes under the house. Because the soil is already about 6" or less from the wood siding and we need to maintain ventilation we can't build up with additional soil. It seems that if the trench is 4-6' from the house that a lot of water will still be pooling and going under the house. Mr. Gardner from Houston, Texas.
Here is the answer:
It is important that you put the drain that far out because if placed close to the house, the French drain acts like a vacuum and pulls the water through capillary attraction. You would be pulling the water to the house.
You need to create a slope from where the soil hits against the house to a spot about 6 feet out. Since you cannot do this by adding soil ... remove some. Create a slope and install the linear French drain.

Author's Notes: You may wonder if my advice is worth anything. Well, read what Jim Sanders wrote to me when he was at the end of his rope: "Hi, I just wanted to write to give you the results of my "Trench Drain". I have had a wet crawlspace for 15 years. Water would fill the crawlspace at times, so we actually had to drill weep holes at the base so that it would enter the basement and eventually, the sump pump.
I have tried everything. Several contractors said that the only thing we could do was to bring the water into the house via drainage tile and let it enter the sump pump. That would work, but because I live on a 6' elevation, there is no reason that I should have water problems. It became like clockwork...when it rained, we would rush home from the lake or wherever we were vacationing so that we could be prepared to start the backup generator, in case the power failed.
We even had our alarm company put a sump alarm on our system, so they could notify us if we had a power failure. Battery backup was not an option, because sometimes we lose power for days and during any rain, our sump would run every 7 minutes...just like clockwork. I found your site and read the article on the trench or French drain.
At first, it sounded a bit like "holistic healing" to me. I failed to understand why a 2 ft. deep trench, 4 ft. away from the house would do any good. How could this simple thing correct an extreme water problem that has plagued me for years, cracked my foundation, settled my garage floor and ruined almost every vacation?
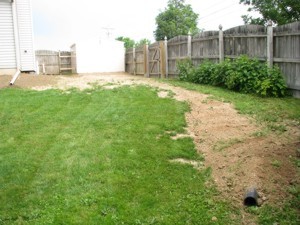
The Linear French Drain trench running from the house. PHOTO CREDIT: Jim Sanders
I decided "what the heck". I had to dig by hand using a trenching spade and a pick-ax, because the builder back-filled our property with brick and blacktop. It took quite a bit of time. Because the ground level varies so much on that side of the house, I was not able to achieve exactly 2 ft. deep. It varied from 18" to 30" in spots, but the slope was downhill. The trench is about 80 ft. long. At times, I thought about filling it all in, because I just didn’t believe that it would work. I stoned it, put tile in, and filled it with #1 round stone. I socked the pipe just for safety measure and I also used geotextile fabric on top, so I could cover with dirt and grass. I also ordered some clay and pitched from the house to the drain.
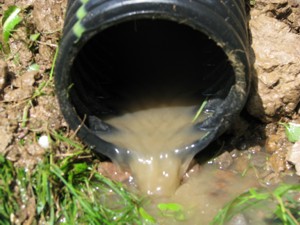
After a short rain, water is running away from the house. PHOTO CREDIT: Jim Sanders
Result? For the last month, we have had 7 or 8 torrential rains, the worst of which was last night. It rained so hard, that our lawn washed out in spots because of the high clay content. Our sump pump, that normally ran every 7 minutes during and after rain, has not turned on for 4 weeks. The silt at the bottom of the sump well is now dry and cracking. Our crawlspace has not shown a trace of water or even moisture. Since I couldn’t see correcting the foundation cracks or the garage floor settling and tilting until I corrected the problem's source, I waited to see if the trench drain worked first. This week, I had a company come in and perform sort of a "mud-jacking" technique on the garage floor, which worked perfectly. Also, during the past few weeks, I parged the cracks in the foundation.
A dry sump pump. PHOTO CREDIT: Jim Sanders
I just wanted you to know how this worked. I stressed for many years over this issue and the solution was nowhere near as difficult as I thought it would be. As a side note, I went to the end of the drain tile during a hard rain to see what was happening. Water was running out of the drain tile in about the same exact volume that it previously ran out of the weep holes in my crawlspace. This winter will be interesting, because last year, the ground next to the house was so saturated that during a thaw, my sump would run constantly. I'm guessing that the ground between the trench and the house will probably be drier now going into this winter." - Jim Sanders, Upstate area - New York
CLICK HERE to get FREE & FAST BIDS from local drainage expert contractors.
This helpful article was featured in my March 28, 2013 Newsletter.
Column B339