Polymeric Sand Installation Instructions

Polymeric Sand Installation

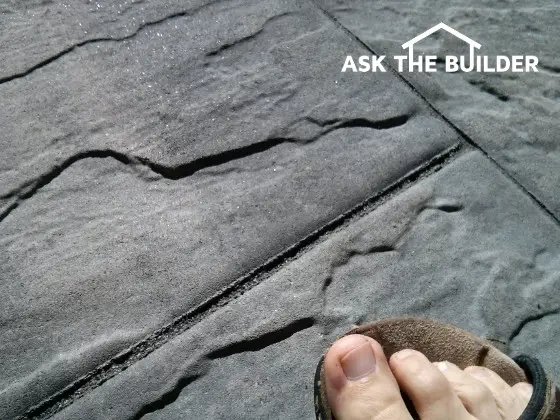
You can see the hardened polymeric sand in the joint between the two pavers. It comes in different colors to compliment the color of the pavers. Toes in photo for scale. (C) Copyright 2017 Tim Carter

"Polymeric sand is best described as outdoor grout. Depending on the manufacturer, it’s a blend of different colored sand grains as well as chemical binders or glues that are activated by water."

Polymeric Sand Installation TIPS

DEAR TIM: I need to use polymeric sand on an upcoming job. I’ve never used it before and some of the instructions and videos I’ve watched are confusing and have conflicting information in them.

Have you used this material before? Did you find it hard to work with?

I’m terrified of having mottled stains on my new pavers! What did you do to ensure your job came out perfect? Diane K., Roselle, IL

What is Polymeric Sand?

Polymeric sand is a newer product that’s creating lots of interest among homeowners, contractors and material suppliers that sell the product. It’s fascinating to me to see how many building products mature as they march through time.

What Sand Was Used Before Polymeric?

When paving brick were first brought to market back in the early 1980s, the joints between the brick were just filled with fine sand.

It didn’t take long for homeowners to grow weary of this methodology because weeds would quickly grow and any cleaning efforts washed away the sand.
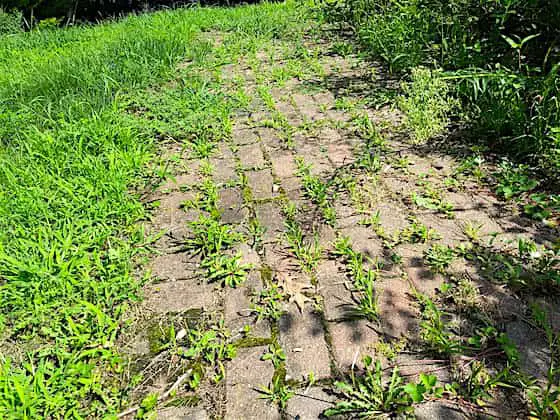
paver weed control

This is a paver sidewalk with out-of-control weeds growing out of the normal sand. The sand can be removed with a pressure washer and replaced with polymeric sandy. Copyright 2018 Tim Carter

Free & Fast Bids

CLICK HERE  to get FREE & FAST BIDS from local patio contractors who'll use polymeric sand on your job.

Is Polymeric Sand Like Grout?

Polymeric sand is best described as outdoor grout. Depending on the manufacturer, it’s a blend of different colored sand grains as well as chemical binders or glues that are activated by water.

When the polymers dry and cure the sand between the joints gets quite hard and it cements the pavers together. Weeds won’t grow between the joints and the sand doesn’t wash away.


What Ingredients Make Polymeric Sand Hard?

Some polymeric sand might have a blend of Portland cement, dry colored pigments as well as the polymer adhesives. The key thing to realize is you can get the sand mixture in different colors that will match or compliment the color of your pavers.

You can even use the polymeric sand on existing paver installations that have just sand in the joints, but it’s quite a bit of work to remove the existing sand without disturbing the pavers.

Have You Used Polymeric Sand?

It just so happens that I recently had the good fortune to use polymeric sand at my own home. I constantly preach to my free newsletter followers to read product label instructions before using a product.

Are the Polymeric Sand Instructions Confusing?

I did that with my bags of sand and came away quite confused myself. I then went online to watch a few videos, some done by my manufacturer, and discovered they had a few oversights that I felt were very important to mention.

Should the Pavers Be Dry Before the Polymeric Sand Installation?

First and foremost, to get a great job the pavers need to be dry. The dryer the pavers are, the better the job’s going to turn out. You want even the sides of the joints dry if possible so no moisture inhibits the dry polymeric sand from flowing to the bottom of each joint.

Should the Pavers Be Clean?

The top surface of the pavers needs to be clean. If somehow the pavers got muddy during the installation, you need to clean off that mud. If you don't clean off the mud, the mud will get mixed in with sand as you brush it into the joints.

The mud will cause the sand to not bond as well and it will create color differences in the finished sand.

You'll have to use water to clean off the mud and this may mean it could take days for the pavers to dry after you wash the tops of the pavers. So be it. I can’t emphasize enough how dry pavers are mission critical.

CLICK HERE  to get FREE & FAST BIDS from local patio contractors who'll use polymeric sand on your job.

How Important are the Polymeric Sand Batch Numbers?

Be sure all bags of the polymeric sand come from the same batch. Look at the labels to ensure they all were made at the same time. If you have any doubt, open the bags and mix the dry sand all together in a large container to ensure the color is the same.
Polymeric Sand Installation

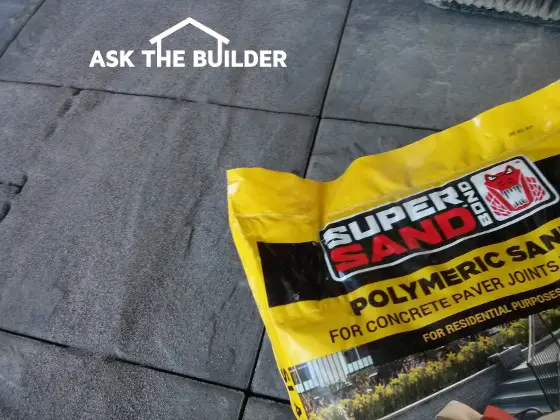
This is the polymeric sand I used on my pavers. I've poured some sand on the pavers to the left of the bag. It's such a close color match you might not have seen it! You can see it flowing into the joints between the pavers in the upper left corner of the photo. (C) Copyright 2017 Tim Carter

How Do You Spread the Sand?

I used a large floor broom with medium bristles to install the sand. The dry sand flowed into the joints with no effort at all.

How Do You Keep the Sand Even with the Pavers?

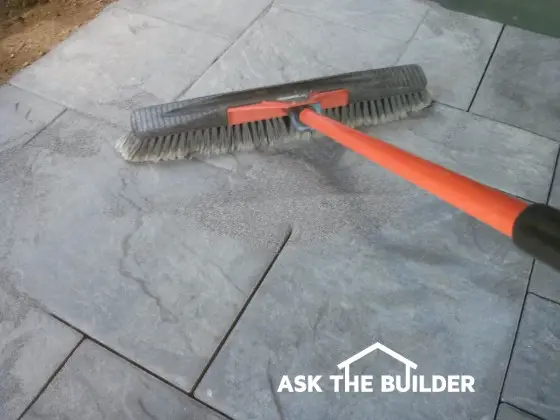
I went back and forth across the joints at a 45-degree angle. Most of the videos I watched showed the broom strokes parallel or at a 90-degree angle. Doing it that way can cause the broom to dig out some of the sand from the joints.
Polymeric Sand Installation

Sweep across the joints at a 45-degree angle. (C) Copyright 2017 Tim Carter

You want light finish strokes as you try to brush the sand from the pavers. Don’t dig the sand out of the joints.

How Do You Prevent Staining?

I read many nightmare stories online about stained pavers during installations gone bad. The common cause was the installer failed to get off all the sand and dust from the pavers before activating the sand with the water.

What is the Best Brush to Use?

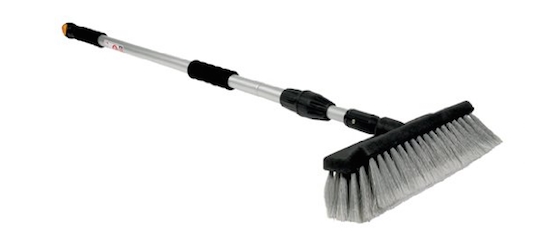
I own a fantastic brush I bought years ago to wash the side of my house. It’s a brush made to wash RVs. The bristles are stiff enough that they don’t flop but soft enough that they don’t scratch automotive paint. It’s a perfect brush to do a fine brushing of the pavers.
rv-brush

This is a perfect brush to clean vinyl siding. It's got an adjustable handle and the perfect bristles that remove dirt loosened by using Stain Solver oxygen bleach. CLICK THE IMAGE NOW TO HAVE THIS BRUSH DELIVERED TO YOUR HOME.

How Much Sand Must be Brushed Away?

I took my time and carefully brushed all the sand grains and as much dust as possible off each paver. I was careful to not dig any sand out of the joints.

Should You Use a BackPack Blower To Remove Dust?

After doing this, I used a backpack leaf blower to blow off any of the colored pigment dust. I was shocked to see how much dust came off the pavers even though I thought I had brushed them well.

IMPORTANT TIP: Do NOT skip this step - use a blower.

How Do You Activate the Polymeric Sand?

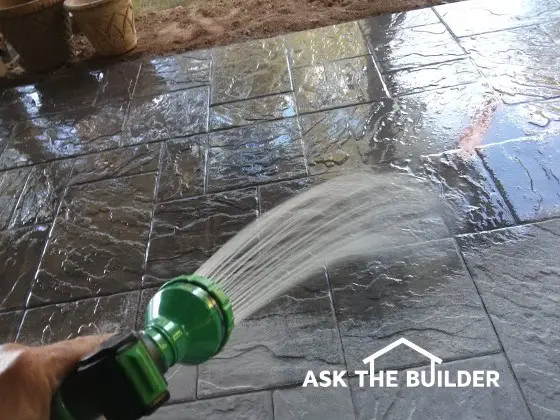
Wetting the sand with a gentle nozzle that acts like a soft rain shower is what activates the polymeric sand. You don’t want a direct stream that can dig sand out of the joints.
Polymeric Sand Installation

Use a hose nozzle that produces a gentle shower. Move it back and forth and just put a light amount of water on the pavers. (C) Copyright 2017 Tim Carter

Move the nozzle across the pavers back and forth and just put a light amount of water down. Most instructions say to wet the pavers several times. I did it three times in about fifteen minutes.

Should I Remove Standing Water?

After turning off the hose, I immediately fired up my backpack leaf blower. I blew off all standing water from my pavers to complete the job.

Standing water will have the color pigments in it and can foul the pavers. If you allow this pigmented water to dry in puddles, you'll end up with blotchy pavers.

Get all the water off the pavers and be careful not to blow any sand out of the joints. Do all this and you’re pavers will look perfect in two hours!
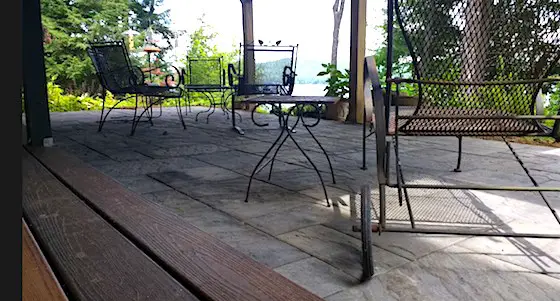
finished-paver-patio

Here's my finished paver patio. It's going to last decades so long as no one pressure washes it. Pressure washing removes the colored cement paste that's coating the sand and gravel in the concrete. Copyright 2017 Tim Carter

CLICK HERE  to get FREE & FAST BIDS from local patio contractors who'll use polymeric sand on your job.

Column 1210

Building on Rocky Land

building on rocky land

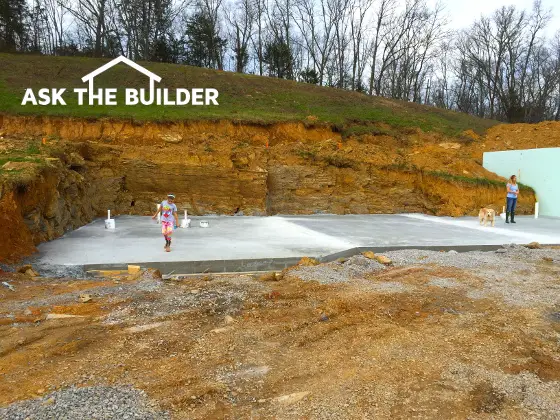
You can clearly see the bedrock in the hillside where this new home is being built. (C) Copyright 2017 Tim Carter

Building On Rocky Land TIPS

This article led to Tim doing a video conference with Ms. Chantell Mason's school classes. They had questions on building on rocky soil. Read about this amazing video conference in Tim's April 29, 2018 Newsletter.

DEAR TIM: The lot where I’m building my new home is quite rocky. The soil cover is somewhat thin, perhaps only 3 feet deep at most.

Fortunately there’s no blasting required to dig into the rock. What are some of the challenges I’ll face dealing with this rock?

What are a few of the best practices to ensure I’ll have a dry basement for years to come? What’s the biggest mistake my builder could make and how do I prevent it? Tim J., Spring Hill, TN

DEAR TIM: Congratulations on your new home project!

Power Is In The Question

You’re asking all the right questions so far and it’s my hope all goes well throughout the entire process. My college degree is in geology and I had quite an interest in both hydrogeology and engineering geology while in school.

Free & Fast Bids

CLICK HERE to get FREE & FAST BIDS from local builders who can help you.

My Geology Degree

Hydrogeology is the study of groundwater and engineering geology focuses on how man-made structures of all types interact with soil and rock. If you’ve ever had the pleasure to fill a water jug or bottle from a natural spring, then you know that water loves to follow tilted and flat pathways within bedrock.

TNT / Dynamite

It’s not too hard to build a home when you’re dealing with rock unless you need to blast. Blasting can be quite expensive.

Two lots above my own home have never been built on because several previous owners have spent tens of thousands of dollars blasting holes in solid granite only to exhaust their budget and go bankrupt. You’re lucky that excavators can dig through your rock.

Footings On Rock Video

Watch this video to see how to put a foundation on solid rock.


Groundwater Moves Sideways

I feel the biggest thing you need to understand is rainwater penetrates topsoil and starts to head down into the ground. But depending on the subsoil makeup and depth to bedrock the water tends to begin to travel sideways or downslope along the contact zone between the soil and bedrock.

Your builder’s job is to install a fantastic foundation drainage system that collects this water as it gets close to your foundation and then channels it away from your home to a low spot on your land.

CLICK HERE to get FREE & FAST BIDS from local builders who can help you.

Create A Sluiceway

Not too long ago, I was sent a photograph where an uniformed builder poured a structural concrete basement slab directly up against the bedrock at a building site. He then placed the foundation on top of this slab.

This poor design allowed water to pool on the footing slab. Immediately ground water collected against the foundation and seeped into the basement. Be sure your builder doesn’t make this rookie mistake.

The builder should have kept the footing away from the solid rock so a trench or sluice was created that could capture and channel the water.

One Foot Rule

It’s best to place the footing of the foundation at least one foot away from the side of the excavated hole. This spacing gives you plenty of room to place a perforated drain pipe alongside the poured or cast-concrete footing.

The drain pipe is then covered with clean washed gravel that’s similar in size to a large grape.

Solid Pipe With Holes

I prefer to use the solid plastic pipe that has 1/2-inch holes drilled in it in two rows. The holes should face down and the pipe should be placed on a 2-inch-thick layer of the clean gravel.

Backfill With Gravel & Straw

This pipe should then be backfilled with the clean washed gravel that has no sand in it. The thicker this layer of gravel, the better. Before it gets covered with soil, put a thick layer of straw on it or cover it with a layer of roofing felt paper. This prevents the gravel from getting clogged with silt from the soil.

Waterproof Foundation Walls

The foundation walls need to be waterproofed, not just damproofed. Damproofing is just a spray coating of hot asphalt. It does a great job of stopping water vapor passing through the foundation walls, but if the concrete foundation cracks, the thin asphalt coating will not bridge the crack.

CLICK HERE to get FREE & FAST BIDS from local builders who can help you.

Membrane Bridges Cracks

Waterproofing foundation systems are designed to deal with foundation cracks. I used a magnificent system on my last house that was a blend of rubber and asphalt.

It was applied about 1/4-inch thick on the foundation walls and then covered with a rigid dense fiberglass panel. This fiberglass protected the rubberized asphalt from backfill damage and it channeled water directly down to the foundation drain tile.

Sharp Rocks Ruin Utilities

You need to be very careful when backfilling any trenches that contain utilities. Buried water, gas, electric, cable, etc. lines need to have a 6-inch bedding layer of sand that they lay on in the trench. Never put a utility line in a trench in direct contact with rocks.

Then once the utility lines are laid, an 18-inch protective layer of sand should cover them. Sharp rocks coming into contact with these lines can injure them and cause lots of pain and suffering.

Foundation Too Deep

Each week I’m reminded of the biggest mistake most builders make when they build. Many builders, no matter what the soil type, dig the foundation hole too deep and set the house too far into the ground.

All too often the top of the foundation is just a few inches above the grade line around the house.

building on rocky land

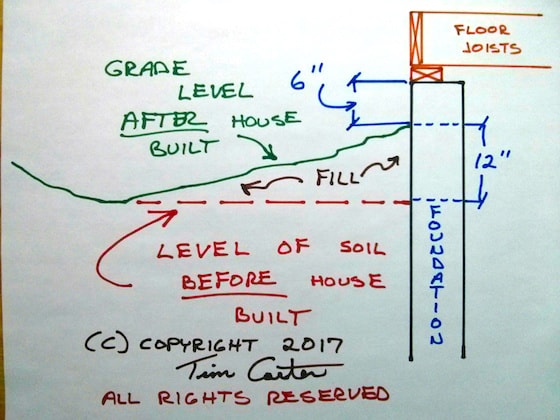
I made this drawing. You can see the foundation wall with a typical sill plate and floor joist. The red line is the lot before the excavator shows up. The top of the foundation should end up 18 inches ABOVE the red line. Use the dirt from the hole to create the slope away from the foundation. (C) Copyright 2017 Tim Carter ALL RIGHTS RESERVED

If you look at homes built around the early 1900s in many cities you’ll discover the top of the foundation was often 3 feet out of the ground! This was done for any number of reasons and it might be considered extreme today.

18 Inches

The top of the foundation should, in my opinion, be no less than 18 inches above the highest point of land within ten feet of the foundation. This allows you to have plenty of foundation above the grade line and create a good slope so water drains away from the foundation.

Email Pain

If you could read my incoming email each week you’d agree this is a primary pain point felt by many new homeowners. I see photographs each week of foundations that are only 3 or 4 inches above grade and the soil around the house is flat or slopes towards the house. No wonder these homeowners have water pouring into their basements and crawlspaces! Don’t let it happen to you.

CLICK HERE to get FREE & FAST BIDS from local builders who can help you.

Column 1208

Selling Used Building Materials

selling used building materials

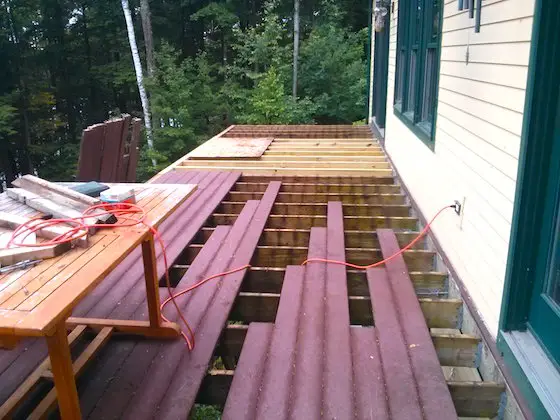
Here's the old Trex decking. I took my time taking it up and it looked perfect after cleaning each piece.  Ready for selling as used building material. Copyright 2017 Tim Carter

Selling Used Building Materials TIPS

DEAR TIM: I’m about to do a significant amount of remodeling and was about to order a dumpster. A friend at work suggested I sell lots of my used building materials instead of putting them in the landfill.

This doesn’t seem worth it to me. Is it safe to do this? Is it practical? Have you done this yourself? What’s the best way to sell used building materials? Julie M., Ann Arbor, MI

DEAR JULIE: I think I can best answer your questions by sharing a few stories with you.

My Selling Success

I’m a huge fan of selling used building materials for any number of reasons. Years ago I discovered that what you might think is junk, some other person might consider it gold.

Burying something that still has useful life under tons of other debris and dirt is not prudent for all sorts of reasons.

Hard To Sell Shattered Drywall

Some items need to be discarded because they get destroyed taking them out. That’s understandable. But many things, even built-in cabinets and bookcases, can be carefully removed giving them a second chance to serve someone else at their home.

Free & Fast Bids

CLICK HERE to get FREE & FAST BIDS from local deck contractors if you plan to remodel or enlarge your deck.

Selling My Trex

Last year I was tasked with building a new deck at my home. Part of the job involved remodeling two existing decks that were adjacent to the new deck. The two decks I was restoring had fifteen-year-old generation one Trex decking on them.

Who would have thought that someone would want my old decking and treated-wood railing system?

Sold My Deck Railing Too!

While the railing was in great shape and needed a coat of paint and the sections were random in size, it still was appealing to a homeowner sixty miles away! I sold the railing on Craigslist.org in less than two weeks for $600.00!

Selling Materials Video

Here's an interesting video of a man who's selling lots of his loot!

Price Way Below New

I priced it about 45 percent what it would cost to purchase the same materials to build the railing from scratch. It’s critical you price out what the same item is selling for new before you list an item for sale. You want to make sure what you’re offering is a great bargain.

CLICK HERE to get FREE & FAST BIDS from local deck contractors if you plan to remodel or enlarge your deck.

Old Can Be In Demand

I was able to sell every piece of my used generation-one Trex decking as well. I had 1,280 square feet of it. You might ask, “Who would want used decking?” That’s easy.

It turns out one of the buyers had a deck covered with the same material. It’s no longer made and he wanted to enlarge his deck. My decking saved the day for him!

Other buyers wanted a no-maintenance decking and the price of new composite decking took their breath away. I ended up selling my used Trex decking for $1.25 per linear foot!

Old Plumbing Fixtures

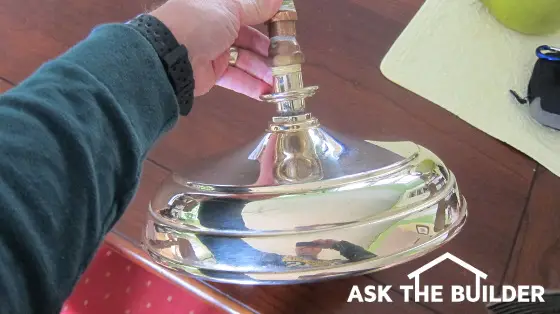
Just yesterday, I sold a gorgeous 15-year-old rain shower head to a person who was remodeling his bathroom. This model purchased new would be over $1,000. I wanted to just get rid of it and gave it away for $125.00.

selling used building materials

This gorgeous shower head sold in less than 24 hours. Your used building materials are wanted by your neighbors. (C) Copyright 2017 Tim Carter

Great Window Boxes

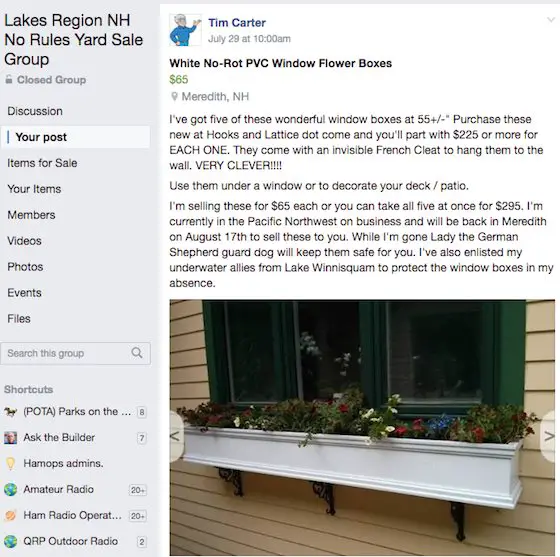
Later in the afternoon, I sold two used no-rot PVC window flower boxes for $130.00. Believe me, you can sell used building materials and fixtures.

facebook flower boxes

Here's a photo of the flower boxes I had for sale. I originally had nine to sell. At the time I uploaded this photo here, I had four more to sell. Copyright 2017 Facebook, Inc. ALL RIGHTS RESERVED

Facebook Groups

In the past week, I discovered a better way to sell used items. As crazy as it sounds you do this using the social media website Facebook. It turns out there are thousands of local groups on Facebook that are marketplaces to sell just about anything.

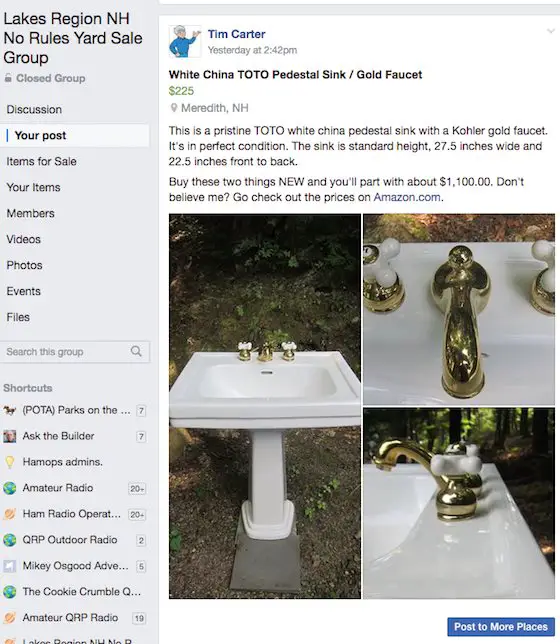
Here's a current listing of mine of a fantastic white china pedestal sink. It will sell for $225 no problems. Copyright 2017 Facebook, Inc. ALL RIGHTS RESERVED

You just need to go to Facebook and look up your town, city or community name followed by the words yard sale, garage sale, or similar phrases. You’ll be stunned by what you discover.

Push vs Pull

Facebook differs from Craigslist in a fundamentally different way. Facebook employs push technology instead of pull. When you list an item on Facebook, everyone that’s part of that group gets notified instantly

With Craigslist, a buyer has to search for your item. If you don’t put in the correct words in your listing title, a buyer who wants your loot may not find it!

Get Best Price

To get the best prices for items, you need to make sure they’re in as good as condition as possible. All the online sites allow you to upload lots of photos of the item.

Take great photos of what you’re trying to sell and upload them. Provide all the dimensions of the items if it makes sense.

Be honest in your description. Even though something is not in that great of condition, some buyer may be willing to invest the time and energy to restore it.

Safety Suggestions

As for the safety of transacting business with total strangers, I’ve never had a problem. Just yesterday, a single woman came to my house to pick up the flower boxes. She didn’t know me from Adam. You need to use common sense and it’s never a bad idea to take a friend with you if you’re going to buy something. It’s not a bad idea to have a friend with you when you sell to a stranger.

Contact your local police department as many are now offering lots of great advice about how to be safe doing online business. Some even have a special area in their parking lots where buyers and sellers can meet while the entire transaction is videotaped. This might be a good idea if you don’t want strangers coming to your home.

Only accept cash. NEVER EVER accept a check. A common scam is to give you a check that looks real. They're not and will bounce.

Start Listing Now

A month from now I intend to list hundreds of things that have been gathering dust in my garage, attic and my outdoor shed. I’ve had such great success using the Facebook groups technology I’m sure I’ll sell every item. It’s just a matter of pricing things right. Good luck and happy selling!

CLICK HERE to get FREE & FAST BIDS from local deck contractors if you plan to remodel or enlarge your deck.

Column 1207

July 30, 2017 AsktheBuilder Newsletter

If you're a new subscriber in the past few days, this is an abnormal newsletter. When I have a sale on my certified organic oxygen bleach Stain Solver, I always make a LAST CALL announcement.

I'll put out a somewhat normal newsletter soon - maybe this week as I travel to Portland, OR, for the KEEN shoe/boot factory tour.

LAST CALL - STAIN SOLVER

The 10% off plus FREE SHIPPING sale is about to end in HOURS.

I have NO CLUE when we'll do another sale. Now is the time to get a 50#r and save huge money.

The sale was a gift to you because of my birthday.

Here's the promo code: Timis65

CLICK HERE to order.

If you go to the cart and the Add to Cart button doesn't work, SWITCH browsers or devices. I guarantee you the issue is at your end, not at the cart.

Quick Story

Just a few hours ago, I finished a new patio under my new deck.

I used precast concrete large format stones that look like slate.

CLICK HERE to see a photo and read about it.

I used a newer product to fill the joints in between the pavers. It's called polymeric sand.

I've never used it before. This morning before going to church with Kathy, I watched two installation videos made by the manufacturer.

It turns out they have an oversight in their videos and in the written instructions on the bag!!!

They showed in the video using a broom to sweep off the excess sand before blowing off the dust.

The problem is they show you in the video to make the broom strokes go parallel or at a 90-degree angle with the joints in the pavers. When you do this, there's a tendency to dig out the sand from the joints.

I experimented and it happened. Having grouted tens of thousands of square feet of ceramic tile in my day, I decided to do the broom strokes at a 45-degree angle to the paver joints.

BOOM!!!! It made a huge difference and the dry sand didn't get dug out of the joints.

After wetting the sand and blowing off the water with a backpack leaf blower, the pavers look AMAZING!!!

I'll have photos for you in a new column I'm writing about this in a few days.

Go back up and get some Stain Solver. I seriously have no idea when we'll have another sale.

The promo code is SET TO EXPIRE so you need to ACT NOW!

CLICK HERE to order.

Portland, OR Meet Up

If you're planning to meet me in Portland, OR this Friday for breakfast, you BETTER reach out to me ASAP to set it up.

Tim Carter
Founder - www.AsktheBuilder.com

Do It Right, Not Over!

July 27, 2017 AsktheBuilder Newsletter

I forgot to tell you about the HUGE Stain Solver SALE yesterday!!!

DUH!

It's in honor of my birthday which is VERY SOON!!!

Kathy and I are giving you a gift because it's a special birthday.

You get:

  • 10% off any size except for the small sample size
  • FREE SHIPPING to any of the lower 48 US states
  • a product with ingredients that are made in the USA - Texas and Wyoming
  • a Certified Organic product from a small business - Kathy and I own Stain Solver

If you don't know about Stain Solver, it's a multi-purpose Certified Organic oxygen bleach.

CLICK HERE to watch a video about what Stain Solver is.

It cleans ANYTHING water washable except for:

  • natural wool
  • natural silk
  • redwood siding / decking

CLICK HERE and scroll down the page to see homeowner Before & After photos of all the things it can clean.

When you see a photo that interests you, CLICK IT to see the before / after.

My all-time favorite Before / After photo is THIS ONE.

CLICK HERE to order.

Oh, the magic promo code is:

Timis65

The sale is only for a FEW DAYS. Don't procrastinate.

Order NOW.

Now back to your normal day.

Tim Carter
Founder - www.AsktheBuilder.com

Do It Right, Not Over!

Toilet Installation Instruction

Toilet Installation

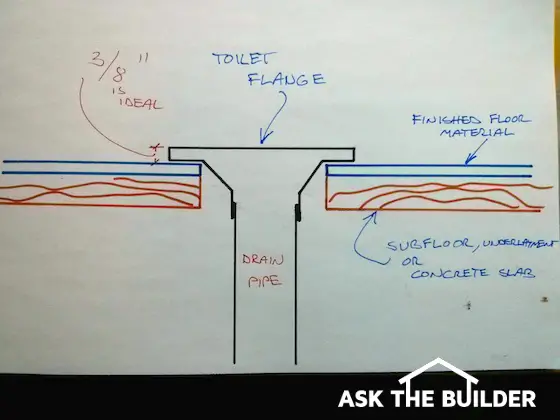
Toilet Installation Instruction | Here's a side-view of a normal toilet flange in a floor. The gap between the bottom of the flange and finished floor is just to show that the flooring goes under the flange. Most PVC flanges happen to be 3/8-inch thick at the edge so you want the flange to be tight to the finished flooring. Copyright 2017 Tim Carter


Toilet Installation TIPS

Don't Be Intimidated

Toilets are intimidating plumbing fixtures. Just look inside one. What about the mysterious connection at the floor. Oh, don't forget, there's the pesky water supply connection as well.

Are you afraid and feel it's time to call the plumber?

Not so fast! You can do it. Toilets are simple.

I'm been a master plumber since before the age of 30 and am going to help you step-by-step install one like I'd do it if I was at your home.

Let's get started. But before we get going, please WATCH this video just below I created to show you how floor joists or floor trusses can interfere with the location of a toilet. You can buy special toilets to solve the issue or sometimes scoot by with an offset toilet flange.

Basics

Residential toilets connect, in almost all instances, to a 3-inch drain line. At the floor level, this drain line converts to a toilet flange. This flange is basically a flair fitting that does two things:

  • provides a way to make a positive air/watertight seal
  • allows you to bolt the toilet to the floor

The flange must be a certain distance away from the back wall if you want your toilet to fit snugly against the wall. The standard measurement for most toilets is 12 inches.

Roughing In A New Flange

If a floor joist is in your way, you may need to go 2 inches in either direction (10 or 14 inch). If so, you'd need a special toilet bowl. Beware, as these are usually much more expensive. If faced with this situation try to use an offset flange. It may allow you to use a standard 12 inch toilet.

You don't want to hack or notch the floor joist as it will weaken it.

Free & Fast Bids

CLICK HERE to get FREE & FAST BIDS from local plumbers who can install your toilet in case you feel you can't do it.

Toilet Flange Height

The height of the top of the toilet flange is critical with respect to achieving a seal so no sewer gas leaks into your home.

The top of the toilet flange should be 3/8 of an inch higher than the finished floor surface in the bathroom.

If the flange is too low or sits flush with the finished floor, the underside of the toilet may not contact all of the wax in the gasket.

If the flange is too high, too much of the wax will get squeezed out as you press the toilet to the floor.

Set Toilet First - NO Gasket!

I always want my toilets to be level. As such, I uncrate the bowl (the tank and the bowl are two parts - unless you have a one piece toilet) and simply set it on the flange.

Do not use the wax gasket at this point (don't worry, I'll explain!) Set your level across the bowl side to side and front to back. Using shims if necessary, make the bowl level. Gently lift the toilet off the flange keeping the shims in place.

The Wax Gasket & Bolts

A wax gasket is used to make a permanent seal between the flange and the bottom of the toilet. Without this gasket, sewer gas or wastewater would flood your house.

toilet wax gasket

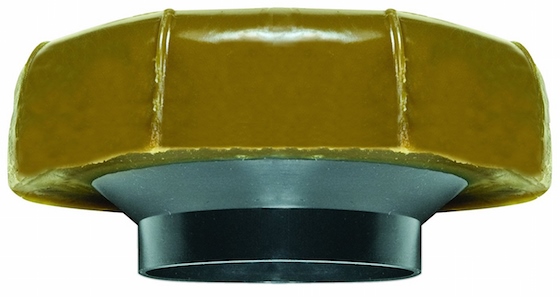
Here's a typical wax gasket with the plastic horn. This one is extra thick and you'd use it in case the top of your toilet flange was FLUSH or BELOW the finished floor surface. CLICK THE PHOTO NOW TO HAVE THIS DELIVERED TO YOUR HOME.

They come two ways: with and without a plastic horn. The horn is a simple funnel which directs the wastewater into the flange. I always get a gasket with a horn.

Place the gasket onto the flange pointing the horn down into the flange. Now install the new closet bolts that attach the toilet to the flange.

Take the bowl, straddle the flange and guide the bowl onto the gasket and the bolts. Be careful!!

You only get one chance. Use a friend to help guide you or to position the bolts.

The toilet will hit the gasket and seem to rock. Gently push the toilet down to the shims trying to keep it reasonably level. Attach the necessary trim washers, brass washers, and tighten the nuts. Remember, you are tightening against glass so don't go crazy and over-tighten!

CLICK HERE to get FREE & FAST BIDS from local plumbers who can install your toilet in case you feel you can't do it.

Don't Lift Up

Once the toilet is tight to the shims, don't try to lift it up or move it too much. You'll break the seal!!!

As you drop the toilet bowl down onto the shims try to make sure the toilet is oriented correctly so the back of the tank is parallel with the wall.

The Tank

This is the easy part. Reading the toilet instructions you will see that two or thee bolts, rubber washers and brass nuts hold the tank to the bowl.

There's a usually a foam or rubber washer that fits on the bottom of the tank to provide a seal to the bowl. This is easier than a kid's erector set. As you tighten the tank bolts be sure to level it. It's a breeze.

Supply Tubes

Years ago plumbers used chrome-plated soft copper supply tubes. They were very hard to install.

Now you can use flexible stainless-steel braided water supply lines that are caveman simple to install. Don't over-tighten the nuts. These newer supply tubes come with a nice inner rubber gasket that only requires moderate tightening to get a leak-proof connection.

toilet supply lines

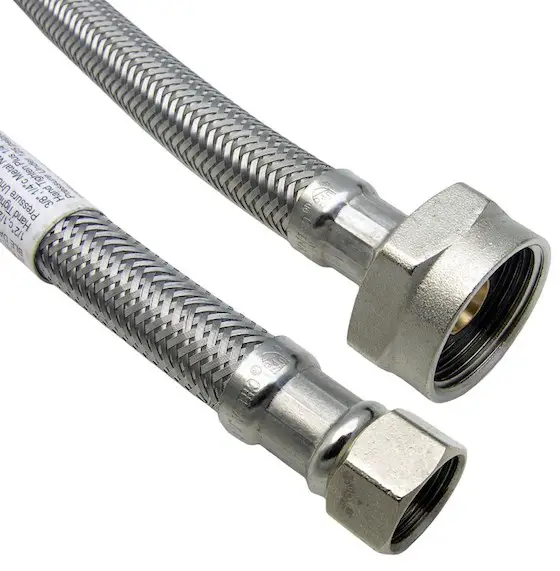
Here are the two ends of the normal stainless-steel toilet supply tubes. The larger nut attaches to the underside of the tank. These tubes come in different lengths. CLICK THE PHOTO NOW TO HAVE ONE OR MORE DELIVERED TO YOUR HOME.


Grout

Finish the installation with tile grout. Fill the space between the toilet and floor with grout.

IMPORTANT TIP: Don't allow the grout to touch the wood shims. The water in the grout can pull out extractive stains from the wood and STAIN your new grout. Keep the grout away from the shims about one inch.

Let this grout dry, remove the shims and grout the remaining holes. Total toilet project completion time: One to 1.5 hours!

Local Codes

Now that I have you all pumped up about changing your toilet, you better hold on for just a moment. Certain localities (states, cities, counties) have highly restrictive plumbing codes. In certain areas it is illegal for a homeowner to change out a toilet.

Only a licensed plumber is permitted to do it in these areas.

I have mixed feelings about these laws. Those in power try to make it sound that only plumbers have the ability to keep you safe from disease and thus they must install the toilet.

I'm a master plumber and am here to tell you if you follow the above advice you'll install your toilet much better than any apprentice plumber and quite a few journeymen.

I've grown weary of too many laws, regulations and other restrictions when it comes to doing work. If you do it right and possibly better than a licensed plumber, then what's the issue?

CLICK HERE to get FREE & FAST BIDS from local plumbers who can install your toilet in case you feel you can't do it.

Column B359

Watch this video to see how Tim SOLVED a problem in minutes!

CLICK here to learn more on how Tim can help solve your problems.

July 26, 2017 AsktheBuilder Newsletter

If you haven't noticed, I tend to let up on the throttle in the summer. Why?

I happen to live where hundreds of thousands come to vacation. Yes, it's that gorgeous.

CLICK HERE to see hundreds of photos taken by others of what's within fifteen or so miles from my home.

I try to spend as much time outdoors enjoying the scenery and amazing WX. What's more I can look at my newsletter software and it tells me that you might be doing the same thing and often be too busy to read what I send.

It's all good. Get outdoors if you can where you live and enjoy this summer WX if you live north of the equator! If you're down under, then you're in the midst of your most dismal winter weather.

The Solar Eclipse

Just under a month from now, there's going to be a rare total solar eclipse that's going to cross the entire USA from coast to coast.

It starts in Oregon and moves towards the Carolinas. Do you live within a few hundred miles of the path of totality?

Are you thinking of taking a leisurely drive to just park to experience the eerie deep twilight?

Think again.

You must not be old enough to remember the Woodstock music festival in the 1960s. A group of guys from my neighborhood and I were going to go. Our plans fell apart. It's probably for the best!

Tens of millions of people planning to see the eclipse are going to be stuck in perhaps the worst traffic jams the USA has ever seen. If you're bound and determined to go, you better take lots of food, water, gasoline, TP and leave your modesty at home.

CLICK HERE to see what's going to happen on all those expressways and small two-lane roads you've been scoping out as your viewing place.

Upcoming Portland, Oregon Meetup

I announced two weeks ago I'm going to be on the Left Coast of the USA for a tad over two weeks very soon. I'm flying to Portland, OR, on August 1st for a two-day KEEN footwear factory tour. The event ends late evening on August 3rd.

Bright and early, say 8 am, on Friday, August 4th, I'm going to have a breakfast meet up in downtown Portland. I know I'm staying in the Sentinel Hotel in downtown and I'm sure there's some quiet breakfast place nearby. I'll scope that out when I get there.

If you want to attend, you MUST email me so I can put you on the list. Be sure the subject line of the email says: Portland Meetup. If you've already contacted me, please do that once more so I can make up my final list.

That afternoon I plan to start to drive south hitting the coast of Oregon, any nearby state parks and for sure Crater Lake NP.

What great places in Oregon and northern CA should I visit? I've got eight days to kill.

If you live in any of these areas or in northern CA, and want to meetup, I need to hear from you NOW.

I'll be in the San Francisco area for two days, but will have very limited time to meet up. The best I can do would be some early morning coffee on Tuesday, August 15th, near the Embarcadero BART station.

Drainage Issues

Over the past few days, I've done quite a few phone consults. Today I've got two scheduled.

Yes, you and I can talk on the phone to solve your home repair problem. Often the advice I give will save you many hundreds or thousands of dollars.

Just two days ago, I was talking with Kali who lives in east central Idaho. She has water running through her crawlspace.

Kali was thinking of calling a soil engineer to issue a report. My guess she would have spent close to $1,500 for this study.

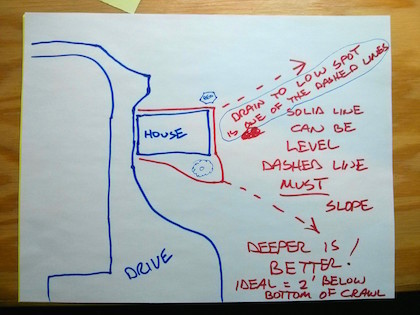
She ordered one of my $50 phone consults and I solved the issue in about twelve minutes. I even made two super-quick drawings for her to help show her what to do.

After I send this newsletter, I have to make up a quick plumbing drawing for Perry in Texas. He and I jump on the phone this afternoon. Here's what I drew up for Kali:


I'm doing more and more phone consults about wet backyards, wet crawlspaces and wet basements.

When the homeowner sends me photos and I look at their house using Google Maps, I discover in most instances the builder put the house into the ground too deep.

If you're building a home, you can't allow this to happen.

CLICK HERE to look at a much better hand-drawn diagram of how your foundation should relate to the ground around your home just after the foundation forms are stripped off.

CLICK HERE to see how to STOP all water leaks into your crawlspace or basement.

CLICK HERE to set up a phone call so I can solve your problem, no matter what it is, at your home.

Tool of the Week

Yesterday I was doing some digging. I needed to use a spade to slice into the soil and to make the bottom of the area somewhat flat.

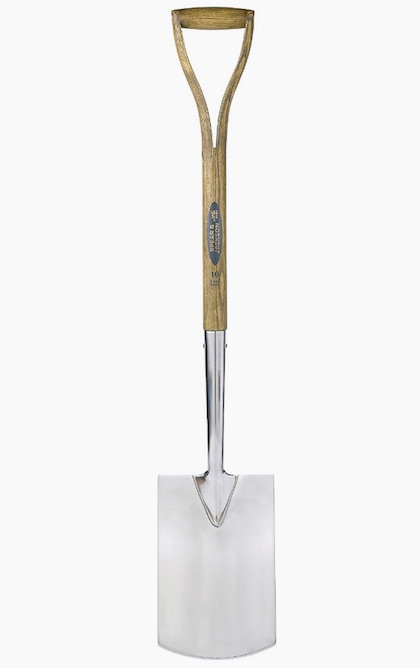
I grabbed Kathy's stainless-steel spade for the job.

Yes, you can get certain garden tools in stainless steel so they don't RUST!!

WOOT!!!!

CLICK HERE to have one delivered in days to your home.

CLICK HERE to see a huge assortment of stainless steel garden and digging tools.

I'll bet you had NO CLUE you could buy rust-free shovels, forks, spades, etc. did you?

​​​​​​​Tell the truth.....

New & Revised Columns

Here's a list of new and revised columns that should save you lots of time and money:

Brick Mortar Repair Mix - BEST Mortar Known

Drain Cleaner TIPS

Lot Clearing Tips

DIY Patio Pavers - Yes, You CAN DO THIS Job

Air Filter Particle Size Chart

FIXING a 3-Way Switch - You CAN TACKLE THIS

Okay, that's enough for today.

I'll try to reach out to you while I'm out west, but don't hold your breath. I may be enjoying the scenery too much and doing LOTS of outdoor amateur radio. CLICK HERE to read my radio stories.

Tim Carter
Founder - www.AsktheBuilder.com

Do It Right, Not Over!

Brick Mortar Repair Mix

Brick Mortar Repair

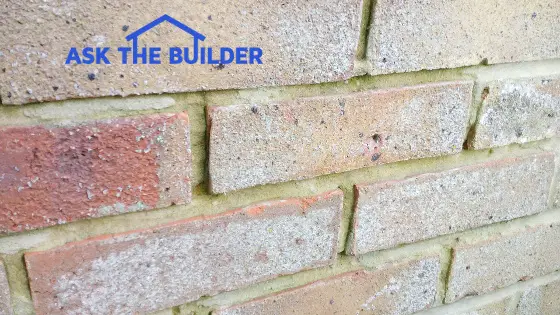
Brick Mortar Repair Mix | The mortar in between these brick was repaired but the mix failed. The workman made at least one mistake. (C) Copyright 2017 Tim Carter

Brick Mortar Repair Mix TIPS

  • Use same mortar Romans used to build aqueducts
  • Hydrated lime mortar with secret volcanic ash - SEE BELOW links
  • WATCH tuck-pointing videos below
  • Be careful of amount of water used to mix new mortar
  • CLICK HERE to Get Tim's FREE & FUNNY Newsletter

DEAR TIM: It appears I wasted some money five years ago. I had my brick building repointed with new mortar and it has deteriorated quickly.

Do you have any idea what caused it to happen? The building is close to the sea, about 500 yards, and is exposed to a fair degree of salt spray and fog.

What’s the best brick mortar repair mix to use and how would you apply it? Ian L., Brighton, UK

DEAR IAN: It’s always a sad day when I hear stories like this. Money is a precious resource for most people and it’s a shame when a repair that was supposed to last one hundred or more years fails in less than five.

Mortar Ingredients

Let’s discuss what most mortars are made with and then we can perform an autopsy on what caused your tuck pointing failure. Most mortars are a mix of fine or medium sand, a dry powder that almost always contains Portland cement and/or hydrated lime and water. In rare instances a mason may add some sort of liquid bonding agent.

Free & Fast Bids

CLICK HERE to get FREE AND FAST BIDS from local masons who can tuck point your mortar joints.

Add Water - Create Magic Crystals

When water is added to Portland cement, some other bagged mortar mix or hydrated lime, it starts an irreversible chemical reaction called hydration.

Small crystals start to grow as the dry powder mixes with the water. The crystal growth is what causes the mortar mix to transform from a plastic mixture that resembles applesauce into an artificial rock once it’s fully hardened.

Interlocking

The crystals that grow interlock with microscopic cracks and holes in the brick. This is why the mortar is such a great building material as it cements one brick to another creating a solid wall if mixed and placed correctly.

Tuckpointing Mortar Video

Here's a pretty good video that shows the tuck-pointing process. The key is to carefully install the new mortar so you don't smear it on the face of the brick.

Causes Of Failure

Here’s a partial list of what might have caused your failure:

  • too much water was used to mix the mortar
  • too little mortar mix or Portland cement was used to make the mortar
  • the mason re-tempered the mortar by adding additional water to it
  • rain pelted the fresh mortar before it had a chance to harden
  • hot and windy weather sucked the water from the fresh mortar too fast

Any one, or a combination of two or more, of the things above could have created your failure. Without doing expensive laboratory testing, it’s hard to say what the actual cause is. Let’s focus on how to do the job right.

Sea Salt - No Problem!

I’m not at all worried about how close your building is to the sea. You’ve got rocky limestone outcroppings that are pounded by the seawater salt spray and they don’t crumble easily. I suggest we make a mortar mix that resembles tough limestone.

Mythical Lime Mortar

There are ancient buildings and probably castles across the UK that are made using a mortar mix that’s lasted for hundreds of years. Sadly some masons have forgotten about this super-strong mortar by favoring bags of mortar mix sold at building supply stores.

The masons of old use just hydrated lime and sand. Once mixed with water, the hydrated lime and fine sand creates actual limestone. You know how durable this stone is so your new mortar will be exceedingly strong.

CLICK HERE to get FREE AND FAST BIDS from local masons who can tuck point your mortar joints.

Hydrated Lime

I suggest that you purchase some bags of hydrated lime.

hydrated lime

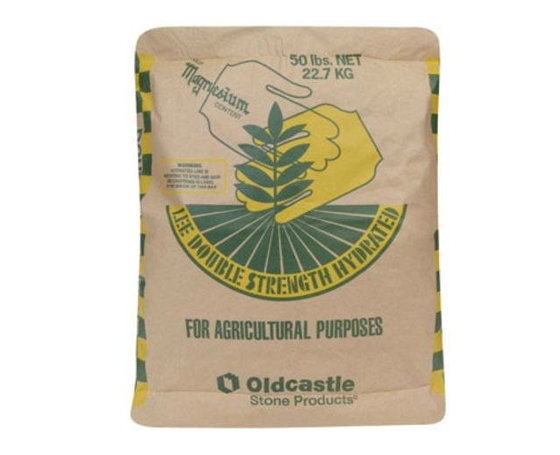
This is excellent hydrated lime. It's a fine white powder and it's going to look great on your home. CLICK THE IMAGE TO ORDER SOME RIGHT NOW.

It’s a cheap material and it’s what was used hundreds and thousands of years ago to make mortars that have stood the test of time. You can mix the hydrated lime with clean sand that will match your existing mortar. The proportions can vary but I’d recommend you mix two parts clean sand to one part hydrated lime.

Strongest Lime Mortar Mix

To create the best mortar mix, add some volcanic ash that’s high in silica content to the mix. I’d mix 1.5 parts sand. 0.5 parts volcanic ash to 1 part hydrated lime.

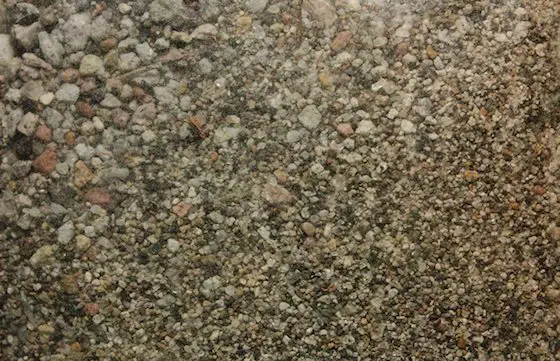
You can buy bags of volcanic ash high in silica content with ease. Here's a great one. CLICK THE PHOTO NOW TO HAVE THIS DELIVERED TO YOUR HOME.

Mix Small Amounts

Only mix as much mortar as can be applied in an hour. You never ever want to add more water to a mortar mix if the mortar starts to get hard. This is called re-tempering the mortar and it fractures the invisible crystals that formed. Once those crystals are broken, they don’t always grow back.

Mortar Consistency

The fresh mortar should have a consistency that resembles a stiff applesauce, not a runny one where liquid collects on the plate. If you add too much water to fresh mortar you simply dilute the amount of lime or cement that’s required to hold the sand together.

Grind Out Old Mortar

To get the best results, I feel you need to grind out some of the old mortar in between the brick. It would be ideal if the new mortar was at least 3/8 of an inch or about 9 mm in thickness. It’s a mind-numbing task to use a grinder equipped with a diamond blade to remove the existing mortar. Wear a mask in case your existing mortar contains silica.

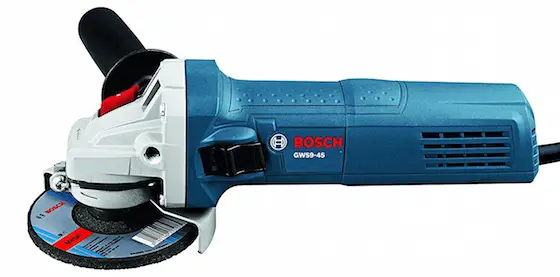
Here's a perfect Bosch grinder that will be easy to handle and will get rid of old mortar FAST. CLICK THE PHOTO NOW TO HAVE THIS TOOL DELIVERED TO YOUR HOME IN DAYS.

Mortar Grinding Video

Here's a fast video that shows how a great grinder with the right diamond blade can QUICKLY cut out old mortar.


Correct Cutting Wheel

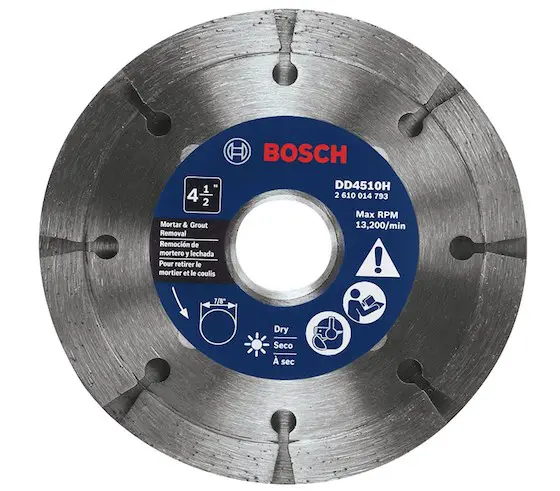
Be sure to get the correct diamond blade that's meant to cut out mortar. Usually they're thicker so you just have to make one pass through the mortar joint. Here's a good one:

Here's a great diamond blade to put on the Bosch grinder. You want a blade that's at least 1/4-inch wide. CLICK THE PHOTO NOW TO HAVE THIS BLADE DELIVERED TO YOUR HOME IN DAYS.

Get Rid Of Dust

Once you’ve ground out the mortar, you want to rinse off the brick and squirt out the mortar joints to remove any and all dust. Dust will interfere with the growth of the lime crystals as the new mortar tries to bond to the existing mortar and the brick.

Cool Overcast WX

Try to work on a cool overcast day with as little wind as possible. I realize these conditions may be hard to come by along the seashore as wind seems to be a constant. Wind can suck out the water from the new mortar too fast causing it to not become as strong as it might.

Dampen Brick & Old Mortar

Slightly dampen the old mortar joints and brick before you add the new mortar. This water will prevent suction from drawing too much water from the fresh mortar into the old mortar and brick.

You need the new mortar to cure and harden as slow as possible so it attains full strength.

Concave Joints Are Best

Use a curved mortar joint tool to create a slightly concave profile to the new mortar.

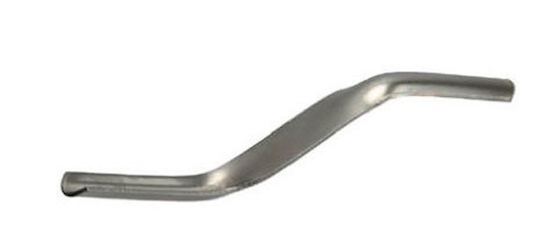
This simple tool creates the best mortar joint that resists water and all other nasty assaults from Mother Nature. CLICK THE PHOTO NOW TO HAVE THIS TOOL DELIVERED TO YOUR HOME IN DAYS.

You often need to tool the mortar within ten minutes before it gets too hard.

CLICK HERE to get FREE AND FAST BIDS from local masons who can tuck point your mortar joints.

Column 1206

Drain Cleaner Tips

Drain Cleaner TIPS for Clogs

DEAR TIM: My plumbing drains occasionally clog. Do the chemical products really remove clogs from plumbing pipes?

Are there safe products to use for septic systems? Do some types of pipes clog more readily than others? How can I prevent those pesky bathtub clogs? Shirley P., Marshall, MN

DEAR SHIRLEY: Welcome to the club!

Master Plumber Pipes Clog Too

When I built my house years ago, I was sure I would never have a clogged plumbing pipe. After all I installed the plumbing drain pipes and I'm a master plumber.

I used smooth plastic drain lines and sized all pipes according to code. It turns out, this wasn't good enough.

Kids Tub Clogged Solid

Several weeks ago, I took a bath in my kids' bathtub to soak my aching feet. Upon exiting the tub, I operated the drain lever. The water in the tub didn't budge! The drain was completely clogged. Attempts to remove the clog with a plunger and a drain cleaning snake were futile.

Free & Fast Bids

CLICK HERE to get FREE & FAST BIDS from local drain-cleaning plumbers who can save you lots of time.

Black Goop = Biofilm

Drano Foamer box

Every time I plunged, black goop came back out through the drain opening. This goop is biofilm.

It can be a combination of bacteria, old food particles, soap film, cosmetic ingredients, toothpaste, shampoos and conditioners, and actual body oils. The film is quite sticky on the surface and hardens as successive layers begin to build on top of one another.

It's not uncommon for biofim to accumulate and choke off a 1.5 inch diameter drain in just 25 to 30 years. The biofilm also emits mold spores when water goes down drains. The gas that ejects the mold spores from the biofilm has an offensive odor.

Hair Clogs

Hair - especially long hair - is also a major clog source for drains. Strands of hair can attach themselves to the biofilm and any rough surface or object in a drain pipe.

The mechanism within bathroom sinks and bathtubs that operate the stopper are favorite collection points for hair. I believe the clog in my bathtub drain was a combination of biofilm and my teenage daughter's long hair.

Grease Clogs

Grease can also clog drains. Pouring liquid grease down a kitchen sink or any drain is a big mistake.

It can solidify and choke off the drains or the main building drain line. Pour lukewarm or cool grease into paper towels or old newspapers and throw it away with your normal garbage.

Easy Drain Cleaning Video

Watch this video to see how to design drain pipes so you can clear clogs FAST.


Powdered Oxygen Bleach

Oxygen Bleach

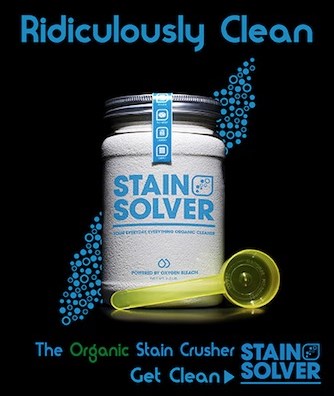
Stain Solver is MADE in the USA with USA ingredients that are food-grade quality. CLICK THE IMAGE to order some NOW.

Stain Solver is a powdered oxygen bleach that can do a great job of clearing drains. It dissolves grease and softens biofilm. Stain Solver is certified organic, made in the USA and has no odors like offensive chlorine bleach.

You mix the Stain Solver powder with hot water, stir until it's dissolved and then pour it into the clogged drain.

It works best if you use a wet-dry vacuum first to suck out as much water from the clogged drain as possible.

Use small extension tubes or plastic tubing taped to the vacuum hose to get water out of drain pipes.

Doing this allows the concentrated Stain Solver solution to get in contact with the clog.

Liquid Drain Cleaners

The liquid drain cleaners can work very well too. I decided to try a maximum strength off-the-shelf product purchased from a local grocery store even though I knew my Stain Solver would work. 

I always love to try new methods and products.

It was a thick product that poured like maple syrup. These common drain cleaners are actually a combination of regular household bleach, alkali chemicals (sodium hydroxide) and other ingredients.

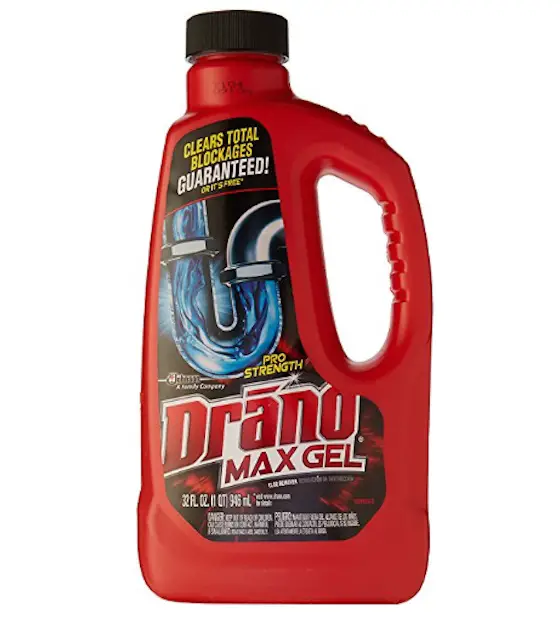
Drano Gel

Here's the product I used to clear the tub drain. There are several different formulations. CLICK the PHOTO NOW TO SEE THE ONE THAT'S BEST FOR YOU AND HAVE IT DELIVERED TO YOUR HOME.

The bleach component works great to dissolve hair, cosmetics and soaps. The alkali ingredient works with the bleach to actually soften and dissolve the biofilm deposits.

CLICK HERE to get FREE & FAST BIDS from local drain-cleaning plumbers who can save you lots of time.

Foaming Drain Cleaners

New foaming cleaners are now available that coat the entire inside of the pipes. The foam attacks biofim buildup on the side walls and top of the pipes. These surfaces are usually left untouched by the liquid drain cleaners.

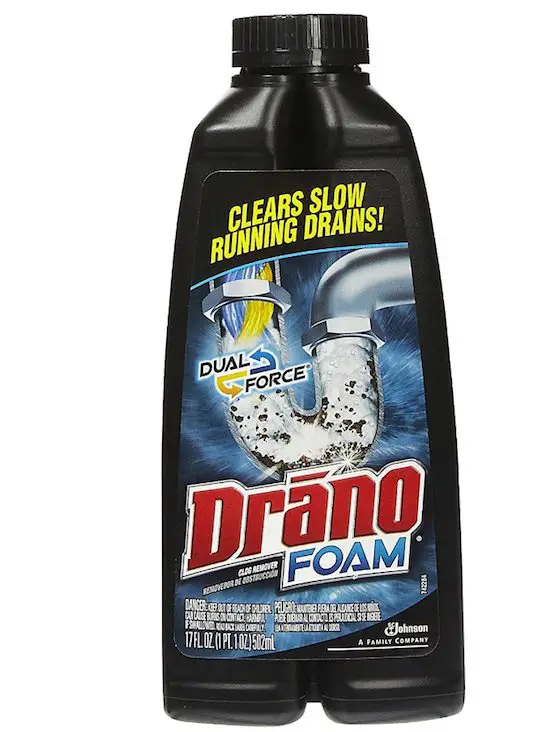
foaming drain cleaner

I've used this foaming drain cleaner on my slow-draining kitchen sink. It seems to help. CLICK THE PHOTO NOW TO HAVE THIS PRODUCT DELIVERED TO YOUR HOME.

Wet Rags & Vacuums

To make sure I got the most punch from the product I purchased, I did something different. With a wet rag stuffed down the tub overflow tube, I used my powerful wet-dry vacuum to suction out all of the water from the drain pipe and the bathtub drain trap.

This allowed me to pour the contents of the drain cleaner directly up against the clog. Within fifteen minutes, my bathtub drain was flowing like new!

Limit Use In Septic Systems

Regular chemical drain cleaners contain ingredients that are harmful to septic systems. The chemicals can kill off beneficial bacteria within the septic tank.

If you have a septic system, you should use Stain Solver on a regular basis. It can prevent clogs before they happen. When used on a regular basis and according to manufacturer's recommendations, it will not harm your septic system.

Stain Solver oxygen bleach will help to minimize biofilm buildup on the inner walls of pipes. It also adds beneficial oxygen to your septic tank.

Copper = Natural Biocide

Copper drain lines seem to have the fewest clogs. The copper actually poisons the biofilm slowing its growth and buildup.

Plastic drain lines are also resistant to clogs although biofilm will attach itself to the smooth insides of these pipes.

Galvanized iron and cast iron pipes clog most frequently due to their rough inner surfaces. If you're installing a bathtub in a new home or remodeling project, put in a 2 inch diameter trap and 2 inch drain line. The larger pipe size will be more forgiving and easier to clean out.

CLICK HERE to get FREE & FAST BIDS from local drain-cleaning plumbers who can save you lots of time.

Related Articles:   Minimize Clogged Drains - Plumbing Installation TipsDrain Cleaners - What Works / What Doesn'tLiquid Drain Cleaners, Clog-Free Kitchen and Bath Drains.

Column 246

Lot Clearing Tips

Lot Clearing Tips

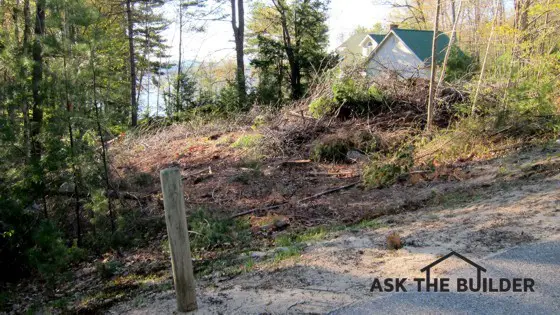
Lot Clearing Tips | Many man and equipment hours have been invested just to get this small lot partially cleared. Copyright 2017 Tim Carter

Lot Clearing Tips

DEAR TIM: I'm going to build a home on a wooded lot that I own. To save money, some friends and I intend to do all the clearing ourselves.

What's should I know about lot clearing? Do you think this is a good thing for me to do?

What are the biggest challenges and how might you best prepare for them? The estimates I got for this task took my breath away, so I'm trying to save money. Randy C., Moultonboro, NH

DEAR RANDY: I understand your desire to save money.

Get Some Estimates

With the economy sputtering along it makes sense to be as frugal as possible. As crazy as this sounds, I wonder if it might not be worth the time to get a few more estimates. Many contractors are not too busy, and you could get some really competitive prices. I'd exhaust that avenue first before I'd do anything else.

Free & Fast Bids

CLICK HERE to get FREE & FAST BIDS from local excavation contractors that know how to clear lots.

Create Simple Specifications

If you do decide to go get more estimates, be sure that each contractor is bidding the same thing. This means you must write out a very accurate job description that says exactly what you want done.

You must specify what happens with the trees, the branches, the stumps, and any large rocks that might be in the way. You need to describe exactly what the lot will look like, using photos if possible from other cleared lots, when the job is finished.

Timber = CASH $ $ $

Be aware that you could have a substantial amount of money in the trees on the land and not be the wiser. It would not be the first time a naive land owner was taken advantage of by a contractor that cut down valuable timber.

I know of land owners who paid to have high-priced timber cut down and carted away, and then the contractor makes additional money selling the logs to a timber mill!

Get Bids From Brokers

If you think you have valuable timber on your land, then you need to call in lumber brokers to get quotes on the value of the timber. Once again, you need to be very careful and have them mark exactly what trees are the money trees and how many of each there are.

Understand most loggers are going to leave your land looking like a moonscape with lots of slash left behind and ruts from the giant skidders that move the logs from the forest to the logging yard where the logs are loaded onto street-legal trucks to be carted away.

Skidder Video

These odd-looking machines can traverse just about any land. If it's muddy, they tear up land.

Let's say none of this works out, and you and your buddies become weekend lumberjacks. The first thing I want you to know is this is very dangerous work, it's hard, and if you're not used to it, it will wear you out faster than running up the Mt. Washington Auto Road.

CLICK HERE to get FREE & FAST BIDS from local excavation contractors that know how to clear lots.

Here's a short list of the equipment you'll need to make a dent in this project. You'll need several powerful chainsaws with 18-inch blades, all the safety equipment for each saw operator (chaps, helmet, visor, heavy gloves, etc.), a timber jack tool that will allow you to lift logs to cut them, chains, a tractor, possibly an excavator, etc.

Lot Clearing Tips

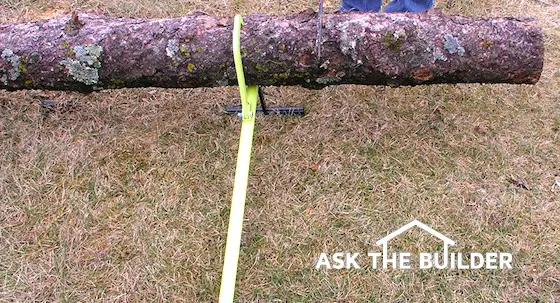
The odd tool with the lime-green handle is a timberjack. It has a moveable claw that has bitten into the log. You roll the log about 90 degrees and it elevates the end of the log up in the air so you can cut off links without getting the chainsaw blade in the dirt. CLICK THE IMAGE TO HAVE ONE DELIVERED TO YOUR HOME NEXT WEEK.

Tool rental businesses should be able to rent you all the mechanical equipment you need, but you'll have to be trained on how to operate them. Be aware that these machines are extremely dangerous, and if you don't know how to make them stable in wet, slippery or sloped ground, be extremely careful.

DIY Excavator Video

You can rent a machine like this to help you clear your land. It takes about 30 minutes to discover how to manage the joystick controls.

As for a plan of attack, you should think about the best way to access the building area so you put the driveway or road in the right spot. Think about drainage and ensuring the road is slightly elevated so it doesn't wash out.

Small Ones First

You should go in and cut the smaller trees out of the way first so you have room to work when you have to bring down the larger trees. Think about what you're going to do with all of the slash.

Slash is all of the tree material that's not taken away to a lumber or pulp mill. You generally have to burn it, grind it up or pile it on the lot so it naturally decomposes. If you decide to burn it, be sure to find out what the laws are about this. You'll undoubtedly need a permit to burn slash.

Firewood Plan

If you're going to turn the trees into your own firewood, you can either cut the logs up into links as you work, or stack the long logs off to the side to cut up later. Be sure you stack the logs at least 20 feet away from where a foundation wall might be.

You have to make sure you give the builder room to work. The last thing you want to do is move giant logs twice.

Stump Removal

Stump removal is an art. If you want to do it quickly you'll need large heavy equipment. It can be done with a bulldozer, but you must plan ahead. If you use a bulldozer to remove stumps, you need to leave about 3 or 4 feet of the tree sticking up out of the ground.

The bulldozer raises its blade and leverages the stump out of the ground. It can't do this if you cut off the tree close to the ground.

If you have access to a large tracked excavator machine, the bucket on the arm can be removed and in its place a large single-toothed blade can be installed. This monster claw looks like that of a raptor and within seconds an experienced operator can make three swipes and the stump is out of the ground. It's both an impressive and terrifying thing to watch thinking of the raw power those machines possess.

CLICK HERE to get FREE & FAST BIDS from local excavation contractors that know how to clear lots.


Column 933