January 22, 2017 AsktheBuilder Newsletter

My website revision project is moving along quite well.

Yesterday, I spent the entire day going back through all of the columns I've revised in the past two weeks and made some subtle formatting changes.

The changes were for the better! It'll be interesting to see if you can tell what I did.

I was going to send out an email to you this past Friday, but with the buzz going on about the Presidential Inauguration, I decided not to compete with the excitement or angst.

The downside to that is you've got a pretty big list to go through today.

Kathy and I met a good friend for lunch yesterday and while driving back home we were talking about the project.

I told her how it's pretty cool to be able to add all the great links to the new products and tools that will help you.

What's more, I mentioned it's fun to see how my writing style has changed over the past twenty-two years. Add to that I've forgotten about some of the things I've written about!

There are topics I've not revisited in that long.

Bottom Line: You're going to be the big benefactor!

Lynn's Retaining Wall

I had one of my 15-Minute phone consult calls this past week with a nice woman who lives in Kentucky.

It turned out to be one of the most fulfilling phone calls I've ever done because I saved Lynn from the jaws of financial death.

When I told her that there was no need to do what the contractor said, her relieved voice was like Aglamesis dark chocolate pecandes dropping into my ears. It just felt good.

You can also get pecandes in milk chocolate, but I digress.....

She was being pressured to tear down a retaining wall next to her home and have it replaced.

The contractor told her that if she didn't do it right away her house would collapse.

He's either a LIAR or the most ill-informed contractor in Kentucky. If I were a betting man, I'd put my money on that he speaks with a forked tongue.

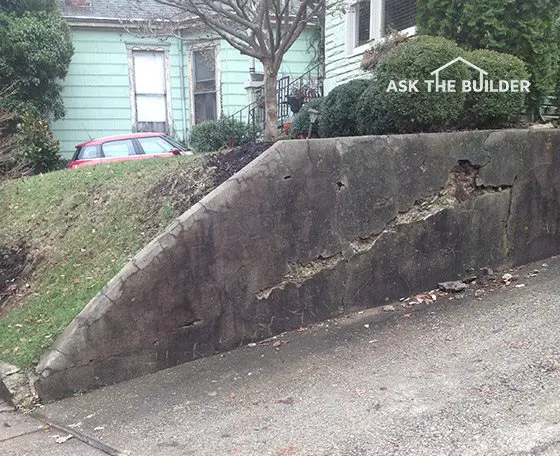
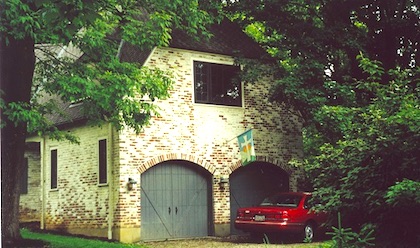
The bottom line is I shared with Lynn a column that I had just finished revising. You'll see it below. I put in a photo of Lynn's wall in the column after I finished the call.

It turns out she only needs about $50 worth of material and it would take two men maybe two days to make the retaining wall look like new.

The wall is about 110 years old, it's not leaning and even if it did fall over, it would be no danger to her home. It would just inconvenience her neighbor.

Your takeaway: Get a second, or third opinion if you feel high pressure from a contractor. Don't fall victim to high pressure. Use some common sense.

In situations like this, after the contractor would have left the first person I would have called would've been a structural engineer.

The engineer doesn't have a dog in the fight. This professional would just tell you what's really going to happen to the wall and when it's going to happen.

The contractor Lynn was talking to was using the most powerful psychological trigger of all - scarcity.

He was painting a picture in Lynn's head how her MONEY would become SCARCE because a collapsed house foundation wall would cost her TENS OF THOUSANDS OF DOLLARS on top of having to replace the outside retaining wall!

Here's all you need to know. My 15-Minute Consult calls come with a full money-back guarantee. If you feel the call's not helpful, it's free.

I'm not trying to SELL YOU on doing a call. I'm trying to SAVE you thousands of dollars like I saved Lynn.

AsktheBuilder.com Gibberish on Mobile and Tablets

In the past two weeks, I've received a few complaints about how certain pages at AsktheBuilder.com come back with strange characters and gibberish when viewed on smart phones, tablets, etc.

Guess what? There's an issue. As best as I can tell, it's with a plugin that formats the content for mobile devices.

When it first happened, I wasn't having an issue on my phone or my tablet, so I may have told you the issue was at your end.

Looks like I was wrong and I apologize.

If all goes well, everything should look MUCH BETTER by Wednesday.

Thank you if you reached out to me to alert me. Let me know if you STILL SEE gibberish after next Wednesday.

Latest Revised Columns

There are some amazing columns below if I don't say so myself.

I had a blast adding links to some outstanding products that are going to save you a ton of money and time.

I BEG you to open each column and scan it even if you don't have the problem right now.

Why?

I'm hoping that each one might make a mental imprint so that when you DO HAVE THE PROBLEM, you remember I've got exactly what you need to solve it.

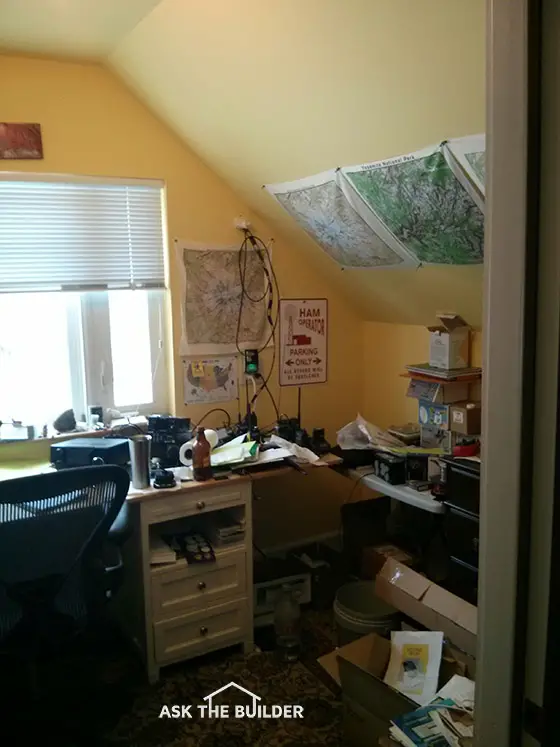
One of the columns below I COMPLETELY forgot I had written.

The issue in the column is happening right now in my own home!!!!!

I'm taping a video about it in the next two days showing how to use the product that will solve the problem.

This product and video will save you a MINIMUM of $200.

I'll add the video to the column and then share it with you.

But for now, I want to see if you can deduce what the problem is I'm having! Good Luck!

Granite Countertop Supports

2x4 vs 2x6 Exterior Walls - Not So Fast!

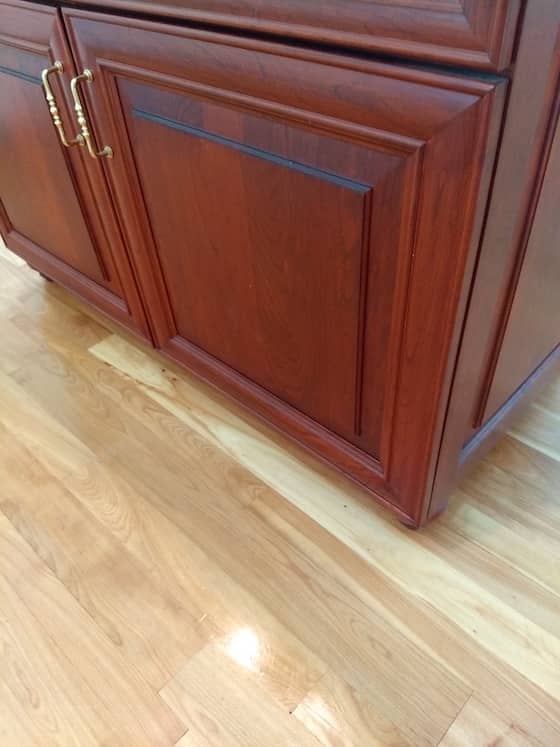
Getting a New Hardwood Floor Level

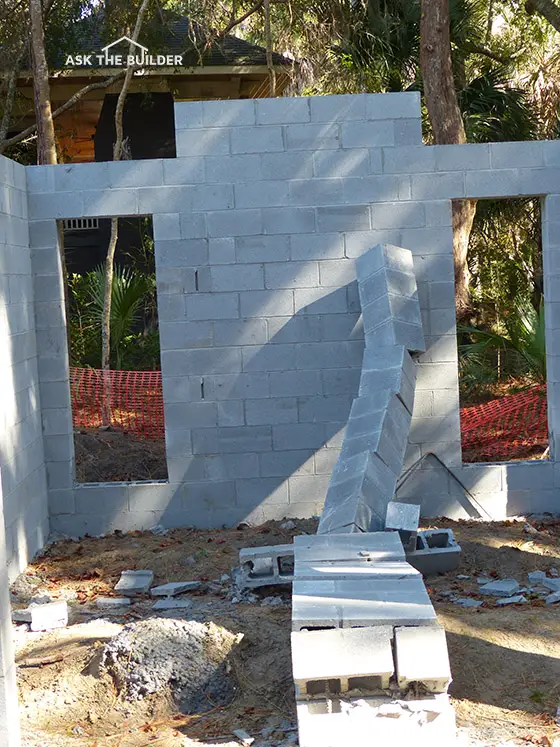
How to Repair Stucco and Crumbling Concrete Block

Attic Trusses - Create a HUGE ROOM for Cheap

Black Spots on Trex Decking

Ice and Water Shield - FOUR VIDEOS!

Fresh-Air Intake Vents - GREAT VIDEO!

DIY Drain Cleaning - You Can Do It!

Removing Wood Stains - Indoor and Outdoor

Rust Removal SECRETS from Brick or Concrete

Klare Küchenabläufe machen für ein glückliches
Leben und Frau.

I'll be back on Tuesday or Wednesday.

Tim Carter
Founder - www.AsktheBuilder.com

Do It Right, Not Over!

Rust Removal from Concrete Pavers

paving brick

I cracked the new paving brick in half. Look at how light-colored the aggregate is! Over time when the red cement paste wears off, the pavers will look different. My traditional clay paving brick patio will stay red forever, because the red clay is the same color throughout the entire brick. © 2017 Tim Carter

Rust Removal TIPS:

DEAR TIM: Last fall, we had two new colored interlocking concrete paving brick patios installed. This spring we noticed the color of the patios is not the same and some of our patio furniture has left some rust stains. To make matters worse, something fell on one of the brick and took a large chunk out of it exposing a different colored core. What is causing the color fade? Is it possible to remove the rust stains? Can the damaged brick be easily repaired to match the existing colored paving brick? Vicki L., Villa Hills, KY

DEAR VICKI: Congratulations on the new patios! My wife and I love our regular red clay paving brick patios. They differ from yours in that my patio will always stay the same color because the clay used to make the brick is the same color throughout the entire brick.

CLICK HERE to get FREE & FAST BIDS from local handymen who can remove rust for you.

Fading and Rust

The fading you are witnessing is a small, but pesky, problem with your concrete paving brick. Unfortunately, the color fade will continue to get worse over time.

Concrete paving brick surfaces look stunning when new because all of the sand and small gravel aggregate in the brick are covered with the pigmented cement paste. The same thing happens with new blacktop or asphalt roadways and regular brick mortar in a brick home.

A freshly laid roadway looks as black as night when new because the deep-black asphalt cement coats all of the sand and gravel in the asphalt. But over time, the roadways start to turn gray as the black asphalt cement is worn off the gray stones and sand by traffic and weathering.

Look at a new brick job and the mortar joints are one color. But look closely at 30 or 40 year-old brick homes and you will notice that you can see the actual colored grains of sand as the thin cement paste has worn away exposing the sand particles.

Remove Rust with Oxalic Acid

paver stone stains

This rust can be removed with oxalic acid. © 2017 Tim Carter

The rust stains are somewhat easy to remove. The first thing to do is to remove the offending furniture from the surfaces and repaint them so there is no exposed metal. I love to use special metal primers that contain zinc or zinc-chromate pigments.

These are often hard to find because the metals are considered to be toxic. If these primers are unavailable, go to a real paint store and ask them for their best rust-preventative metal primer.

I happen to like a wonderful spray paint that's got both the primer and finish paint in one. I've seen the actual lab samples where the paint is exposed to accelerated salt-fog testing and it outperforms all other consumer paints.

It's X-O Rust Professional spray paint.

X-O Rust Paint and Primer spray can

Here's a spray paint that's great for steel beams and columns. It contains a metal primer. This brand also is available in quart or gallon cans if you have LOTS of steel to paint. CLICK THE IMAGE TO ORDER IT NOW.

Follow the directions on the paint can label and then apply the paint as directed.

If you use a traditional primer, always apply the finish paint the instant the primer says it can be recoated. Doing this allows the primer and the finish paint to interlock chemically and mechanically for an excellent bond.

CLICK HERE to get FREE & FAST BIDS from local handymen who can remove rust for you.

Buy Oxalic Acid!

You need to buy some oxalic acid to remove the rust stains. It is a crystalline toxic organic compound that is mixed with water.

oxalic acid

This is a bag of oxalic acid magic crystals. It's great for removing extractive chemical stains, especially on redwood. CLICK THE IMAGE NOW TO ORDER IT.

Commercial laundries often use oxalic acid to remove rust stains from fabrics and it will really work well as it chemically reacts with the iron oxide in the concrete. The iron oxide is put into solution with the acid and then simply rinses away.

Be careful using this acid and follow all instructions on the product label. It is a good idea to capture the runoff from the process as otherwise it may kill nearby plants and trees.

Repair Damaged Brick

different colored aggregate

The hole in the brick reveals the different colored aggregate. © 2017 Tim Carter

The damaged brick can be repaired by using a coarse sand, Portland cement and a colored pigment powder that will colorize the patching material to match your existing brick. These colored pigments that are added to the sand and cement can often be purchased at brick yards. Brick masons use these same pigments to color mortar.

You'll probably have to mix several different batches and make test samples to get a perfect color match. The mixture always dries lighter than when it is wet, so don't fret once you have mixed the material. It can take up to 30 or even 45 days for the samples to cure to a finished color.

Replace Paving Brick

The best way to repair damaged concrete paving brick is to simply replace the damaged brick with a stored one. I hope that your installer left behind extra paving brick of all the sizes and colors within your patios. Better yet, these brick should be stored outdoors in an out-of-the-way location where they weather at the same rate as the patio brick. This way when it is time to replace a brick, it is an exact match.

If you are forced to buy new brick that do not match in color, you can accelerate the weathering process to make them match your existing pavers. Simply mix some muriatic acid with water - one part acid to ten parts water - and start to dissolve the colored cement paste from the top surface of the brick. Do this carefully and make sure the brick completely dries so you see how much cement paste you have etched away with the acid solution.

Work Like a Dentist

The key to long-lasting repairs in the brick is to ensure the patch is keyed into the brick. Typically most holes that occur are smaller at the bottom of the hole than the top area or outline of the hole. The resulting hole is similar in shape to an ice cream cone. If you simply install patching compound, frost action can pop the patching material out of the hole with ease.

If you carefully chisel the sides of the hole so that the bottom is larger than the top, the patching material will not pop out. This is how dentists put a filling in a tooth.

You can also achieve the same results by using a small rotary hammer drill bit to drill angled holes at the base of the defect. These holes should mimic tree roots that angle out away from the base of a tree. When the patching compound is packed into the hole, it enters these small tubes and permanently roots the patching compound to the brick!

CLICK HERE to get FREE & FAST BIDS from local handymen who can remove rust for you.

Column 527

Removing Wood Stains

remove wood stain

You can remove wood stain from these cabinets or the hardwood floor. It's hard to get out all the stain. Copyright 2018 Tim Carter

"To remove all oil stain from a piece of stained woodwork, you usually have to sand it. Oil stains penetrate into the grain of the wood and some of it just can't be pulled out by a chemical stripper."

Removing Wood Stains Checklist

Is it Hard to Remove Wood Stain?

It's not too hard to remove wood stain. A good wood stain remover is regular paint stripper.

You may want to return stained wood that's indoors to the wood's natural color. It could be too dark for your tastes.

How Much Stain Will the Stripper Remove?

Paint stripper can remove about fifty percent of the wood stain.

paint urethane stripper

This is a great paint stripper to try first to remove oil wood stain from natural wood. It's pretty much non-toxic. Always TEST it on an out-of-the-way area of the wood to see how it does. CLICK THE IMAGE NOW TO ORDER SOME.

To remove all oil stain from a piece of stained woodwork, you usually have to sand it. Oil stains penetrate into the grain of the wood and some of it just can't be pulled out by a chemical stripper.

CLICK HERE to get FREE & FAST BIDS from local painters who can chemically strip your wood.

Do Mildew & Algae Harm Wood?

Mildew and algae do not hurt wood. They are surface defects and usually feed off the wood finish or food that collects on the wood.

Mildew is a fungus that grows on the surface of wood or wood finishes. It does not hurt the structure of wood, however, its grey and sometimes black appearance is unsightly. High humidity levels promote the growth of mildew.

Oxygen Bleach

Stain Solver is MADE in the USA with USA ingredients that are food-grade quality. CLICK THE IMAGE to order some NOW.

To test for mildew, simply put a drop of oxygen bleach solution on a suspected spot. Do this in an out of the way location. If it is mildew, the oxygen bleach will begin to create micro bubbles and usually the mildew will disappear in a matter of minutes.

I happen to prefer Stain Solver certified organic oxygen bleach. It's Made in the USA with USA ingredients. You just mix the pure powder with hot tap water, stir a minute or two and you're ready to use it.

Stain Solver has no odor like chlorine bleach. It's non-toxic. Chlorine bleach is highly toxic and will kill all surrounding vegetation, even trees if you expose them long enough to chlorine bleach.

Stain Solver will not remove the natural color of the wood, nor will it damage the lignin that binds the wood fibers together. It's the safest bleach you can use on outdoor wood.

To remove the rest of the mildew, scrub the area with detergent mixed with the oxygen bleach.

Can I Mix Bleach With Ammonia?

IMPORTANT TIP: NEVER mix bleach with ammonia or detergents or soaps that contain ammonia. The combination of bleach and ammonia produces toxic gases which can be FATAL, especially in unventilated areas! After cleaning, rinse the washed area with a solution of bleach and water to kill any remaining mildew spores.

Watch the video below to show you how easy it is to remove stains from outdoor wood using Stain Solver oxygen bleach. Yes, the open of the video is a little corny, but the local ABC-TV affiliate always wanted me to have some fun with my segments that appeared on local TV in Cincinnati, OH.

How Do I Remove the Dark Stains from Cedar?

Use certified organic oxygen bleach to remove dark wood stains from cedar.

If you are a victim of extractive stains, they can be removed. All you need to do is to mix a solution of Stain Solver oxygen bleach. Mix one cup of Stain Solver powder to one gallon of hot tap water.

Use this solution to wash the stained area. Rinse well.

How Do I Remove Dark Redwood Stains?

Use oxalic acid to clean redwood and remove dark wood stains.

Then, find a plastic bucket or pail. Now, mix four ounces of oxalic acid crystals with one gallon of warm water.

oxalic acid crystals bag

This is a bag of oxalic acid magic crystals. It's great for removing extractive chemical stains, especially on redwood. CLICK THE IMAGE NOW TO ORDER IT.

Note, do NOT use a metal bucket for this solution! The oxalic acid will react with the metal and cause massive problems!!!

Wash the stained area with this solution and simply let it dry. Do not rinse it off until the solution is dry. Any remaining stains should come off when you rinse off the dried oxalic acid. Be sure to use goggles and gloves when using oxalic acid. It can hurt your skin and eyes. It can also hurt plants, so spread some plastic over them.

CLICK HERE to get FREE & FAST BIDS from local deck cleaning companies.

Can Cement & Mortar Stain Redwood?

Yes, cement and mortar can create dark stains on redwood.

The lime which is a part of virtually every concrete and mortar mix can cause stains on redwood which cannot be removed. Redwood which is splattered with these compounds develops black stains which are impossible to remove. Take whatever precautionary measures necessary to prevent splatter.

Column B66

Attic Trusses – Room Size

Attic trusses created this room. This is my cluttered man cave and ham-radio shack. This room is over the garage of my New Hampshire home and it was created using attic trusses. The room is 12-feet wide, the vertical wall to the right is 4-feet tall, the ceiling above is 8-feet tall. The wider the structure is, the BIGGER the room can be. The steeper the roof pitch, the HIGHER the ceiling can be in the room - within certain limits! - © 2018 Tim Carter

Attic Trusses Checklist

Best Way To Frame - The SBCA - The Authority on All Things Trusses

You can get the best information about attic trusses, and all other structural building components, by visiting the Structural Building Components website that was built just for you.

Attic Trusses - Create a Free Room or Rooms

My friend, Loren Power, will be the first to tell you that I made a mistake on his house. He trusted me to build his home and it was one of the first I had ever done.

He was the one who pointed up into the vast attic space of his home and said, "What a huge waste of space. Why didn't we make some sort of room up there?" Of course this was after the entire roof was constructed and it was too late to turn back.

CLICK HERE to get FREE & FAST BIDS from local carpenters who can install any trusses for you.

Loren's comments years ago quickly put me in my place. It was obvious that I still had lots to learn about offering options to homeowners.

Do Steeper Trusses Create Bigger Rooms?

The steeper the roof pitch, the bigger the rooms will be. My daughter's house has attic trusses. The house is only 28 feet wide with a 10/12 pitch and she has a giant room that's 18-feet wide with a ceiling height of 9 feet eight inches!

If your new house will have a steeply pitched roof - say 10 inches of rise for every 12 inches of run (10/12 pitch) or more - then you can gain some very serious room if you upgrade to an attic truss.

For example, if your house is a 50-foot-long by 38-feet-wide structure, you can get an attic truss that will allow you to create a full height room (8 foot ceiling) that is 16 feet wide by 50 feet long!

That's 800 extra square feet. Think of how you could slice and dice up that space into different rooms.

How Much Extra Money Do Attic Trusses Cost?

My guess is that the national average for an attic truss that will create the space we just described will cost you about $100 more than a regular common truss. These prices change with the demand for lumber. 

For the 50-foot-long room, you'll need about 24 trusses. This is $2,400 plus the cost of the plywood subfloor. Let's say plywood costs $20 per sheet for 3/4 inch tongue-and-groove yellow pine. We'll need 25 sheets to cover our 800 square foot space. This will add an additional $500 to our material cost. We are now at $2,900 plus tax. Let's just say it will be $3,100.

Get out the calculator. $3,100 divided by 800 square feet equals just $3.88 per square foot rough construction cost!

That's a HUGE bargain, especially when you compare that to the overall cost of your house.

Not only that, this cost is almost purely material cost. The labor to set the trusses is no different than had you not included the room. You would be a fool not to create this space or at least a partial space up in the trusses.

Can You Store Things in Regular Trusses?

No, regular trusses are not designed to act as storage or attic trusses.

I received an e-mail from an individual. He had discovered a hidden storage space up in his attic.

His dilemma was whether or not the floor of the space could support the weight of storage boxes. Had the builder installed attic trusses or their step-sister storage trusses, I doubt I would have received the e-mail.

My advice was him to get a FREE & FAST BID from a local structural engineer who'd come out and tell him what he can store up there. NEVER take a chance. Get a bid.


Can You Create a DIY Truss?

Yes, you can build your own truss or trusses. The issue is how you make your connections and if you've done all your calculations correctly.

How well did you do in high school geometry? If you did fairly well, then cutting roof rafters will be a piece of cake.

All you have to keep in mind is the fact that there are primarily two cuts in rafters. The ones that are straight up and down (plumb cuts) just like a plumb line and level cuts (heel cuts). Rafters simply have a series of cuts in them, all of which are either parallel with one another or oriented at 90 degrees to one another.

Watch my Framing Square VIDEOS to see how this is done:

How Do You Make Angled Rafter Cuts?

To cut a rafter you need to know the pitch of the roof. This is the rise and the run relationship. By convention, we call it out as the number of inches a roof slope climbs as you proceed 12 inches horizontally across the roof. An example would be a 4/12 pitch roof. The roof "rises" 4 inches in height for every 12 inches it "runs" horizontally.

A framing square will create the series of parallel lines and perpendicular lines if you simply slide it along one of the edges of the rafter. Note that a framing square has two legs. The narrow one that is 16-inches long is the tongue.

The fatter one that is 2-feet long is the body. The are oriented at 90 degrees to one another.....now isn't that a coincidence.....?

Note that there are markings - in inches - on both the inside and outside edges of the square. The starting point of the markings is at the corner where the two legs meet. This is important. You must decide to use either the markings on the outside edges or inside. I happen to like using the outside edges of the framing square.

Get some scrap pieces of 2 x 4 and practice making these two cuts.

CLICK HERE to get FREE & FAST BIDS from local carpenters who can install any trusses for you.

How Do You Make 4/12 Rafter Cuts?

Let's say we are doing a 4/12 pitch roof. Find the 4 inch mark on the outside edge of the tongue. Locate the 12 inch mark on the outside edge of the body. Position the square so these two marks are touching the same edge of the rafter your are going to mark.

Watch the videos above to see this done.

Note how the square is oriented at an angle across the rafter. The tongue of the square is creating your plumb cut where the rafter will rest against the ridge board. The body is creating the heel cut where the rafter will sit on top of the wall. We could mark and cut right now if our span was just one foot. But we aren't building a cat house!

How Do You Calculate Rafter Length?

Let's go back to geometry. The rafter square makes two sides of a right triangle. The sloping rafter makes the third component - that being the hypotenuse.

The length of the hypotenuse is what goofs everyone up. How do you figure out the length of the rafter? It is simple mathematics. It has already been done for you if you buy a quality framing square. There are tables on the body of the square that tell you how long the rafter is for the different pitches for each foot of horizontal run.

You can also purchase books, booklets, or fancy construction calculators that will instantly tell you the rafter length as long as you plug in the rise, run and span values. Once you grasp how to orient the square, this is your only other challenge.

How Do You Do Ridge, Tail, and Seat Cuts?

If you do the pure math to figure out rafter length, you will always be a little long. Why? Just about everyone uses a ridge board.

You need to shorten the rafter for half the thickness of the ridge. This often means slicing off an extra 3/4 inch off the plumb cut at the one end.

The seat cut is the notch where the rafter sits on the wall. Don't make this too deep. Never cut out more than 1/3 the plumb cut distance into the rafter.

The rafter tail cuts where the roof ends are best made - in my opinion - after the roof is framed. If your wall is not perfectly straight - most aren't - your gutter board will mimic the curved line of the wall if you cut the tails at the same time you make all your other cuts. It is more work to do it in the air, but it is well worth it.


How Do You Install Trusses?

Trusses can be installed using just man or woman power or you can get help from a crane or any other machine that can safely lift the truss and set it into position.

Every year many construction workers get killed or seriously injured from truss assemblies that collapse suddenly during construction. The most common problem is that the trusses were not braced properly and sufficiently during the erection process.

Attic trusses almost always need to be set by a crane. They're extremely heavy.

All truss manufacturers will gladly supply you with a booklet showing how to brace trusses as you set them on top of the walls. A simple 2x4 or series of parallel 2x4's providing the 16 or 24-inch spacing isn't enough! You need additional diagonal braces that make X's on the top chord of the trusses.

Larger trusses often need similar diagonal bracing on the vertical center post web member too. the larger the truss (both height and span) the more complicated the bracing. Gravity, wind, the motion of workers, and an unexpected bump by the crane can easily topple a truss roof during construction.

Don't try to ever set attic trusses if you've never done it before. Have a seasoned crew of carpenters there to assist you. 

CLICK HERE to get FREE & FAST BIDS from local carpenters who can install any trusses for you.

How Do You Install Complicated Trusses?

If you're setting a hip roof made from trusses, you will probably have girder trusses, special hips, etc. There's a certain order in which the components must be set. Not only that, you work from the two long ends of the roof towards the middle.

The truss manufacturer will almost always provide you with a set of erection instructions to help you. If you're a rookie, I wouldn't think of trying this without some experienced help.

CLICK HERE to get FREE & FAST BIDS from local carpenters who can install hip trusses for you.

Column B203

How to Reinforce Concrete Block

The concrete block pier at this job site toppled over because the contractor failed to properly reinforce it with steel bars surrounded by pea-gravel concrete in the hollow cores. Note the other obvious defect: No pre-cast concrete lintel over the window openings. This photo was sent in by a homeowner worried that the workmanship on his job was poor. I assured him that the primates on the Career Builder TV commercial could have done a better job. This is NOT one of my AsktheBuilder jobs, that's a fact. Photo Credit: Alan Todryk

Reinforce Concrete Block TIPS:

  • Mortar is strong in compression - weak in tension
  • Concrete block needs steel reinforcement
  • Concrete block should be attached to concrete footer
  • WATCH steel & concrete block video below
  • CLICK HERE for Tim's FREE & FUNNY Newsletter

DEAR TIM: I'm building a new home and two concrete block piers toppled over when a ladder was leaned against one. The one pier crashed into the second one. Why did this happen and what could have prevented it? I thought concrete block was the smart product to use for my foundation and home, but now wonder if I made a big mistake. Have you built with concrete block successfully? What did you do? Alan T., Charleston, SC

DEAR ALAN: Let's start out by reassuring you that concrete block is a great building material. It's strong, it can be used in any number of ways, and it is used in all sorts of residential, commercial and industrial applications. Stop second guessing yourself. You need to direct that attention to the contractor on your job and any written specifications that were part of your blueprints and plans.

Tension & Compression

The block piers toppled over because the connection between the mortar and the concrete block is not able to resist the force of being pulled apart. The ladder placed against the top of the pier converted the pier to a lever. The seemingly minimal force at the top of the ladder was multiplied at the base of the pier where it fractured.

The mortar in between each course of block is strong if you try to squeeze, or compress it. But if you try to bend or stretch it, that's tension, it's very weak. Most masonry products, including concrete, only have 10% of the strength in tension as they have in compression.

CLICK HERE for FREE & FAST BIDS from local brick and block masons.

Fill Hollow Cores

The vast majority of concrete block are hollow. When laid on their side and stacked in an offset manner they resemble, to a degree, a honeycomb made by a hive of bees. Bees fill the void spaces of the honeycomb with honey. Your contractor should have filled the hollow spaces in the block with pea gravel concrete and steel bars.

Realize he may have been getting ready to do this just before the accident occurred. Someone may have goofed up and put sideways pressure on the pier before the concrete and steel could be added. Not all contractors work 24/7/365. I only did it on rare occasions myself to hit a mission-critical deadline.

Concrete, mortar, and almost all rock are very strong when you compress them, but these materials usually only have one tenth the strength when you try to bend or stretch them. Engineers and technical folk call those bending or stretching forces tension. You commonly hear them talk about the tensile strength of a building material.

Steel Is The Answer

Steel, on the other hand, has fantastic tensile strength. For example, common one-half-inch reinforcing steel on a residential job site may be rated at 40,000 pounds of tensile strength. That means it fails or tears apart once you apply 40,000 pounds of pulling force to it. WOW!

CLICK HERE for FREE & FAST BIDS from local brick and block masons.

Steel in Concrete Block Video

The first 20 seconds of this video show you how steel needs to be in the CENTER of the voids of concrete block. Then watch at 1:10 to see how they got the vertical steel in the PERFECT location. You'll see a flat 2x4 up in the air in a straight line. This face of the 2x4 was carefully staked out and represents the CENTER of the wall.

Pea-Gravel Concrete

Once your contractor mixes up small pea gravel concrete, not the sandy mortar he used to lay the block, and pours it into the block voids along with the long steel rods, the concrete block then starts to resemble reinforced poured concrete.

Pin Block to Footing / Footer

It's a best practice to use this same reinforcing steel to connect the concrete block walls to the poured concrete footer. I did this on all my jobs making sure the steel rods protruded up from the concrete footer about 2 feet. I then dropped the long steel bars from above down to the top of the footer so the steel pieces overlapped.

The reason you want to use the pea gravel concrete instead of mortar is it's stronger. The rocks used in concrete mixes are responsible for much of the strength concrete achieves once it's cured. You want to use smaller pea gravel because the void spaces in the concrete block wall are not too large once mortar oozes in between the block and the steel is in place.

Center Steel

It's important the steel bars in the block are centered in the void spaces to ensure they're surrounded by concrete. In a retaining wall situation, it's important to place the steel so it's closer to the wall face that's not touching the earth. It's very important to have a structural engineer specify what needs to be done in these situations. Follow her or his recommendations closely.

You can also used thin wire reinforcing for concrete block walls. This unique product is placed on top of a row of block in the horizontal mortar joints. This thin steel, once embedded in the mortar, adds significant strength to long concrete block walls.

Pilasters

Pilasters or wide piers can also be incorporated into long and tall concrete block walls to add more strength. Once again, it's best to have a structural engineer specify where and how these elements should incorporated into your design. The money you spend on getting the advice of a structural engineer is often the best spent money on a job.

Here's all you need to know about concrete block and reinforcing steel: It's a great combination, it's affordable, it doesn't require lots of skill to combine them and you end up with a foundation that's as strong or stronger than a poured concrete foundation.

One of the things I really like about concrete block is the average person can build with them. It takes some skill to lay them plumb and level, but it's a skill that can be achieved with modest practice. You can used decorative concrete block around your home for all sorts of projects, just be sure you reinforce them if you want them to stand the test of time.

CLICK HERE for FREE & FAST BIDS from local brick and block masons.

Column 1016

Clothes Dryer Venting

clothes dryer vent

Massive amounts of water vapor are belched into the air each minute a clothes dryer is working. © 2017 Tim Carter

Clothes Dryer Venting TIPS

  • Exhaust air must go outdoors
  • Use smooth galvanized 4-inch pipe
  • NEVER exhaust in attic or roof overhang - SEE BELOW
  • Roof vent hoods for no-snow areas
  • CLICK HERE for Tim's FREE Newsletter - It's funny!

DEAR TIM: My husband wants to vent our clothes dryer directly into our garage in an attempt to keep our cars warmer in the winter months. I think dryer vents should be directed outdoors. Can you settle this clothes-dryer-vent debate? Where would you vent the dryer and what are the top things you would avoid when installing a clothes-dryer vent? Cindy R., Redondo Beach, CA

DEAR CINDY: I get asked so often to referee these marital debates, I am thinking of buying a white-and-black striped shirt. Your husband should be congratulated for thinking of a way to use the waste heat from the clothes dryer, but his proposed method will cause some secondary effects that could end up costing you time, trouble and money.

This may also be a building-code violation in your area, as it is not a good practice to have penetrations in the wall between a house and the garage.

CLICK HERE to get FREE & FAST BIDS from local dryer vent installers.

Water Vapor Bad

Along with all of the heat that would pour into your garage, you also get scads of water vapor. If you have ever seen a clothes-dryer vent belching out a plume of water vapor on a cold winter day, you know this might be problematic.

All of the liquid water that was in the clothes will get sent into the garage, if your husband implements his idea. This water will undoubtedly condense on all of the cool surfaces in the garage causing rust and corrosion on any unprotected steel tools or parts.

Condensation and Lint

But the water vapor will also condense in places you can't see. You may end up with water and mold issues inside of your garage walls and in an attic space above the garage. Wood rot is a distinct possibility if this water vapor discharges into the garage for any length of time. Lint will be everywhere in the garage as well.

Dryer vents, and the importance of doing it right, are a very misunderstood aspect of home building and remodeling. Many people underestimate the thousands of cubic feet of air that are expelled by a clothes dryer each time it dries just one load of clothes.

Vent Outside

This air must be exhausted outdoors as your intuition told you. But this doesn't mean you can't capture some of the heat before you exhaust the air.

I've found that it is often best to vent fans and dryers through the roof if you live in an area with little, or no, snow.

I urge you to watch this video of mine to see how easy it is to install the correct vent-cap flashing on a roof. Have no fear - if done right you will have no leaks.

Side Wall Best

I always say to vent clothes dryer exhaust outdoors. You can do this sideways through a wall or up through a roof as hot air rises with ease. The most important thing to do is read all of the written instructions that come with a clothes dryer and follow them to the letter. The instructions often describe in great detail the preferred pipe to use and the configuration of the pipe as it makes its way from the back of the dryer to the outdoors.

CLICK HERE to get FREE & FAST BIDS from local dryer vent installers.

Smooth Metal Pipe

Almost every clothes-dryer manufacturer will tell you to use smooth metal pipe as the venting material. This pipe should be 4 inches in diameter and extend some maximum distance. Each manufacturer will state how long the vent pipe can be. You need to do some math, as 90-degree fittings that allow you to turn corners must be accounted for in the calculation. A single 90-degree fitting usually equals 10 feet of straight pipe.

If you live in a cold climate, you may want to think about how to reclaim heat from your dryer. This will save you some money on your heating bills. The way to do this is to use metal pipe inside your home and allow it to act like a radiant heater or a car radiator in reverse.

Harvest Heat!

To extract heat  from a simple clothes-dryer vent, try to install the metal vent pipe so it is near or at its maximum length indoors. If you have the luxury of an unfinished basement, you may be able to run the metal vent pipe at a slope from the dryer to a window that is perhaps 20 feet away. The hot pipe radiates the heat directly into your basement along its entire length.

You may be able to fabricate a crude heat exchanger using some scrap sheet metal. But if you do this, be sure it is made with a door that allows you to open it to check for lint buildup. Fires that feed on clothes-dryer lint are a reality, and you must always make sure your clothes-dryer vent is free of lint buildup.

Insulate Pipe in Cold Space

It's very important that the clothes-dryer vent is well insulated if it passes through a cool or cold space like a crawl space or attic on its way to the exterior.

If the pipe is not insulated, water can condense on the inside of the vent causing leaks or poor dryer performance if the pipe becomes filled with water. This water can leak and drip down onto ceilings or soffits.

Best Vent Hood

The best dryer vent hoods in my opinion are the ones with double doors. I have two at my own home, one that's used for a bathroom exhaust fan so it stops cold air from backdrafting into my home. The image below is the one I used. CLICK THE IMAGE or CLICK HERE to order one right now.

clothes dryer vent double door

Look at the double doors. This keeps pests out and prevents cold air from backdrafting into your home. CLICK THE IMAGE to order it now.

Beware Soffits & Overhangs!

Avoid installing the dryer-vent termination cap in a soffit overhang under a roof. The clouds of water vapor can easily find their way into the attic through soffit vents, cracks or any other small opening. This water vapor will condense on the cold lumber in the attic. I have seen photos of frost one-half-inch thick that has coated large areas of an attic. Other photos have shown a plume of black mold on the underside of the roof just above the soffit where the dryer vent exits the house.

You can readily purchase dryer-vent roof caps that connect to the 4-inch smooth metal pipe. These caps have a damper that keeps animals out of the pipe. They do require periodic maintenance to ensure lint does not clog the damper leaving it partially open.

No Indoor Vents!

Beware of the dryer-vent kits that say you can exhaust the air inside your home. For them to convert all of the water vapor to liquid water, they would have to be equipped with a very large refrigerated coil as part of the system. Without this coil, vast amounts of water vapor invade your home.

Cleaning Dryer Vents

Lint can build up in a dryer vent pipe. I once had to move a vent pipe for a single mom and the entire pipe was choked with lint.

The dryer will not function properly if the vent gets reduced in size by lint buildup.

Use the following great brush to remove lint from your dryer vent pipe.

dryer vent brush

This is a fantastic product to clean out your dryer vent. CLICK the photo to have it delivered to your home in days.

CLICK HERE to get FREE & FAST BIDS from local dryer vent installers.

Related Column: Your Pesky Dryer Vent Pipe

This column was featured in the January 22, 2013 AsktheBuilder Newsletter.

Column 714

Black Spots on Trex Decking

Trex Deck

This is part of my outdoor deck complex. It's covered with amazing Trex Transcend decking. The long narrow deck to the left was originally covered with generation one Trex. The lower deck to the right was new the summer of 2016. I know, from years of experience, I need to wash my deck periodically with Stain Solver oxygen bleach to keep it looking like new. CLICK THIS PHOTO to ORDER STAIN SOLVER NOW. - © 2017 Tim Carter

Black Spots on Trex Decking TIPS

DEAR TIM: I have 1500 sq. ft. of lakefront boardwalk consisting of TREX Accents decking. There are no trees nearby. It started developing black spots within two years after installation in 2014.

Coincidentally that is the same year that TREX settled a class action law suit regarding Accents and they then discontinued that line of decking. However that didn't stop the retailers (Lowe's) from continuing to sell this substandard product in order to clear out their inventory.

I am mad as hell at Lowe's and TREX, I called TREX and they will not stand behind their product even though they have known for many years that Accents has a huge problem.  It is going to cost me at least $20,000 to replace this deck. Jim C. Eaton, OH

DEAR JIM: Guess what? I had a generation-one Trex deck (manufactured in 2000) at the current house I live in here in central New Hampshire. It's also lakefront, but I've got lots of oak, birch and evergreen trees around me. My deck also suffered from the black spots.

Don't get out your checkbook for a new deck. You'll spend another $30,000, or more, and you'll end up with black spots again.

CLICK HERE to get FREE & FAST BIDS from local deck cleaners who can help you.

No Maintenance is a Myth

Up until recently many home building and remodeling products were sold as maintenance-free. That's a myth. Everything, I don't care what it is, requires maintenance.

IMPORTANT: Maintenance includes periodic cleaning.

It's possible when you bought, or selected, the Trex Accents material you thought you were never going to have to do anything. I've received hundreds of emails from homeowners who told me this. They thought Mother Nature would take care of everything.

They were wrong.

Mold and Mildew Equals Black

Those black spots are mold and mildew. It's eating food that lands on your Trex Accents decking. The food could be dust, dirt, and airborne sugars from some other vegetation that's carried to your deck by the wind.

It can also be organic matter that's in the lake water and is splashed up onto the decking.

It can be food that comes down on the deck each time it rains. Mother Nature doesn't always have the best housekeeping habits.

CLICK HERE to get FREE & FAST BIDS from local deck cleaners who can help you.

Food + Water + Mold Spores = Black

Mold growth is like fire. You need three things to have a fire:

  • fuel
  • oxygen
  • heat

You need three things to have mold growth. I already mentioned the two you have - food and water. 

Water can come from rain, dew or the lake.

The third part of the mold/mildew triangle is spores (seeds).

Mold spores are everywhere except in the Center for Disease Control labs and any other place that has incredible expensive air filtration that keeps mold spores out of the air.

Your deck is covered with mold and mildew spores. All the time everyday of the year. When the spores land on food and water is introduced, they start to grow.

Deep Clean First

Oxygen Bleach

Stain Solver is MADE in the USA with USA ingredients that are food-grade quality. CLICK THE IMAGE to order some NOW.

You can STOP the black spots by just doing a periodic cleaning. The first step is to get the decking clean. I had great success at my own home using Stain Solver.

Stain Solver is a certified organic oxygen bleach you mix with hot tap water. Stir it until it dissolves, add the solution to a garden hand-pump sprayer and saturate the deck on an overcast cooler day.

IMPORTANT TIP: Let the solution work for 15-30 minutes. The longer you let it work, the less you, or a worker, has to scrub.

Some people let the solution work for two or three hours. This requires that you keep the decking WET with the solution with periodic re-spraying. Never allow the solution to evaporate.

Periodic Cleaning HELPS

This is the part you're not going to like. It goes back to the first part of my answer.

You need to maintain the cleanliness of the deck. This means you need to take away one of the three parts of the mold triangle.

You can't take away the spores because they land there all day long. You can't take away water.

Take away the food. The moment you see one black spot reappear, you get out the Stain Solver and spray down the deck. This time you can add a little liquid Dawn dish soap and lightly scrub the decking a few minutes after spraying the solution.

You don't need to wait the 15 or 30 minutes. You'll not have to work hard scrubbing.

Black Spot Prevention

You can also stop the black spots by spraying the decking with a copper sulfate solution. Copper is a natural biocide.

Copper plating was used by the owners of the historic clipper ships like the Cutty Sark and Thermopylae to make them more money. It was attached to the hulls of the ships and it prevented the growth of barnacles and other organic animals from growing on the wood hulls.

This organic growth slowed the ships by creating more drag and reduced the profits of the owners. This same copper is also on the USS Constitution.

Copper Sulfate Solution

I'd purchase some copper sulfate crystals and dissolve it in hot water.

The strongest solution you can make is achieved by mixing about 1/2-pound of copper sulfate crystals in a quart of hot water.

Copper Sulfate

This is exactly what you need to keep algae, mildew and mold from decking and patios. CLICK THE IMAGE NOW TO BUY IT.

Put the solution in a hand-pump garden sprayer and apply it to clean decking.

Apply it as a fine mist on the decking on a hot deck so the solution evaporates as fast as possible. You don't want excess solution to get into the water.

The copper will soak into the wood fibers of the Trex and naturally create a barrier to the growth of the mildew and mold.

 I can't tell you how often you'll have to apply it, but it could be four or five times a season. The sun's ultraviolet (UV) rays will break down the copper and expose the wood again to the mildew and mold.

I know one thing, it will only take a few minutes to do this each time versus cleaning the decking!

CLICK HERE to get FREE & FAST BIDS from local deck cleaners who can help you.

Column Black Spots on Trex Decking

Fresh-Air or Make Up Air Intake Vents

fresh air intake vent

This fresh-air intake vent will do a great job. You may need several to get enough air indoors to satisfy all fuel-burning appliances. Pipe them with solid 4-inch metal pipe. The tips below are SO GOOD I decided to share them with my 31,000 subscribers who read my November 29, 2020 newsletter. CLICK THE IMAGE TO ORDER THIS VENT NOW.

Fresh Air Vent TIPS

IMPORTANT TIP: Make-up air vent is the same thing as a fresh-air intake vent. 

DEAR TIM: I've got both a fireplace and a free-standing wood heater spaced 15 feet apart from one another in my open kitchen and living area. The fireplace has a fresh air vent in the hearth.

I've only used the fireplace twice in fifteen years because when I start a fire in the fireplace, it pulls a sooty smell from the wood heater. Surprisingly, I do not get the smell when I use the wood heater.

I'd like to install gas logs in the fireplace. Will gas logs pull air from the wood heater and cause the same sooty smell? Jamie L., Gulfport, MS

Fresh Air Vent Needed for Fireplaces

DEAR JAMIE: I would be willing to bet money on my answer: Yes. Based upon your description, you are experiencing back drafting.

A fireplace consumes vast amounts of air each minute as the fuel burns. It can easily be 250 to 350 cubic feet of air per minute. The fresh air vent in the hearth may be blocked or it may not be able to supply enough air to satisfy the appetite of the fire.

The additional air to feed the fire must come from somewhere. Simple physics will tell you that the air will enter the room through the path of least resistance. In your case, it appears the air has decided to enter the room through the flue of the wood heater.

CLICK HERE to get FREE & FAST BIDS from local contractors that can install a fresh-air intake vent at your home.

Dangerous Backdrafting

Back drafting is an enormous problem. It is a by-product of the constant push to make homes more energy efficient and air tight.

The trouble is, homes are equipped with things that blast air, and lots of it, out of the living space. Carbon monoxide, CO, is a real danger if you don't prevent backdrafting in your home.

Fans, Water Heaters & Central Vacs Need Fresh Air!

Have you ever stopped to think about what happens when you activate the switch for your bath fans, kitchen cooking ventilation fans and central vacuum cleaner? What happens when you turn on your clothes dryer? These devices exhaust air outdoors and in doing so create a partial vacuum in your home.

You need to make sure you have as much air coming into your house where you WANT IT TO COME IN as you have air leaving your home via all those things above you turn on!

All you need is a simple fresh-air vent that is cut into the sidewall of your home. Here's a dandy one:

Fresh-air Vent VIDEO:

Controlled Entry

If you do not have an air inlet to re-supply the exhausted air, the replacement air will leak in through windows, doors, chimneys, water heater and furnace exhaust piping, cracks in the house exterior, etc.

If several appliances are operating and the demand for air is great enough, exhaust gases from fuel burning appliances can be sucked backwards into your home. This can cause dangerous carbon monoxide to be pulled back into your home.

Modern Furnaces Have Built-In Fresh Air

Many modern furnaces and water heaters have built-in pathways for the air needed to burn the fuel. In fact, virtually every residential building code mandates that combustion air for fuel burning appliances be supplied to fuel-burning appliances.

But more air than combustion air is needed in the average home. For years, commercial and institutional building codes have required this extra ventilation or make-up air.

This air creates a healthier interior environment, insures that plenty of fresh air is entering the building and that dangerous back drafts are avoided. It is in your best interest to provide this ventilation or make-up air.

This thinking is not new by any means. There are companies that actually sell sophisticated air exchange devices that provide some or all of this needed ventilation or make-up air.

But I am not so sure that you need to invest in this equipment. If you do decide to investigate these appliances, be absolutely certain that you see a clear rate of return on your investment. In my opinion, there may be some more practical and far less-expensive solutions.

CLICK HERE to get FREE & FAST BIDS from local contractors that can install a fresh-air intake vent at your home.

Fresh-Air Vents Are Easy to Install

There are many types of fresh-air vents. If you want to provide fresh air into your heating and air-conditioning system as is done on commercial jobs, you'll need more than one.

You'll pipe one, or more, close to the appliances that are burning fuel. This will supply the needed combustion air.

You'll pipe one, a simple 4-inch pipe is all that's needed, directly to the return air plenum very near your air handler or furnace. Any decent HVAC technician can do this.

CLICK HERE to get FREE & FAST BIDS from local contractors that can install a fresh-air intake vent at your home.

Higher Fuel Bills With Fresh Air?

You may wonder if the introduction of cold or hot air into your home will cause your energy bills to rise significantly. In actuality, they may stay the same or drop.

The air that is consumed by the fans, clothes dryers, vacuums, fireplaces, fuel burning appliances, etc. is coming in anyway to offset the vacuum produced when these things operate. By installing a simple device to cause this air to enter in just one place instead of many different places, the thermostat that controls your furnace and air conditioner may actually cycle on fewer times each day.

Read the email I received from the guy who purchased my house back in Cincinnati, OH. He was questioning an open air duct.

Column 446

How to Repair Stucco and Concrete Block

Crumbling Concrete Block

Repair Concrete Block | Here’s some older crumbling concrete block that resembles cut stone. The damage is superficial and can be repaired with ease. Great crumbling concrete foundation diy fix tips can be found on this page too. Photo Credit: Tim Carter (Bricks were white, but turned blue in the photo.)

Repair Concrete Block and Stucco Tips

DEAR TIM: I live in a house with a concrete block foundation. I think the outside of the block has a decorative stucco on it because the exterior of the block is not smooth. Some of the exterior is crumbling and I wonder if my foundation is going to fail. Can the damage be repaired? How do you get the stucco to stick onto the block and not fall off? Each time I’ve tried to do the job, the repair material falls to the ground. Help! Lynn L., Mt. Airy, MD

DEAR LYNN: If each of the concrete block looks similar with respect to the exterior pattern, I would say the block were made that way and it’s not a stucco coating. When concrete block were first brought to market, it didn’t take the block manufacturers long to realize they could make the outside of the block look fairly decent as if the block were fancy cut pieces of limestone or even granite.

CLICK HERE to get FREE & FAST BIDS from local block contractors that can repair your block or stucco.

How Can I See Foundation Block?

You can look at the inside of your foundation and see what kind of condition the block are on the side that faces your basement or crawlspace. Look for similar crumbling or cracks. If the inside of the block looks good, then I feel confident your problem is just a cosmetic defect in the block. The good news is this is very easy to repair.

Why Did Your Repair Fail?

Let’s discuss why your previous repair attempts failed. There list of reasons could be long, but we’ll just concentrate on the ones that are at the top of the list. When you decide to repair the vertical face of stucco, concrete block or even concrete, the surface needs to be clean, dust-free, and structurally sound. This means you need to remove any loose crumbling material to a depth by scraping with a stick that to remove more material you need a chisel and hammer.

cracked concrete wall

Holes like this in a concrete, stucco or concrete block wall CAN BE PERMANENTLY repaired using the materials and tips I offer below. KEEP READING and WATCH the VIDEOS. © 2017 Tim Carter

Should the Repair Material Be Sticky?

The repair material you use must have enough cement and/or lime in it so that it’s sticky. Realize the Portland cement and lime you’ll sometimes find in mortar mixes or bagged concrete is the primary ingredient that makes the repair material bite or stick onto something else much like paint, glue or epoxy adheres to surfaces. If you don’t have enough cement or lime in your repair mix, it won’t stick well.

Is a Dry Mix an Issue?

Your mix may have been too dry and the concrete block sucked too much moisture from the mix too fast. This can also cause the repair material to not be as strong as it could be.

Will Repair Material Stick to Dirty Concrete?

Oxygen Bleach

Stain Solver is MADE in the USA with USA ingredients that are food-grade quality. CLICK THE IMAGE to order some NOW.

No, your new repair material will not stick to dirty concrete block or that covered with algae or mold.

I use Stain Solver, a certified organic oxygen bleach, to get mold, algae and other dirt from concrete block or stucco.

It's a powder you mix with hot tap water. Stir until dissolved and put into a hand-pump sprayer. Saturate the area to be cleaned working on an overcast day if possible. Keep the area very wet with the solution spraying more on every few minutes.

You'll see it foam and bubble if you look closely. Do not allow it to dry. Keep spraying.

Keep the masonry wet with the solution for at least 15 minutes. The longer you let it soak, the less you have to scrub. Scrub, rinse and make sure the old masonry is clean and free of dust and grit.

Should I Remove Loose Material?

Here’s how I’d repair your damaged stucco or the face of the concrete block. I prefer to make my own repair mix using just medium clean sand and pure Portland cement. Use hydrated lime in the mix because it really makes the repair mix sticky.

hydrated lime

This is excellent hydrated lime. It's a fine white powder and it's going to look great on your home. CLICK THE IMAGE TO ORDER SOME RIGHT NOW.

What is the Primary Adhesive in the Repair Material?

Portland cement on it’s own, when mixed with sand, will create a repair material that can last hundreds of years. But adding hydrated mason's lime will make it even better. Click the above image to order the hydrated lime.

I prepare the concrete block by removing all loose material. Brush the block with a stiff brush. Washing the concrete block is also a good idea flooding it with water and scrubbing the area at the same time. You’ll want the block to be slightly damp when you start the repair, so washing it will not hurt the repair process.

Should I Install Pins In Deep Holes?

If there are deep holes to repair, the repair material will hold decades if you install downward angled long galvanized bolts into the hole. These are anchors, or posts, that the repair material will surround.

Have at least 2 inches of bolt showing so the repair material can really get a good grip. You can't have too many anchors.

Drive them in with a hammer or drill into the hole with a rotary hammer drill and drive the anchors, bolts or even short pieces of rebar into the holes. Get creative!

CLICK HERE to get FREE & FAST BIDS from local block contractors that can repair your block or stucco.

What is the Best Cement Sand Ratio?

The repair material should be mixed no less than two parts sand to one part Portland cement. For extreme strength and stickiness, you can mix one part sand to one part Portland cement.

If you're going to use hydrated lime as well, and I suggest you do, here's the mix I'd go with:

  • 4 parts / measures medium washed sand
  • 1.5 parts / measures of Portland cement
  • 0.5 parts / measures of hydrated lime

You add enough water to make the repair mixture resemble whipped mashed potatoes or warm cake icing. This means the material is wet, has body and will easily hold onto the side of a trowel that’s held in a vertical position.

If the material droops, falls off the trowel or resembles a thick gravy that sloshes around in the bucket, you added too much water. Add more sand and cement in the proper amounts, stir and make the material thicker.

What is the Cement Paint Secret?

The magic trick most don’t know about is a bonding layer of cement paint. Cement paint was used by masons of old to help new stucco material bond to old stucco, concrete or concrete block. You make cement paint by just mixing Portland cement powder with clean cold water. Mix it to the consistency of regular paint.

With the cement block clean and slightly damp, take an old paint brush and paint the area to be repaired with this cement paint. Brush it on as you would paint, but not too thick.

IMPORTANT STEP: Only brush on as much cement paint as you can cover with the stucco repair mix in five or ten minutes. You NEVER want the cement paint to dry on the concrete block so avoid working with this in the direct sun, on windy days or whenever conditions are such it would dry rapidly.

What are the Best Application Tips?

Apply the stucco repair mix over the cement paint. Make sure it’s no thicker than one-half inch. If the area to be repaired is deeper or thicker than that, you may have to apply two, maybe three, coats of stucco. If you need to do this, be sure the first coat is left rough and resembles a tiny mountainous area so the final or next coat has plenty of surface area to bite into. Wait at least 24 hours to add a second coat.

For deep holes, refer to the tips above about the anchors, posts, or bolts you need to drive into the deep hole.

To create a smooth texture on the repair, use putty knives, or other small metal hand tools that will allow you to recreate the look of surrounding concrete block. Don’t try to texture the repair material immediately, as it may take ten or fifteen minutes for the stucco material to stiffen up allowing you to sculpt it with tools.

CLICK HERE to get FREE & FAST BIDS from local block contractors that can repair your block or stucco.

Stucco Repair Videos - WATCH ALL THREE


This column was referenced in the May 21, 2014 AsktheBuilder Newsletter, along with a quote from the Lord Of The Rings.

Column 1040

January 17, 2017 AsktheBuilder Newsletter

I've got lots of revised columns for you below.

I'm having a good time doing this project. Why, you might ask?

For years, I've known that lots of the information I've discovered the hard way working on countless jobs is still trapped up in my gray matter.

This project is giving me a chance to transfer it to you so you can use it. You can't believe the amount of NEW CONTENT I'm adding to some of these past columns.

Not to mention sharing with you the amazing products I love and use to complete the projects.

For example, yesterday I spent an hour updating a column I wrote probably eighteen years ago about whitewash.

Yes, whitewashing is a viable alternative to painting!!!

You're looking at a whitewashed project of mine.

This particular job, overall, was the most challenging one of my entire building career. There were two room additions here, one you can't see on the back of the house. Both had a 17/12 pitch roof and part of the roof on the back addition was curved.

There were many difficult things about this project, including the homeowner. But that's a story for another day over a plate of BBQ.

A major part of the job required me to match PERFECTLY the 70-year-old whitewash on the original house. My painter and I nailed it.

CLICK HERE now to discover all sorts of cool things about whitewash, how to make it and how easy it is to use.

Troubling Phone Call

Late yesterday afternoon, I had a troubling phone call with a grade school classmate of mine. We were very, very good friends through grade and high school.

It turns out he is helping his son remodel a 70-year-old house in the St. Bernard suburb of Cincinnati, OH.

He proceeded to tell me that a severe storm back about four months ago flooded his son's basement requiring them to rip up a thin vinyl-tile floor.

He was faced with the task of removing a black troweled-on mastic. My friend didn't go to my website to look for information. He didn't bother to call me.

He went and rented a grinder. Not only did he remove the mastic, but he also ground into the concrete.

Here's part of the conversation:

"(name withheld), you should have called me before you rented that grinder."

"Why??

"Did you realize the mastic, because it's so old, very likely had asbestos in it as a fortifier? Also, grinding into the concrete creates clouds of silica dust. You can contract serious silicosis by breathing silica dust."

"I had on a mask."

"Was it one approved to stop asbestos fibers and silica dust?"

He didn't know......

I have a column at my website about how to remove tile mastic.

Just a day before my son and I were talking about how I'm in the life preserver business.

Ninety-eight percent of the email I get are from people who are in DEEP TROUBLE AFTER they started a job or hired a contractor.

If they would have just spent 30 minutes using my Search Engine at AsktheBuilder.com, they'd probably not be drowning.

Don't drown - Use my Search Engine.

CLICK HERE now to use it and watch a SPOOF video I made about three years ago. Trust me, I'll never be an actor.

Consider doing your friends, family, co-workers, neighbors, etc. a HUGE FAVOR. If you ever hear them say they're about to start ANY home improvement or they're about to HIRE a contractor, BEG THEM to go use my search engine.

They'll most likely discover tips on exactly how the job should be done and WHAT are the BEST materials to use.

I don't like to give people bad news that will cost them thousands of dollars as I'm throwing them a life preserver, but I do it each day to many who email me crying for help.

Latest Revised Columns

Just a few days ago, after sending out a batch of the revised columns, you may have been the one who sent me an email that read something like this:

"Tim, I'm really enjoying reading your past columns. I had NO IDEA all these topics were at your website."

Yep, and we're just scratching the surface. For the rest of this year I think you'll be amazed at some of the content you'll be seeing, including older, but still relevant, videos.

The following columns have quite a few of my videos in them.

Enjoy filling your brains with knowledge!

Laminate Floor Over Concrete Mortar Bed - 3 DIY Install Videos! ​​​​​​​

Fence Post Tips and Secrets

Clean Algae and Moss From Roofs

Gutter Guard Test Results - THREE Great Videos

Andersen, Pella and Marvin Window Comparison - Window Install VIDEO

Replace Cast Iron with PVC? Maybe Not!

Change Tile Grout Color

That's enough for you for today. Are you having fun doing the translations?

あなたの心は今日のように決して柔らかくはありません。

Anata no kokoro wa kyō no yō
ni kesshite
yawarakaku wa arimasen.

Tim Carter
Founder - www.AsktheBuilder.com

Do It Right, Not Over!