DEAR TIM: How can I match the stucco finish on my eighty-year-old front porch? I tried using white Portland cement and buff sand, but as you can see in my photo, the results are atrocious. I added some dry cement pigment to try to get a match and it just didn’t work. I noticed the old stucco has dark sand in it. Is that important? What’s the best way to get a match, if it’s even possible? What can I do now to fix this so I don’t have to sleep on the couch? My wife is none too happy with me right now. Help me Tim, you’re my only hope! Brian McA., Whitehall, PA
DEAR BRIAN: What husband amongst us has not slept a night or two or three on the couch for a brazen misdeed around the home? It’s a right of passage, albeit an undistinguished one. Alas, I’ve got good news for you!
You’re going to soon be in your wife’s good graces because you’re going to make that front porch foundation wall stucco look stunning. But before we do that, let me tell you how difficult it is to match stucco. If you share this with your wife, you may get back into your own bedroom tonight and on a nice comfy mattress.
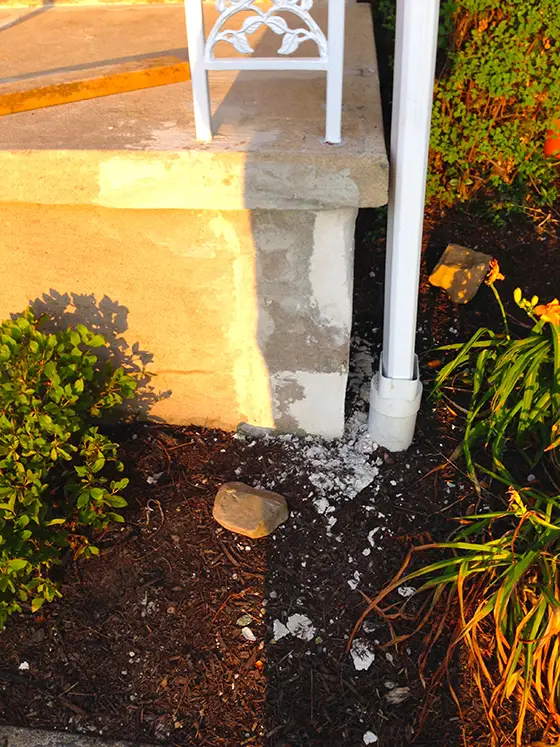
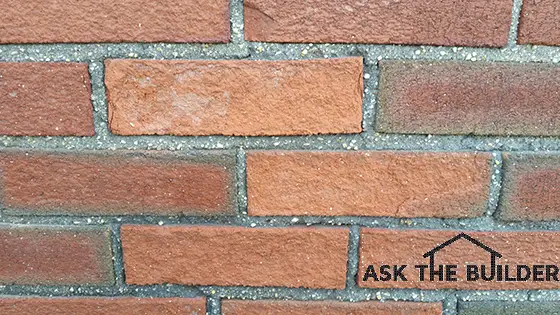
These patches don’t match at all. It requires some testing to get a perfect match when working with cement stucco. Photo Credit: Brian McAllister
I think the best way to describe how hard it is to match stucco is to imagine trying to repair a tear in just about any fabric. Even the best tailor or seamstress will have a nearly impossible time blending in the sewing needed to repair the slit or slash.
The most important thing to realize is that the stucco you see on your front porch does not look today like it looked eighty years ago. Mother Nature has changed the appearance of the stucco just like she does with anything left in her presence.
When the stucco was new, each piece of sand had a thin coating of cement paste over it. The color of the stucco was very uniform much like the patches you have in your photo. Note how you can’t see any color at all of the individual grains of sand in your fresh patches. Once you grasp this, you’ll understand how tough it is to match stucco.
Over time weathering works to remove the cement-paste film from the sand. This is why you now notice the dark grains of sand in your stucco. Your stucco can also get stained from rain splashing dirt against it. Soot from decades of diesel exhaust and who-knows-what can also settle into the stucco finish altering its appearance. Your new stucco patches have none of this.
The first thing to do when trying to match stucco, or brick mortar which is nearly identical to stucco, is to start with the sand. Look very closely at the sand grains in the existing stucco. Note the colors, the sand grain size and the blend of the colors.
The sand for the existing stucco probably came from a gravel and sand pit within fifteen miles or less. It was not easy eighty years ago to truck sand to a job site. Visit all the nearby sand and gravel pits and start to look at their different sands. Most gravel pits have different piles of sand. You need to find a sand that matches as close as possible what you have now.
Once you have the sand, now it’s time to clean your existing stucco. I’d use a solution of oxygen bleach to do this. It’s not harmful to your plants and it’s not aggressive like a pressure washer. A pressure washer could damage the stucco, so think twice before using one.
After the existing stucco is clean and dry, you can now try to get a match on the cement used to bond the sand together. You tried using white Portland cement adding pigment to it. I’d try to just go with a traditional gray Portland cement and see what happens. I’d also try to make different batches using hydrated lime in addition to the Portland cement. The lime will modify the color depending on the ratio of cement to lime in your mix.
Apply the different test batches to the face of some small concrete brick. Allow them to dry and cure for at least a week to see how you’re doing. Realize the grains of sand in the stucco make up probably ninety percent of the color matrix so you need to acid wash the new stucco samples after 30 days to see the real color of the new stucco you’re making.
See how hard this is? Most people don’t have the patience to undertake this job because it’s just so time consuming. Most people want instant gratification.
The easiest way to solve your problem is to just re-coat the entire foundation wall with new stucco that’s all made the same way. To get the new stucco to bond permanently to the old stucco you need to use cement paint. I’m assuming you’ve cleaned the old stucco of all dirt, grease, etc. before you start.
Cement paint is just a mixture of Portland cement and water. You add water to Portland cement stirring until it’s the consistency of a thin latex paint. Slightly dampen the existing stucco with water, brush on the cement paint and immediately cover it with the fresh stucco. Do not allow the cement paint to dry. Work in the shade or on an overcast day with no wind.
Column 1160