Makita LXRM03 Radio Video

Hi, I'm Tim Carter and I've got a really neat tool that I need to show you. It's one that's absolutely necessary around every jobsite, as far as I am concerned. It's going to put you in a good mood, that's why it is important.

This is the Makita LXRM03B 18-volt LXT Lithium-Ion Cordless FM/AM Jobsite Radio with iPod Docking Station Tool. It is a beauty. Very handsome and very rugged. Produces great sound and it a multi-powered audio device. This unit has an AM and FM radio. In addition you can plug in an iPod, iPhone or MP3 player to this radio.

The radio has 5-preset buttons for your favorite stations. It has a built-in alarm clock in case you need to be some where at a certain time. It also features a count down timer.

The unit is powered by an 18-volt Lithium-Ion battery, but has an input jack so it can run off 115-volt power source.

Under a lid on the top of the radio is a docking station for your iPhone or iPod.

The battery is accessed from a cover on the back side of the radio. In that same compartment is a place for two AA batteries. These keep the memory chip powered so you don't lose present stations, date, time, etc. when the 18-volt battery dies.

So what do you think? It produces great sound and I should know. I am a ham radio operator and this is a great radio. I can't talk around the world with it, but that is okay. It's a great receiver.

Go take a look at it, but keep your credit card handy. You are probably going to use it and take that radio home.

I'm Tim Carter, W3ATB, and I'm gonna be clear on your final.


October 18, 2012 AsktheBuilder Newsletter & Tips

I want to thank you for passing on your kind words about my good friend Mike Wilson. I drove all day Saturday from New Hampshire to Richmond, Virginia. That put me within striking distance for his memorial service on Sunday in Raleigh, NC.

Prior to my leaving, I decided to write down some of my memories about him in an attempt to describe who he was. That was a good thing for me to do. It helped start the healing process. If you want to know more about Mike, just go to this page I created on my blog in his honor.

When you drive 1,800 miles by yourself in less than 96 hours, you have lots of time to think about things. Here are some random thoughts that crossed my mind:

  • The speed limits in New Jersey are recommendations.
  • If you put cell phone antennas in trees, the radio waves cause grotesque mutations causing the tree to be twice as tall as any nearby tree. The mutations also create stubby limbs and an obese thick tree trunk. Oh wait, that's the actual antenna pole.
  • Rookie Formula One and NASCAR drivers use the New Jersey Turnpike for lane changing practice.
  • Freeways are not free. In addition to the 45+ cent tax per gallon of gasoline I paid each time I filled up, I spent an additional $60 in tolls to get to and from the memorial service. Yikes!
  • You can avoid enormous volumes of traffic driving through the night.
  • The word dragoons is one letter off dragons for a reason. Dragoons of the past were the ancestors, I believe, of our current bad-a** special-force military personnel.


Tip of the Week - Shower Curtains and Doors

If you want to keep bathroom mold and mildew at a minimum, you need to keep your shower area as dry as possible. This means it's best to squeegee down the walls after you shower. Get as much water down the drain as possible.

If you have a shower curtain, shake it to get off as much liquid water as possible before exiting the shower. If you have a swinging door, leave the shower door OPEN. You want the inside of the tub and shower area to dry as rapidly as possible.

Without water, mold and mildew have a tough time flourishing.


Second Tip of the Week - Save Sweet Moola

Yesterday, I attended a closing where I refinanced a second mortgage on my house. I cut my interest rate in half. This will save me $6,000 a year on interest. WOW!

There's a secondary benefit to this. That extra money that used to go to the mortgage company can now be saved for a rainy day. Or you can save part of it and use the other part for needed home improvements.

Take a look at your current home mortgage situation and do the math. It could be very advantageous for you to refinance with rates at historic lows.


Back Up Your Data!

You may wonder what the following has to do with home improvement. I'll tell you. It will radically improve your home life if you know you'll never lose one-of-a-kind computer data. Much of last week I was in distress about my friend Mike and one other thing - my DIY Shed videos.

Ten days ago, I tried to triage the hard drive on my iMac. I was just getting started to edit all the shed videos. All of the videos for the shed project were on my iMac as well as a backup external hard drive. The hard drive on my computer was becoming seriously unresponsive and by Monday morning, it had completely locked up.

It's back now from the Apple store with a brand new hard drive, and it's as good as new. I forgot how fast the computer runs when the hard drive is at 100 percent.

Fortunately, I had been running the Time Machine feature on my iMac. This software performs automatic backups of all programs and data. I had no idea if the data on the computer hard drive had become corrupted or if it was going to be lost.

I also didn't know if the backup drive had great copies. I just ASSUMED the videos were on the backup drive. I can tell you that I'm about to sign up for a secondary cloud service backup plan as well. Cloud backups are copies of your important files that reside on a remote computer(s) someplace else in the world.

The problem with doing backups at your own home is that a disaster could wipe out both your computer and your backup drives. If you religiously keep a second set of data outside your home, you're protected.

Most people will not go to this extreme. If you're not backing up one-of-a-kind photos, data, documents, scanned images, etc. to an external hard drive as well as a cloud service, you're possibly making a serious mistake.


Clutter Contest Alert!

Next week I'll be announcing a contest that's easy to enter and one you have a great chance of winning! Some contests are too hard to win, but not this one. In fact, if I was eligible, I'd have a great chance of winning. You have to have a messy set of garage, workshop or basement tool area shelves.

Bosch Take Your Day Back

My buddy Loren will be wasting his time if he enters. If you go to his garage, his tool bench, shelves are in perfect order. No dust, no clutter, everything in it's place. It looks like a museum display.

You and I, however, are not like Loren.

Bosch Tools is looking for the messiest garage or basement storage shelves they can find. Whatever you do, don't clean up the shelves where you store your tools and supplies until after next week when I make the announcement. You'll need them nice and messy so you can take a photo or two to send in.

Be SURE you open next week's newsletter so you get the details about this contest.


Schlage Electronic Deadbolt Review

Last week I installed a very cool electronic deadbolt lock made by Schlage. I put in the Plymouth Keypad Deadbolt. It's a handsome lock that allows you to control access through a door without using a key. It does come with a key in case you forget the codes or the battery dies. Image

This deadbolt was so very easy to install. It required one screwdriver! I had it installed in minutes. You can program in temporary codes for a workman or other person who just needs temporary access to your home.

The keypad is illuminated for nighttime use.

My only complaint with the lock is the design of the outer twist knob. I felt that it could have a slightly better shape that would allow you to squeeze it between your index finger and thumb so that when pulling the door closed, you'd have a better purchase.

Now, I say that assuming you don't have a regular door knob. I used this deadbolt as the primary and only locking mechanism on my shed door.

I highly recommend this deadbolt. It's very well made and I simply love that you don't need a key.


Kids Love Stain Solver

Do you need a smile today? I've got a photo for you that should put a big grin on your face. Go to the Stain Solver Facebook page and scroll down. You'll see two happy lads! Just wait till you see the expression on the older boy's face!

I'd appreciate it if you would do one or more of the following while there:

  • Friend Stain Solver
  • Like the post
  • Share the post on your time line
  • Comment

How to Patch a Hole in Blacktop

patch hole blacktop paint brush

This cracked area in the blacktop will soon be a pothole. You can make a permanent repair using skills and magic. Photo Credit: Tim Carter

DEAR TIM: There are several places in my asphalt / blacktop driveway that are starting to crack. It looks like holes and entire sections of the blacktop will fail. I can't afford to have a professional come in to repair the drive. In the past the patches I've installed have all failed and popped out. Is there a way to patch my driveway and have the repairs last for many years? What did I do wrong? Amy S. Goochland, VA

DEAR AMY: Potholes in driveways and roadways are the bane of homeowners, drivers and road maintenance workers. They appear like mushrooms after a spring rain, often with little warning. Unfortunately many potholes re-appear again, like yours, because the repair process was done poorly or skipped one or two very important steps.

It's possible to repair your driveway yourself, but realize it may take some extra effort on your part to get long-lasting results. You can make quick work of the job if you have access to a special power tool that you can rent at a tool rental center.

Why do most asphalt hole repairs fail?

Most blacktop or asphalt hole repairs fail because of two reasons. The shape of the hole is wrong and the base material under the blacktop is either fouled or not compacted. If you desire to patch the hole in your driveway only one time, you must do several things correctly.

In your case, it sounds like you'll have to remove some of the cracked blacktop to make the repair. It's possible your repairs in the past failed if you tried to add patching compound on a shallow depression. That method will never work if you're using the ready-mixed asphalt repair products that come in a bag.

Do what the Dentist does!

Think about how fillings in teeth work. Your dentist drills into your tooth and creates a hole where the bottom of the hole is slightly larger than the top. He adds a filling compound that gets hard quite quickly. Because of the shape of the hole, the filling is locked in place. You need to do the same thing with your pothole.

What to do at the edges of the cracked area?

I'd use a power demolition hammer with a 1.5-inch-wide flat chisel at the end to excavate the failing blacktop in the center of the cracked area. When you're at the edges of the cracked area be sure you lean the top of the power hammer in towards the center of the hole. This will create an angled face on the edges of the blacktop. Remove all loose pieces of blacktop from the hole so the gravel base is exposed.

Make sure the crushed gravel under the blacktop is free of any mud or soil. If there is mud in it, removed the fouled gravel and replace it with crushed gravel that matches what was originally under the blacktop. Compact it well with a tamping tool or a flat piece of wood you hit with a hammer. You can add a small amount of water to the gravel to help compact it.

Read the instructions on the bag of blacktop repair material. They will tell you the minimum and maximum thickness of the repair patch. Usually you can safely add 3 inches of patch material, but you must do it in several stages. You add 1 inch of material to the hole and then compact it.

Your final layer of patching material needs to be slightly less than one-half inch above the surrounding existing blacktop. Using a heavy metal tamper you want to pound the repair material so it's flush with the surrounding blacktop. Be sure there's no shallow depression that will cause a puddle to form after a rain.

If the repair is in a spot where car or truck tires contact it, I'd recommend you place a piece of scrap plywood over the repair area until it cures and gets hard. The repair compounds that come in a bag will get very hard over time, but when first installed they're soft.

Anytime no car traffic is expected on the patch, remove the plywood to allow air to get to the repair compound. Exposing the patch to air and sunlight will accelerate the curing process.

You can watch my video that shows how to patch blacktop. Simply type "driveway repair video" into the search engine at www.AsktheBuilder.com.

This column was featured as the I Didn't Know That! column in the July 23, 2013 AsktheBuilder Newsletter.

Column 957

October 10, 2012 AsktheBuilder Newsletter & Tips

This is going to be a fairly short newsletter because I got some expected, but bad news yesterday. A very close childhood friend of mine, Mike Wilson, had to be sent back to Heaven early yesterday morning. I've spent the last 24 hours in a semi-fog flooded with a mixture of great sadness, fond memories of us in our younger days and reflecting on my own mortality. Mike was one year older than me, but way too young to check out.

Tim and Mike Wilson


Here's a photo of Mike and me taken back in 1971 or 1972. He's got his arm on my shoulder. We were bursting full of testosterone that day!

Eleven months ago, he was diagnosed with stage four colon cancer. It's a very long story, but his oncologist believes his disease was directly related to his prostate cancer struggle from eight years ago. If I have the story right, he was getting regular scans after his prostate treatment, but the person reading the scans six or seven years ago *missed* the onset of the new colon cancer.

Bottom Line: If you or a loved one is undergoing follow-up scans for cancer treatments, *always* get a second opinion on the scans. I'm no doctor and I'm most definitely not a image expert, but I might not be typing all this right now if Mike had thought to not put all his eggs in one basket. Rest in Peace Mike. You'll be sorely missed.

I want to thank you in advance if you reply to me with condolences. I'll not be able to reply to you individually as I'm in a horrible rush to get things done in advance of my trip to his memorial service.


Fantastic DIY Gutter Guards

Over ten years ago, I started a quest to locate the best gutter guard. I've tested just about every gutter guard known to man in the past fifteen years. For years and years, all the gutter guards I tested FAILED.

They never failed in the fall, as they all did a marvelous job of keeping leaves from the gutters. They failed over the winter and in the spring when either the gutter guard got clogged over time with tiny organic debris, or the guards would allow tiny debris to get into the gutter.

One day while cruising the aisles at the National Builders Show, I saw a fascinating gutter guard. I turned around and walked back to the booth. What I saw was an amazing technology that I knew was the Holy Grail of Gutter Guards. This product had a stainless-steel micro-mesh screen that reminded me of Kathy's pantyhose. You know how tightly knit the nylon is in panty hose!

I knew immediately that no debris would get into the gutter. I started to test the different brands of the micro mesh and even got to meet Alex, the inventor of the micro-mesh gutter guard technology. In a side-by-side test of the two leading micro-mesh products years ago, I discovered that MasterShield was the better product in *my* opinion in a real-world real-conditions test at my home.

Looking at the micro-mesh gutter guard I like, you'd swear that water would just run over the top and onto the ground as it seemed impossible for water to pass through the tightly woven mesh. But Alex devised a way for water to actually be pulled through the tiny spaces between the threads of stainless steel!

Realize that not all micro-mesh gutter guard products are the same. Some of the impostors out there can't handle large volumes of water. In heavy rains, water can run across the inferior products. Some fail after a few years because the micro mesh gets fouled by the oil leaching from the asphalt shingles. In torrential downpours at my house, the water never ran over the gutter guards onto the ground.

My biggest beef with the Mastershield product was you could not buy it as a DIY product. You had to have it dealer installed. I begged the owners of Mastershield to come up with a DIY product as tens of thousands of people would want to install it themselves.

Please understand that my interest in gutter guards was based on the 300+ feet of gutter I had at my last home. It was a nightmare cleaning the gutters multiple times a year. I had to have a product that worked well and needed no ongoing maintenance.

Fast forward several years and I'm bursting with excitement that you can now buy a new DIY version of the amazing micro-mesh gutter guard! It's designed by the original patent holder for this technology! Alex and his team, after years of me pestering them, have announced a DIY micro-mesh gutter guard called Clean Gutter.

You've got plenty of time to get this product installed before the snow flies at your house. Clean out your gutters perfectly one last time as soon as most of the leaves fall at your house, and then install the Clean Gutter guards. It should be the last time you have to deal with your gutters! Go ahead and order some now.

If you do decide to purchase these affordable DIY gutter guards, you need to know that I get a very small commission. But as with all situations like this, I only do this with products I own or use on my own home. If a product passes that ultimate test, you know it'll work well for you too. Let me know what you think after you get it installed! If you don't want to install it yourself, a local handyman can do it easily for you.


Tip of the Week - Getting the BEST New or Replacement Windows or Doors

Years ago, while doing research about windows and doors, I discovered a well-kept secret about how to find the best ones. As you well know, the people selling windows or doors try to play Jedi mind tricks on you with fancy talk and features trying to convince you they have the best products.

Guess what? What if I told you that an independent association with the highest integrity can point you to the best windows and doors? I'm not talking the folks at that magazine that begins with a "C". They don't even come close to what I'm talking about.

I talk in great detail about this mystical association in a video I just taped. The link to it is at the end of this column. You MUST watch this video, but for now continue to read the rest of my story.

I guarantee you'll be amazed at what you discover. My guess is you'll head off to two websites after you watch the video: AsktheBuilder.com to read more about AAMA (the mystical association) and Simonton.com (see below).

I built my shed this summer and wanted two windows in it to provide a view to the lake, fresh air and lots of daylight. Energy efficiency and quality construction were of paramount importance to me too.

I chose to use Simonton windows because they sport the exclusive gold AAMA label. Just a handful of window and door products have passed the rigorous testing standards that allow them to display the prestigious gold label. You'll see the actual label in the video below.

Realize that Simonton makes windows for both new construction and replacement. If you're in need of new windows, take a hard look at Simonton.

Simonton was a sponsor to my shed project, but I only chose to use their product at my own home because I feel you can't beat their quality. Evidently AAMA feels the same way since they allow their gold label to be place on the windows!

Watch this video. It'll all make sense.

Simonton ProFinish Window Video


Hi, I'm Tim Carter and I want to talk about replacement windows, as well as windows for new construction. This is a double casement window that I am installing in my shed. This particular window is a Simonton ProFinish Window.

This window features -

  • all vinyl
  • available in a variety of colors (Hunter Green in this case)
  • the frame features a 3/4-inch deep channel  that
    allows the trim boards to slide into, creating a great fit and finish
  • high energy efficiency
  • triple locking mechanism on the window sash
  • passed the AAMA (American Architectural Manufacturers
    Association) Gold Certification standards for construction and energy
    efficiency

Check them out. They are a great window.

October 2, 2012 AsktheBuilder Newsletter

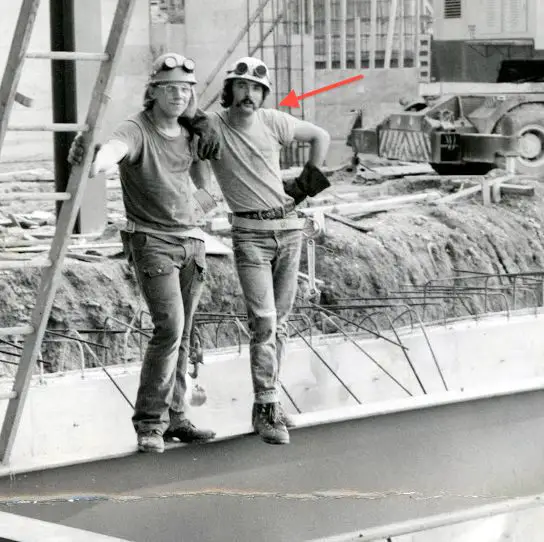
Fall has arrived here in New Hampshire. We're not at peak color near my house, but it should happen this week. I took a few photos this morning because the sun finally peeked out from behind the clouds. It's been fairly gloomy the past four days. I'll get better photos soon!

Fall trees in NH

Further down in this newsletter, you'll see a FLASH sale on Stain Solver and all of my digital download products. You'll have to hurry on both, because the sales are limited. I'm not making this up.


Tip of the Week - Painting Vinyl Siding

Vinyl siding expands and contracts significantly as the temperature goes up and down. Some people grow tired of the color of their house, and in the past it was nearly impossible to paint vinyl siding without it peeling.

Some of the major paint companies have risen to the challenge and have created paints that stick really well to vinyl siding and plastic trim. It's still wise to try to avoid darker colors as they absorb heat.

Remember that paint is just colored glue. If the bond between the paint and the vinyl siding breaks, the paint peels. You can see why the paint manufacturers had a significant challenge developing a paint that can stretch as much as the vinyl siding expands and then shrink back when the siding contracts as it get colder.

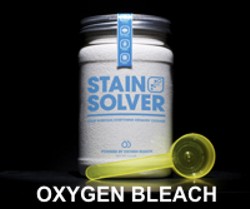
If you decide to paint your vinyl siding, you need to really clean it well. Stain Solver will help with that. Paint on overcast days when the temperatures are between 50 - 70F if at all possible.

Don't take the paint salesman's word that the paint will work. READ the label and make sure the paint is formulated for vinyl siding or plastic trim.


Start Your Own Handyman Business!

This Saturday I'm doing a LIVE 3-hour class that shows you how to start and run your own handyman business. This class is live in real time just like broadcast TV. You can ask me questions in a chat window as the class happens. It's easy. I have a friend of mine who I taught how to run a handyman business. Here are the facts:

He works the hours he wants to. He constantly has a backlog of work. He can take off any day he wants to. He cherry picks the most profitable jobs. He makes about six figures a year. I left out the most important part: He wakes up HAPPY each day because his work has very little stress.

PowHow Live Video Class with Tim

There are only a FEW seats left in this class. Are you unhappy with your job? This class may invigorate you and get you to finally control your destiny. I have NO IDEA when I'm going to run this class live again. Go now and sign up. I'll see you in the classroom on Saturday October 6, 2012 at 1:00 pm ET.


AZEK Trim Molding

One of the last building materials I used on my shed was PVC trim. I chose it because I wanted the exterior of the shed to be nearly maintenance free. The siding is fiber cement, which will never rot, so I wanted a trim that had the same characteristics.

AZEK Trim Molding

I chose to use AZEK trim for all sorts of reasons. You should just watch the video I taped to see it, and decide if you want to consider it on your next project. My guess is you will.


My Shed Video Series

If all goes well today, I'll be taping the last videos for my shed project. I underestimated the time it would take for me to do many things without a helper. The good news is that I'll soon be editing and releasing the videos. At the outset of the project, I thought there would be 100 videos showing you step-by-step what to do. Well, I underestimated that too. There's not going to be 100 videos. I think the number will be closer to 200. As I'm typing this, some of the stair-building videos are downloading into this computer I'm using. Just yesterday, I taped close to 25 videos showing just 'part' of the stair building process. You're not going to believe the detail in these stair-building videos.

If you purchased the videos, either through the Kickstarter website or here through this newsletter, realize that SOON you'll be getting access to the videos!


Fantastic Architect You Can Use!

I want to introduce you to Keith Carney. He's an architect that lives in Connecticut, but can draw plans for a project far from his home. How do I know this? Keith drew the plans for my shed project, and he did a magnificent job. One of the things I like about Keith is he has lots of hands-on experience in building and remodeling. That gives him a unique perspective grounded in the reality of what building materials work best and what their limitations are.

Keith's a licensed architect in these states: CO, CT, ID, NE, NM, NV, WY and KS. He can get a license in other states, as it's just a matter of filling out paperwork. But for many jobs around your house, you many not need a set of stamped drawings. You can hash that out with Keith.

Keith does both residential and commercial plans. Maybe you need something done at your place of business. Are you thinking of remodeling your basement, maybe remodeling your kitchen or bathroom? Keith can do the plans. Do you want to do a room addition? Keith can do it. Maybe you want a new home? Keith could be your guy. Reach out and contact him. I'm sure you're going to be very happy when you see examples of the detail in his plans. Believe me, details are everything when it comes to plans!


FLASH Stain Solver Sale

As soon as the shed videos are edited, I'm going to start paying much more attention to the Stain Solver business. What you're about to see is a peek at the future.

If you're aware of websites like Groupon, Amazon, Yugster, Woot, DealChicken, etc., they all tend to have flash sales. A flash sale is very limited in scope or the time of the sale. It's also a sale that happens with little or no warning. Those people paying attention reap huge savings by opening up email announcements.

For example, I subscribe to Woot alerts. An item may go on sale, but they only have 50 or 100 available at that price. You have to quickly open the emails when the arrive and take action if you want the deal.

That's part of the new strategy with Stain Solver. Subscribers to the Stain Solver newsletter are going to see these flash sales first. If you buy Stain Solver, you automatically get put on the newsletter list. I will announce sales here in this newsletter, but the Stain Solver subscribers get pick of the litter.

Here's the first flash sale: Beginning right now, there are just 100 50-pound buckets of Stain Solver on sale for 15% off. I know these are going to disappear fast, so you better go grab one now if you want one at the sale price. The sale price is ONLY available at the AsktheBuilder.com shopping cart. You need to CLICK HERE.


Digital Products Sale Too!

Moments ago, I received an email from Michaela who lives in Boston, MA. I was just down there last night! But I digress. Read about the horrible mess she's now in. It's too bad she didn't use my Room Addition Checklist. More on that after you read her email:

"I am currently 2/3 of the way completed in adding a second floor to my home. I have not liked any of the subs that my GC has hired, thus far, or even my GC for that matter! I have told him that I would like to get my own painter instead of using his - he doesn't have a painter he always goes with; he'll be picking whoever gives him the lowest price. The GC says this is fine with him as long as he still gets his cut of the profit. I agreed that that would be fine to be fair. I suggested a fair 10% of the allotted amount of $8000. The GC said his profit is $2000 - 25% of the amount budgeted! He claims that his personal profit was very small in the beginning of the project and that he is getting his money from the tail end. However, this does not seem right to me! Why should I pay him $2000 for doing absolutely nothing!? I have signed a contract with him that does say that $8000 is allotted for painting and that he would be responsible for getting the house painted. However, if I have taken this responsibility off his plate, does he have a right to demand a profit, especially one that is so high?"

Let's do an autopsy on this problem. Michaela is in trouble because she didn't have a precise breakdown of ALL job costs at the bidding stage. What's more, she didn't get it in writing at the BIDDING stage what the overhead and profit would be for the builder.

Guess what? My Contractor Hiring Guides - great tools to use when you are getting bids - require that the bidding contractors give you cost breakdowns AND state their profit and overhead. You MUST know this before you sign a contract so you don't get in a pickle like Michaela.

My hiring guides do more than ask for a detailed cost breakdown. To show you how good they are, I've put them on sale. Every digital product I sell at my shopping cart is on sale at 50% off for the next five days. This means eBooks, checklists, eGuides, etc. In other words, anything that's made from electrons is on sale. The promo code is: fall50

AZEK Trim Molding Video

Hi, I'm Tim Carter and I want to talk about some really interesting exterior trim board. It is made from plastic. But look at this, the corner board is actually plastic trim. It looks just like normal painted trim. It is a full 3/4-inch thick. This trim can be used around windows or doors. It nails and installs just like normal wood trim.

Here's the cool part - you can actually paint it! It can be painted but with a special paint that's made for plastic trim. And even the pigments are formulated for the plastic trim so the material doesn't overheat if it is put in the sun. It is however best to paint it a lighter color. On my project, I painted one side a dark green. I can get away with it because of the location of the shed, it won't receive direct sunlight. The one side faces North and is set deep in the woods.

The trim can be used around windows. It can be used as facia on the gutter boards. It can be used any place you would use normal wood trim. It looks great and it won't rot because it is plastic.

One final thing, it does have a signification expansion / contraction coefficient. So be sure to pay attention to the manufacturer's installation instructions. They will tell you how to allow for the changes in cold and hot weather.

This trim comes all different thickness, different widths and lengths. It should be available in the size you need. It is great when you are going for a low maintenance exterior finish. If you want white trim, you are in luck. You won't have to paint it at all.

This trim is by AZEK.

How To Remove Roof Algae

Roof Algae

Clean roof shingles with Stain Solver. This roof is covered with different species of roof algae. You can see where the lead is helping to keep the roof clean. If there was a copper strip along the entire roof ridge, the roof would be perfectly clean. CLICK on THE IMAGE to purchase the copper strips and solid copper nails.

How To Remove Roof Algae

DEAR TIM: Many of the roofs in my neighborhood are covered with black streaks, mine included. What's causing this to happen and can the roofs be cleaned? I'm able to walk on my asphalt shingle roof with ease, but am afraid of hurting the shingles by cleaning them.

Once the roof is clean, is there a way to prevent the streaking from returning? Could all of this been prevented? Molly G., Jacksonville, FL

DEAR MOLLY: Hundreds of thousands of roofs on homes and other buildings suffer from the stains you're plagued with. It's a harmless algae that's gorging itself on the powdered limestone filler that's often added to the liquid asphalt in shingles to help add weight to them.

This limestone never used to be a component of shingles. When the matts used to build shingles switched from traditional felt paper to fiberglass, the manufacturers had a problem getting the shingles up to the minimum weight requirement. Someone decided to use powdered limestone dust, but they didn't realize that it was a delectable food for the tiny algae. Fortunately, the algae doesn't harm the shingles.

The first thing to do is to be sure to read any paperwork that you might have concerning the warranty for your shingles. You want to discover how the manufacturer recommends to clean their product. If you don't have it, you can frequently get it easily online at the shingle manufacturer's website.

To save you the trouble, most manufacturers will void the warranty of their shingles if they discover you used a pressure washer on your roof. They're afraid that if an untrained person gets the cleaning wand too close to the surface, it will blast away the ceramic granules that provide protection to the tender shingle below.

A few years ago I decided to test a pressure washer on asphalt shingles to see what would happen. I did this on my own home on an asphalt shingle roof that had a 15-year warranty and the shingles had been on the roof for 22 years! I was getting ready to install a new roof, so if I did damage the shingles it wouldn't matter.

I used a 25-degree tip on the 2,400 psi pressure washer and held the wand about 9 inches away from the surface always pointing the wand down the roof. The water spray cleaned off all the lichens, moss and algae leaving the roof looking like it was new. I constantly stopped to check to see if I was removing any of the colored ceramic granules. In my case, the shingles were not damaged.

I do NOT recommend you do this, as you may damage your shingles. I just wanted to share the results of my experiment. You should never do anything that would void a warranty.

Instead you should clean your roof with just regular soap and water and a scrub brush. I've gotten stellar results using an oxygen bleach solution. Some people use chlorine bleach and water, but chlorine bleach is highly toxic to any vegetation that surrounds your home. Any chlorine solution that drips or is rinsed off the roof can kill your landscaping. Oxygen bleach does not harm vegetation.

stain solver bottleIt's best to clean a roof when it's cool and the sky is overcast. Working on a sunny day will cause the cleaning solution to evaporate in seconds or a few minutes. Spray the oxygen bleach solution on the roof working in strips from top to bottom of the roof. Each strip you clean should only be 4 feet wide. You do NOT want to be standing on a wet part of the roof as you clean. Always be on a dry section as the cleaning solution is slippery. Consider wearing a fall-protection harness in case something goes wrong.

Once the roof is clean, you can prevent the algae from coming back by installing a strip of copper at the top of the roof. This photo shows exactly how the copper should look:

copper roof strip

I was the first person in the world to identify that copper prevents the oxidation of asphalt molecules on asphalt shingles. It also stops roof algae and moss.  See how easy it is to install this copper in a new-roof installation? CLICK the photo to order the copper strips.

If you have about 3 inches of copper exposed at the top of the roof, each time it rains a tiny amount of copper will wash down on the roof. Copper is a natural biocide and the algae will not grow in its presence. Zinc works too as does lead, but the copper is more powerful.

You can purchase asphalt shingles that contain copper in the ceramic granules. These shingles are marketed as being algae resistant. I tried these on a shed I built and was disappointed. The north-facing section of the roof developed black algae stains in just three years.

It's my feeling the roofing manufacturer didn't put enough of the copper-containing granules in the shingles as a cost-saving measure. Copper is getting very expensive and to stay competitive, the manufacturer possibly decided to put less in the shingle.

Look for algae resistant shingles that have the best warranty. These probably have enough copper in them to resist algae growth.

You can watch a video that shows how to clean roof algae. Simply type "removing algae stains video" into the search engine at www.AsktheBuilder.com.

Column 955

September 26, 2012 AsktheBuilder Newsletter & Tips

Last week I signed up to start taking CERT classes. CERT is an acronym for Community Emergency Response Team. The first class was last night. You have to take the classes to become a CERT volunteer. You don't have to commit to become a volunteer to take the free classes. Does that make sense?

Within the first 30 minutes of the class, I became acutely aware of how unprepared I am for a disaster of any kind in my community, and I was a Boy Scout! It became readily apparent that in a real emergency, my family and I would absolutely be on our own - and I'll bet the same is true about you.

Here's why. Within a 30 mile radius of where I live in central New Hampshire, there are probably only 75 full-time paid firefighters. There are probably no more than 100 police officers. Yes, there are quite a few more volunteer firefighters, but my guess is the total number is less than 500. But the population numbers in the tens of thousands of people in that same geographic area. In the summertime, the population dramatically swells as vacationers come into the area adding more stress to the fragile support system.

Now add up how many fire trucks there are. Not many. If there's a major disaster, the fire departments already have pre-plans completed, and will be charged with saving and dealing with the MOST valuable assets in the community. Guess what? Your house and my house are at the bottom of the list. Your house means much to you, but it is of little value to the community as a whole.

CERT is an acronym for Community Emergency Response Team

I urge you to sign up for the CERT classes in your area. You'll discover what you need to do to be prepared. You'll discover what you must know to SAVE yourselves while you wait for days or weeks for help from the pros. See the fantastic reading materials I walked away with last night in the photo above? That beige manual is over 1-inch thick and packed with fantastic information. Remember, you don't have to become a CERT volunteer, but I would highly recommend it after you take the classes. Your community NEEDS you.


Tip of the Week - Repairing Scratches in Hardwood or Laminate Flooring

Last week, Kathy and I were moving furniture from a self-storage locker we stopped using. It's a long story, but as we were bringing in a piece of furniture into my office, I stepped on a small block of plywood that was upside down. There were tiny finish nail heads sticking out of the plywood.

You guessed it. I scratched the laminate floor. Drat!

I was upset for being such a dunce - the plywood scrap should have NEVER been on the floor, but I quickly let that thought escape my head. Why? I knew I could go upstairs and grab my box of different colored shoe polishes and instantly disguise the scratch.

The trick to using shoe polish in a floor scratch is to always start with the lightest color first. If you have a dark hardwood floor and use a shoe polish color that matches the finished floor color, the scratch will almost always come out much, much darker. That looks just as bad as the original scratch!

Take a very tiny amount of shoe polish on a cotton swab. Just touch up a very small part of the scratch to see how it looks. Get up and stand back from the scratch to really see what it looks like.

If you have a really deep scratch, guess what? You can call a furniture repair wizard. These magicians have a small case that contains an alcohol lamp and different lacquer sticks. Within minutes, they can fill the scratch and completely disguise it. You don't have to refinish an entire floor if you have just one or two scratches.


Stain Solver Success Story

As you might imagine, we get fantastic testimonials each day about my Stain Solver oxygen bleach. Here's one from Lee Wright.

Lee lives in greater Boston. I met him about three weeks ago when I had to speak to the Boston SEO Meetup group. To make a long story short, Lee purchased some Stain Solver. He sent dramatic before and after photos. Read what he sent me yesterday:

"Dear Tim,

It worked. Thanks for your help.

And it got the spaghetti sauce out of a nearby comforter, too.

The difference in the color of the carpet is primarily daylight versus incandescent light and flash. And as it turned out, while there was quite a mess when I first spilled the spaghetti – with sauce I'd just made using tomatoes from our garden! – we worked pretty hard to get as much up as possible, so by the time we got to the Stain Solver, the spots, while still clearly noticeable, were much lighter. We also took your advice and cleaned the entire carpet.

The comforter, on the other hand, got no attention until we washed it with Stain Solver a couple of days later."

Stain Solver is indeed a miracle cleaner. There are hundreds of things you can use it on around your home. Recently it was certified to be completely organic.

This is but one reason Carolyn and her Mommy Co-op up here in New Hampshire purchased SIX huge cases of Stain Solver about two weeks ago!


Kickstarter Shed Video Update

If you purchased the series of videos about building the shed, they're getting close to completion! The job has taken longer than anticipated for a number of reasons. The good news for you is that I'm going to over deliver.

Originally, I promised you 100 videos of the shed-building process. I've surpassed that. Right now I'm taping the step-by-step videos of building the stairs from the shed floor to the attic. Just that series of videos will number about 20! Wait till you see the step-by-step videos of how to build the winders that are part of the steps. You'll be blown away.

Bottom Line: Please be patient. I'll have the videos for you very soon. The shed is days away from substantial completion!


Starting and Running Your Handyman Business

I've created the outline for the LIVE online workshop that explains how you can get started running your own Handyman business. Based on the survey results from last week, I can see it works best to have the classes on a Saturday.

There are only 12 seats in the class. The best part about attending the class live is that you get to ask me questions LIVE just like in a real classroom environment.

I'll be taping the entire class, and if you're not one of the lucky 12 who get signed up first, you'll be able to purchase access to all the materials after the class is finished.

The class will be produced by PowHow.com. They have a fantastic interface for this live streaming video teaching system. It's highly recommended that you have high-speed Internet access and a connected video camera to your computer if you want me to see you. You don't have to have a video camera to attend the class. I don't have to be able to see you in the classroom for you to participate.

Go to the AsktheBuilder page at PowHow.com to see the syllabus. If you want to attend this class, you better sign up NOW. It will sell out quickly. The cost for the videos after the workshop is over will be priced more than the live class.

Be SURE to sign up for the 3-Hour Workshop, not the individual one-hour classes. Those will be offered at a later date.

Building Stair Steps

These are unique triangular stair steps that allow you to gain nearly two feet of elevation in the same space as a traditional flat landing. Photo Credit: Tim Carter

DEAR TIM: I have to build a simple set of steps but I'm totally lost. I don't understand how to calculate what the distance should be for the risers and the treads. Everything about building steps seems challenging. Step building seems harder than using an abacus to do math! Help me understand the thought process of building steps! Lonnie P., Long Beach, CA

DEAR LONNIE: I'll be brutally honest with you. Building steps is hard, very hard. Remember that geometry and school teacher that had an attitude and told you to pay attention? I'm talking about the teacher that chanted in class, “Class, you'll need this information one day. I promise you that!” Guess what, he/she was right. You should have paid attention.

Building simple steps is a classic exercise in geometry because you're dealing with triangles. The trouble is there's literally an infinite amount of triangle sizes that are available to you when you go to build a set of steps, and you need to decide which one works best and meets the building code. You bet it can be confusing.

When I say triangles, that might confound you as the average person sees a flat tread and a vertical riser when they climb steps. But the best way to look at steps is to consider them in a side profile, just like that one photo police take in the booking process after an arrest. Look at a set of steps sideways and place a straightedge on the nosing of the steps and lo and behold you have a series of triangles that touch one another right at the upper and lower tips.

This relationship is important to understand because this is just one aspect of building a set of steps that's safe to go up and down. The human brain is very adept at memorizing exactly how high it needs to lift your leg to just clear the top of each step as you climb up a set of steps. If a riser is too high or even too low from an adjacent one, you'll absolutely trip. The building code permits a minor variance between riser heights, but I recommend that when you do the math, make sure all risers are equal.

Many people are injured each year in accidents on steps, so building code officials have invested lots of time to create standards that produce safe steps. I urge you to check with your local building department to see what the current code requirements are for steps. They change from time to time, so what I tell you now might not be accurate at a later date. To make matters worse, your local code-governing body can modify the requirements that you might discover in the national model building codes. Yes, it's a moving target, but there's nothing I can do about it.

Years ago, when I was actively building in the field and having to satisfy my local building inspector, the code stated that the sum of two risers and one tread had to fall between 24 and 26 inches. The code also contained a minimum tread depth and maximum riser height. But even with that, there's an infinite amount of tread and riser combinations. Remember what your math teacher said, there are an infinite number of points on a line.

As a young builder, I did some reading and research and discovered that the sweet spot, and many architects I worked with agreed, was a set of steps that sported a 7.5-inch riser and a 10-inch tread. It just so happens this is right in the middle of the old code requirement as the sum of two of those risers and one tread is 25 inches.

You can build stairs once you have learned just a few of my secrets - step-by-step - from risers and treads to the stringers and mortises with this eBook.

Over the years I built many sets of stair steps that had that combination, and my customers felt they were the most comfortable steps they had ever gone up or down. But you must make sure this will meet code in your city or town. Don't build them that way hoping they'll pass inspection.

If you can control the height between the two levels the stairs connect, your job of building steps is much easier. I say this because you can find out what your local code requirement is and just make sure that the distance between the two finished floor levels is the exact multiple of the code-approved riser height. Back when I was building, this simply meant that the distance between floors was some mathematical multiple of 7.5 inches.

Make sure you have a full grasp of all the other requirements concerning stairs. You have to be aware of head room, the minimum finished width of steps and the handrail requirements. Believe me, stair building can make a grown man cry and you've not even broken out the framing square yet. Wait till you do that!

It's best to draw out a simple line drawing of the steps before you start to build them. Double check your math.

The biggest mistake made by rookies is the failure to have the correct height between the two different floor levels. You have to do the measuring from where the first step starts and the last step ends. If the lower level is out of level, your math could be off by as much as an inch! Simply dropping a tape measure from the top floor down to the bottom floor only works if you have a staircase where the first step is directly under where the top step ends.

You can watch a video that takes the mystery of winder steps found at a landing at www.AsktheBuilder.com. Simply type "winder steps video" into the search engine at www.AsktheBuilder.com. NOTE: The winder steps video link will be updated soon. The video is currently being taped.

Column 954