How to Build a Garden Pond

DEAR TIM: I've been trying to convince my husband to build a small garden pond that has a waterfall for me. He claims it's too hard and talks about all the challenges. What does it take to build one? Do you need to rent expensive equipment? Do you need special skills? Can you point me in the right direction, as I think I'll just surprise him and show him he's not dealing with a pushover. Vicki B. Nashville, TN

DEAR VICKI: It's hard for me to answer a few of your questions because I'd need to know the soil conditions at your home. But let's assume that you've got a clay soil that has few rocks in it. I'll also assume that there's no hardpan or other hard layer close to the surface. If you have nice soil that's not too hard to dig, you can do this. The biggest reason you'll succeed is you have the right attitude.

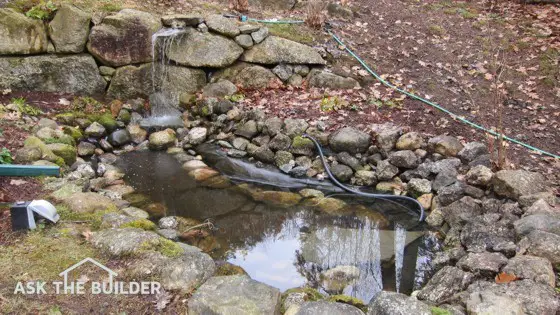
 This garden pond was built with a simple shovel and some sweat. A large piece of rubber roofing and rocks are all that's needed.  Photo Credit: Tim Carter
This garden pond was built with a simple shovel and some sweat. A large piece of rubber roofing and rocks are all that's needed. Photo Credit: Tim Carter

As crazy as this sounds, you just need one or two shovels, and maybe a wheelbarrow. If your land is pretty flat where you want the pond, then you don't even need the wheelbarrow as the dirt you dig to make the hole for the pond will be used to build the hill that will form your waterfall.

I prefer to use a round point shovel to do the major part of the digging. This shovel has two curved edges that meet at a point at the tip of the shovel. This shape is perfect for cutting into moist soil. I use a flat garden spade with a flat edge for trimming and creating platforms within the pond.

If you're lucky enough to have a somewhat sandy clay soil, they seem to dig easier if they're damp. Some clay soils get very sticky when they're too wet, and the clay sticks to the shovel. You'll have to experiment to see what are the best soil moisture conditions to dig. If you need to add water, just turn the sprinkler on to water the soil to get it right.

Many garden ponds are about 18-24 inches deep at the deepest part. The depth of the pond is dependent upon what you're going to have in it. If you want water lilies and other aquatic plants, you need to plan the pond so the plants are at the proper depth.

Some ponds have shelves or flat ledges on the sides as you shape them. These shelves can have shallow plants on them and are great places to place decorative rocks that you can see through the water. I'd spend some time drawing out what you want and thinking about how much water you want over the features in the pond before you start to dig.

Frogs and other creatures that will find the pond love to hang out in and about rocks that are in the pond. You need to plan for this so you don't make the pond too small. The pond may look big when you dig it, but as you fill it with stone and rocks, all of a sudden there's little room for water!

The best liner I feel for a small garden pond is black commercial rubber roofing material. It comes in giant rolls and you can often get a nice piece of scrap roofing left over from a roll for a decent price. Call several commercial roofers and see who can supply you with what you need. Find out the biggest piece you can get so you can line the pond with one continuous piece. You want to avoid seaming the rubber at all costs.

I like to make a dirt curb that's at least 5 inches high around the pond. You lap the rubber roofing over this curb and extend the rubber at least a foot into the yard around. Place rocks on the top of the curb to hide the rubber and hold it in place. This curb stops surface water from flooding into the pond in periods of heavy rain.

The most challenging aspect of the pond is creating the waterfall. You can make a stone cliff of sorts to create the elevation needed for the fall. I like to use a 1-inch inner diameter black rubber hose to connect the submersible pump that's hidden by rocks in the pond up to the outlet at the top of the waterfall.

I recommend that you use another piece of rubber roofing material to help you construct the waterfall structure. This secondary piece of rubber drops down into the pond and you hide it with rocks.

The purpose of this is to catch any water that leaks or runs down the rocks. If you don't do this, water from the pond can soak into the surrounding soil and effectively drain your pond.

The electric power that feeds the pump must be protected by a ground fault circuit interrupter (GFCI) outlet to prevent outdoor shock hazards. If you don't know how to install one of these outlets correctly and safely, by all means hire a professional electrician for this part of the project.

You can watch an informative video that shows a garden pond with a waterfall and how to build one. Just click here “garden pond video”.

Column 928
How to Build a Garden Pond Video

Hi, I'm Tim Carter and I want to show you a garden pond or a fish pond with a waterfall. I want to show you the basic construction. I just cleaned this one out and because the water level is not filled up all the way, you can easily see the construction.

This pond has a waterfall at one end. The water level is down about halfway and is about a foot deep now. This pond has a few different levels. Notice the flat area just under the rocks on the right. There is an additional ledge on the other side of the pond.

The pond liner is a sheet of commercial rubber roofing. The pond was dug out and shaped the way the owner wanted. Then the rubber liner was laid over the pond and up and over the sides of the pond.  This keeps the water from running in behind the liner.

The water level will come up another 16" to reach the normal depth. Under a large piece of slate in the bottom of the pond is the pump that circulates water to the waterfall. The black water hose is visible since the water level is down, but once the pond is full, the hose will be hidden from view.  The hose travels up the other side of the pond and flows out onto a flat piece of slate to create the waterfall.

This pond receives a fresh supply of water from the downspout. So every time it rains, the water flows into the pond. So that is the basic tour of how this pond was constructed. Not too complicated.

Coast Rapid Response 3.00 Pocket Knife Review

Coast Rapid Response 3.0 Pocket Knife

The pocket knife industry has always been strong and new models come out all the time. I’m convinced this is because a knife is such a personal item. Each person is drawn to certain things about a knife.

My first impression of the Coast Rapid Response 3.00 pocket knife, while it was still in the impenetrable stiff plastic packaging, was that it looked good. I had to use my trusty SOG Flash 2 pocket knife to free the trapped Coast knife from its clear bondage.

Here are the tech specs on the knife:

  • Blade length: 3.00 in.
  • Overall length open: 7.00 in.
  • Weight: 3.70 oz.
  • Blade material: High-carbon stainless steel
  • Partial Serrated Blade edge
  • Handle material: Fiberglass-filled textured nylon
  • Ambidextrous Thumb stud on each face of the blade
  • Full Stainless Steel frame
  • Ambidextrous pocket clip
  • Roller-Cam technology spring opens knife

These knives are built so that you can open them with one hand. Such was not the case with this bad boy. Try as I might to open the knife with the thumb studs, I couldn’t. It simply hurt my thumb too much.

The other issue with the knife is the spring lock that holds the knife in the open position. This needs to be moved sideways so you can close the blade. Once again, it was very difficult to push down on this lever to produce enough friction to move it sideways.

The knife comes with a safety switch that allows you to lock it so the blade doesn’t open. I feel it's superfluous as the blade takes a lot of persuasion to go from the closed to the open position.

Although it’s a very handsome knife, I give it 2 hammers out of 5.

This new Coast knife is going to be a decoration on my desk as my SOG Flash 2 will be in my pocket until such time as Coast issues an upgrade model fixing all the problems. My guess is it will be called the Rapid Response 3.10.

Exterior House Remodeling

Joyce DiSanto did a complete facelift on her home. Her house remodeling included a complete exterior remodeling, a metal roof, concrete roof, stucco, stone, window pop-outs and solar panels.

Check out her pictures of the house before and after remodeling.


If you want to submit pictures and the story behind your project, CLICK HERE to go to the Before & After Submission Page.

Building a Shed

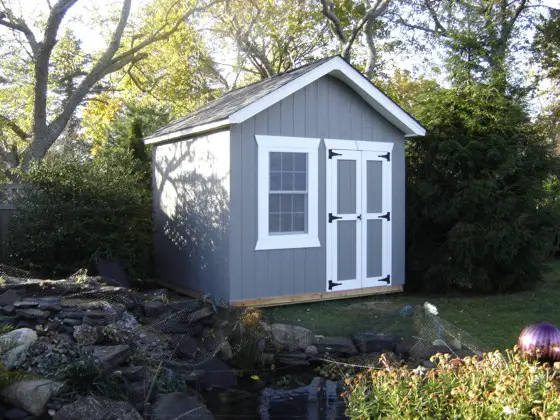
"Really no before pictures, because there wasn't anything there but grass. This is my shed that I built by myself and without a plan, I just went for it as I was building the shed. I wanted something different than the prefabs or buying one from a shed company.

Take a look and let me know what you think."

Mike Rignola


If you want to submit pictures and the story behind your project, CLICK HERE to go to the Before & After Submission Page.

Storm and Hail Damage

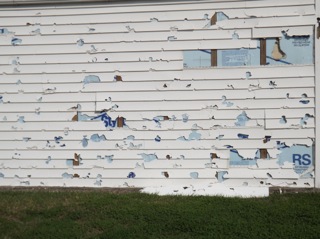
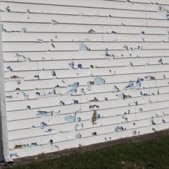
The following pictures are from Trudy whose town was hit during the recent storms. I have requested that she provides After pictures once these buildings are repaired. But for now, we only have the Before images.

"Hi Tim,

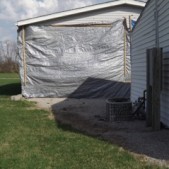
Here is a start of some hail damage pictures. These pictures are of my nephew's garage. The one with the tarp is his double-wide trailer. Probably a good third of our town has this much damage. We live about a mile from him.

I kept nagging my husband to look for damage on our house, but he said we wouldn't have enough to turn in to insurance.

I finally got the contractor and adjuster both here. We are getting a new roof on our house, house garage and separate back garage. All new gutters and downspouts both places. An upstairs window. The vinyl under the gutters and down a little of the side of the house (fascia and soffit).

Our back garage has vinyl siding, and it has to have a new back and two lights replaced. My gazing ball and solar light were damaged, as well as crawlspace vent covers, etc. But if you drove by, you would think we had no damage.

Oh, we have a one and ½ story and the sides of the dormers are being replaced as they are vinyl.

It knocked out many windshields and/or back windows. My son's girlfriend's car had $8,500 damage. My sister-in-law's van was totaled."

Trudy Bledsoe

Hail Damage
Click on thumbnails below for a larger image.


If you want to submit pictures and the story behind your project, CLICK HERE to go to the Before & After Submission Page.

March 20, 2012 AsktheBuilder Newsletter & Tips

What's in this issue?

Latest News
Friendly Reminder
Senco F-18 Review
Before & After
Where's My Answer?
Phone Fraud
Tip of the Week
Stain Solver Sale
Video of the Week
Blog Post
Q & A of the Week

Oh do I have spring fever! As I write this, it's a bluebird day - not a cloud in the sky, the temperature is climbing to 75 F, and the snow is almost gone. If you stand in the sun, it's almost so hot you can't have on a long-sleeved shirt. It's great weather to take a walk.

I was working just a few days ago on the lumber takeoff for a large shed / mini barn I'm going to build as soon as the weather breaks. This project is going to spawn quite a few new eBooks, all of which will have numerous videos in them.

My plan is that each eBook will just showcase, in great detail, each aspect of building the structure. You can purchase a la carte just what you need to know.


Friendly Reminder

In this newsletter, you'll see several links back to my website. When you're there, I ask you to do one thing for me. Please help me by clicking the Social Media button in the upper left corner of every page you visit.


Senco F-18 Nail Gun Review

I posted my first tool review at the website. Tool Reviews is a primary navigation category, and I'm quite sure it's going to be very popular.

Have you ever used a nail gun? If not, you may want to after you read this review.


Before and After

The new AsktheBuilder.com website design launched last week. One of the primary navigation buttons at the top of every page is Before & After.

I encourage you to share some nice photos of any projects that you want others to see. With the wicked Spring weather just around the corner, it could be before photos of your house or property followed by after photos of storm damage. Trudy sent me some hail damage photos taken near her home that were frightening.

You submit your photos and story using this form at the website.


Where's My Answer Tim???

Each time I send a newsletter out, I get at least one curt reply from a subscriber. They're all the same.

The person wants to know, "Why haven't you answered MY question?"

Well, let's do the electronic autopsy now.

Are you positive your question made it to me? Did you check your Spam folder for my reply? Is it possible you somehow accidentally deleted it? Is it possible that your ISP or mail handler failed to deliver my answer to you?

I take pride in answering incoming questions. It's done primarily by Ellen. She's worked for me for, gosh, what is it Ellen, sixteen years? Ellen is my Numero Uno Customer Service rep, and she deals with all the incoming questions. Those she can't answer she sends to me. Ellen answers most questions within days of receiving them.

To the best of my knowledge, I'm the *only* home improvement website that answers real questions. Most of my peers don't have a Contact Form where you can ask a question.

Bottom Line: Please don't be so quick to blame me if you don't get an answer. The trouble could be in your set. :->>>

Please be aware I have a product that allows you and I to talk on the phone if you have an urgent problem where a mistake could cost you hundreds, thousands, or even tens of thousands of dollars. You can invoke my 15-Minute Phone Consult.


Phone Fraud

I saw this story at the USA Today website about caller ID fraud. It's not directly related to home improvement, but a thief could steal the money you were going to spend on tools or a new kitchen.


Tip of the Week - Fence Cleaning

"Hi Tim, I was reading up on Stain Solver for cleaning my wooden fence. Is scrubbing with a brush mandatory? It's a pretty good amount of fencing (corner lot) and the thought of scrubbing (vs. power washing) gives me pause. I agree that pressure washing (unless very careful) can be terribly damaging. I used one on my last home's fence, and wood was FLYING everywhere. Regards," Chris.

Here's the thing about cleaning. Let's say you hang your dirty clothes on an outdoor clothes line and then spray them with a great solution of soap and water. I mean spray them for an hour or two using a hand pump sprayer, then rinse them and allow them to air dry.

Will they be clean? Of course not, it's the mechanical agitation of the clothes being tumbled or moved by the machine agitator that cleans them. The soap just helps lift and transport the dirt away.

The same is true with washing a car. You've used a spray cleaner at one of those self-clean car washes, but there's always a thin film of dirt left.

You have to mechanically agitate the fence to deep clean it. Just get a helper. Switch tasks. One person is in the lead with the hand pump sprayer applying my Stain Solver making sure it doesn't evaporate. The second person follows behind with a scrub brush on a pole. The scrubber is also responsible for rinsing the fence.

It's not hard. Just switch jobs every fifteen minutes. Work on an overcast day if possible. On a sunny or windy day, the Stain Solver solution may evaporate too quickly.


Stain Solver Sale

Since Chris mentioned it, and my new Deck Cleaning and Sealing eBook will be complete very soon, I want to tell you the annual Spring Stain Solver Sale is just around the corner. It's going to happen the first two weeks of April, so be opening each newsletter to make sure you do not miss it.


Video of the Week - Control Joint Video

Are you going to be pouring new concrete soon? It could be a driveway, patio, sidewalk, even a basement floor. You must understand what happens to concrete as it transforms from the plastic state to the solid state. Massive internal tension forces actively try to rip it apart. Watch this video to get a feeling of what you have to do to prevent jagged random cracks.


Blog Post - Future of FREE High-Quality Content

I promised you a blog post about what I feel the future holds for free high-quality content on the Internet.

I'm deep in the bowels of the Internet on a daily basis as my business depends on it. This causes me to have a drastically different view of things than you probably have.

Suffice it to say I see a huge change ahead. Read this blog post and please comment at the bottom of it. Tell me how you really feel and keep in mind how the content business operated BEFORE the Internet existed as you now know it.


Q & A of the Week - Roof Flashing Leaks

DEAR TIM: My house was recently re-shingled. However, leaks are present near a chimney and where a lower roof meets a second story wall. I was able to get up on the roof and look around. The metal work around the chimney and along the wall was not replaced. It is old and rusty. However, I discovered fresh silicone caulk in and around this metal work. Was the caulk installed incorrectly? J. W.

DEAR J. W.: YES! The caulk was installed incorrectly. It should have never been used in the first place! Caulk is not a substitute for roof metal work or flashing. Roofing shingles are a fantastic product. Many of them are...

Click Here to continue to read about Roof Flashing Leaks.

Don't forget - Do it Right, not Over,
Tim Carter

Shed Door Latch Tip #2

Keith Mealy Shed Latch

Keith Mealy Shed Latch

Keith Mealy Shed Latch

Keith Mealy of Cincinnati offers his shed door latch solution.

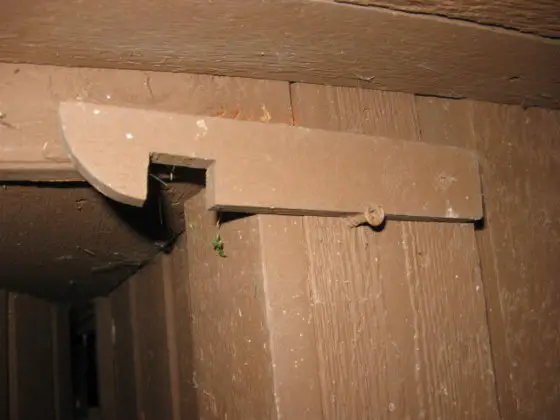
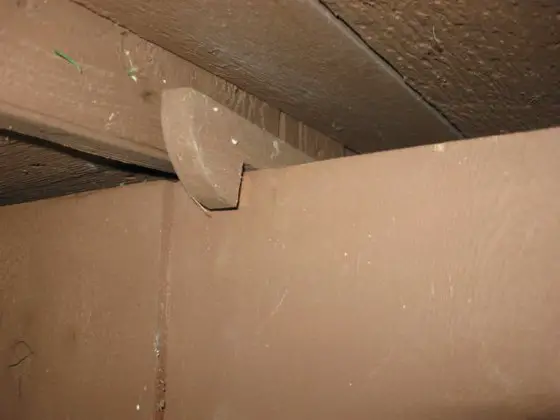
"I have what I think is a more elegant solution. Two screws and a 6" piece of 1x2.

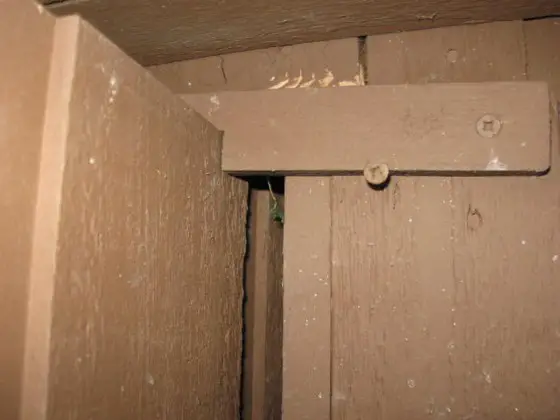
The latch sits under the edge of the gambrel roof along the side of the shed. When the door is fully opened, it latches. When it's time to close the door, grab the top of the door and flick the latch up with your thumb."

Keith Mealy

Closet Organization Remodeling Project

Joy Davis, who lives in Iowa, tackled this closet remodeling project.

"I was going to reorganize a wall in my entry closet but the more I thought about it the more I decided to do.

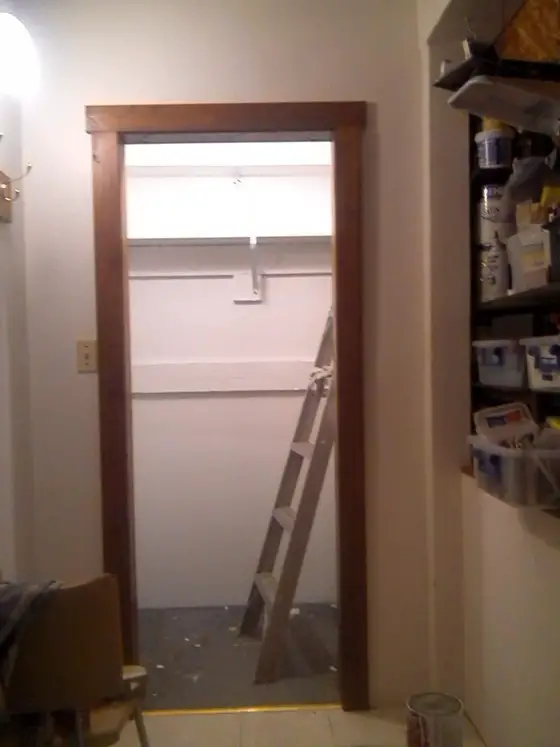
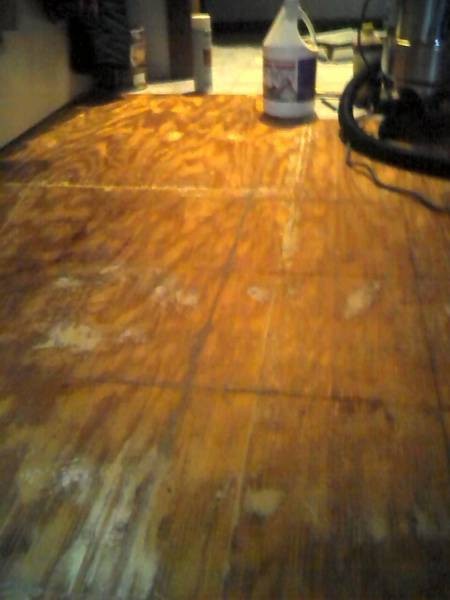
So I ended up painting all the walls, pulling up the linoleum in the front part of the closet and taking up the carpet in the back closet (the back closet was the original entry closet but we added another closet on the front of it years ago), building new shelves and putting in a regular closet pole instead of just hooks.

I put new shelves in a little cubby on the right (which had been a big jumbled pile and you could never find anything).

I am a very rank amateur at building so I used plastic totes for drawers in the cubby. Also I bought some plastic CD/DVD holders in which to store nail and screw boxes.

I added hooks and hangers for brooms and such to get them off the floor. And some wire baskets, by the door, to organize and store hats and gloves. I got them at Wal-Mart. They were called stackable baskets and were for fruit and such. I hung them on cup hooks, so they are removable. It had been a real mess before, using the old box on the floor to store the hats and gloves. Everything was always spilling out. I also added a lower set of hooks for grandchildren's coats.

In the process of cleaning the closet for the remodel, I found some linoleum tiles that I forgot I had. There was enough to do the entire closet!

I spent less than $80 on the project. I used reclaimed boards and leftover boards where I could and I either painted or re-stained them. Unfortunately, I took my before picture after I had cleaned and started on the project instead of when it was a total mess where you could hardly walk through it."

Joy Davis

Joy Davis' Closet Before
Joy Davis' Closet Floor
Joy Davis' Closet After


If you want to submit pictures and the story behind your project, CLICK HERE to go to the Before & After Submission Page.

Ridge Board Length for a Hip Roof

David Ellis of Illinois asked "how do you figure the length of the ridge board in a hip roof garage?"

David, the ridge board for a common hip roof is easy to calculate. You measure the length and width of the structure to and from the actual building line.

The building line is the point from which you start to calculate the run of your common rafters to the centerline of the roof.

I also assume you'll be using a 2x material for the ridge board.

Subtract the shorter wall length from the longer wall length< and add 1.5 inches for the length of the ridge beam or board.

Example: Let's say I'm building a shed that measures 10 feet by 16 feet. These are the measurements of the walls once covered with my sheathing and create the actual rectangle of the roof line.

16' - 10' = 6 feet

6 feet plus 1.5 inches = 73.5 inches for the ridge board

You have to add the 1.5 inches because that accounts for the king rafters that connect to each end of the ridge board just like the common rafters that touch the sides of the ridge board.

Tim Carter