What's in This Newsletter?
Latest News
Cold Weather Tips
Another Free Guide
Veronica California Travel Tips Update
Winter has really arrived here in New Hampshire this weekend. From what I see in the news, that's pretty much the case in many parts of the nation.
Yes, I know you may live in sunny Florida, or balmy Southern California. I have something in this quick weekend edition for you too! Hang in there.
Hundreds of thousands of homes got snow on their roofs and the temperature is dropping like a rock. That's the perfect storm for ice damming.
I thought it being a weekend and you might have some spare time, I'd share some very quick tips with you to save you money, heartache and stress.
I also have a very important update about Veronica below. Please be sure to read it.
Cold Weather Tips
Preventing Ice Dams and Their Leaks
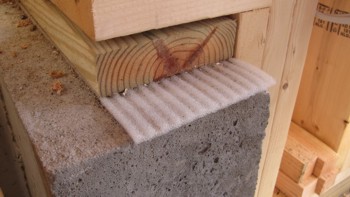
I could write an entire book about ice dams. There are great products to put under your shingles to prevent the leaks caused by ice dams. Or you can have an expert roofer install traditional metal roofing on the lower 4 or 5 feet of your roof.
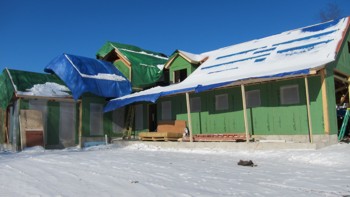
But what if you don't have these? The absolute best prevention to stop ice dams and their loathsome leaks is to just starve them of their fuel. I raked my roof yesterday. Here's a photo of it.
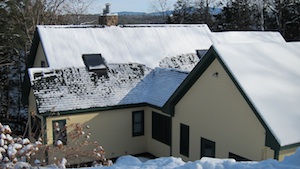 Get outside right now and use a snow rake to rake as much snow as possible from your roof.
What happens next is magical. Even on an overcast day often enough infrared radiation gets through to melt the light covering of snow.
Once the roof shingles are clear of snow, they act like giant evaporators for any melt water that tries to make it down the roof from the snow pack you couldn't reach. The water never makes it to the edge where it normally dams.
This is not a perfect method, but it absolutely works here at my house in New Hampshire.
Drafts Around Windows and Doors
Often cold air enters homes around door and window frames. The installers could have done a horrible job of installing insulation between the window/door frames and the rough opening. You can't go outside and caulk cracks. It's too cold. It's not practical to tear apart the interior trim and inspect for insulation.
But if you have painted wood trim around windows and doors, you can get matching colored caulk - or use clear water-based caulk, to seal gaps between the trim, the walls and the door/window frames. You'd be shocked at how the collective length of a tiny crack allows many cubic feet of cold air into your home each day.
Wall and Switch Outlets
Electrical outlets on exterior walls can leak massive amounts of air. Simple foam gaskets can stop much air leakage. You can also remove the cover plate, vacuum any dust between the edge of the box and wall, and caulk this air entry point.
Sand
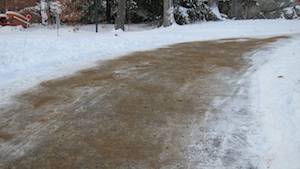 If you have to deal with ice outdoors, don't overlook the amazing properties of sand.
It's literally dirt cheap. In some places, like my town, it's FREE. At our Waste Transfer Station, they have sand available all year for free. Just bring your own buckets.
Sand will provide great grip on ice and it accelerates melting when the sun comes out. The dark tiny rock particles absorb heat from the sun.
You can recycle the sand from your drive or walk when spring comes. Just sweep it up and reuse it next winter.
Water
If you live in the city and are on city water, winter means water main breaks as the frost starts to drive deep into the soil and the expanding ice lenses put downward pressure on the soil above water mains.
My mom used to save the white one-gallon bleach bottles and have water in them in case of an emergency.
I used to make fun of her. Guess what? She was smart. On more than one occasion, that water came in really handy.
Store some water at your home. Start saving soda bottles, milk bottles, etc. Be sure to clean them out well before putting water in them. This is true of the plastic milk jugs.
You MUST rinse them out well, especially the small loop area of the milk bottle handles. Milk up in that area that doesn't get rinsed out will sour and the water in the jug will taste horrible or it will smell really bad.
Another FREE Guide
I had fun creating the Wet-Dry Vac Uses Guide. It was all you! You provided the content.
Two days ago we ran out of plastic containers to store leftover food. Kathy had just made a large pot of great tasty bean soup with a tomato base, if that's what it's called. The broth part was reddish.
Anyway, I always do the dishes and put the food away. I thought, "What am I going to put all that soup in?"
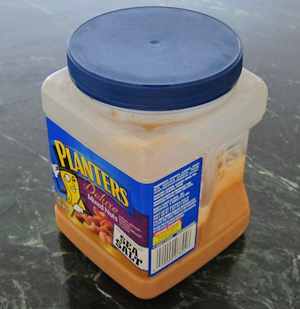
Ta Da! I remembered I had been saving these large 32 oz plastic containers that cashews come in. Oh my, with the large screw on lid, they were PERFECT.
So, what things do you reuse around your house? I would REALLY like or you to send me a great photo of the thing being reused.
This new guide will look so much better with color photos. Are you up for it? If so, don't reply now. WAIT till Tuesday. I'll have a special page on my site where you can enter a little story and Upload the photo you take. Thanks!
Veronica CaliforniaTravelTips UPDATE
If you've just subscribed in the past three days, this will probably not make too much sense.
On Thursday, I sent out a very RARE mid-week newsletter. It was actually a plea to help a close friend.
I explained to you the situation by asking you to watch a quirky video I taped about two hours before I sent the newsletter. It's about a YouTube competition a close friend of mine is in.
Many of you responded positively and voted for Veronica. She's most grateful as am I. But there were about five subscribers who hated on me. I can live with that. They want the newsletter on their terms, even when it's free.
As I'm typing this, Veronica just lost the lead. She REALLY needs our help now if you've not yet voted.
I feel the back story will convince you why I'm devoting energy and space to this. It's important to my psyche.
I met Veronica and her great husband, Jason, probably seventeen years ago. She was a budding newspaper Features editor. Veronica was in charge of my column that ran each week in The Daily Press in Victorville, CA.
She got burned out about five years ago. I started to mentor Veronica and Jason encouraging them to start to tape videos.
Veronica started the California Travel Tips channel at YouTube and Jason started the Chef Tips channel. He's a professional chef.
It's just the two of them and their two darling daughters. They are competing against at least one other website and channel in this YouTube competition that has multiple employees, probably a very large six-figure annual production budget and a video production company that has hundreds of thousands of dollars of equipment.
Veronica and Jason have one camera, a tripod and they edit the videos on a PC in their living room. It's a classic David vs. Goliath story.
But look at Veronica's videos. The quality is fantastic. I would expect her competition to be miles above her. In my opinion, they're not. That's why I believe Veronica deserves your vote.
I'll close with this. The haters on Thursday who gritched at me for putting this in my newsletter don't know me well.
I'm a recent convert to Karma. I'm a believer in Abundance Juice. I'm convinced that Givers Get.
I decided to give to Veronica. I decided to risk losing subscribers and money to help a close friend who I've been mentoring. It's that simple.
Please go vote for Veronica now if you feel she deserves it. Watch all the videos at this page and you be the judge. The contest is OVER on Monday January 16th at 5 pm PT. VOTE NOW.
Thanks so very much.
BIG Stain Solver news and New Home Construction NEWS on Tuesday!!
 A close friend of mine is Veronica Hill. I've known her for probably 17 years. She used to be my editor when my column ran in The Daily Press in Victorville, CA. About five years ago, Veronica decided to leave the declining newspaper industry and start her own business online.
 Last winter was the exact opposite. It started to snow late, December 27th to be exact, but oh my. It seemed to dump on us ever 5 days until March. It got cold and the snow didn't melt. It was brutal.
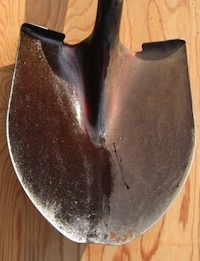 It's not too late to protect your yard tools from rust. Exposed steel on garden tools can rust with little effort when they get cold and then water vapor condenses on the metal.
 I shared last week with you a video of me demonstrating new
  Sarah, with the help of her parents and husband built a magnificent loft bed using my plans. Now, I don't have a before photo, but you get the idea.


 On New Years Eve, my son Tristan helped me tape a new video. It was fun working with him, and we did it on the fly.