October 18, 2011 AsktheBuilder Tips And Newsletter

What's in This Newsletter?

Latest News
Interactive Delta Brizo Showroom
Washing Machine Time Bombs
Christmas Gift Guide
Firewood Storage
Latest Book I Read
Facebook Fan Page

I hate to be the wet blanket, but last week's Remodelers Show in Chicago was pathetic. It's a possibility that your local home and garden show in the spring had a larger convention-center footprint than this show.It's absolutely a sign of the times. What's more, the vast majority of attendees - remodelers - I talked to were within a day's drive. For the most part, the aisles were wide open.

I did see a few interesting things, and was able to do some business there, but the low attendance, lack of major name-brand exhibitors, etc. is a telling tale of how stressed the industry is. Last winter's National Builders Show was no different. It was just a shadow of it's former self.

Here are some links to videos I shot on the floor of the convention center:

Deck Pier Video

LED Lights for a Deck

Camouflage Vinyl Siding


Interactive Delta Brizo Showroom

Brizo Delta Faucet ShowroomWhile in Chicago I made my first-ever trip to the historic Merchandise Mart. It's the largest commercial building in the world I was told.

After you walk in the front door and go past the elevators, you'll see Delta and Brizo's new showroom. It's open to the public and you can see, touch and use all of their new faucets. The best part is you can operate all of them!

Ms. Kelly Litton, the store manager, took me on a tour. Watch this video I shot on the fly. Thanks to Todd Fratzel for his videography skills.


Washing Machine Time Bombs

Stainless Steel Washing Machine HosesA very good friend of mine, Bryan, lives in San Francisco. He rents an apartment and last week he had a major plumbing disaster. Luckily he was home when it happened. Had he been gone or at work, oh my.

One of the supply hoses to the washing machine burst. Bryan does not own the machine nor the connecting hoses. They are the property of the building owner. But right now the owner is blaming Bryan for messing with an overflow alarm. It's a long story.

Water flowed for ten minutes before he discovered the problem. I get at least one email a month from subscribers like you where this has happened.

A mold remediation company was called in to cut away the damaged drywall and set up heaters and dehumidifiers to prevent a mold bloom.

The question is, if you're renting do you have adequate liability insurance? If you live in a home and have homeowner's insurance, are you completely covered if something like this happens to you? Call your insurance agent. Get out your policy and have the agent PROVE to you that you have coverage.

The entire incident could have been prevented with washing machine supply hoses that are clad with braided stainless steel to prevent blowout leaks. If your washing machine is anywhere OTHER than a basement with a concrete floor and a floor drain, you NEED these. Here are the stainless-steel washing machine hoses I use at my own home.


Christmas Gift Guide!

I'm starting to put together a DELUXE Christmas Gift Guide for that handywoman, handyman or pro around your home that's so hard to buy for.

It's going to be broken down into sections and list my favorite tools at different price points so no matter what your budget is, you'll be able to find that special gift that comes with the AsktheBuilder Seal of Approval!

This is a first ever for me. Look for it the second week of November. You'll not believe some of the things that will be in there!
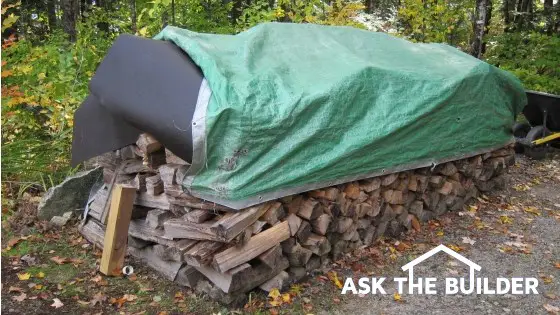
 

Firewood Storage

I just wrote a new column about firewood storage tips. It talks about an inexpensive way to keep firewood dry. I know there are many other methods. If you want to share your method, just reply to this newsletter. Send high resolution photos if you can.

But if you want to see some spectacular photos of stacked firewood, then you just click that link. Wow! The one of the fake downed tree is my favorite, although it would be cool to be in that Hershey's kiss structure at night!


Latest Book I Read

Not Without Peril Book
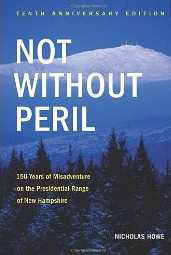
I live about 50 miles due south of one of the most dangerous mountains in the USA - Mt. Washington. Hundreds of people have died on this tiny mountain because the weather conditions near the summit are almost always radically different than they are in the valley at the trailheads.

By most standards, it's a tiny mountain, only 6,288 feet tall. This means many non-mountaineers try to climb thinking it's no big deal. Guess what? This past week the temperature at the summit was in the low 20sF and 100 mph winds were howling. Down at the base at the parking lot - it was mild weather.

Not Without Peril is a book I got for my birthday that tells fascinating stories, starting with the first person who died, about the conditions and poor decisions hikers made. If you like to read true suspense stories and want to gain a real respect for Mother Nature and Mt. Washington, you'll love this book.


Facebook Fan Page

AsktheBuilder on FacebookIf you were a fan of mine on Facebook last week, you were getting all my updates about the Remodelers Show. You could have even joined me at The Gage Restaurant on Thursday night! We had a blast. Please go LIKE me now and get ready for lots of new tips each week.

Firewood Storage Tips

firewood storage

This firewood is protected from rain and snow. You can easily see the tar paper that covers the top of the firewood that's under the green tarp. PHOTO CREDIT: Tim Carter

DEAR TIM: I'm tired of trying to burn damp firewood. Neighbors of mine leave their wood unprotected as well. Right now I can't afford to build a nice firewood storage shed. I can't put it in my garage either as I'm worried about termites and insects. What are some affordable and effective methods to store firewood outdoors? I'm looking for stacking tips, and ways to help air dry the wood as well as keep it dry. Kelly L., Apple Valley, MN

DEAR KELLY: I see unprotected firewood piles all the time where I live here in New Hampshire. In fact, I see lots of neatly stacked firewood that has no top cover. I've always wondered how well that wood burns. No doubt you get a much hotter fire if the wood is dry, as some of the combustion BTUs are absorbed by the water and water vapor that is created as the damp wood cooks in the fire.

As you might imagine, I've seen, as I'm sure you have, all sorts of gorgeous and practical methods of covering firewood. A friend of mine has his own wonderful firewood shed that's adjacent to his home. I had plans drawn up for a new detached garage that had an extended shed roof at one end that was to be a giant firewood storage area.

There are endless possibilities with respect to firewood storage. But when money is tight and you need dry firewood stored outdoors, I'm a firm believer that some inexpensive tar paper and a fiberglass tarp are quite possibly one of the most practical methods to achieve the goal.

Many years ago, a retired engineer taught me how to stack firewood so it air dries quickly. The first thing to do is to split all the firewood to the size you intend to use when you burn it. Be sure when it's cut that it's the correct length to fit in your fireplace, wood stove or fireplace insert. You'd be surprised how many people try to maximize the length only to discover it's too long by an inch.

It's best to store the firewood off the ground. If you can afford some treated lumber 4x4s, these work great and can last decades. If you have access to some younger straight trees like some birch, you can cut those to make runners that are about 14 inches apart center to center. If you use trees, it's very important they be the same diameter. You want the stacked wood to be plumb so the piles don't tip over.

If you can't afford the treated lumber or don't have access to the trees, then at least store the wood on well-drained gravel. You just don't want the wood in contact with damp soil. This will allow the lower row of firewood to rot over time.

Think about the prevailing wind direction at your house. It's ideal to stack the wood so the long rows are parallel with the prevailing wind direction. Once the wood is covered, the piles act like a miniature wind tunnel as the wind blows through and across the wood.

At the end of each row of firewood, I usually have three stacks next to one another, you want to stack each successive layer at 90 degree angles to one another. This tower of firewood offers very good stability at each end so that the weight of the pile doesn't cause the wood at the end to tumble off the row.

I also keep about 6 inches of space between each row to promote air circulation. If you stack all the wood tightly, it takes longer to dry. If you do three rows of wood, try to make sure the center row is higher than the other two by about 4 inches.

Once you've got the wood all stacked, I usually go no higher than about 54 inches, then I cover the wood with two long pieces of overlapping tar paper. The higher center row of wood help ensure any water drains to the sides of the pile. I then cover the wood with a fiberglass tarp so the top is covered and it extends partially down the sides. I try to keep the ends of the rows uncovered as much as possible to promote great ventilation.

Don't cover the stack of firewood completely with a tarp. This traps water vapor and makes it nearly impossible for the wood to dry.

It's best to install some stakes and rope at the sides of the tarp to extend the tarp out away from the stacked wood much like a camping tent rain fly. These tarp wings ensure the sides of the wood stack don't get wet from all but the worst driving rain.

It's vitally important that you do everything possible to promote the movement of air through the wood if you want it to dry rapidly.

The real firewood pros stack and cover their wood for at least a year before they intend to burn it. This means you typically have two years worth of wood on site at the beginning of each wood-burning season.

Don't forget that some wood is easier to split when it's partially dry. Other wood is best split as soon as it's cut into links from the fallen tree. Talk to a professional woodsman to determine when it's best to split your wood. A hydraulic wood splitter will become your best friend if you intend to burn lots of firewood. I love my 27-ton hydraulic wood splitter.

Column 905

Camouflage Vinyl Siding Video

Hi, I'm Tim Carter and I am here at the Remodelers' Show in Chicago. I am walking down one of the aisles and I really found something cool. I think you will really like this, especially if you are outdoorsman, or if you are looking for a very unique shed. This will be the talk of the neighborhood.

Look at this really unique vinyl siding. It is camouflage siding. This is just a vinyl siding product just like you would use on your home. The trim pieces are also vinyl siding. This siding would be great for a little hunting shack. These kits will be available at the larger sporting goods stores.

A very unique siding product, but image if you wanted a special look for your backyard shed. You would have imaged you could get camo siding.

Deck LED Lighting Video

Hi, I'm Tim Carter and I am here at the Remodelers' Show in Chicago. I want to show you something I just discovered at one of the exhibits. It is a really great LED lighting that you can build into your deck.
EB015 Cleaning & Sealing Deck eBoo Cover

Here are the little lights shown in this sample piece of decking. Down on the floor, you can see the LED lights in place. In this video, the lights are on and you can see that they would make a great accent around your deck. And it even gets better.

Lets say you want some down-lighting on your 4x4 posts, check this out. On the side of the post, you have this light fixture you can install all around your deck. And even at the post caps, you can install small LED lights on all corners of the post cap.

These make great touches you can add to your deck to dress it up.

Building A Deck Pier Video

Building A Deck Pier

Hi, I'm Tim Carter and I am here at the Remodelers' Show in Chicago. I just stumbled across a really neat booth. If you are getting ready to build a new deck and you have to put in concrete piers and you are just wondering how in the world you are going to do that. And get it right. Look at this. You aren't going to believe it.

EB015 Cleaning & Sealing Deck eBook CoverThis is called the Form-Footer. This is a plastic system with all the various parts included. The rebar comes in the kit and is precut and everything just snaps together. Need more height? Just add another section to the form. This allows you to get the deck pier down below the frost line and above the ground.

A very interesting product, that sells for less then $100. Just dig the hole, drop in the assembled Form-Footer with all the rebar precut, and you are ready to pour concrete. One of the best footer devices I have seen. Wish I had these back when I was building decks!

This video was mentioned in the May 1, 2013 AsktheBuilder Newsletter.

Delta Faucet Showroom Video

Hi, I'm Tim Carter and I am at the Delta / Brizo Showroom at the Merchandise Mart in Chicago, IL. I am with Kelly Litton the manager of this facility.

Kelly states that this is the Flagship showroom for Delta Faucet Company. This showroom was built in May of this year. They figured Chicago was centrally located for the United States and close to their main facility in Indianapolis. And it is also at the Merchandise Mart which is an awesome center for people to come in, design and work on different things for the home.

One of the nice things about putting a showroom in a place like this is we are very urban. We are in the middle of downtown Chicago. Delta is concentrating on urban penetration. This will help us get the word out about the products we have in the big cities.

This is a beautiful showroom. Lets check out some products. In this showroom everything works. So you can definitely work all the systems. It only has cold water so testing the shower might be a little chilly.

One of the shower installs has a push button screen to turn on and off the various features. So testing the Delta faucets in real time is possible.

One of the things Delta is famous for is their innovative technology. Delta has had touch faucets for many years in the kitchen. This year they have added bathroom touch faucets. These faucets operate by simply touching it.

Now they are gone a step further. You don't have to touch the faucet. By just bringing your hand within about 4-inches of the faucet, it will turn on. As long as your hands are within that range, the faucet stays on. Remove your hands and it turns off. Great if you want to just wet your toothbrush. Bring it in close, the water comes on and wets your brush. When you remove it to brush your teeth, the water turns off.

Kelly indicates that this makes it convenient to get water when you need it and germ-free since you don't actually touch the fixture. Plus you don't have to clean it as often because you haven't touched it.

Tim also visited the Delta and Brizo Faucet Showroom in August 2010.

October 11, 2011 AsktheBuilder Tips And Newsletter

What's in This Newsletter?

Latest News
Chicago Meet Up
Strange Odors In Your Home
Outdoor Repairs and Cold
Lisa from London
Facebook Report

I've been crazy busy the past two weeks. How about you? Lots of great things are on the AsktheBuilder.com horizon. The biggest thing is a radical new website design. It's finished and we're getting ready to turn the design into CSS and HTML. I believe you're going to love it. I know I do.First, I finally tackled a major project here at my New Hampshire house. The builder who built this home I live in totally messed up the front porch. The Executive Summary is that his carpenters nailed the treated lumber ledger boards directly to the OSB sheathing.

Suffice it to say it was a mess. I fixed all the issues and now the fiber cement siding extends down over the foundation as it should have from the get go.

I disconnected the porch structure from the house using some clever 4x6 heavy angle irons that are bolted to the house foundation. I taped a series of videos that I hope to have uploaded for you next week. You're going to love that series of videos.

Ten days ago, I volunteered to help with communications for the NH Marathon. It was a nonevent radio-wise which means good things for the runners. No one was injured, so that means success. When a health emergency arises, radio traffic can get busy indeed.

I also finally located my missing ham radios. Now I've got a second handheld and will be installing my sweet mobile radio in my truck.


Last-Minute Chicago Meet Up

I'm leaving for Chicago in the morning to attend the Remodelers Show. I have tomorrow night open if you want to have a quick meet up. I'll be staying very close to the Hyatt on East Wacker next to the Chicago River if that helps orient you.

Please email me ASAP and let's see if we can get something together. I'm open to suggestions. Be sure to include your cell phone number. Change the Subject Line of your reply to: Chicago Meet Up.

I'll NOT be able to respond to you until tomorrow afternoon because of travel and a meeting I have just after getting from Midway to downtown. As soon as I can check email after lunch I will. Just leave tomorrow night or late afternoon open if you can. Be flexible if possible.

I hope to come back from the show with plenty of videos for you about new products.


Strange Odors in Your Home

In the past few days, I've received several emails from subscribers like you about strange odors. The commonality in all cases is the people lived in condominiums or apartment buildings.

In one case, a tenant traced the odor to spider spray and mothballs another tenant's exterminator used to eradicate the eight-legged creatures.

Another case was a lazy homeowner that allowed his dog to urinate in the basement of his condo. The pungent odor wafted through air leaks between the condos. With some caulk, the next door neighbor was able to stop the infiltration of the odor.

The takeaway should be that when living in close quarters with other humans, think about how you'll deal with offensive odors that may come your way.


Outdoor Repairs and Cold

Old Man Winter is just around the corner. You may live in a place where it's already snowed.

Suffice it to say you might only have a few weeks of decent weather to make repairs that will last.

Keep in mind that some materials - just about any with water in them - can become problematic as the temperature drops. You don't want latex paint or caulk freezing at night before it's had a chance to cure.

Realize that things dry somewhat slower as the sun gets lower in the sky.

Okay, I don't need to hear from you braggarts who live in Southern California, Arizona and Florida who get glorious weather most of the winter. Blah blah. :->


Lisa from London

Lisa from London, not London, Kentucky, the London in England, emailed me yesterday.

"The builder threw grout down my toilet and it has solidified. Is there a solution I can pour down the toilet to dissolve the grout?"

Lisa, if you can still see the grout in the bottom of the bowl, you can probably remove most of it very carefully with a sharp stick.

First clean and sanitize the bowl. Then pour a bucket of clean water quickly into the bowl to remove most of the water.

Use a sponge to get rid of any remaining water. Sharpen a dowel stick and tap it gently with a hammer to see if you can chunk up the grout.

Be careful not to hit the grout too hard. You don't want to break the china, nor scratch it.

Try to work from the edges into the center of the mass of grout.

Save all the debris and mail it to the idiot builder.

You can use muriatic acid to soften the grout and clean off any residue from the china. Be careful as the acid fumes are very powerful. Open the windows and wear gloves and goggles.


Facebook Report

AsktheBuilder on FacebookAre you a Facebook fan of mine? If not, why not?

Today I loaded a few photos I took over the past 24 hours. You may want to see them.

I also solved a few problems for other homeowners like you. Remember, if you're on Facebook, PLEASE leave a comment at the bottom of the column telling others what you discovered when reading my column. You'll see the Facebook comment widget at the bottom of the column. Thanks in advance!

Cutting a Roof Rafter

A simple framing square, circular saw and a tape measure

A simple framing square, circular saw and a tape measure are just about all you need to make perfect angled roof rafter cuts. PHOTO CREDIT: Tim Carter

DEAR TIM: I’ve got one last project before winter sets in. I want to build a small shed, but am not sure how to frame the standard gable roof. I can handle placing the framing square to make the plumb and heel cuts, but I’m confused on how to arrive at the exact length of the angled roof rafters. This is above my current pay grade. Is there a crash course you can teach on how to get the length of the rafter just right? Tommy T., Stowe, VT

DEAR TOMMY: I distinctly remember being in the same situation many years ago as a rookie carpenter. Roof framing was a vast mystery to me, but I was eager to learn and started reading all sorts of books about the subject. Soon I was able to frame very complex roofs and the cuts came out great. I did make a few bonehead mistakes, but I’m not going to let that happen with you on this simple shed roof.

The gable roof, in my opinion, is perhaps the easiest roof to frame outside of a flat roof. To frame a gable roof, all you really need is a framing square that has crisp dimension markings on it as well as all the tables that one normally sees printed on the body of the square.

To get your head around the math that’s involved, Let’s just think about a line drawing. After all, the top edges of the two roof rafters really are just two of the three lines in a triangle. The base of the triangle would be the straight line that connects the two sloped lines where they pass over the outside surface of the exterior walls. In other words, roof framing is just basic trigonometry.

Good framing squares already have done the tough math for you. If you have one of these framing squares, look at the body of the square. This is the part that’s almost always 2 inches wide and 24 inches long. On it you’ll see a table. Usually the first line of the table reads: Length of Common Rafters per Foot of Run. You may have to look at both sides of the square to see this table.

Note - there are all sorts of numbers, usually with decimal points, under the inch markings on the square. You should see the number 20.0 under 16 inches, the number 16.97 under 12 inches and 12.65 under the 4 inch mark. This tells you you’re looking at the correct line in the table.

These numbers with the decimal points, are the multipliers that will give you the exact length of the rafter along it’s sloped line. All you need to do is provide the “run." Run is HALF of the width of the shed across which the roof covers. If your shed is going to be 20 feet wide, then the run would be 10 feet. I always measure the total width to the outside face of the wall sheathing.

The only other thing you have to decide is the pitch of your roof. That’s what the inch markings on the body of the square represent. For sake of discussion, let’s say that you want a 4-12 pitch roof. Using the number from the table on the square, you would multiply 12.65 times 10 to get the length of the common rafter. I say this assuming your shed is going to be 20 feet wide.

Doing the math, you’ll see that the length of the rafter is 126.5 inches. Here’s where it can get a little confusing. This is the true mathematical length of the rafter assuming there is no ridge board. In other words, if you cut two of these rafters exactly the same and set them up on the wall plates, the plumb cut lines at the top would fit perfectly with no gap at all. The same would be true for the heel cut down where the rafter sits on the wall.

But in practice, there’s almost always a ridge board in common roof framing. It’s usually a 2x piece of lumber. If this is what you’re going to do, then you have to shorten the length of the rafter by HALF the thickness of the ridge board. It’s half because the ridge board is centered between the two rafters that touch the ridge board.

Now, understand that this doesn’t mean your rafter length is 3/4 inch shorter than the 126.50 inches. It’s close to that, but not exactly.

What I always do is make the accurate plumb cut line on the lumber as if there is no ridge board. This is the true length of the rafter. But then measure out from this plumb cut line perpendicular the 3/4 inch shortening dimension. Now draw a second parallel plumb cut line next to your first one. This line needs to be down the rafter making it shorter, not longer. I made that mistake many moons ago!

The plumb and heel cut lines are made conveniently by a framing square because a square is a 90-degree angle. The tongue of the square, which is almost always 16-inches long, is oriented 90 degrees to the body of the square.

Since the plumb cut is absolutely the vertical line of a right triangle and the heel cut is the base of a right triangle, you can see how the framing square creates these lines as you slide it up and down the rafter with it set at the proper pitch.

It’s caveman simple when you see it done. This is why it’s important to use the small brass stair gauges on a square so its orientation doesn’t vary as you slide it up and down the rafter.

For more information, read my How to Cut a Simple Common Roof Rafter column.

Column 904

September 27, 2011 AsktheBuilder Tips And Newsletter

What's in This Newsletter?

Latest News
Installing New Siding
Work Pants Discovery
New Toilet Fill Valve
Facebook Photos

NW TripI'm back in New Hampshire after nearly three weeks of travel. It was a business/pleasure/business trip that started in Philadelphia, then to Salt Lake City, up through Montana then to Banff and Jasper in Canada, over to Vancouver and Victoria in British Columbia and finally ending in Seattle. Can you see why that's probably too much travel at one time? I loaded some updated photos and funny videos with captions to the Picasa album I created for this trip. You've got to watch the videos. They will have you laughing for sure.

Installing New Siding

Mellodee from Kerrobert, Saskatchewan, Canada wrote to me:

"I want to re-side my house.  It currently has two layers of siding, one of vinyl and one of hardboard. The house is currently very warm and draft free. Do I need to remove both layers or can I reside over the hardboard?  If both layers are removed can the new siding be put over the framing with Tyvek wrap only or do I need to add a Styrofoam insulation for warmth. Part of the house is 2x4 and part 2x6. Look forward to your help."

Mellodee, I was just up near you right next to the Saskatchewan Glacier that's fed by the Columbia Icefield.

I would recommend removing the top layer of siding for sure. You do have a unique opportunity to help add more insulation if you want to strip the house down to the studs. In that case you can add a layer of foam sheathing that will greatly enhance the R-value of your wall system. That needs to be covered with a water membrane and air barrier similar to Tyvek.

However, you need to ensure the structural stability of the house as you work. This means at the corners you must have a sheet of plywood or oriented strand board that's nailed at 6-inch intervals on the edges and no more than 12-inch centers in the field of each panel.

You have to work in sections. Don't strip the entire house as it could collapse if there is a big windstorm. Talk to a seasoned remodeler, builder or structural engineer before you go crazy on this project.

Have a great understanding of window and door flashings as well so you don't have any rot down the road.

Work Pants Discovery

I had a clothing malfunction while traveling. It's a long story that involves having clothes in two suitcases, but switching to just one at the last minute.

Suffice it to say I packed two pairs of convertible pants that have zip-off lower pant legs in a suitcase that went with me to Philadelphia.

These pants convert to shorts in less than 60 seconds. But they didn't make into the bag I used to go out West. I discovered the mistake after arriving in Salt Lake City.

The only pants I had were the shorts I wore on the plane to Salt Lake City. Groan.

The next morning, a Sunday in Butte, MT, I found a Bob Ward's Sporting Goods store that was open. Thank goodness! The only pants I could get, and this was the last stop before Glacier National Park, were some Columbia Lander pants. I really wanted convertible pants, but oh well.

What a surprise! The Lander pants are perhaps the most comfortable hiking pants I've ever worn. I can see they'll make a fantastic work pants for projects around the house.

I love the extra security pocket with a zipper built into the right-side regular pocket. The small thigh pocket is *perfect* for my cell phone. It would work for sunglasses as well.

If you're tired of ill-fitting jeans that are uncomfortable, you simply have to give these pants a try. I LOVE mine. I'll be getting more for sure.


New Toilet Fill Valve

My guess is the Fluidmaster Toilet Fill Valve has been around for close to 30 years. I distinctly remember installing my first one on a repair job. It was so easy and they work so well for years.

For years, there's been little competition. Perhaps it was a patent issue. It appears there's a new kid on the block now.

I was sent a HydroClean HC660 Fill Valve that looks like it's a clone of the Fluidmaster. Handling it out of the box I can assure you it's easy to install, but I've not yet had a chance to test one.

One feature that looks very cool, and I wonder if it works, is the L-shaped water inlet tubing that scrubs the bottom of the toilet tank after each flush.

The manufacturer claims that it keeps the tank clean. I can see how that would work as the incoming water would stir up the sediment and cause it to be flushed into the toilet bowl those first seconds as the flapper valve is open.

This product is worthy of your attention. You should click this link and see for yourself. I hope to install mine in the next two weeks. Let me know what you think if you get one.


Facebook Photos

AsktheBuilder on FacebookAre you a fan of mine on Facebook? If not, you're missing a ton of FREE information at my fan page each week. Since the last newsletter, several of the photos I upload got some creative answers. It's fun guessing what the photos are.

I also told Hassan the best pipe to use for radiant in-floor heating.

I helped Lisa clean her dirty floor with Stain Solver.

I offered a possible solution to Elizabeth about her unreachable window.

And much, much more. You should really become an AsktheBuilder Fan on Facebook.


Flashing a Deck

deck flashing

Flashing a Deck | The correct flashing with the proper profile is seen overlaying the inferior deck flashing that was installed by a nonprofessional. PHOTO CREDIT: Tim Carter

DEAR TIM: I need to install a deck ledger board against a house with wood lap siding. Soon I'll be doing the same on a brick home. What's the proper way to install flashing so I don't get any leaks where the ledger board connects to the house? My online research indicates this could be a serious problem. Something tells me that it's very important to get this right. Tony P., Waltham, MA

DEAR TONY: Your research is spot on. Leaks at or around deck ledger boards are a serious issue. A couple of years ago, a new home was being constructed next door to me. I was stunned when I saw the builder nail a deck ledger board directly to the side of the house. Not only was no flashing installed, the builder nailed, instead of through bolting, the board directly to the oriented strand board sheathing with no water membrane behind it.

It's a shame that many young carpenters, builders and homeowners don't connect the dots about how the exterior finishing material on a home - be it wood, brick, stone, vinyl, etc. - needs to act just like shingles on a roof. Traditional asphalt shingles keep you dry inside because one shingle overlaps another as they march up the roof.

A deck ledger board needs to do the same thing. It needs to be just one more component in a waterproof assembly on the side of a home. The trouble is, it takes some skill to make this happen.

In the case of your wood siding, it's not too tough. What's more, there are new flexible membrane flashings that may make the job easier for you. I'm a little concerned about these new materials. I'm a fan of metal because I know it will work and is much tougher than the membranes. Some of the membranes are sensitive to ultraviolet light, and may break down if they are exposed to sunlight. Be sure you read the product label about exposure to direct sunlight.

Stop and think about how wood lap siding works to keep your walls dry. Each piece above the one below overlaps so that water can't get behind each piece of siding. You need to use flashings to provide this same overlapping effect where the deck ledger board connects to the house.

Once you've cut away the siding at the deck ledger location, you install a metal or membrane flashing that overlaps the siding below the ledger board. This needs to overlap the siding at least as much as the wood siding did before you cut it away.

What's more, the metal flashing needs to be bent so the bottom 3/8 inch of the flashing is bent at a 30-degree angle so it doesn't touch the siding. This little kick out allows water flowing over the flashing to turn to droplets that fall to the ground. If you don't do this and the bottom of the flashing is in direct contact with the siding, capillary attraction can pull the water up so it leaks behind the siding.

EB015 Cleaning & Sealing Deck eBoo CoverThis first piece of flashing needs to extend up at least 2 inches behind the deck ledger board. You then attach the ledger board to the wall using approved through bolts, not lag bolts. Drill the holes through the ledger board the exact same diameter as the shank of the bolt so it's a tight fit. Use a heavy rubber flat washer that will get sandwiched between the ledger board and the metal washer that's under the head of the bolt. Once the bolt is tightened, the rubber washer will produce a waterproof connection at each hole.

A secondary top flashing now needs to be installed over the top of the ledger board. This flashing needs to extend up at least 2 or 3 inches up under the siding above the deck. Keep in mind the bottom of the upper siding should be at least two inches above the flashing or the decking that's near the house. Never put horizontal siding in direct contact with any horizontal material.

This upper flashing must extend over the top of the ledger board, down the face of the ledger perhaps one-half inch and then kick out away from the front face of the ledger board. Bend the metal so it has the 30-degree angle so water turns to drops of the edge of the metal and is not pulled up by capillary attraction.

The top of the deck joists that connect to the ledger board has to have a minor fire cut put into the top corner of the joist where it connects to the ledger. This 45-degree cut does not weaken the joist at all and it prevents the joist from crushing the metal where you have bent it so it doesn't touch the ledger board. This first cut is mission critical.

This flashing method works for brick or stone homes as well. The only problem is that the upper flashing needs to be inserted into a mortar joint up on the brick above the ledger board. You'll have to use a chisel or a grinder to remove the mortar at least 3/4-inch deep.

I prefer to use 40-pound tin flashing for this work because it's easy to solder it when you need to install long lengths. You can't just overlap the metal and hope it won't leak. Where two pieces of flashing connect or overlap, you need to solder that joint to make one continuous piece of flashing.

Column 902