DEAR TIM: I want to buy my husband a tool bag or tool box to surprise him. His tools are always scattered about and he wastes so much time looking for them. I assume you've had all sorts of experience in tool organization, so can you tell me what's worked best for you? My feeling is that if it works for you, it will be a dream-come-true for my husband. What's your favorite tool bag now and why? Meredith B., Greenville, SC
DEAR MEREDITH: You hit the nail on the head alright, as I've tried just about every tool organization product known to man. In fact, I still have the gray metal Craftsman tool box that was my dad's. I estimate that box to be close to 50 years old. It still has the logo plate on it.
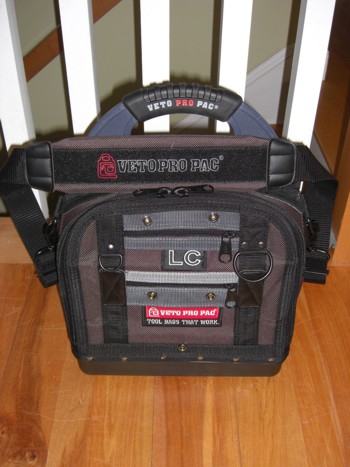
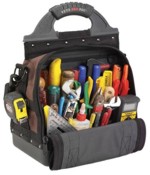
This is a deluxe synthetic canvas tool bag that will make you more productive. PHOTO CREDIT: Tim Carter
Let's talk about the traditional tool boxes first before I share what my favorite is. What I don't like about the traditional tool box is the lack of internal organization. Some late-model tool boxes tried to create little compartments in the tray for tools, but for me, those never worked. If you fill up the tool box with tools of all sorts, they just lay on one another and you're constantly digging out tools to find what you need.
Not only is this a waste of time, the tools start to get worn from rattling against one another. It's not much different than throwing clothes into a closet and then rummaging around the pile to find what you need. When you hang clothes up, you can see them and put your hand on that blouse or pair of pants as soon as your eye sees what you want.
Nearly two decades ago, inventors started to deal with this rumble that was resonating from the toolboxes. I can clearly remember seeing a first-generation tool organizer that fit over a 5-gallon bucket like a saddle on a horse. This organizer had all sorts of different-sized pockets for all sorts of hand tools. It was a great first step towards making tools visible and accessible.
 |
 Do you want the EXACT tool bag I wrote about in this column? |
| This is an affiliate link. If you purchase this item, Amazon will pay me a small commission. | |
The only problem with this open method was that the tools could get wet or dirty as they had no covering on them. Although this was not a deal killer for me, it was just two steps forward and one step back with respect to protecting the tools. The bail handle on the bucket was also problematic as the bucket became filled with heavy tools.
If you jump in the time machine and go back about 12-15 years, you'll discover the first generation of soft-sided tool bags that had all sorts of pockets, chambers, etc. for tool storage. One of my favorite was an actual backpack that was made to carry hand tools.
One of the latest soft-sided tool bags that I've tested really has got my attention. I'm convinced your husband will love it. It's shaped like a backpack, but it opens on both the front and the back. The flaps just zipper up and down and fold away using handy snaps so the flap doesn't touch the floor or the ground.
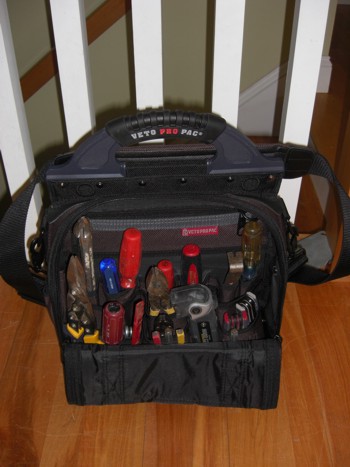
You can put just about any hand tool you can imagine in this deluxe synthetic canvas tool bag. They come in different sizes depending upon your husband's tool collection. I can see owning one, two or three of these bags and setting them up for each project discipline.
For example, one part of one side of this tool bag could be dedicated to electrical tools. You'd easily take up space with your linesman's pliers, wire stripper, needle-nose pliers, circuit testing tools, etc. The other half of that side of the tool kit might be dedicated to plumbing tools.
I can see one entire tool bag that's just for carpentry tools. The list of tools you might put in the little pockets is endless. Nail sets, screwdrivers of every type, chisels, plumb bobs, torpedo levels, tiny pry bars, etc.
Your husband is going to love the tool bag if you get the one I'm now using. Of that there is no doubt. I love the padded shoulder strap that comes with it. When not in use you park it next to the tool bag handle with common hook and loop connectors. This keeps the strap off the ground and out of the way.
You can look at both open and closed tool bag solutions. The open tool bags have come a long way since the simple ones that overhung a bucket. Any number of these bags have designs, both open and closed, that work perfectly for every tradesman.
For example, I know the one bag I use would be perfect for my heating and air-conditioning contractor. He has all sorts of specialty hand tools, nut drivers, and specialty tools he uses to service AC units, furnaces and boilers. The bag I use now would keep all of the tools he needs protected, dry and right where he needs them.
Electricians, maintenance men in hotels, elevator mechanics, refrigeration contractors, plumbers, etc. all need tool bags like this that help them keep their specialized tool organized, clean and protected. If you know of one of these craftsmen, suggest they look at the new tool bags to see if they don't feel it will help them in their everyday work.
|
 Do you want the EXACT tool bag I wrote about in this column? Get it here. |
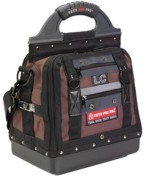
VETO PRO PAC Model LC Tool Bag
This is an affiliate link. If you purchase this item, Amazon will pay me a small commission.
Column 878