DEAR TIM: Does home wallpaper that I see differ much from the products I see at paint stores and specialty wallpaper stores? The wallpaper for my home needs to be fairly durable and washable because my kids will surely get their hands on it.
What can you tell me about home wallpaper borders? Is there a special technique one employs to install these? If you can share any mission-critical wallpaper installation tips, I would sincerely appreciate it. Sheila V., Clearwater, FL
DEAR SHEILA: Wallpaper for the home is probably one of the smartest decorating things you can do to add flare to a room. The colors and patterns in wallpaper can really go a long way to create a mood that’s hard to achieve using just paint and other decorating accessories.
You may find it hard to believe, but there can be a vast difference in quality with home wallpapers. Low-quality wallpapers are difficult to handle and hang once the glue has been activated on them.
Looking at a roll of wallpaper and trying to determine if it’s a quality product is very hard. When in doubt, always visit a store that just sells wallpaper. Make it a point to talk with the manager or owner.
If they have been in business for years, they’ll be able to show you high-quality paper as well as some economy lines. There are many things that affect the price of wallpaper besides the actual paper.
My wife selected a high-quality wallpaper for our dining room about eight years ago. I’ve hung countless rolls of wallpaper in my life, as it’s a job I love to do.
As soon as I began to hang the second sheet, I could see why it was a great paper. The matching of the pattern was superb, and the wallpaper was very stable on the wall. Once dry, the seams were invisible.
Just about every wallpaper for homes that you’ll look at will be vinyl coated. This crystal-clear coating is very forgiving when it comes to washing off dirt and smudges.
Be sure to talk to the wallpaper store manager about clear vinyl coatings. The gloss on these coatings is very slight, so imperfections beneath the wallpaper don’t stand out like beacons.
Home wallpaper borders are a very interesting wallpaper accessory. Some borders are made to match papers that have a simple and subtle pattern. You can use borders only in a room that has painted walls if you choose.
Just A Few Tools
Let's get started with the tools. Fortunately, you don't need many tools to wallpaper.
Here's a list that will get you going on this job:
- retractable razor knife with snap-off blades
- 4.5 or 6-inch drywall taping knife
- smoothing brush or plastic smoother
- 4-foot level
- grout sponge
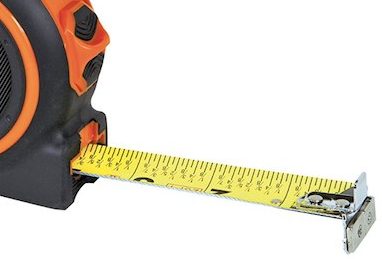
- measuring tape
- paint roller & pan
- paint brush
Click the Image Below to get all, or some, of the tools now:

CLICK HERE to get all the tools I recommend in one place. It's easy and fast.
For the most part, wallpaper borders are fairly easy to install. Most of them are trimmed along the top edge, so you just butt them up against the ceiling.
Your only challenge is wrapping a border around an inside corner. Professionals will create a cut seam in corners to prevent the unsightly shrinkage issue where the paper pulls out from the corner.
As you approach an inside corner, wrap the border around the corner pushing it tightly into the corner. Use the razor knife to cut a vertical line one-quarter inch away from the corner.
Make sure the border is still tight in the corner. Slide the cut border piece over the small tab of border making the cut edge dive into the corner. It should look perfect.
If you’re installing a home wallpaper border on top of a wallpaper that’s vinyl coated, you must use a special vinyl-to-vinyl adhesive. These are special glues that will bond the border to the coated wallpaper. These are not required if you apply a border to a painted wall.
Any wall that’s to receive a wallpaper border or wallpaper should be primed with a special paint. This paint prevents the wallpaper glue from penetrating through to the drywall paper.
An added benefit to using these special wallpaper primers is the added work time you get as you hang the paper. The glue doesn’t set as fast allowing you plenty of time to position the paper as you trim it. I always use these magical paints.
Wallpaper Videos
Watch these videos to get an idea of what you're up against. You can do this job since it's a small room and there's not much to cut around.
If you’ve never hung wallpaper before, I highly recommend you practicing in a closet. This sounds crazy, but you’ll discover how to trim paper at the ceiling and floor, as well as what to do at inside corners.
One of the most important things you need to do with wallpaper and borders is to allow them to relax just after you activate the glue. The paper expands after the glue is wet. If you apply the paper immediately after activating the glue, you can end up with countless blisters and bubbles that will not come out at a later date.
It only takes about five minutes for the paper to relax and expand. Be sure to book it after you activate the glue. This means fold the glue side of the paper back onto itself. Don’t worry, you’ll be able to peel the paper apart. This booking ensures the glue doesn’t air dry as the paper relaxes.
I prefer to use gel-type paste activators rather than water to activate pre-pasted papers. A paint roller is a great tool to use to apply the activator. When the wallpaper is first installed, there will be a bumpy appearance even though you’ve smoothed it with a wallpaper brush.
Don’t freak out if it looks slightly bumpy. Those bumps will completely disappear within 24 hours as the water leaves the glue.
Column 793