What’s in This Issue?
FOLLOW ME ON TWITTER
SO MUCH TO SAY - SO LITTLE ROOM!
BITTER COLD WEATHER
LARRY AND BILL
LAST CALL FOR BOSTON
SEARS EDITORS CONFERENCE
CERTIFIED ARBORIST HELP
HEATING PROBLEM IN CANADA
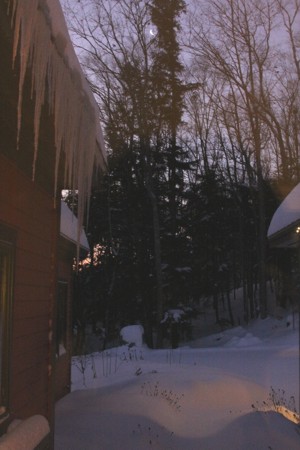
SNOWING
BILL KEMP
GREEN REMODELING BOOK
GOLF LESSON
LATEST COLUMNS
SO MUCH TO SAY - SO LITTLE ROOM!
My visit to Cincinnati for the Christmas season ended nine days ago with a last-minute decision to leave 13 hours early to drive ahead of the massive snowstorm that caused the 50-plus-car pileup on I-93 just south of where I live in New Hampshire. That trip back up here caused me to skip the newsletter last week. Ouch! Now I have too much to report! I'll try to get it all in with lots of tips.
As for the drive back to New Hampshire, I've decided from now on, I'm going to always leave Cincinnati at 5 or 6 p.m. Tristan, my son, and I drove through the night arriving in Utica, NY at 3:45 a.m. The roads were empty shooting up through Ohio and across I-90 at that time of night. We slept for six hours, got up, ate some grub and bolted through the southeast Adirondack Mountains on State Route 8 arriving in Burlington, VT at 2:00 p.m. We unloaded his gear, got him settled for classes the next day at Champlain College, and I was on the road 25 minutes later. I arrived back at the lake house in Meredith, NH at 5:30 p.m last Saturday. Hours later, the snow started to fall. This time I beat Mother Nature, but I'm always aware she bats last.
BITTER COLD WEATHER
Many are suffering from the bitter cold weather gripping much of the USA right now. I was in Orlando, Florida just three days ago at a Sears Editors Conference, where they showcased some absolutely amazing new products. More on that later. I was standing in shallow left field of the Osceola County Stadium, the spring-training location for the Houston Astros, freezing to death. So even the deep south suffered for two days. I taped several videos there, one of them about the origin of the name of the town where the stadium is located. I'll have those videos up for you soon.
When I got back here to New Hampshire just past midnight on Thursday night, it was -14 F. On Friday morning, two of the pipes here at my house were frozen. The kitchen sink hot-water line is still frozen as I type this three days later! I didn't build this house, and I'm pretty upset at the builder, plumber, carpenter and insulation contractor. Frozen water-supply lines in a six-year-old house are simply unacceptable, especially in a NH house where temperatures routinely drop below zero.
The pipe is still frozen because my house here in NH has a finished basement with drywall ceilings. I hate those things! You have no access to mission-critical utilities like this hot-water pipe. If a gorgeous and attractive suspended ceiling were here, I'd have had hot water again in about 30 minutes using a hair dryer. But I digress.
The other pipe that froze here was on an interior wall. I'm sure the reason is related to cold air dropping down the wall through the gap around the sink vent pipe as it penetrates up through the attic. It might also be a poorly insulated chimney stack. This house I'm in has two metal chimneys. Oh well, I simply wanted you to know that I suffer along with you at times.
LARRY AND BILL
I got to hang out with Larry Phillips and Bill Pass in Orlando for about 90 minutes on Wednesday night. Both are subscribers to this newsletter, and took me up on the offer to share a soda. It was a great time discovering what they both did. As you can imagine, they had all sorts of questions to ask me about AsktheBuilder.com and what I do each day. There was never a lull in the conversation. I'd love to do more of these and even am thinking of having an event where we can all meet if you're willing to travel to a location. Tell me if that interests you.
We were seated under the massive glass ceiling in the atrium of the Gaylord Palms Resort. If you visit Orlando, consider staying there. Wow is it a gorgeous place! I took a restful two-hour nap in the warm sun by the pool just before meeting Larry and Bill. That night the cold front rushed in and Thursday was cold!
LAST CALL FOR BOSTON JANUARY 24th!
If you live near or in Boston and want to hang out, let's do it this Saturday, January 24th. I'll be attending the Boston Home and Garden show. If you want to do lunch, email me.
SEARS EDITORS CONFERENCE
As I just mentioned, I was in Orlando, FL several days ago. It was a whirlwind trip with me on the ground in Orlando for only 32 hours total. Sears understands how the media works. For years, I've been very lucky to be invited to numerous conferences where they showcase new products to members of the media. This event was a first for me. It was their annual Lawn and Garden conference. All of my past events were centered around Sears hand and power tools.
In upcoming newsletters, I'm going to share with you all I saw. But for now let me tell you that the most amazing thing there was a propane-powered string trimmer. WOW ! ! ! ! Have you been frustrated like me for years when gasoline-powered engines fail to start? Those days are over. Propane doesn't have the carburetion issues that you have with gasoline. Propane is delivered straight into the engine as a gas from the get go, so there are no problems with deposits that clog the small orifices in carburetors. Wait until you see the videos I plan to do showcasing this fantastic innovation.
I also drove a zero-turn lawn mower with a regular steering wheel, not the two levers. The lightweight electric lawn mowers were wonderful. I'm getting one for my yard up here in NH. There were many more great lawn and garden tools, so watch upcoming issues of this newsletters for columns and video links.
CERTIFIED ARBORIST HELP
I need some help from a professional. Are you a certified arborist or Christmas-tree grower? If so, what's the best fertilizer to use to accelerate the growth of evergreen trees here in New Hampshire?
HEATING PROBLEM IN CANADA
Judy Isherwood wrote me:
"I live in an old house near Montreal. It has an old coal furnace that has been updated. But still the upstairs radiators are always hotter than the downstairs ones. We have chinked the windows as best we could and tried to block the fireplace, but downstairs is cool while upstairs is very warm. I have read about a pump, or something, called the Smoother, which promises to even out the heat. Are they correct? Since we have such an old system, no one wants to touch it, but maybe an attachment to the pump would work, though I can't understand how. I have a publishing business that I run from my home. My office is upstairs and is relatively warm, so I can spend most of my time here. But sometimes I have company and it is chilly in my living room. I'm sure this is not an unusual problem. I suppose if I know a good plumber I could ask him but I don't."
My response to Judy was:
"You may be a perfect example of someone who would benefit from a small point-of-use electric heater.
Think how much you might spend on the pump and installation. Then what if it causes a problem? The electric heater only needs to be turned on when you're in that room. It may cost 20% of the pump and labor. The electric to operate the heater may be just a little more than the cost to operate the pump!
Actually, it may be far less as the pump might run much more than the heater. The heater may only be on 90 minutes a day when you want to sit downstairs."
The point is, be sure you think through all options before you pull the trigger on an improvement. In this case, the little heater may be a much wiser investment.
SNOWING
I have to tell you that it's snowing like mad up here as I type this. It's magical! The snow on the evergreens is gorgeous. As soon as the storm is over, I'll be testing two snow blowers. Watch for those videos in the next issue. It's drop dead gorgeous outside right now.
BILL KEMP
Just before flying to Orlando, I was in Paramus, New Jersey to deliver a speech at a national sales meeting. Dealers who handle the MasterShield gutter guard were gathered to discover how to grow their businesses in this tough economic climate.
One of those in attendance was Bill Kemp. He's a young man that reminds me of myself twenty years ago. Bill has a home-improvement business (kempwindows.com) located in Richmond, Virginia.
He struck me as intelligent, forward thinking and nimble. I also got a very strong vib that he's as honest as the day is long. If you live in or around Richmond, VA and have met Bill, tell me what you think of him.
I share this because it's refreshing to meet contractors who really care about their customers, and treat their jobs as a vocation. It's my feeling these professionals exist in just about every town in the USA. In fact, I developed a set of four videos that are in all of my checklists that show you exactly how to find these great craftsmen and women. No doubt I could travel to Richmond, VA and reverse engineer using my methods finding out about Bill in no less than 90 minutes. You want a professional to do your work? Then see if one of my checklists matches your upcoming job:
GREEN REMODELING BOOK
I just received a book titled: Green Remodeling - Changing the World One Room at a Time. It was authored by David Johnston and Kim Master. It appears to be a comprehensive encyclopedic guide describing how you can make your home green as you remodel. In these harsh economic times, remodeling is going to be what's happening as the new-home construction market has all but disappeared.
You may want to take a peek at a sample chapter of this book if you are part of the Green Movement and intend to remodel soon.
GOLF LESSON
Two years ago, my kids bought me golf lessons for my birthday. Believe me, I needed them as my game is like that of the normal hacker. My 37 handicap tells it all. But let me tell you that I always have a great time when I play. I just enjoy being outdoors on the course with my friends. I'll never be a golf pro, but Tiger will never be able to produce a cheek cut on a valley rafter like I can. Yes, I know that he can afford to hire 100 roof cutters at once to do it for him. That's not the point.
My oldest daughter Meghan did her homework. She scheduled a swing and club analysis with Cincinnati's only PGA Master Teaching Professional. I believe he's the only one in Ohio as well. This wizard's name is Joel Suggs.
I've been so busy over the past two years in making the move to New Hampshire that I had only taken two of the four lessons that were in the gift package. But all that aside, Joel and I have become close friends over the two years communicating via email and phone calls. Three days before coming back to NH, I took my third lesson. It was a cold, icy and rainy day, but Joel had a warm practice area set up indoors with a large net and his mandatory cameras. To make a long story short, I GOT it. Joel's magical methods and his computer setup showed me how to swing properly. His simple methods allowed me to discover in minutes the way professionals swing the club so it stays in the swing plane. Go to his website to see the video he took of me. It's amazing to see the improvement in just minutes of instruction.
After memorizing the muscle movement, we went outdoors to hit balls. Well over half were hit so they at first traveled right of the target line but then developed the magical slight draw so they gently curved back to the center of the fairway. Yippee ! ! ! ! ! !
Go to Joel's blog and sign up for his free newsletter and free phone consult. You don't have to live in Cincinnati to benefit from his teachings. When I go back to Cincinnati this spring to visit Kathy, Joel and I are going to play 18 holes for fun. I can't wait to show off as I'm practicing here in NH. It's a good thing my basement has 11-foot ceilings allowing me to take a full swing. Joel is a great man. He's a third generation golf professional. You'll not be disappointed. If you need help golfing, you simply must sign up for his newsletter. It's free, just like mine.
UPDATE: Joel's site seems to be down.
LATEST COLUMNS
I think you've had enough of me for a week. Next week I'll have a huge list of new columns and videos for you to read and watch.
Click here to read past copies of my newsletters.
Tim Carter
Founder - AsktheBuilder.com
Do it Right, not Over.
AsktheBuilder.com