January 4, 2009 AsktheBuilder News and Tips

What's in This Issue

HAPPY NEW YEAR
ICE CLEATS
TONS OF NEW COLUMNS
SUPER INSULATION
PAINTING CABINETS
ORLANDO VISIT
CINCINNATI ENQUIRER
BRICK WEEP HOLES
SPIRIT OF CHANGE
RECENT COLUMNS


HAPPY NEW YEAR!

Happy New Year to you! I'm all set for a fantastic 2009, no matter what all the news says. I'm still cautious and watching my spending, but in October, I discovered that the Chinese word for crisis is made up of two other of their words: danger and opportunity.

I'm going to try to do my best to show you opportunity throughout the year with respect to how you can save money and time with projects at your home. You can help me by telling me the help you need.


ICE CLEATS

Since moving to New Hampshire, I've discovered that ice cleats are a must. These things slip onto regular boots and allow you to walk on ice as if it were dry pavement. I've tried YakTrax, but am not too satisfied. They break easily on slopes. My driveway is steep, so I need a pair of ice cleats that don't slip off your boots and don't break. What brand have you had the best luck with? My driveway creates lots of stress on the cleat as you walk up and sideways. What about the heavy-duty Stabilicers I see online? They seem to get great reviews.

Read my January 8, 2009 Newsletter for an update on the ice cleats.


TONS OF NEW COLUMNS AND SOON NEW VIDEOS

Stay with me through the entire newsletter. There are tons of new columns at the end. Now that the Christmas season is behind us, new AsktheBuilder.com videos are on the horizon. The end of January and beginning of February look to be busy times taping videos.


SUPER INSULATION

Months ago, I had a quick mention in a newsletter about using the heat-tile technology that's on the Space Shuttles to help us reduce our heating and cooling costs. It appears those crafty Germans have once again got a head start. Can you imagine a house with no furnace? Just before Christmas, I received an email from Kimberley, who lives in Florida. In it was a link to a story she saw in the New York Times. Kimberley was a little miffed, and here is part of what she had to say:

"....With increasing fuel and food prices - hopefully more people will be open to new ideas and demand things that make sense and help save money and the environment. I live in Florida and am amazed and appalled that the Sunshine State isn't leading the nation in solar-energy technology. When I was a very young girl in the seventies, my aunt in Miami had a solar water heater installed at her home, and I remember the scalding hot water flowing from the tap at her house. It worked, and her electric bill was low. Well, I think the nation is wising up now to what's available."

Kimberly, I agree 150%. We need to put all sorts of pressure on our elected officials to create long-lasting incentives that will allow technology to come to the market that will allow us to save money and the planet's resources and make us energy independent.

To view the article in the New York Times, you may have to create a free account. It's worth it. Wait until you read how these houses in Germany have NO furnaces or air conditioning.


PAINTING CABINETS

Carolyn Bohler of Hardin, Texas emailed me:

"I need to know if our old mobile-home laminate cabinets can take paint like you showed in the video.  They are hideous, and I want to change them. The cabinets are medium to dark brown, shiny and probably particle-board material. I thought of using compound on the front and adding a raised stencil and some shading and painting.  HELP ME."

Carolyn, the simple answer is Yes. If you're like many right now, there is no way you can afford to get new kitchen or bath cabinets. Paint can make them look marvelous. We just redid our kitchen two years ago, and our island cabinet is painted an ivory color with coffee-colored highlights. I didn't think it would look good, but I should have trusted Kathy. It's actually my favorite cabinet in our kitchen.

The house I'm at in New Hampshire has painted kitchen cabinets. They look great even though they are a solid color. Just be sure you follow all the advice in my Painting Kitchen Cabinets video!

Be aware that at my new website, that's soon to be launched, there will be all sorts of interesting solutions to everyday problems like this. What's more, I intend to do some neat videos that will only be on the new website. Be sure you open all newsletters in the future. Why? There's going to be a very special offer in an upcoming issue for you.


ORLANDO VISIT

I'm going to be in Orlando, FL on the evenings of January 14 and 15, 2009. Sears has invited me down there to attend a conference about all the great new lawn and garden tools that will be ready for you in a few months.

At this point, I'm open to grab a bite to eat or have a soda with you. I'll know more where I'll be in a few days. You'll need to come to me as I'll not have any wheels. Surely there will be a nicer restaurant near my hotel we can meet and greet. Or if the weather is great, we can relax out on the patio that surely must exist where I'm staying. We shall see! If you live in Orlando and want to get together, email me ASAP.

Larry and Bill joined Tim in Orlando.


CINCINNATI ENQUIRER

A week ago, The Cincinnati Enquirer had a special announcement. Being a syndicated columnist, the note from the publisher got my attention. It talked about changes that would start the next day. Well, after I saw the changes, I had to write about it. If you subscribe to a daily newspaper, I urge you to read my blog post. It has some interesting things in it about my early connections with the Enquirer as well as the Cincinnati Post and Times Star! In fact, I'm going to tape a video later today about the paper platters I talk about in the blog post. I'll have that video link for you in a few days.


BRICK WEEP HOLES

I owe some of my success to a few companies that were sponsors of mine way back in the Dark Ages of the Internet. I'm talking about 1995-97. AsktheBuilder.com launched in November of 1995, and Pella was my first sponsor. But I quickly added other companies, most of them smaller businesses that didn't have huge marketing departments. I discovered it was far easier to communicate with the president of a medium or small-sized company than the marketing manager for a Goliath in the industry. The sponsors I had back then got me through the transition phase from active builder to writer/publisher.

One of these companies was R.H. Tamlyn and Sons. I got to know Tom Tamlyn, the president, quite well about ten years ago. Several days ago, UPS delivered a box to me from Tamlyn. In the box were all sorts of samples of his products, a new catalog and business cards of key people on the Tamlyn team. Tom's card was in there as well.

One of the practical items he's selling now at his online store - he didn't sell online in 1997 - is a retrofit rodent and bug guard for brick homes that have the vertical weep slots. A weep slot is a missing vertical head mortar joint you might see in the first row of brick on top of the foundation. These slots are there to allow water to escape to the exterior of your home. They should always be open. Sometimes bees, bugs and other things see these as great entrances to the massive void space behind brick veneer. These rascals can then block the weep slots with all sorts of debris, so it's a good idea to block them. The guard stops things from getting in, but allows water to drain out.

I decided to link to this item in Tom's store to help return the favor of his support of me all those years ago. I feel he runs a great company that really tries to sell fantastic products. Tamlyn primarily sells to builders and remodelers, but you may discover something at his store you can use.


SPIRIT OF CHANGE

In the spirit of change for 2009, I did something I haven't done in over 30 years. My youngest daughter requested it. Moments ago, I shaved off my mustache. Kathy thinks I look odd. Kelly says I look younger. All I can say is my upper lip is cold at this point. Watch for a new video soon where you can see me sans mustache.


RECENT COLUMNS

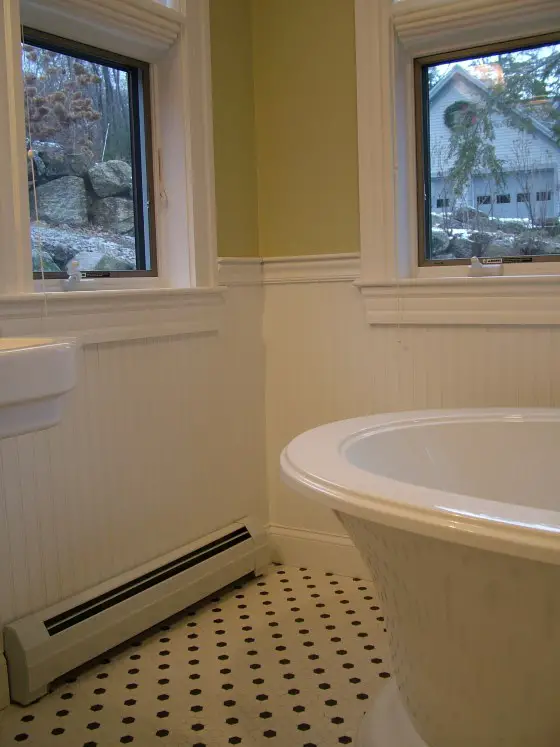
Wainscoting used to be tough to install in a home. Not anymore. You can get kits made for your home.

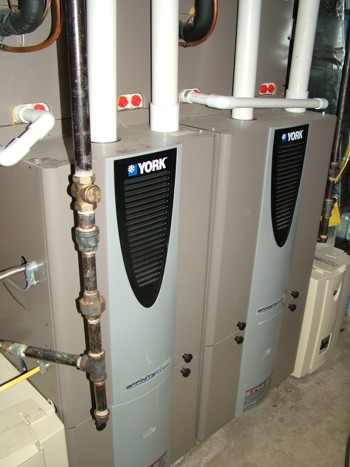
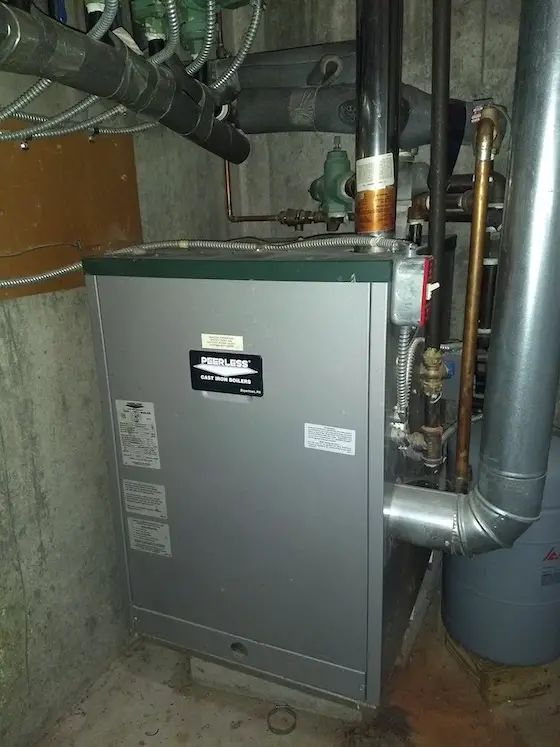
When it gets really cold, is your furnace or boiler able to keep you warm? Do you want to know why it's struggling?

Do you have ice forming on the plumbing-vent pipes on your roof?

Have you seen frost form on walls? Not outside your home, I'm talking about the INSIDE walls of your house!

When you see cracks that form on your outside walls, is your foundation on bad soil? Discover one way to tell.

Click here to read past copies of my newsletters.

AsktheBuilder.com

Best Space Heater

DEAR TIM: What is the best space heater that will allow me to work in my carport which is partially enclosed? It's about 20-feet x 9-feet x 9-feet tall. I need a space heater so I can work outside. I've looked at a kerosene space heater as well as a propane space heater. These models are currently priced between $150 and $250. Would you be able recommend a portable space heater that you think would work best for me in this situation? Reinhard Forster, rural Oregon

DEAR REINHARD: Before you can consider any space heaters, I feel you need to make a decision as to what needs to stay warm. Are you just trying to keep yourself comfortable, or are you trying to heat the entire space? My guess is that since the carport is pretty much open to the weather, you aren't trying to heat the air in the space as well as the things inside the carport.

If you were doing woodworking or some other task in the space that required the air temperature as well as the objects in the space to be above a certain temperature, you may want to consider a space heater that works similar to forced-air heating systems. But something tells me that it's just you that needs to be warm.

In that case, I would suggest some type of radiant heater. An electric space heater that is basically a giant toaster qualifies. The electric coils glow like low-grade filaments in a light bulb, and this infrared heat passes directly through the air to your body. The air is not heated by the glowing coils.

Some gas space heaters are also radiant heaters. The burner where the gas is combusting radiates the heat outwards. I've seen many a propane space heater that will do a fantastic job for you.

If you are leaning towards gas space heaters, then be certain to see what they say about carbon monoxide. Be sure the space heater you purchase doesn't harm you. If you do decide on an electric space heater, you may have to run a separate electric circuit to the carport to satisfy its appetite for power. Some electric space heaters can easily consume over 2,000 watts.

Column QA

Toilet Gasket

wax gasket for toilet

Sewer gas smell can leak into your home if this wax gasket has detached from the underside of your toilet. Copyright 2018 Tim Carter

DEAR TIM: My husband installed a new toilet gasket on the toilet in our master bathroom as part of adding a new ceramic-tile floor. He's pretty handy, but soon after I noticed a sewer gas odor in this room. He can't smell it, and I'm reluctant to have him do the job over.

The toilet doesn't move, the caulking is perfect so I can't imagine where the odor is coming from. For years, there was never an odor. What needs to be done to correct this? Vikki H., Henderson, KY

DEAR VIKKI: The toilet-bowl gasket was not installed correctly. The smoking gun is the fact no odors were ever present before your well-intentioned husband started the bathroom-remodeling job. I'm afraid that he needs to start over, but we need to discover what he did wrong so this second attempt yields a perfect result.

As for where the odor is coming from, many people forget that the holes where the toilet bolts pass through the ceramic toilet-bowl base are usually never sealed. The sewer gas that's wafting past the toilet wax gasket can easily seep past the bolts and the decorative caps. The caulking between the base of the toilet bowl and the floor will do nothing to stop the odor if these bolt slots are unsealed.

Thousands of homeowners who attempt to change toilet gaskets run into problems for any number of reasons. The seal between the toilet flange and the toilet bowl is mission critical. The toilet flange is the transition fitting that allows you to connect the toilet to the drain piping. Not only is there the issue of sewer odors, but vermin and water can also leak from this joint if the toilet gasket is not making positive contact.

toilet gasket

This is where the toilet gasket contacts the underside of a toilet. You can see the recessed area clearly. PHOTO CREDIT: Tim Carter

When you replace a toilet gasket, you need to pay close attention to many details. One thing homeowners, and some rookie plumbers, fail to look at is the recessed area under a toilet bowl. This part of the toilet is often about three-quarters-inch deep. This distance is measured between the bottom of the toilet bowl where it contacts the finished floor and the underside of the unglazed porcelain outlet where the wastewater exits the toilet.

The next thing you should pay attention to is the thickness of the toilet wax gasket. Most of them are no more than seven-eighths-inch high. I've measured many, and some are just three-quarters-inch high. You may be wondering why these dimensions are important.

For a toilet gasket to seal properly, the space between the underside of the unglazed fixture where the water exits the toilet and the top of the toilet flange should be no more than one-half inch. If you do a little math, you'll discover that this means the top surface of the toilet flange should be above the finished floor surface at least one-quarter inch. The top of the flange should be level, and the flange must be secured to the floor so it doesn't move.

It's possible that your husband wasn't aware of this important point. The top of the toilet flange may have been flush with the floor, or even sticking up too high. I've seen toilet flanges installed by inexperienced plumbers and homeowners that were an inch or more above the finished floor. When a toilet flange is too high, a poor seal can result because all of the wax gets squeezed out between the toilet and the flange as you secure the toilet to the flange.

In your case, I think a toilet-gasket autopsy will reveal that the toilet flange got buried by your new flooring. This is a very common mistake. A homeowner may install ceramic tile in place of a sheet-vinyl floor. By the time ceramic backer board is added and the new tile, the top of the toilet flange can be well below the finished surface of the floor. When this condition exists, it's entirely possible the toilet gasket never even touches either the flange or the underside of the toilet bowl.

Be sure your husband removes the toilet, and discards the toilet wax gasket he just installed. Clean the surface of the toilet flange as well as the underside of the toilet bowl. If the flange is not sticking up one-quarter inch above the surface of the ceramic tile, you can add an extender to the flange or use multiple toilet gaskets to achieve the seal. If you use an extender to create a new flange height, be absolutely certain the gap between the existing flange and the extender is sealed with a code-approved sealant. Failure to do this could create both water and sewer gas leaks once again.

toilet wax rings

Another common mistake homeowners and rookie plumbers make is trying to level the toilet bowl as they install it. The toilet bowl needs to be level side to side and front to back, but this adjustment should be completed by dry setting the bowl over the flange without the toilet gasket in place. Use shims to get the bowl level. Then carefully lift the toilet bowl off the flange keeping the shims in place.

I've had the best luck over the years installing the toilet-bowl gasket on top of the flange instead of the underside of the toilet bowl. I use the toilet wax gasket to help align the long toilet bolts. I then carefully start to slowly drop the toilet down onto the flange trying to keep the bowl level as it drops closer to the floor. The shims ensure the bowl will be level.

If you attempt to level the toilet after the toilet gasket has contacted the flange and the underside of the bowl, you may break the seal as you lift one side of the toilet up to make the level adjustment.

Read about Helen's problem with a toilet wax gasket in my February 22, 2011 Newsletter. Ed has a toilet flange problem. Read his email in the DIY Bathroom Plumbing column.

Column 759

CLICK here to contact Tim to help solve your problem.

OSB Plywood

DEAR TIM:  My builder insists that 5/8" OSB plywood is fine for the roof. The OSB board got wet after one significant rainstorm before the shingles were able to be put on. Do you think that we will have any problems with our OSB sheathing roof? James K., Northwest PA

DEAR JAMES: The OSB board on your roof should be just fine. This engineered wood product is made to get wet. The lumber mills realize it's impossible for houses to be constructed in consistently dry weather.

OSB sheathing does much better getting wet than OSB subflooring. You can get swelling with OSB subflooring that puffs up the material. But roofs and sidewalls that have OSB board dry much faster than sheets that are laying horizontally on the floor.

If at all possible, allow the OSB plywood to dry thoroughly before the roofer applies the underlayment. It doesn't take long for the OSB roof sheathing to dry in most situations. A little breeze and some sun can dry the roof sheathing in hours.

Column QA

House Foundation Repair

DEAR TIM: We live in a ranch-style house on a crawl on a very sandy lot.  Some of our older neighbors have told us it used to be a garbage dumping ground, which is evident by the chunks of glass that get pushed up by moles and such.

When we bought the house about 12 years ago, the owner pointed out that the dining room in the middle of the house sloped slightly.  My husband put some jacks under the center foundation walls to attempt to stabilize it and avoid further sloping.

In the last year or so, the problem has gotten significantly worse.  The door frames are cracking, one corner of our brick front has a large crack, the floors are separating from the trim at the base of the walls, and there are several cracks in the corners of some of our ceilings.  From the road, it looks as if our house will split in two at some point.

When my husband went in the crawl to investigate his options, he discovered that the foundation walls he had previously jacked up, in the center of the house, were still holding, but that the foundation walls that go around the perimeter of the house and are dug down into the ground to basically hold the weight of the house are what seem to be sinking.

We still owe a lot on our 30-year mortgage, and live check-to-check on one income to allow me to be home with our young children. We are looking for the most effective, economical way to fix our problem.  Any advice you can offer would be greatly appreciated. Misty Mulligan, Shelbyville, IN

DEAR MISTY: I'm sorry to hear about this unfortunate situation concerning your house foundation. The foundation of a house needs to sit on strong soil. If your suspicions are confirmed, that the lot was a former dump, you may have some work ahead of you. I'm convinced you can stabilize the foundation, but until you determine what the subsoil conditions are, you're wasting time and resources.

I suggest that you talk to your local government officials to see if there are records of the lot being a dump. You can also get old topographic maps that may show your lot was a ravine that has been filled in. You can often get these topographic maps from local soil engineers or universities that have a geology department.

You need to discover what the subsoil conditions are. I would also dig a test pit outdoors about 10 feet away from the foundation. This can be done by hand, but if the pit gets deeper than 4 feet, make sure you install shoring in the pit so the weak soil doesn't cave in on whomever is digging. You can also rent a very small backhoe that can dig a 10-foot-deep trench in less than 20 minutes. Be sure you have all underground utilities marked if you dig. You don't want to sever electric, gas, water or sewer lines.

Once you determine where the good soil is, you can then plan to install piers that will support your house foundation. It's hard work installing piers, but it is sometimes a do-it-yourself job. But if you discover you have to go deep to get to good soil, you will need a professional to do this.

Column QA

Frost on Walls

DEAR TIM: I have frost forming on some of my exterior walls. This has never happened before, and it's freaking me out. What's causing this to happen? Can it damage my home? Dana S., Bena, MN

DEAR DANA: When the temperature drops well below zero, which happens with regularity in Minnesota during the winter, you bet you can get frost on cold interior surfaces.

Inside your home the air is warm. This warm air can hold a fair amount of water vapor. When warm, moist air contacts a cold surface, it can condense. You've probably seen this in the summer if you take a cold can of soda or pop onto your patio to relax. Within minutes water droplets start to form on the outside of the can.

This same thing is happening on the walls of your home. But the walls are so cold, the water that is condensing is turning to ice and frost.

It can cause damage once it thaws and runs down the wall. What's more, there is a possibility the water vapor is collecting inside the wall. This is a far more serious problem if it's happening.

You can minimize the frost from forming by trying to lower the humidity inside your home. This is not always easy, but check to make sure your humidity setting on your humidifier is set very low. As the outdoor temperature drops, you need to make sure you put less water in the air in your home.

Water vapor also is generated by cooking, showers, hanging things to dry, indoor plants and even aquariums. Just try to watch the water you use indoors in cold weather.

Column QA

Roof Vent Ice

DEAR TIM: My vent pipe running thru the roof extends about 30 inches above the roof and has a metal cap on it to keep debris out. Ice formed at the end of the vent pipe and blocked it.  Do I need this cap on the vent, it seems to create ice and block it, Can I leave the vent pipe open with no debris cap on it? Cleon Shafer, Coram, Montana

DEAR CLEON: I can see why the ice forms, as you sure get cold temperatures there. The water vapor rising from the plumbing system readily condenses, and then flash freezes on the cap. As this happens continuously in bitter-cold weather, it's no wonder the plumbing vent clogs with ice. When this happens, the plumbing system will get starved for air.

The bottom line is that you can remove the cap. I can't imagine why you would need it in the winter. Not seeing your house, I would think it may have been put on to stop debris from overhanging trees. But if those are deciduous, they have dropped their leaves by now.

Once there is no snow or ice on the roof, I would periodically check the vent pipe to ensure it is free of any organic debris. If the vent system is connected correctly to the drain pipes, you can insert a garden hose into the vent pipe to flush debris into your sewer or septic system.

Column QA

Heating Systems

heating system

Heating System | Here are two side-by-side natural gas forced-air furnaces.  They were sized carefully to match the heat loss of the house. Copyright 2018 Tim Carter

"Furnaces, boilers, portable heaters, electric heaters, etc. are like shoes and clothes. They come in different sizes."

Heating System Checklist

  • Step one is to do a heat-loss calculation
  • Always slightly oversize your heating system for rare cold spells
  • Save lots of money by just wearing more clothes and a hat indoors
  • Minimize air infiltration to stay nice and warm

Related Links

What is Radiant Heat? Is it Magic?

How Does My Darn Heat Pump Work? You'll NOT Believe It!

Free & Fast Bids

CLICK HERE to get FREE & FAST BIDS from local heating contractors.

Heating System Myths Revealed

DEAR TIM: Are all heating systems the same? My heating system is running constantly and it can only maintain a temperature of 67 F in my home. It's very cold outdoors, actually below zero.

But even still, I would expect the house to be comfortable even if the temperature got bitterly cold. Why is my home heating system not able to keep up? What can be done to keep me warm when it gets really cold? Valerie G., Lafayette, IN

Do I Need A Heating System in Florida or California?

DEAR VALERIE: Bitter cold temperatures are straining hundreds of thousands of heating systems all over the nation. Even sunny Florida and California can get unusual cold snaps. I think you may be a victim of an undersized furnace or heating system. There are many of these scattered about in your city, state and our great nation.

Can a Heating System Be Too Small?

There are numerous analogies I can throw up to help you understand the situation, but let's use one that many will understand. Imagine trying to use a small gardening wheelbarrow to haul a load of gravel that fits in a pickup truck. The wheelbarrow simply would get overloaded. It can only handle so much soil or gravel before the excess spills over the sides. Heating systems can be overwhelmed by cold temperatures.

Do Furnaces and Boilers Come in Different Sizes?

Furnaces, boilers, portable heaters, electric heaters, etc. are like shoes and clothes. They come in different sizes. A boiler that works to heat my home will not be large enough to handle heating a hotel or an office building.

Who Sizes a Furnace or Boiler?

Heating contractors have the ability to size a furnace or boiler. They do this by calculating the heat loss of your home. That's the actual term - heat loss - and it's a measurement of how many Btus of heat your home loses each hour in its battle with cold temperatures.

CLICK HERE to get FREE & FAST BIDS from local heating contractors.

heating system

This is my own boiler. If the outdoor temperature drops below 5 F, the house loses more heat each hour than the boiler is able to produce in an hour. The colder it gets outdoors the colder it starts to get indoors. Copyright 2018 Tim Carter

How Do You Calculate Heat Loss?

When your house was built, the heating contractor was supposed to take all sorts of measurements that enable him to calculate very accurately the heat loss. These calculations are done on a room-by-room basis so the contractor can make sure that he pumps or pipes into each room the necessary Btus to make that room comfortable. These calculations are based upon a seasonal average low temperature in your area. When Old Man Winter drops the temperature far below this average for days on end, your furnace can't deal with the larger deviation.

Does Heat Loss Increase as the Outdoor Temperature Drops?

Understand that the colder it gets outdoors the more Btus your home loses in an hour. This is pretty easy to understand when you think about it in broad terms. Assuming your home is at 72 F and it's 60 F outdoors, the inside of your home will stay comfortable for quite some time.

But if it's -25 F outdoors, the temperature inside your home will drop like a rock. Your furnace or boiler works to offset this leakage of heat to the outdoors, and when it gets bitterly cold, it simply can't produce the amount of heat each hour that's being lost.

Should I Get a Bigger Furnace?

You can install a bigger furnace if you like, but what will happen is that in mild weather, it will run you out of the house as it sends vast amounts of heat into the house in a short amount of time.

If your home is forced-air heat, understand that perfectly balanced systems have the air floating out of the ducts in lower velocity. This prevents whistling noises at the registers. You want gentle amounts of air flowing from the ducts that keep you warm without noise.

How Can I Stay Warm Indoors Now?

To keep yourself warm now, I suggest wearing more clothes. Wear long underwear, multiple layers on your legs and arms and even a hooded sweatshirt. Wear sheepskin-lined slippers and light gloves. It's really important to keep your hands and feet warm even inside your home. The extremities on your body send signals to your brain when they sense the temperature is starting to fall. It's a defense mechanism that helps preserve body heat.

Should I Ask For the Heat Loss Calculations?

If and when you get a new furnace or boiler, be sure you request to see the calculations that are required to show what your heat loss is. You can't assume the current size of your heating system is correct. The original contractor may have undersized it. It's really important that your system is sized to match the actual heat loss.

What Does a Contractor Look At for Heat Loss?

When a contractor calculates the heat loss of a home, they look at many things. They need to know the amount of insulation in the walls and ceilings, the number of windows and doors and how big they are, the type of construction of the house, the number of occupants, how many lights are in the home and many other things that affect the production of heat and how well the house can store this heat. It's not as easy as it seems.

Does It Matter Which Direction My House Faces?

Even the compass direction the exterior walls face is important. If the side of the house that has the most windows faces north, the heat loss will be greater than if they face south. In the northern hemisphere, the north side of the house gets no direct sunlight into the windows in the winter months. This can make a difference.

Simply take the time to ensure you get a heating system that will provide you with maximum comfort most of the time. In the rare times it gets bitterly cold, you'll need to snuggle with a loved one or just wear more clothes to keep warm at minimal expense.

CLICK HERE to get FREE & FAST BIDS from local heating contractors.

Column 758

December 21, 2008 AsktheBuilder News and Tips

What's in This Issue

MERRY CHRISTMAS
NEW LEAD RULES
PATCHING A PLASTER CRACK
NEW PRODUCTS
SUBSCRIBER FEEDBACK
RECYCLING DRYER-VENT HEAT
ROTOZIP FLOORING AND TILE KIT
RECENT COLUMNS


MERRY CHRISTMAS!

I'm writing this on a quiet Sunday afternoon at the dining room table of my house in Cincinnati. Tristan and I got home late Friday night after an uneventful 15-hour drive from New Hampshire. My oldest daughter Meghan decided to follow behind leaving today, but a second vicious winter storm will delay that. My place in New Hampshire got 12 inches of snow from a storm that started on Friday and ended in the early morning Saturday. Another 20+ inches is forecast today with near blizzard conditions. We are hoping she makes it home for Christmas!

I know that this is going to be a tough Christmas for many. The news each day is very depressing, but unfortunately it's reality. Kathy and I started significant belt tightening months ago. I'm sure you are in the same situation. We are trying to focus on all the positives in our lives right now, not the negatives. It's hard to do that sometimes, but I feel things could be much worse. There are people all over the world who are really suffering.

I hope you can enjoy this time of year with your friends and family. A friend of mine, Jeff Walker, taught me a valuable thing several years ago. He uses the time between Christmas and New Years to reflect on the past year and set goals for the next year. It really has worked well for me. Just recently he sent me a powerful email. It contained advice in it that can help you in the tough times ahead.

The bottom line is that we must all learn new things to survive this economic storm. But learning means you MUST change your behavior. Any psychology 101 student knows this. Remember Pavlov's dog? I'm changing my behavior as we speak. I know where I've been wasting time, talent and resources. No more. How can I help you *learn*? What things in 2009 do you want to change by yourself around your home? Tell me, and I'll see if I can help.

Merry Christmas to you and your family!


NEW LEAD RULES

Beginning tomorrow, the EPA has a new set of rules that affect houses, and people that own and work in them, 30-years old or older. These are houses that can contain lead paint. These rules are pretty stringent, and will help protect you against the sinister poison - lead. Read my past column about lead paint, and if that doesn't get your attention, nothing will.

I urge you to spend some time at the EPA website. The best thing to do is to read the summary of what is required of contractors who will be working on your home after tomorrow. The regulations get tighter in the near future.

You MUST read the information at the EPA website. I beg you to read all the information on this page, especially the parts about homeowners and contractors. See what's expected of the contractors, and how they must protect you and your home.


PATCHING A PLASTER CRACK

Erica, from Pittsburgh, PA emailed me the following: "I have a crack in the plaster of my spare bedroom, and am not sure of the proper way to fix it. The crack is about a foot and a half long, and directly follows the seam where the ceiling and wall meets (it is a sloped ceiling- so the crack is on a diagonal). The room is a bit colder than the rest of the house, and I first noticed the crack when the weather got much colder. Is this an easy fix? Can I fix it myself, and how?"

Erica, these plaster cracks often show up in late fall. The cracks are often places where houses relieve stress, just like arm, leg, neck and back joints in our own bodies. When the winter air starts to get drier, moisture leaves the wood framing in your home which causes shrinkage. This shrinkage creates tension and pulls apart the wood and the plaster with it. You can't stop this natural process, which is why you see cracks reappear year after year in the same place.

I've had great luck in the past filling these cracks with acrylic caulk when they are at their widest. This usually happens in late winter. If you can wait to repair this crack until the end of February, you'll get better results.

Try filling the crack at that time with caulk using a damp sponge to remove any caulk that smears onto the plaster. I apply the caulk to about 6 inches of the crack and swipe the excess off the crack with a flexible putty knife. The caulk usually will shrink after a few days. There are newer caulks that shrink very little, so look for that characteristic on the label. You may have to caulk it a second time to get the crack to look great.

To get professional results, after the caulk has dried, you may want to tape and finish the crack as you would any seam in new drywall. This has worked well for me in hundreds of cases.


NEW PRODUCTS

About a month ago, you may have been one of the subscribers that brought to my attention a spray paint made for painting plastic. You'll enjoy this quick story. Think about all of the home-improvement products that are out there. They have to number in the tens of thousands, maybe hundreds of thousands.

When I got back here to Cincinnati for Christmas two days ago, Kathy had a stack of mail for me to go through. In the stack was the most recent press kit from Krylon, the spray-paint people.

I opened the press kit, and there was a gorgeous catalogue of both new and existing products including the Fusion product of theirs that's made to work well on plastic. But tell me if you knew that Krylon had all these things:

  • a hammered-finish paint
  • a metallic-shimmer paint
  • a high-heat paint
  • OSHA Color paints
  • Farm and Implement paint to match common tractor colors
  • glass-frosting paint
  • chalkboard paint metallic
  • leafing paint

and many, many more. This is not intended to be a commercial for Krylon, but more an exercise to show you how difficult it is to stay up with all that is new.

This same problem happens each year at the enormous Builders Show. I've gone for many years to this venue. It's absolutely impossible to go to each booth and see all the new products at the show. To be honest, it's very frustrating. I'll do my best to keep you abreast of all that's new, but if you see something before I mention it, let me know!


SUBSCRIBER FEEDBACK

I've shared with you many times how I get emails each time I send a newsletter. Nine days ago, I got this from Dustin Gebhardt:

"This week's newsletter really hit home for me, especially the part about your friend Mike working for Sears.  You see, I, too, work for Sears, albeit indirectly.  I am the Plating Engineer for Danaher Tool Group in Gastonia, NC.  The vast majority of sockets for Sears Craftsman tool kits are manufactured, plated, and packed right here.

Due to the uncertainty in the economy and subsequent downturn, we've recently had to reduce our workforce.  All of this has made me realize just how important "Made in the USA" means.  I really appreciate your Sears plug, and I wonder if you could mention the importance of "Made in the USA" in your next newsletter. Thanks for all of your advice."

Dustin, you bet I can. We still have manufacturing happening here in the USA, but much of it is shifting offshore. It started happening decades ago. Books have been written as to why, so I'm not about to discuss it. But I do feel it's important that we try to keep the money we all make here in the USA when we can. Transferring wealth to other nations is not in our best long-term interests.

This perfect economic storm that is building is a great time to reinvent ourselves. It should be a wake up call to all of us that we need to become more competitive in the global economy. Dustin, you need to know that I have quite a few of your sockets in my garage and workshop. Keep making them!


RECYCLING DRYER-VENT HEAT

I got an email from Win Harrington. Win asked: "In the winter, should I disconnect the dryer vent to the outside and keep the heat in the basement?"

The answer is a huge NO! Doing this will pump vast amounts of water vapor into your home which can condense inside exterior walls and your attic creating mold, mildew and wood-rot issues.

If you want to extract the heat, you can lengthen the vent pipe inside your home as long as you are within code and the manufacturer's guidelines. The extra surface area of the metal pipe will radiate heat into your home.

You could also figure out a way to pass the vent pipe through a water jacket that heats a larger quantity of water. This water could then radiate the stored heat back into your home. Don't ask me to engineer that - it's just a random thought of mine.


ROTOZIP FLOORING AND TILE KIT

Here is a last-minute Christmas gift idea. I'm testing a Rotozip RZ10-FT, which is a fantastic tool kit that allows you to make all sorts of cuts you need to do when installing ceramic tile or laminate flooring.

This kit has a wide assortment of bits and tool attachments that permit you to even cut the bottom of baseboards should you need to slide tile or laminate flooring under them in a remodeling situation.

I've used Rotozip power tools for years and can speak to their quality and time-saving attributes. If you got a gift certificate for Christmas or will have a credit from things you are returning, you may want to use it on this tool kit. If you care for this tool, it will last for many years.

I'm embarrassed to say that I have no link for you to see this wonderful kit. I went to the Rotozip website and there is nothing there for it. I'm just as stunned as you might be. I even went to Amazon, and there is nothing there as well. You can see the actual power tool - the RZ10, but not the entire kit. Sorry about that!


RECENT COLUMNS

Wait until you read my review of this amazing chainsaw.

Do you have to repair floor grout?

Are you thinking of installing wood fencing? You'll discover tips in this column.

I've got radiant floor heating in my New Hampshire house. Oooooouuuh is it ever nice!

Click here to read past copies of my newsletters.

Merry Christmas!

Tim Carter
Founder - AsktheBuilder.com   - Do it Right, not Over.

AsktheBuilder.com


Wainscoting

Wainscoting

The wainscoting in this bathroom was fairly easy to install, and it really adds character. PHOTO CREDIT: Tim Carter

DEAR TIM: I attended a Christmas party at a home that had wainscoting. It was gorgeous. The beadboard wainscoting was painted a different color that the wall above to accent it. What can you tell me about installing wainscoting? I like raised-panel wainscoting, but would settle for the beadboard wainscoting if I had to. Can you tell me the important things to know about how to install wainscoting? Stephanie D., Minneapolis, MN

DEAR STEPHANIE: You're not the first to be smitten with wainscoting, and you'll surely not be the last. My wife and I have raised-panel wainscoting in our existing home, and it will be installed in the new home we're planning. This traditional wall finish can add character to just about any architectural style. The beadboard wainscoting you saw can produce both a country look as well as a clean, modern look with its vertical lines.

I remember years ago when my sister had her home built. She wanted beadboard wainscoting. I was just getting into construction at the time, and she wanted the real beadboard, not the imposter material that comes in large sheets. I remember installing the horizontal blocking in the walls so there was solid wood to secure the thin vertical strips of tongue and groove beadboard. It wasn't hard to install the blocking, but it's a good idea to do if you want real beadboard.

If you want to install beadboard wainscoting in an existing house where it's too late to install blocking, you can easily get the wood to stick to the walls by adding a dab of construction adhesive to a couple of spots on each board before its nailed at an angle through the tongue

Over the years, I've discovered all sorts of tips about installing wainscoting. Perhaps the biggest time saver is pre-finishing the material before it's installed. This, in my opinion, should be done whether you decide to paint or stain the wood. It's of the utmost importance to make sure you completely coat the entire tongue portion of the wood. The wood can shrink after it's installed. If this happens, it will reveal a vertical thin strip of wood that's unfinished. This can be really problematic if it happens at each joint where the grooved edge of a board overlaps the tongue of the adjacent piece.

It's also easier to paint or stain the wainscoting while it's flat on a workbench or on top of a piece of plywood suspended between two saw horses. You just need to set the finished material inside a covered area away from dirt and dust as it dries.

There are challenges when installing wainscoting in existing homes with respect to electrical outlet boxes. You need to make sure you're code compliant with respect to the distance between the edge of the electrical box and the finished surface of the wainscoting. You may have to install approved extensions to comply with the code. This is not a problem in new construction, as the electrician can mount the boxes so they match up with the surface of the wainscoting.

As you discover how to install wainscoting, one thing you'll quickly see is that you need to be aware of the thickness of the wainscoting and how it plays with the trim around doors and windows that may sit close enough to the floor such that the wainscoting rises up above the window sill. These places where the wainscoting collides with other trim must be dealt with using great skills and often some master-carpentry magic.

You'll sometimes discover that it's best to install the wainscoting before any baseboard trim. To get a really great look at windows and doors in the room, you may have to install extension-jamb filler strips to bring the window and door trim so it sits on top of the wainscoting. I didn't have to do this at my home as my door-casing trim is a full 3/4-inch thick. My wainscoting was only 3/8-inch thick so the door trim still was proud above the surface of the raised-panel wainscoting.

If you decide to install raised-panel wainscoting, it pays to pre-finish the raised panels and all other parts before you assemble them. Some movement may occur with the raised panels that can reveal the unfinished wood.

Raised-panel wainscoting is also harder to work with respect to electrical outlets on the wall. You need to be sure the electrical boxes fall within the flat area of a raised panel. You can't have the outlet boxes where there is a vertical stile or the beveled edge of a raised panel. As you might imagine, this requires lots of planning ahead of time to determine the center of each raised panel.

Some raised-panel wainscoting comes with its own baseboard as part of the system. I used this at my own home with great results. I also used this same wainscoting to provide the facing for my basement wet bar. The bar is done in cherry veneer, while the wainscoting in my dining room is painted a rich gold color.

Column 757