How To Install A Phone Jack Video

There are modular phone jacks boxes available to handle up to 6 lines. Each line requires a pair of wires. If your existing phone wiring only has four wires, that is a maximum of two phone lines. Some phone cable has eight wires, or four pairs for four phone lines or circuits. Just snap in the correct number of phone outlets you require. The phone wires just snap into place on the back side of the phone jacks.

Using the right modular equipment makes phone jack wiring a simple, neat job.

Mortise Video

Using a circular saw, a hammer and a wood chisel, you can cut the mortise. Adjust the circular saw for the proper depth of cut. Mark the width of the groove using either the board that will go into the groove or use a tape measure and a framing square. Take the circular saw and make a number of parallel cuts between the marks. After making several passes, the wood chisel will be able to easily remove the remaining wood.

The simpler method for cutting the mortise is to use a router. With the right size route bit, the router will make simple work of that groove. It is quicker and more precise then using the circular saw.

Paint Stripper Video

A semi-paste stripper are thicker and can be applied with a simple paint brush. Tip - use a metal paint pan, not a plastic or paper one. Some strippers will dissolve those non-metallic trays.

Brush the stripper on, following the manufacturer's instructions. Allow it to sit for the recommended time, so that the stripper does the work. Once the paint stripper has worked, use a putty knife to scrape off the old finish. Steel wool or paper towels will also work. Tooth picks are great for getting into those small areas.

Wipe the stripper off with a cloth. Then lightly sand the wood and remove the dust. You are now ready for finishing the wood.

Wood or paint strippers are wonderful products, but be sure to read the warning labels on the container. These are aggressive products and can harm your skin or burn your eyes. Used properly, you will get great results.

Low Voltage Wiring Video

Using the wrong fastener or staple on low voltage wire can result in a short. This type wire has a thinner insulation than other electrical wiring. The wrong fastener can cut right through the wire.

Low voltage wiring is used for door bells, telephone wiring, computer wiring, thermostat wiring, etc. Be sure to use the right staples to protect the wire. The old fashion staples with a cardboard protector will work great with this size wire.

A hand stapler is available with a special tip and special cable staples designed just for low voltage wires. The staples are rounded to prevent damaging the cable. Be sure to use them on your next wiring project.

Internet Cable Video

Using a standard outlet box, installing computer network cabling is a simple job. Computer jacks use 8 wire cable. This is known as CAT 5 cable. Each wire has an individual color.

The RJ-45 jacks allow the cable to be easily installed. Position each wire into the proper slot and press the wire into the jack to complete the connection. A computer data cable wall jack is available and mounts onto the standard outlet box.

Networking your house when building or remodeling will save time and money. Do it now, you will be using computers in the future.

Heating Costs Video

To lower your utility bill, you have to use low fuel. Turn down the thermostat as low as you can stand it. Install a programmable thermostat to save energy automatically while you are not home or are sleeping.

You can get a good return on your investment will the addition of insulation in your attic. You can install bat insulation yourself or call an expert to blow in a few extra inches or a foot of installation.

Check the weatherstripping around your doors and windows. If you feel cold air coming in, the weather stripping needs to be replaced.

Follow these tips to help save energy and lower that utility bill. You can save money.

This was shared in Tim's January 17, 2019 Newsletter under Critical Thinking And Common Sense.

Sizing Air Conditioning

ac units

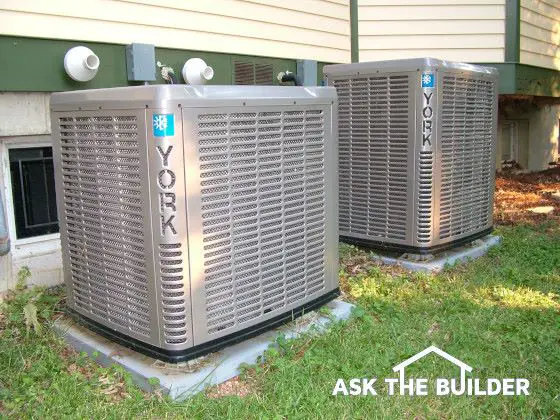
Sizing air conditioner - These are two AC units outside my own home. I have two separate systems in my home, one for the first floor and one for the second floor. The one on the right is a monster 5-ton unit. Richard Anderson did the heat gain calculations to ensure it was the right size. Should you cover AC unit in winter? Copyright 2021 Tim Carter

Sizing an Air Conditioner Checklist

  • Do the required Manual J calculations
  • Follow all ACCA guidelines
  • AC units come in different sizes like shoes and clothes
  • Heat Gain calculations provide data so each room is cool

Sizing an Air Conditioner - Do It and You'll Be Cool!

Related Links

Return Air Ducts - Key To Keeping Cool - SECRET INFO - Don't Share!

AC Sizing Problems - Does This Sound Like Your Home?

Why Doesn't My House Get Cool?

Your house may not get cool because it was built like the Gibson's house in Cincinnati, OH. Sizing an air conditioner is very important.

My friends - the Gibson's - purchased a tract home about 15 years ago. It was actually the sub-division model home.

The front of the house has no less than ten windows if I'm not mistaken. One month ago their AC unit gave up the ghost.

My HVAC man, Richard Anderson, installed a new AC unit for them. The Gibsons had always complained about being uncomfortable. They thought the AC unit was low on Freon. It turns out the AC unit was never sized right from the get go. It was 1.5 tons too small!

Do I Need Return Air Ducts?

Yes, you need return air vents and ducts in just about every room of your home. These vacuum hot air from the room and return it to the air handler to get cooled.

To add insult to injury, the Gibson's had no return air ducts from the second-floor rooms. There was just one central return duct in the second-floor hallway. Richard cut a hole in the wall above each bedroom door to allow hot room air to get to the return duct in the hallway.

What is Heat Gain?

Heat gain is a scientific measurement of how many BTUs per hour of heat is generated inside your home.

My HVAC man did a heat gain calculation to make sure that the properly sized unit was installed. He has a neat computer program that allows him to do this.

You can do the same thing by hand - I have done it numerous times - and arrive at the same results.

Does One Size AC Unit Work in the Same House?

No, one size AC unit will not work in all houses even if they're the same. There are many factors that determine the size of an air conditioner.

Tract houses often have similar sized AC units. The builder or HVAC person simply does one calculation and often applies it to all houses that are similar in size. Guess what? This doesn't work!

In the case of my friends, the glass on the front of their house happens to face west-south-west, the WORST possible direction! The blazing sun late in the afternoon cooks the inside of their house. I'll bet that a number of you reading this bulletin have similar situations.

Can Square Feet be Used when Sizing Air Conditioner?

You can size an air conditioner using square feet, but it's not the best way. I'd only do this to just get in the ballpark with respect to the actual size.

Some HVAC contractors try to size AC units by doing a simple square foot analysis. They use a gross multiplier that ranges from 400 (older homes) to 1,000 (newer homes) sq. ft. of floor space per ton to arrive at total BTU heat gain or total tonnage.

This method is unacceptable. If your HVAC person proposes this, find a qualified technician who understands heat gain and knows how to use Manual J.

CLICK HERE to get FREE & FAST BIDS from local AC Technicians who can install the right sized AC Unit for your home.

What is Manual J?

Manual J is a publication created by the Air Conditioning Contractors of America (ACCA)

This manual is used to calculate heat gain and heat loss.

Calculating heat gain is really complex. You must use a booklet called Manual J. This booklet takes you step-by-step through the process making you account for each and every source of heat.

manual j acca

This is the only manual to use to calculate heat gain and heat loss for your home. CLICK THE IMAGE to order it now.

Many scientists have worked over the years to formulate the tables, formulas, and values that combine to form this bible of the air conditioning industry.

You can purchase a copy of Manual J - and I URGE you to do so - if you want to really understand how air conditioning works. The ordering instructions can be found if you keep on reading.

The manual is actually a rather technical booklet, but if you follow instructions well, you can easily work out a heat gain computation of your own. You will at least get close. Don't get bogged down in all of the technical mumbo-jumbo within the manual. Simply take your measurements and crunch some numbers.

How Do I Find a Professional Who Will Use Manual J?

It's best to use a nationally recognized HVAC contractor. CLICK HERE to locate one.

Should I Install a Larger AC Unit to get Cooler?

No, do not install a larger AC unit. It will short cycle.

Some people want to oversize their equipment so they are assured of being cool on those hot days. This can be a big mistake. You actually want to undersize your equipment ever so slightly.

Researchers at Texas A & M found that air conditioners that were undersized by 10 to 20 percent are more efficient and more effective at removing water vapor (humidity) from your indoor air.

Now I will agree with them to a point, but I don't know if I would undersize my own equipment to the 20 percent benchmark! I would go 5 percent at the most....a totally unscientific approach since I have always sized the equipment on my jobs to match or slightly exceed the calculated heat gain.

Oversizing a unit causes problems because the unit doesn't run long enough. You want your air conditioner to run for 15 - 20 minutes at a time. This allows the recirculating air to come into contact with the cold coil inside the air handler.

This is how humidity is removed from the air. You will feel most comfortable when as much moisture is squeezed from the interior air as is possible. Short cycling air conditioners don't remove humidity well at all.

CLICK HERE to get FREE & FAST BIDS from local AC Technicians who can install the right sized AC Unit for your home.

How Do You Calculate Heat Gain?

The first thing you need to do to calculate the heat gain of your house is to purchase a copy of Manual J. This booklet is very likely at your local library and/or you may be able to borrow a copy from a local air conditioning distributor.

The point I am trying to make is that it contains 116 pages of tables, examples, and other valuable information that is physically impossible for me to include in this tiny Bulletin.

My copy of Manual J has an awesome example computation. You can see the floor plan of the house and the computation sheet. This allows you to see how they arrived at all of the individual heat gain BTU's. The example computation will allow you to easily compute your own house's heat gain.

The following instructions are meant to HELP you make sense of the rather technical Manual J. Without the following notes, I'm afraid that you might give up in frustration.

Who is the ACCA?

Air Conditioning Contractors of America (ACCA)
2800 Shirlington Road
Suite 300
Arlington, VA 22206
www.acca.org
Call Toll Free - 888-290-2220


How Do You Calculate Temperature Difference?

OK, it gets much hotter on average in Las Vegas or Dallas than it does in Chicago. This is important as you need to keep in mind the heat intensity when sizing AC. Manual J has extensive tables that will list your city or town or one very near you.

There is a temperature listed that will usually only be exceeded 2.5% of the time. In other words, it can get hotter than that temperature but only for short periods of time. You don't want to design your system for worst case scenarios. If you do this, it will be oversized.

75 to 78 degrees is the recommend interior temperature. You subtract 75 degrees from the temperature listed for your city. This is your design temperature. You will have to round this value to some factor of 5 for all subsequent calculations. In other words, if you arrive at 23 degrees, call it 25.

What About Heat Gain Through Windows and Glass Surfaces?

The largest and most direct source of heat gain is glass. You know this anytime you have stood in front of a window on a hot sunny day. You feel like an egg in a skillet.

Heat gain through glass is affected by the compass direction the glass faces, whether or not the glass is shaded by an awning or trees, the layers of glass, and the total surface area of the glass. This aspect of your calculations is critical. If you make a mistake here, it can be big. Take accurate measurements and be sure of your compass directions.

Your BTU heat gain calculations start once you have measured all of your windows and noted all of the other data. I prefer to add up all of the square footages of the glass that face a certain compass direction. I then only have to go through the calculation one time.

Locate the proper table(s). You will need to know your design temperature, the compass direction, type of shading, and glass thickness. Once you zero in and find the right values, you will cross reference these to a number that is called the "Heat Transfer Multiplier" (HTM).

You take this number and multiply it times the square footage of glass surface for that particular compass setting and shading requirements. The resulting number is the number of BTU's that you are "gaining" through your glass. Write this number down as you will be adding up ALL of the BTU's to get to your total Heat Gain. Note the vast difference in the numbers between similar windows that face West and ones that face North.

What About the Heat Gain of Exterior Doors?

You now proceed through the same exercise for your exterior doors. You will be asked to select a door type and then find your design temperature and cross-reference once again. Use this HTM and multiply it times the total square footage of exterior door types. Once again the resulting total will be BTU's of heat gain from the doors.

How Do I Calculate the Heat Gain Through Walls, Ceilings, and Floors?

You will need to follow the same steps you did in the above exercises to get the BTU heat gain from all other surfaces that are in contact with the hot, humid outdoor air. This simply requires accurate measurements on your part and an investment of time. Do it on a step by step basis following all of the steps in Manual J.

Is Air Infiltration Important?

All houses leak air. Old houses tend to leak more air than newer ones that are of moderate to high quality. There is a special calculation that you must do to find out the BTU's of heat gain your house experiences from air infiltration.

You basically have to calculate the total cubic foot area of your house multiply this times .40 and divide the result by 60. This gives you the cubic feet per minute (CFM) of air infiltration. You multiply this final CFM value time the HTM value on the Air Infiltration table. Having fun yet?

What About Latent Heat Gain Sources?

Manual J will then walk you through a process of determining some hidden heat gain sources. The occupants of the building create heat as do appliances and light fixtures. All of this - even though it is not great - must be accounted for.

The net result of all of this effort is a total heat gain which should be somewhere in the neighborhood of tens of thousands of BTU's. My own home has a total heat gain of about 68,000 BTU's. Remember, you divide the total BTU's by 12,000 to reduce the BTU heat gain into tons of AC. Take your time with the calculations and you will be rewarded. The entire process should not take you over 3 hours.

CLICK HERE to get FREE & FAST BIDS from local AC Technicians who can install the right sized AC Unit for your home.

Read how Tim kept warm in his house in the January 9, 2015 Newsletter.

Column B231

Insulated Concrete Form Tips

Insulated Concrete Forms 

When you have been in the construction industry as long as I have it takes quite a lot to get one excited about a new product. After all, I have heard the talk and walked the walk of many manufacturer's new products. Insulated Concrete Forms (ICF) have not only got my attention but that of thousands of builders across the USA, Canada and Europe. It is a revolutionary method of building structures to say the very least.

The 3 Little Pigs

Remember the fairy tale about the 3 little pigs? The pig that survived had a masonry house. An ICF house allows you to build a masonry house that can withstand strong puffs of wind (say in the 200 + mph range) yet allow you to finish the interior and exterior to virtually any style and type. Can you imagine living in a soundproof, super insulated, fire resistant structure that can look Victorian, Modern, Colonial, etc? These are all possible with an ICF house.

Poured concrete is one of the most durable man-made building materials currently available. It is cost effective and can be placed in ICF formwork with minimal training. Once you see an ICF house - both inside and out - you will be convinced.

Seeing is Believing

I had the pleasure of walking through a brand new ICF house in Dallas, Texas this past January. It was impossible to tell by looking at the house that the structure was concrete surrounded by foam. The house was simply gorgeous.

The floor plan was not rectilinear as you might expect a house made from blocks to be. The walls were angled, curved, and all different heights. You pick any floor plan and I'll bet an ICF manufacturer can easily make it happen for you!

A Growing Industry

The ICF industry is so new that each year more manufactures show up for the party. This evolution is fairly natural in the building industry. Builders and consumers benefit because this type of fierce competition often produces more innovative products / methods and usually lower prices. As it stands now, you pay just a small premium (1 to 4 percent) to build with ICF materials instead of common wood framing. Within a few years, you and I will not pay extra. In fact, I feel that with time, an ICF house will cost slightly less than a wood frame house.

Avoid Rookies if Possible

One of the problems with ICF houses is that a contractor in your area may not be too experienced. If you decide to build an ICF house, take your time and interview builders. Talk only with those who have several houses under their belt. As my daughter Meghan says you don't want to be their "lab rat".

You can often get names of experienced builders from the manufacturers. Don't hesitate to call and ask. Often you will be handed off to a local factory representative. Your phone efforts may take several days, but you will be rewarded. Be sure to visit job sites and ask questions about the house and contractor. Most homeowners will oblige you.

Different Methods

The ICF method of construction is basically the same for all systems. Once poured, the concrete is surrounded on either side by foam. The foam is a great insulator. You know this if you have ever bought fast food coffee. The assembly of the systems is quite variable. Just because a contractor has installed one system don't let that fool you to think he can do them all. Some systems are as different as night and day.

Attachment Points

How do you attach siding, brick, drywall to the foam? Each system has a different method. Some systems have wood furring strips, many have plastic strips or buttons that you use. My favorites are the ones that have steel as a part of the foam system. The steel studs or strips that are part of the foam provide you with strong connection points. If you choose a plastic system you need to exercise care when driving screws. Go a little too far and you can strip the plastic away from the screw shank.

Pay attention when you look at different systems as to the attachment method. Look to see how much target area is available for nailing and screwing things. I recommend systems that have as much steel or plastic as possible. You never know where a siding nail might fall so you want something there other than foam!

A Final Word

I believe ICF systems will overtake traditional framing methods in many parts of our nation. The energy savings benefits, solid construction, and numerous other positive qualities make it a natural. If you are just getting in the construction business, it would be wise to look at ICFs!


Insulated Concrete Form Manufacturers

Here is a list of as many ICF manufacturers as I could find. I guarantee you that more will pop up in the future. Not only that, I would expect some of the companies listed below to mysteriously drop off the radar screen in the years to come. As in all growing industries some companies can't keep up and they fall by the wayside. What does this mean to you? You should look for a company that has a long track record. Ask how long the ICF system they use has been patented. Several of the companies below are hybrids of another. In other words, designs have been modified and all of a sudden a new company is born. I have listed beneath each company the type of system they make. This should help you to limit your calls if you have already made up your mind as to the type of system you plan to use. I urge you to call all of these companies. You will be buried with useful information. Your choices may be limited as not all companies will necessarily have distribution in your area.

  • AAB Building System, Inc.
    800-293-3210
    Blue Maxx - Flat wall system

  • AFM Corporation
    800-255-0176
    Diamond Snap-Form - Flat wall system
  • American Polysteel Forms
    800-977-3676
    Waffle system
  • Amhome
    813-996-4660
    Screen wall system
  • Ener-Grid Building Systems
    602-386-2232
    Waffle system
  • Energy Lock, Inc.
    801-288-1199
    Screen wall system
  • Featherlite Inc.
    407-575-1193
    Screen wall system
  • Foam Forms Systems, LLC
    816-483-7688
    Flat wall system
  • Greenblock Worldwide Corp.
    719-687-0645
    Flat wall system
  • I.C.E. Block
    800-ICE-BLKS
    Waffle system
  • ISOMAX
    314-677-8433
    Flat wall system
  • Insulform
    206-242-9424
    Waffle system
  • KEEVA
    602-827-9894
    Screen wall system
  • Lite-Form, Inc.
    800-551-3313
    Flat wall system
  • New Energy Wall Systems
    810-435-6056
    Screen wall system
  • Polycrete
    514-646-3825
    Flat wall system
  • Quad-Lock Building Systems
    360-671-3911
    Flat wall system
  • Rastra
    619-778-6593
    Waffle system
  • Reddi-Form
    800-734-8268
    Screen wall system
  • Reward 3-10 Forms
    800-468-6344
    Waffle system
  • SmartBlock
    800-CONFORM
    Waffle system
  • TechSystems
    614-781-0655
    Flat wall system
  • ThermoFormed Block Corp.
    800-821-0855
    Waffle system
  • Therm-O-Wall
    507-367-2183
    Waffle system


Books, Pamphlets & Publications

As you might expect, there are some fantastic publications out there about ICFs. Perhaps, the best one I have seen is a hardback book that is - in my opinion - the bible of the ICF building system. It is a recent book and is very up to date. It is titled:

Insulating Concrete Forms for Residential Design and Construction by VanderWerf, Feige, Chammas & Lemay

This book is published by the Portland Cement Assocaition (PCA). You can call them for pricing information at 800-868-6733.

The PCA also has two booklets worthy of mention:

Design Criteria for Insulating Concrete Form Wall Systems by John Roller

Energy Comparisons of Concrete Homes Versus Wood Frame Home by Pieter VanderWerf

Three other associations also will possibly have some wonderful information - either for free or at a reasonable price. Call them and see what you find!

  • Canadian Portland Cement Association
    613-236-9471

  • Insulating Concrete Form Association
    847-657-9730
  • National Ready Mix Concrete Association
    301-587-1400


ICF Installation Tips

Installing ICF systems is absolutely not a weekend DIY project. It requires multiple skills to successfully complete an ICF structure. For example, you need to be a decent carpenter. Window and door bucks (forms for openings) must be constructed, walls need to be adequately braced, and square, plumb, and straight corner posts must be placed for many of the systems.

Add to this rodbusting (reinforcing steel placement) skills and concrete handling and you have quite a job! The point is this: Once you work with an experienced crew you could probably tackle a smaller job. But don't think that you can do a job with no problems by just reading books or instructions from manufacturers. That would be very naive.

The Footer - Most Important!

Traditional poured concrete walls or concrete block walls can be placed successfully on footers that are somewhat out of level. Concrete block mortar joints can be adjusted to make up as much as 2 inches of footer height difference. Poured walls are made level by chalking a line inside the forms. So, if the forms are on an unlevel footer, no problem! Simply get the top of foundation lines right inside the forms and you are fine.

ICFs are unforgiving. They are manufactured to tight tolerances. If you have a hump on a footer and then place the blocks between the corner posts, you will surely get a belly in the wall where the ICFs relieve the stress caused by the unlevel footer.

You can install level footers by using straight steel forms and or newer plastic forms that have built-in drainage. Another method used by some contractors is the placement of the first row of ICF forms as the footer concrete is still wet. This resembles laying concrete block. It is the method I would choose to use as you can get the ICF blocks perfectly level in both directions.

Remember that ICF blocks are tender. You need to use caution when working around them. Be aware that you can only pour walls a certain height and then must stop before you go to the next level. If you try to go to high you can have a blowout in the form work!


Great Installation Book!

McGraw-Hill in conjunction with the PCA has published a fine smaller paperback book about installing ICFs. It covers the systems, tools needed, techniques, and many tips. Here is the title:

Insulating Concrete Forms
-
Construction Manual -
Successful Methods and Techniques

VanderWerf & Munsell

Column B221

Extra Wall Insulation

The first day the column associated with this bulletin ran, I knew I was in for trouble. My email box was overflowing with messages both pro and con about the column. Every now and then, I decide to write about a topic that REALLY gets people's critical and judgmental juices flowing. This particular topic - extra insulation in exterior walls - is obviously one of them! There seems to be lots of people out there who think they are energy experts.

While doing research for the column I spoke with energy experts - people who study the topic and do research 40 - 60 hours a week, 50 weeks a year - at the Oregon State University Extension Service and scientists at the Building Research Council at the University of Illinois. I knew that it made sense to add insulation in exterior walls, I just didn't know where the dividing line meandered east to west across our fine nation. These people provided me with the data I needed to make that determination. Too bad I didn't follow their recommendations myself! Of course, I didn't have access to their results - the studies weren't done when I built my house. I happen to have 2x6 walls with a total R-value of 26. If you look at the total heating degree days for Cincinnati, it looks like I might have done better to keep my money in the bank!

Controversy

Many factors were considered when the scientists at the University of Illinois came up with their magic number of 5,750 heating degree days. Among them were the current and projected costs of energy. If energy costs rise faster than they predicted, then the 5,750 number is wrong. The "make sense" number would drop. If energy costs actually become less in the future, then the "make sense" number would rise! The skeptics or those who scoff at their method may use different inflation, interest, or energy cost numbers. Some critics don't even like to use the heating degree method in the first place! Anytime mathematics and big money is part of a column, watch out!

Calculating Added Costs

Let's say you want to figure how much it is going to cost to add 2x6 walls to your new home. What do you need to consider and just how do you arrive at the total cost number?

There are three elements that you have to consider when you modify the thickness of your exterior walls: added framing lumber, insulation, and window & door jamb costs. Labor costs for all of these is practically negligible. Rough carpenters have to bang a few more nails when using 2x6's but it doesn't really add much.

Column B217

Tarnish Free Brass Faucets

Changing a kitchen sink faucet might not be for you if you are claustrophobic and/or are 6 foot 5 inches tall and weigh 240 pounds or more. The space inside a kitchen sink base cabinet is often limited. Add a disposal to the brew and it can be a real challenge.

The job really isn't too hard to do but you can develop a backache or headache from strained muscles. By the time you are finished, you will feel like Harry Houdini trying to escape from a straight jacket.

One Simple Tool

If you are attempting to change out an existing faucet, you must have one necessary tool - a basin wrench. This weird looking tool has a spring loaded swivel head that allows you to loosen and tighten faucet body and faucet supply tubes in the narrow space between the sink bowl and the back of the sink base cabinet.

Forget about using traditional wrenches in this dark space! You may be lucky and find an adjustable wrench that will work, but a basin wrench will do the job in a flash. Purchase one at a plumbing supply house.

Is the Water Really Off?

Boy did I learn something important about 20 years ago! Turning off a shutoff valve under a sink doesn't always mean the water is off! In fact this just happened to me recently in our second floor hall bath. I shut off a 12 year old valve so I could change out a faucet cartridge. But when I turned on the faucet to insure the water was off, guess what? There was still a decent flow! Don't make this mistake! If you cut into a supply line or loosen a supply tube nut backed up by a faulty valve, a flood may ensue.

Is It REALLY Tarnish Proof?

Have you seen old technology brass kitchen faucets? They can really look bad in a short amount of time. A kitchen is a harsh chemical environment. Tomato juice, orange juice, vinegar, etc. can really cause problems with traditional brass.

The new tarnish free brass faucets are really great. The beauty, however, is only skin deep. But that is all the deeper it has to be. At the surface, the brass is really not brass. It is a brass alloy. The brass faucets are bombarded by special metals in a vacuum chamber. This process creates the tarnish-free alloy.

The finish will not corrode, tarnish, nor discolor. It is quite abrasion-resistant. Steel wool will not harm the finish but those kitchen Scotch-Bright pads will! So, watch how you clean the faucets.

Filtering Faucets

Water quality is a big issue in many parts of the nation. You should be concerned as water can contain all sorts of chemicals. One of the most common chemicals that is used to kill bacteria in water is chlorine. It is effective but often can leave an odor or bad taste in water.

For years you have been able to buy under sink filters, inline water supply filters, and even large add on filters at the point of use. You can now get a new kitchen faucet that has a hidden slim filter in the tubular faucet arm. This nifty filter is designed to remove chlorine taste and odor from water.

This filter will only work if you turn a discrete knob at the end of the faucet. This way you can use water that still contains chlorine to clean and rinse dishes and for other cleaning chores. When you want filtered water for drinking or cooking you simply twist the knob and filtered water flows from a tiny diversion port next to the main aerator. You can't mistake the two flows, trust me!

Who Makes It?

At the time this bulletin was published, only one company made such a faucet. It is:

  • Price Pfister
    818-896-1141

You can bet that the other faucet companies will respond to this challenge!


15 Kitchen Faucet Installation Tips

Read the Instructions

If I've typed this once, I've done it a thousand times. It is vital that you follow instructions in order and to the letter. If you don't pay attention, you can damage some parts and actually have to disassemble the faucet. For example, you might forgot to put on the spray trim nut BEFORE you attach the hose to the base of the faucet......been there / done that....

Right Tools

You often must have a basin wrench to install a kitchen sink faucet. This handy wrench is made to fit in the narrow channel between the sink and the back of the sink base cabinet. Two adjustable wrenches, a screwdriver, and a flashlight will usually be all that you need to complete the job.

Plumbing Supplies

Don't start the job without pipe dope or liquid Teflon thread sealing compound, plumber's putty, extra supply tubes - an assortment, extension tubes (known as Delta tubes here in Cincinnati), and paper towels. The Delta tubes are simply bendable tubes that have a male end and a female end. These tubes are simple compression type fittings that allow you to reach from the faucet to the shutoff valve in case your regular supply tubes are a tad short.

Faucet Spray Attachments

These devils usually have to be installed first. You need to install the holder in the sink top. Use plumber's putty under this coned shaped housing. The putty prevents water from leaking into the sink cabinet. Put the hose down the holder and bring it up into the center faucet hole of the sink. Connect the female nut of the hose to the male port on the faucet body. Use pipe dope or liquid teflon here! Failure to make this connection NOW instead of AFTER the faucet is in will save you a migraine headache.

Set the Faucet

This is really simple if you are installing a new sink. Why? Because I always mount the faucet to the sink before the sink is installed in the top! If you are changing out a faucet, you will be on your back. Most faucets come with a gasket that fits on the bottom of the faucet. Be sure you put it on right side up and facing the right direction. Also be sure the faucet is pointed towards the front of the sink! Look for the name brand on the face of the faucet base as a guide.

Supply Tube Connections to the Faucet

Using the new nuts provided by the manufacturer, attach the supply tubes to the faucet body. These are simple compression fittings. As you tighten the nuts, you will make the connection leak proof. You don't have to be Hercules to get a leak proof joint. One turn past finger tight is often plenty.

Supply Tube Connections to the Valves

This is where most leaks originate. The supply tubes must enter the valve compression port head on - not at an angle. If you are changing out a faucet, you will need to buy a new compression nut and brass ferrule. You will not be able to salvage them from the old supply tubes. If you use plastic supply tubes, they require a special plastic ferrule. Don't try to use a brass one here. I guarantee a leak!

Tighten Compression Nuts With TLC

Tighten the compression nuts on the valves slowly and with care. Make sure the supply tube is not bent as it passes the compression nut on the valve. One turn past finger tight is good enough before you turn on the water.

Remove the Aerator

Before you even think about turning on the water, remove the faucet aerator. Look for a black washer that might be stuck up in the faucet arm. If you forget this, it might be blasted out of the sink when the compressed air in the lines is released.....been there...done that.....

Failure to remove the aerator will usually cause an ugly flow of water, Disturbing old water lines or working with new copper will undoubtedly send grit, flux, etc. out of the pipes once the water is turned back on. It is really tough to clean those little filters in the aerator!

One Valve at a Time

Turn the water on one valve at a time. Turn the valve slowly. If you have to turn the water back on at a remote location, do it ONLY if a helper is at the faucet to warn you of a major malfunction in your work. 5 - 10 gallons of water could be everywhere before you can make it back to turn the water off! Check for leaks and then turn on valve number 2!

Veggie Spray Air Locks

If you have a spray attachment and no leaks, be sure to discharge water through it once you have flushed the faucet lines. The trapped air in this hose can sometimes cause sluggish water flow at the faucet.

Low Flow? Trouble is not in your Pipes

Do you have low flow once the faucet is in? This could be a result of a flow restrictor within the faucet ...... It is a water conservation measure.

Reinstall the Aerator

Once you have flushed the lines for 5 or 10 minutes, you can reinstall the aerator. If this is new construction let the hot water flow for 2 - 3 minutes to help flush out any hardened flux in the lines.

Shut Off Valve Packing Nuts

Once the water is back on, you may have a slow drip in the center of a shut off valve. This often happens because the valve packing was disturbed. You will see a nut that surrounds the valve stem. Turn it clockwise 1/8 turn or less to stop the leak.

No Leaks? Great, But Test for the Slow Ones.....

Small pin hole leaks can take hours to develop and drip. Install paper towels on the floor of the sink base cabinet to act as targets and a handy device to tell if you have a leak. Always look high for a leak. The leak may run down the supply tube and make you feel the connection at the valve is faulty when in fact the leak is where the supply tube meets the faucet. Feel with your hand to locate dampness if necessary.

Related Articles: Brass Kitchen Faucet, Brass Faucet Manufacturers

Column B216