DEAR TIM: Small house plans are the topic of discussion between my husband and I. As we approach retirement, we are going to move from a larger home into a new smaller house for a number of lifestyle and financial reasons. What advice can you offer so we do not make a mistake building a house that is too small? Are there distinct do's and don'ts when it comes to scaling down from a large home to a small one? What can we do to make our small home feel like a large one? Meredith M., Bryan, TX
DEAR MEREDITH: I can certainly see the attraction of moving from a large home to a smaller one. There is less space to clean, heat, cool and redecorate. All of these things can save money when you think about living in a home for a period of years. As I grow older, I do not want my own home to become a black hole that consumes my time and money. Golf courses, ski slopes and other activities will do a fantastic job of consuming both, and yield pleasure in return.
The small house plans you and your husband will settle on are the most important documents in the entire construction process. They will communicate your dreams and desires to the builder, and to all of his subcontractors and suppliers. The plans must be complete and well thought out in every respect. To proceed with half-baked ideas and concepts you hope will work is foolhardy.
Some of the biggest planning mistakes I have seen happened when homeowners looked at blueprints and three-dimensional renderings of a new home that dazzled them. The contracts were then signed and work begun before the people even realized how the new home would relate to their living and entertaining habits.
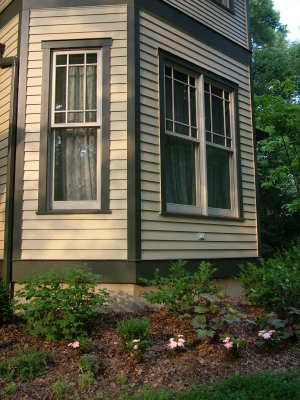
This house is perhaps too small. The narrow rooms might not handle furniture very well. There is no room for mistakes when working with small spaces. PHOTO CREDIT: Tim Carter
The best analogy I can give you is building a deck. People think that a 10-foot by 14-foot deck is large when it is first built and the carpenter is loading up his tools. But the deck shrinks dramatically in size when you try to fit a standard table and chair set as well as a few other items on the deck platform.
As for your list of do's, I would make a list of all furniture you intend to move from your existing home into your new home. Be sure the rooms in the new home are large enough to handle the furniture. Make scale cutouts of the furniture and position them in the scale conceptual drawings you can get from the builder or architect. Don't forget about the space you need to navigate around furniture.
Think long and hard about your entertainment plans for the future. If you plan to have large parties, where will everyone sit? If you invite family over for holiday occasions, think about how the house will handle this brief influx of people. Will your new kitchen be large enough to handle guests chatting while you stir the simmering sauces at the stove?
Do not assume everything will work out. Do not overlook storage. If you are going to bring lots of things with you from the old house, where will they fit in the new home? Storage solutions are many, but keep in mind that off-site storage costs can eat into your future retirement budget. Talk to your builder about using storage trusses over the garage and attic trusses over the main part of the house. These affordable structural elements create vast amounts of storage space for a small initial investment.
Don't forget about future mobility issues. As you and your husband age, stairs, bathtubs and even door knobs can become trouble spots. Plan now for a house that will be easy to use if you or your husband lose both dexterity and mobility. Consider a larger bathroom that allows you to enter a shower in a wheelchair. Hallways need to be a minimum of 42-inches wide and 48 inches is even better. Lever-type door handles are far easier to operate than a knob you must grab.
Column 632