Indoor Greenhouse DIY Photos

Storm Door with beveled glass on greenhouse

Indoor Greenhouse DIY - This is outside looking into the space. That is a Pella Storm Door with beveled glass - tulip pattern to match the greenhouse theme.

Indoor Greenhouse DIY - It's Easy with Pittsburg Corning Provantage System

An indoor greenhouse diy paradise is possible if you use glass block you assemble with plastic spacers and silicone caulk. You can build a sizeable indoor greenhouse in a day.

The most important part is to make sure the first row of glass block is perfectly level in both directions.

Watch this video to see how I built the indoor greenhouse diy oasis you see in the photos on this page.

 outside 45 degree corner.

This is the outside 45 degree corner. You use special 45-degree glass block to create the corner. As long as you have the walls plumb, the corner will be plumb too.

Watch this video to see how to GROUT the glass block once you have them all installed:

custom cut redwood ceiling

I'm standing in the door looking in and up to the ceiling. The grid is made from custom cut redwood. Do you like those cool ceiling panels or what? 


Left interior wall with electric outlets

This is the left interior wall looking through the open storm door. See the electric outlets and thermostat control that activates cooling fan when grow lights raise the temperature too high?

Related Column: Free-Standing Shelves

Roof Flashing Repair – Don’t Use Caulk

roof flashing

Roof Flashing Repair | The brown-red strip is a sill flashing. It has a bend in it and extends up behind the wood siding. The siding and the flashing act just like the shingles below.  All overlap one another just like the shingles on the roof.

DEAR TIM: I have a simple sloped roof over a side porch on my new home Each time it rains, water leaks down the wall of the porch. The vinyl siding above the roof simply touches the shingles and there is some caulk that has pulled apart. Can I stop the leak by adding more caulk? Is there a more permanent solution? Demise L., Beckley, WV

DEAR DENISE: Oh my! In my opinion, caulk is not an acceptable substitute for traditional metal roof flashings. Don't use caulk for roof flashing repair. Certain caulks are highly weather resistant, but they can fail if there is too much movement between the roofing materials and the things that are not roofing such as your vinyl siding.

Does Vinyl Siding Expand and Contract?

Vinyl siding, for instance, has an enormous expansion / contraction coefficient. This simply means that as the temperature of vinyl siding goes up and down during the day and night, it expands and contracts dramatically. This movement can and does break the bond between the siding and the caulk or the caulk and the shingles.

What is a Roof Flashing?

A roof flashing is something that connects roofing materials to something that isn't a roofing material. Here are a few examples of something that a flashing touches:

Do Roofers Make Flashing Mistakes?

The roofer that worked for your builder made an enormous mistake by not installing a simple metal flashing that should have covered over the top of the last course of shingles and then continued up the vertical face of the wall. This metal flashing piece is normally eight inches wide and perhaps ten feet long. Four inches of the metal laps over the shingles and the remaining four inches extends up the wall. If the roof is longer than ten feet where it butts up against the house, two or more pieces of flashing are overlapped and soldered to make one large continuous flashing.


Avoid repairing roof leaks yourself! Find a professional using my Roofing Replacement / Repair Checklist. I offer a 100% Money Back Guarantee.


How Do You Make Flashings?

Virtually all professional roofers own a tool called a metal brake that enables them to quickly create a crisp bend in the metal flashing that matches the angle of the roof where it meets the house. They typically add a second small bend of about ten degrees one-half inch in from the edge of the metal that overlaps the shingles. The addition of this second break or bend takes the waviness out of the metal that often happens when the metal is cut using a traditional metal-cutting scissors or snips.

WATCH THIS VIDEO to see a flashing with a similar kick-out bend:

Can A Metal Brake Be a Cutting Guide?

You can minimize or eliminate waves in the metal when cutting sheet metal such as tin or aluminum if you use the metal brake tool as a cutting guide. When I had access to a brake and had to cut sheet metal, I would insert the piece of metal into the brake tool and push the clamping lever to lock the break's jaws down on the sheet metal. Using a razor knife equipped with a new blade, I would make score the metal along the top jaw of the break. The razor would actually cut partially through the metal and when the brake handle was rotated up and down several times, the metal would separate much as the pop tab on an aluminum drink can breaks when bent back and forth.

roof flashing close up soldered seam

This is a soldered seam between two pieces of the 40 pound tin. You can also clearly see the edge that has been created with the break. This bend in the metal actually keeps the metal very straight.

Where Do You Find Most Roof Leaks?

Ask any professional roofer and they will often tell you that flashings are the source of over 90 percent of roof leaks. Unfortunately, many rookie roofers or ambitious do-it-yourselfers do not fully understand how flashings should be made and how they work.

The flashing that is missing at your home will work because it acts just like the shingles below it. The flashing overlaps the shingles and then extends up the wall of the home. The vinyl siding then overlaps the metal flashing. Each successive piece of vinyl siding overlaps the one below it. This overlapping system of materials does a fantastic job of stopping water.

CLICK or TAP HERE to get FREE quotes from local companies that can install your roof flashings.

What are the Best Flashing Materials?

Great roofers readily understand and see this and they know the correct materials to use. Look at professionally installed flashings and you will rarely see caulk. Solder is the product of choice to permanently seal seams and small holes created while overlapping and bending flashing metal around chimneys, dormers, wall corners, etc. that are routinely encountered when roofing materials touch up against things up that periodically penetrate a roof.

Should Aluminum Flashing Be Used With Brick?

Not all flashing materials can be used universally up on a roof. Aluminum works well in many locations, but should not be used in contact with masonry of any type. The alkaline chemicals in mortar can react with the aluminum and cause corrosion.

What About Tin and Copper Flashing?

Tin used to be available in different weights. 20 and 40 pound tin are the most common. I prefer 40 pound tin as it lasts much longer. However, harsh regulations imposed by the EPA have made it just about impossible to find tin-coated steel. It's a regulation I disagree with and is not based on solid science.

Copper, of course, is the premier flashing material. It can last up to 100 years without failure and is as easy to solder as tin. Galvanized metal and sheet lead can also be used, but they are more difficult to work with.

What About Using Thin Stainless Steel Flashing?

Thin stainless steel is a great flashing material. It's easy to bend and some come with self-adhesive backing for uses on walls and under doors and windows.

York 304 stainless steel flashing

This is a fantastic stainless steel flashing you can mold yourself to fit any brick sill opening. CLICK on THE IMAGE NOW TO ORDER THIS AMAZING NO-RUST PRODUCT. York 304 stainless steel flashing

Read my January 13, 2013 AsktheBuilder Newsletter for a shocking article on using caulk with copper flashing! This was one of the finest home improvement magazines.

Column 529

Architect Cost and Fees – Know What You Want

Custom Built Home under construction

Architect Cost and Fees | This custom home was designed by a top residential architect and is being built by a superb builder. The architect does stop by the job site from time to time to check quality and progress. Photo Credit: Tim Carter

DEAR TIM: My husband and I are going to build a new home on a lot we own. After interviewing several architects, we've discovered that the fee charged for the plans is a function of the amount of service they provide as the house is being built. Is it necessary to have the architect part of the building team if we hire a decent contractor? Why pay a higher fee to the architect if the job goes smoothly? What can we do to ensure the job does go smoothly? Henrietta S., Glenview, IL

DEAR HENRIETTA: Congratulations on this exciting project! You are about to take a trip that has many paths. Some of them lead to the Twilight Zone and others can take you to Fantasy Island. All too often, people end up at the wrong place. There is no doubt a superb architect paired with a fantastic builder will help make your building experience a happy one, but unfortunately, it is not an absolute guarantee.

Mr. Blandings Architect - Great Example

A great example of this dynamic situation where an architect follows the house from conception to completion is in the famous movie Mr. Blandings Builds His Dream Home, starring Cary Grant. The architect was routinely in scenes where Cary Grant and his wife needed help dealing with the builder and his subcontractors. Every week during the process there seemed to be new problems that had to be solved, granted some were slightly sensationalized for the movie, but all were based in reality.

CLICK or TAP HERE to get FREE BIDS from local architects to draw your plans.

Watch some of the scenes below to get an idea of what should and can happen. Great architects can add lots of value to your project.

Use Software to See 3D

The problem with building a new home is that many homeowners do not possess the power of visualization. Problems start to happen on jobsites when the homeowner finally sees things that just appeared as lines on a drawing. Great builders and architects have this mystic power and using it allows them to take a two-dimensional set of blueprints and create a real three-dimensional image of the finished object in their heads. Modern computer software is now available that allows planners to create three dimensional views and actual walk-through views of what both the inside and outside of a home will look like.

What About Change Orders?

Architects can be exceedingly helpful during the building process to assist with any change orders and to act as the tie-breaker in minor or moderate disputes between you and your builder. This is an often overlooked tool in a homeowners toolkit. If you can get the architect to agree to this and then put that language in the contract between you and the builder, you may avoid costly legal disputes at a later date.

Should Architects Do Inspections?

Architects also take pride in their work and want to see that the house is built the way it was drawn. Often the methods and materials they specify exceed building code requirements. Periodic field inspections at critical times allow the architect to verify the builder is doing the job right. You may not have the time nor the expertise to do these inspections yourself. Once again, if you decide to use the architect in this capacity, be sure it is spelled out in the contract between you and the builder. Note that the builder must make any and all corrections at his sole expense as pointed out by the architect.

I would talk with several of the architects and see if you can arrive at a compromise. You pay the base rate for all of the design work, working drawings and anything you need to get bids and a building permit. Then see if the consults and inspections can be ordered ala carte as you might need them.

You Need Schedules and Specifications

If you want your job to go smoothly, you must have superb plans and detailed specifications. It also pays for you to preselect all items that will be used in your home. Do not rely on allowances and then try to pick things as you build. Some fixtures need very long lead times. If you delay deciding, you may severely limit the things you can select from. The preselection process eliminates surprises, and allows you to get bids from contractors that are highly accurate as each bidder knows exactly what they need to install.


How would you like to use my specifications for your new home?
I will gladly share hundreds of my tips and building secrets with you and your builder.
Check out my New House Specifications. 100% Satisfaction Guarantee!


Great Plans Eliminate Confusion

The extra money you pay an architect to go along for the ride can be looked at as an insurance policy. Many of us have house insurance policies that protect us in the event of a fire, storm or natural disaster. We don't want these bad things to happen, but still pay premiums year in and year out. I pray that you also have no problems during your homebuilding experience, but having an architect on call might give you tremendous peace of mind during your journey.

Can You Get Perfect Plans?

Perfect plans and specifications are possible. Years ago, I was awarded a job where the plans were great and the Fortune 500 Company executive homeowner had spent the time to create a binder that had photos, model numbers, finishes, paint chips, carpet samples, etc. of each and everything in the job. At the meeting where we signed the deal, he said, "My work includes many trips and meetings. I doubt I will ever see you during this job. It will be nearly impossible for you to contact me with questions so I have tried to think of all you need to know."

CLICK or TAP HERE to get my Sample Blueprint. It's step one to get perfect plans.

Well, he did a fantastic job, but his wife got involved and changed some of his ceramic tile selections as the job progressed. Had that not happened, I would have successfully completed the project with no interaction after the contract was signed. It's a dream come true for a builder as far as I am concerned as I knew what I had to do and never had to wait on an indecisive homeowner.

How Do We Minimize Cost Overruns?

You can minimize or eliminate cost overruns by having a long meeting with the bidding builders as soon as the plans and specifications are complete. It's important to go over every part of the plans explaining all aspects of the job. Do the same with the specifications. This meeting puts the builder on alert of any special things about your job.

Once the bids come back, have a second similar meeting. The builder must submit a very detailed cost breakdown much like the one I've sold for years. CLICK or TAP HERE to see it.

CLICK or TAP HERE to get FREE BIDS from local architects to draw your plans.

Tim Carter Autobiography

Thank goodness for power miter box saws and long-lasting L.L. Bean flannel shirts!

Thank goodness for power miter box saws and long-lasting L.L. Bean flannel shirts!

The Autobiography of Tim Carter

Life began for me in the early 1950's. I was born and raised in the University Heights (South Clifton) suburb of Cincinnati, Ohio. As I replay the tape of my early childhood, it keeps turning up memories of great places to play. A dense stretch of woods started just up the street behind Joe Conrad's house and passed behind my house extending all the way down to McMicken Street. Within these woods one could find a wonderful creek and both the short and long trails that wound through the dense woods down to Central Parkway and the abandoned subway tunnels.

Across the street from my home, directly behind the Little Sisters of the Poor, there was another wooded ravine where the mysterious swamp could be found. The ravaged and charred remains of my Texaco tanker ship are still there. It exploded and sunk in the fabled swamp when an M-80 ignited; by a time-delay cigarette fuse blew it to kingdom come.

In the early 1960's, the ravine was filled in with thousands of truck loads of dirt to create a new connector roadway between Dixmyth and Clifton Avenues. That connector road is now part of Martin Luther King Drive.

It didn't take long for my buddies Roger Boncutter, Pekka and Charles Mooar, Mike Wilson, Billy Gottesman and several others to discover that a few scrap pieces of wood and some rocks piled up on one of these mounds of dirt made a great fort to protect you from incoming mudballs. Many a day my friends and I would play war among the piles of dirt. It was great fun, that is, until you got hit in the head with one of those hard mudballs!

Life Scout and Ad Altare Dei

I was really active in Boy Scouts. I didn't make it to Eagle Scout (I needed just 6 merit badges), because I could not swim. Two of the required merit badges were Swimming and Lifesaving. I had about as much chance of getting those merit badges as growing wings from my ears. However, two of the merit badges I did receive were Home Repairs and Journalism. Now isn't that a coincidence? I made it to the rank of Life scout, and got my religious Ad Altare Dei medal.

Not only that, my first job ever was collecting paper-route money for The Cincinnati Enquirer. I was eight years old. Two years later, I had my own afternoon paper route delivering The Cincinnati Post & Times Star. It was a one-hundred-paper route, and I made one penny per paper. That was huge money back then, as each week I got paid six dollars! To put that into perspective, some of my friends got 50 cents allowance each week while others got maybe a quarter.

High School and the Clumsy Years

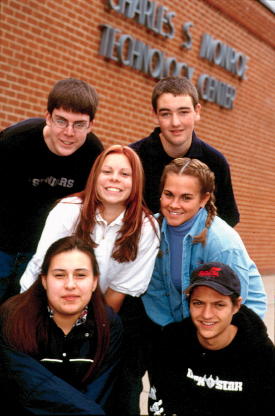
High school was a really fun time. I got to date lots of great girls - as none of us were really yet adults. Let's see there was Carol Voss, Mary Chris Funch, Cindy Conrad, Patty Gorman and several others. I also didn't pay attention in Latin class, so I had to go to summer school. That is where I met Mary Gene Helmick.

I went to Roger Bacon High School. Many days after school I worked at Skyline Chili. During my senior year in high school, I was the editor of my school's newspaper, The Baconian. Although I couldn't hear them, the cosmic tumblers were starting to interlock as I had my own opinion column in each issue. I used this column to poke fun at the administration, classmates, and other schools.

Go for Throttle Up

Kathy, my lovely and patient wife, also waltzed into my life during my high school years. The University of Cincinnati felt sorry for me or else they were shy of their enrollment quota. In any event, that's where I got my Bachelor of Science degree. My major was Geology.

My brain finally got jump-started in college. I wasted lots of brain juice in high school just messing around. But once in college, I really took things seriously.

What a difference it makes when you study and turn assignments in on time. Because I knuckled down and got an overall average of 3.46 or something like that, I was offered a full scholarship and an assistantship for a Master's Degree in Engineering Geology. Believe it or not, I turned this opportunity down. I wanted to go into business for myself.

It's Time To Build

Three months after graduating from college, Kathy and I got married. She worked as a clerk at a hospital. I went to work fixing up old houses. Small jobs led to bigger and bigger jobs. Before our first wedding anniversary, we bought our first house. It was in really bad shape. I fixed it up and turned a profit.

Back then we didn't call it flipping, but that is what I had done - I had flipped a house. In fact, the term used in the 1970's was rehabbing. This delightful house was purchased for $8,500.00. I spent $8,000.00 in materials and for some labor to fix it up. It took only five months.

Kathy and I moved into the home, but started to look for another rehabbing opportunity. After one year, we decided to buy a larger home that needed work. Back when I purchased the first home, I had estimated the house might sell for $21,000.00. I goofed up. It sold for $35,000.00 just 14 months after buying it. That enormous profit was enough to tell me that construction and real estate were the places to be. The construction bug had bitten me, and quite hard I might add.

I rehabbed more houses, did contract work for other homeowners, and eventually began to build custom homes. The new houses were always fun. It seemed like a picnic, as I could actually work on top of a foundation that was level and square! The remodeling jobs grew more complex. By the mid-1980's, I was constructing ultra-custom $250,000 room additions and $75,000 kitchen remodels.

Every aspect of residential construction interested me. I read technical journals about how to do everything. Then I tried to do the things myself. Soon I figured out that you can't do every task at the jobsite. You had to invest too much money in equipment that was seldom used, and you couldn't multi-task.

Once a job is under roof, several trades can work simultaneously. I gravitated towards carpentry, plumbing, ceramic tile and concrete. Over the years, I became a master carpenter, a licensed master plumber and a master roof cutter. There is nothing quite like the feeling of completing a complex common framed roof or installing three floors of cast-iron plumbing stacks.

I also became a licensed real estate salesperson in 1975. Ten years later, I had fulfilled the requirements to sit for the broker's exam. I have been a licensed real estate broker in Ohio since 1986.

The New Media Career

In 1993, I was selected as one of the top 50 remodelers in the United States by Remodeling magazine. They publish an excellent trade magazine. This award enabled me to begin a new media career. Kathy suggested that I take my book idea and turn it into a syndicated newspaper column.

I had always wanted to write a book about how the average homeowner gets taken by builders and remodelers, primarily because many workers simply do not do things the right way. She was right! It worked. AsktheBuilder was born on October 2, 1993, and continues to be sold to new newspapers each month.

In March of 1994, I started my radio broadcasting career. I ended this career in the spring of 2006, because I determined I could better spend my time creating more content on AsktheBuilder.com. I also do 90 second television segments that are very popular at YouTube Video. Just click that link and once there, type " Tim Carter" into the search box. I think you will really enjoy what you see.

Sigh.... Not All Information Out There is Accurate

Each year I attend many trade shows and editors conferences so I can report on the latest products and building systems. At these events, I have had the pleasure and good fortune to meet many other media personalities.

What I have learned after talking with some of these people is that very few of them have an extensive background in residential building and remodeling. Be sure to keep that in mind when you read other columns in newspapers magazines or on the Internet.

Also, be careful about the advice you might hear on certain radio shows. As much as I hate to say it, some of the hosts of these shows have no extensive hands-on experience building or remodeling homes. Sure, they may have done a project around their own home, but that does not qualify. The real world of building and remodeling happens when you must satisfy both the building inspectors AND discriminating customers.

Be really vigilant when you watch the bubbly personalities on cable television shows where the advice often seems a little too good to be true. What you see on television is not always what really happened at the jobsite. It is amazing what can be hidden by a wide camera shot, or how an editor can cast a magical spell over the tape during post production editing. I know this as I have seen them do it.

Here at AsktheBuilder.com, I try to tell you the simple facts. Some jobs are easy, but others may be very difficult. Because I have decades of hands-on experience in every aspect of residential construction, I can tell you the truth about the complexity of different tasks.

Why tell you a project is easy, when in fact it is hard and you need $1,200.00 or more worth of tools to do the job right? Some other media personalities, I feel, can be a little misleading. I try to tell you the cold hard facts. One of my mottos is:

A Swig of Reality Juice Can be Bitter,
But It Makes the Job Go Better.

I am proud to say I worked for nearly twenty years, often six days a week, in the field with a tool belt on. I didn't ride around in a truck and call subcontractors on my bag phone. What? You don't know what a bag phone is? They were one of the first cellular phones!

Well, that's the scoop. Hey, are you still awake? If so, I hope you enjoy this and future visits to the AsktheBuilder.com. If you have a question be sure to first use the navigation key words on the left of each page on this website. You can also use the Search Engine in the upper left corner of each page. If you still need help, just click the handy link just below.

Thanks for stopping by AsktheBuilder.com!


Learn more about Tim by visiting his Google Profile.

Matching Brick Color – You’ve Got Choices

matching brick

Matching Brick Color | Are you sure you know where the new brick meets the old? The color match from the roadway and even this close is almost as good as it gets. This is an Ask the Builder job I'm very proud of. Go find this house on the south side of Grand Vista Avenue in Cincinnati, Ohio.

DEAR TIM: I am getting ready to build an addition and need to match the brick on my home. The house is only 12 years old and the original brick had a sand finish. We are told the brick is no longer available. How is that possible? What can I do to get brick to match? Nathan H., Lindo, UT

DEAR NATHAN: I realize this doesn't help, but you are by no means alone. I suspect hundreds of people per week across the nation face the same problem you do. In some cases, a person is looking for a solitary brick to make a repair. In other cases, a person may want to fill in an opening. Accidents happen and brick walls need to be repaired or replaced. In some cases, the homeowner lucks out and finds a brick that is a perfect match or one that is so close that from a short distance you can't see a discernible difference.

How are Bricks Made?

A brick type and style can become unavailable for any number of reasons. First and foremost, the brick is made from clay. The clay deposit in the ground can become depleted and or the characteristics of the clay actually change as the mining pit is extended. The changes in the clay can be very subtle and almost impossible to detect over a period of days or weeks, but when you compare one brick to another made 12 or even 20 years later, the difference can be astonishing.

Your problem could be as simple as the brick company going out of business or the brick itself going out of style. Brick styles change over time like cars, clothes, cabinets, and other consumer goods. For example, 80 years ago a popular brick style was one that was hard-fired and had a distinctive satin glaze. The brick also had a salt and pepper appearance with smaller random dark spots on the surface of the brick. Visit many east coast cities and you can see hundreds of these brick homes in older neighborhoods.

How Do You Locate Matching Brick?

You may have to expand your search for the brick to neighboring states. It is possible the brick is still made but is now called by another name. The original brick manufacturer may have been bought by a larger company and your brick is now sold under a different name by a different distributor.

Take excellent color photographs of the brick using a very good camera so that you capture the true color of your brick. Don't hesitate to mail these photographs to brick distributors in hopes that you might find your brick still in existence.


Avoid mismatching mortar! Find a good contractor and learn the secrets to repairing masonry with my Masonry Repair (Chimneys, Stucco & Brickwork) Checklist. I offer a 100% Money Back Guarantee.


matching brick color

Here's a huge mistake. They matched texture perfectly but the newer brick on the right has too much orange in it.

Should I Match Color or Texture First?

If you discover your brick is not made anymore, then the first thing you must do is strive for a color match. Do not let a brick salesperson talk you out of this strategy. Try to find brick that is very close, if not identical, in color. When trying to match brick, many people strive to match texture first, then color.

You can see texture difference when you stand close to a brick surface, but rarely can you see differences when you stand back 50 or 100 feet. Most people will view your addition from a distance. But color mis-matches stand out from any distance. If the color difference is significant and the texture match is perfect, the result will be glaring.

Can Brick Be Stained?

The last resort may be brick staining. Any number of companies make high-quality stains that may allow you to achieve a perfect or nearly perfect color match if you start with the correct texture.

You probably can buy a handful or two of brick from a distributor and use these to test the staining system. Be sure to stand back 10 or even 20 feet to look at the finished stained brick as they are held up against your existing home. Your eyes can sometimes play tricks on you when you look at the brick up close.

CLICK or TAP HERE to get FREE quotes from local companies that can repair your brick.

What About Matching Mortar?

Don't forget about matching mortar at the same time. Pay close attention to the color and size of the sand particles in your existing mortar. Not all sand is the same. You must use new sand that matches the existing sand as closely as possible.

CLICK or TAP HERE to discover the best way to match mortar color.

How Can I Age New Mortar?

Once the new addition is built, you will probably have to age the new mortar to match the old mortar. You can do this with any number of brick-cleaning chemicals that will wash off the cement and lime paste that covers the sand particles.

Be sure to use an approved cleaner for the brick you buy. Do not automatically think that muriatic acid will safely clean your brick. It can harm some brick and may ruin your freshly stained brick if you have to go that route.

Author's Note:

Here's a comment from Don Foster, a top brick-staining expert:

"Tim, great article. If looking for a great match and staining is involved have them then match size and texture then get as close as they can in color and a stain can do the rest. Make sure it is a Proven Masonry Stain and not a paint-like stain. A Proven Masonry Stain is Transparent/Translucent like in nature and does not create a layer that would crack, peel, blister, or flake and allows the brick to breathe naturally, meaning does not trap moisture. In fact, a stained brick will get wet just like the unstained brick right next to it. A Proven Masonry Stain will not change a Maintenance Free brick to a Maintenance one. I do not know of another product that can say that. Keep up the great work you do, it is appreciated."

Don "Brickman" Foster CLICK or TAP HERE to discover more about what Don's talking about.

Level Sand and Gravel – Use a Transit or Laser Level

builders level

Level Sand and Gravel | This is my builders level and it has served me very well for nearly 30 years. It's highly accurate if you take the few moments and set it up properly. The fiberglass grade pole is leaning against the tripod and extends out to 14.5 feet. It is easy to operate both with just a ten-minute training session.

DEAR TIM: I am in the process of installing a brick patio around a pool. The brick needs to be placed on compacted gravel upon which I then place a two-inch-thick layer of sand. The sand must be smooth and even so the finish bricks look right. How in the world do I establish the proper heights for all of these materials? I need help picking the right tools and the right methods. Jose N., New Brunswick, NJ

DEAR JOSE: Oh gosh, I wish I could just come over and help do this. In the time I spend trying to explain it, I think you and I could have two or three jobs finished. Once you see how easy it can be, you'll be amazed. The methods work for just about any finished surface whether there is a pool nearby or not.

Optical or Laser Level  - Which One?

An optical level is one you look through like you would a telescope. You see a crosshairs much like you see markings looking through a submarine periscope. You need two people to operate an optical level. The second person holds the grade pole. See below for what a grade pole is.

A laser level shoots out a laser light in the same plane. A sensor device on a grade pole emits a sound when the grade pole is at the right height. You can operate a laser level with one person. Watch this short video about how a laser level works:

What is a Good Laser Level?

Look at this one. I have one just like it. You'll need all you see in the photo to work alone. CLICK or TAP HERE to order one.

outdoor laser level

This is a fantastic kit for an outdoor laser level. You get all you need to work alone. CLICK on THE IMAGE to order one.

What is Finished Grade Height?

The first thing one must do is to establish the final finished surface height. In your case, you have this grade elevation. It is the finished edge or lip around the swimming pool. In the case of a regular patio or sidewalk, you might determine the finished surface by the surrounding ground or the relationship between the surface and nearby steps, decks or driveways.

Should the Finished Surface Slope for Drainage?

Yes, in almost all cases the finished surface should slope to drain water to the edges. A gentle slope of 1/8-inch per foot to many looks level to the naked eye.

The next thing you have to consider is any slope you want in the finished surface. Slope is good, as it allows rainwater and snow melt to run off the surface. I would think you would want water from the surface to absolutely drain away from your pool. Who wants debris-filled storm water running into the fresh, clean pool water? A gradual slope of one-eighth inch of drop per every two feet of run should be enough slope in most instances.

Where Should Grade Stakes Be Placed?

I prefer to establish grade stakes driven into the ground for reference points. The tops of these stakes represent the different heights you need to hit. For example, you need three different grade stake elevations: one for the height of the compacted gravel, one for the uncompacted sand and the final one for the finish brick at various points around the pool.

How Close Should Grade Stakes be Placed?

These stakes need to be placed perhaps eight feet on center, so that you can set a very straight piece of wood or perfectly straight metal straightedge on top of the stakes. If there is a gap under the wood or straightedge, this tells you that more material needs to be added. If too much material is placed, then the straightedge will not rest upon the tops of the stakes.

How Do You Know When You Have Enough Fill?

When you have the perfect amount of material in place, with respect to the given stakes, the surface will be perfectly smooth. You and a helper can check by rotating the straightedge, on top of any of the stakes, just as the hands of a watch or clock rotate around the dial. The network of stakes allows you to move the straightedge to different stakes to check that all points are in the same plane.

bottom of the grade pole

The bottom of the grade pole is resting on the top of a piece of rebar. The top of the rebar can represent any height that you determine. Once at the right height, you place the straightedge on top of it and any other grade stake at the same height.

Establishing the proper height of the stakes can be a challenge. I have used by trusty builders level or transit for years to do accomplish this goal. My level looks similar to the expensive transits that surveyors use, but all my instrument does is establish a level sight line as you look through it.

What is a Grade Pole?

A grade pole is a straight rod that has accurate measurements printed on it. By using a graduated grade pole on top of each stake, I can tell if the stake is level or in the same plane as all of the rest. My grade pole is simply a long vertical ruler that is marked in increments of one-quarter inch. The person looking through the builders level focuses on the grade pole markings to determine how high or low the top of a stake might be.

How Does a Grade Pole Work?

For example, once my instrument is set and level, I look through it. If the grade pole is resting on top of the pool edge and reads 4 feet 1 inch, then I need to make sure the top of the stake representing the finished brick produces a reading greater than 4 feet 1 inch. This greater amount is a function of the amount of slope I am trying to create at any given location. So if I am say 6 feet away from the pool edge, the reading looking through the transit might be 4 feet 1 and three eighths inch. Since the instrument is projecting a straight line as you look through it, any reading that gets bigger means the bottom of the grade pole is dropping.

You can often rent builders levels or laser leveling equipment at tool rental shops. The store manager should be able to give you a quick tutorial, just after you hand over your deposit. You will be amazed at how well these tools work, so long as you get them level before you use them.

Are All Grade Stakes at the Same Elevation?

No, in many cases the grade stakes are not at the same elevation. If you want a concrete slab or some other surface to be perfectly level, then the grade stakes should be at the same elevation.

Keep in mind, that not all grade stakes will always be at the same elevation. If the pool patio is not a consistent width around the pool, the grade stakes farther from the pool edge will be lower and lower as you continue to create fall as you move away from the pool edge.

It is always best to make a written plan of the grade stakes and confirm the mathematics. You can also string lines if the stakes are in line with one another. The string will prove if one stake is higher than an adjacent one. Of course the builders levels will do the same as long as you keep track of the different stake heights. See why I wanted to come over to help?

Jackie wrote about leveling her driveway. Read her story in the August 18, 2009 AsktheBuilder Newsletter.

Advertising Rates and Programs

Advertising on AsktheBuilder.com works because people who surf the Internet do so for two primary reasons:

Pleasure and Problems

The 40,000 +/- people who come to AsktheBuilder.com each day have problems that need solutions. They are often in pain and need immediate relief. Here are a few simple problems:

  • a leaking roof
  • water pouring into a basement
  • which flooring product is best
  • what contractor to use
  • what tool to buy

Ads on AsktheBuilder.com offer solutions. Order an ad now so you can help people.


Quick AsktheBuilder.com Advertising Facts:

  • Cost - Invest as little as $3.00 per day
  • Demographics - 95% of visitors are homeowners, 65% of which are women
  • Impressive Click-Through Rates - some ads get as high as 12% CTR
  • Traffic - 20,000 - 30,000 Unique Visitors per Day
  • Real-Time Tracking - View your ad campaign success in real time 24:7:365.


Ads at AsktheBuilder.com are Contextual Ads. Your ad is placed adjacent to relevant content that matches your product or service. The ads that get the most traffic appear at the top of the AsktheBuilder.com category pages. Your ad can also appear in a specific column that might reference your product or service. You can place as many ads throughout the AsktheBuilder.com website as you like.

There is absolutely no quid pro quo advertorial at AsktheBuilder.com. No favorable articles will be written about products simply because you decide to buy advertising space. All articles on AsktheBuilder.com are factual and written from Tim Carter's personal experience or research done about the topic.

Here is what our most popular ads look like:


Types of Ads:

There are four different ad types at AsktheBuilder.com. These ads are able to appear on all pages in addition to Google AdSense ads. The current AsktheBuilder.com ad products are:

  • Simple Text Ad
  • Graphic Text Ad
  • Category Banner Ad
  • Large Photo Ad next to Videos

Simple Text Ad:

You can see three simple text ads in the above image. The Engineered Wood Association, LP Building Products and Saver Systems ads are Simple Text ads.

Each simple text ad has 25 words or less of descriptive text. There are two distinct links back to your website within the text ad - the company name and the small text URL at the end of the ad.

These Simple Text Ads are sold for a period of one year and they offer Unlimited Impressions and Unlimited Clicks.

Simple Text Ad Prices:

1 Text Ad = $1,000*
2 Text Ads= $1,300*
3 Text Ads= $1,550*
4 Text Ads = $1,750*
5 Text Ads = $1,950*

All prices are NET to AsktheBuilder.com, in case you are an Ad Agency.

Ready to order this ad? Contact Ad Sales now!

* The position of any particular ad in each ad block is determined just like the ads on the right side of any page of Google search results. Those advertisers who want to be at the top of the ad block do so by investing more for that valuable advertising real estate.

When the ad blocks are small with just a few advertisers, visibility is good for all advertisers. You can get great placement for the minimum stated ad-rate price above. But as more ads are sold, the ad block grows longer. Those ads sold for the minimum stated price get pushed to the bottom of the stack.

If you want top billing in any ad block or category, you simply have to make a slightly larger investment than the current top advertiser.


Graphic Text Ad:

You can see three simple Graphic Text Ads in the above image. The York, Moen and Wasauna ads are Graphic Text ads.

Each Graphic Text ad has a 30-pixel-high by 100-pixel-wide graphic and 25 words or less of descriptive text. There are three distinct links back to your website within the Graphic Text ad - the graphic image, company name and the small text URL at the end of the ad.

These Graphic Text Ads are sold for a period of one year and they offer Unlimited Impressions and Unlimited Clicks.

Graphic Text Ad Prices:

1 Graphic Ad = $1,500*
2 Graphic Ads = $1,950*
3 Graphic Ads = $2,325*
4 Graphic Ads = $2,625*
5 Graphic Ads = $2,925*

All prices are NET to AsktheBuilder.com, in case you are an Ad Agency.

Ready to order this ad? Contact Ad Sales now!

* The position of any particular ad in each ad block is determined just like the ads on the right side of any page of Google search results. Those advertisers who want to be at the top of the ad block do so by investing more for that valuable advertising real estate.

When the ad blocks are small with just a few advertisers, visibility is good for all advertisers. You can get great placement for the minimum stated ad-rate price above. But as more ads are sold, the ad block grows longer. Those ads sold for the minimum stated price get pushed to the bottom of the stack.

If you want top billing in any ad block or category, you simply have to make a slightly larger investment than the current top advertiser.


Category Banner Ad:

A Category Banner Ad is a traditional graphic ad that sits at the very top of any category page just under the AsktheBuilder masthead graphic. The banner ads are 625 pixels wide by 90 pixels high. Your graphic team can develop any banner using real product photos, several photos stitched together or any graphic image that communicates your message. You are permitted to place words of text within the image that create a call to action. The graphic must be in .jpg or .gif format. Here is an example of a simplistic Category Banner Ad.

The graphic ad alone is a link to your website or sales page. Only one Category Banner Ad is sold on top of each category.

The Category Banner Ads are sold on a CPM (Cost per Thousand Impressions) basis. The cost is $50 per CPM with a $1,000 retainer paid in advance.

All prices are NET to AsktheBuilder.com, in case you are an Ad Agency.

Ready to order this ad? Contact Ad Sales now!


Large Photo Ad next to Videos:

If you want a large photo ad next to our popular videos, we have that ad product available. Note the large photo to the left of the video on this page.

These Large Photo Ads are sold for a period of one year and they offer Unlimited Impressions and Unlimited Clicks.

1 Large Photo Ad = $1,875
2 Large Photo Ads = $2,275
3 Large Photo Ads = $2,675
4 Large Photo Ads = $2,975
5 Large Photo Ads = $3,375

All prices are NET to AsktheBuilder.com, in case you are an Ad Agency.

Ready to order this ad? Contact Ad Sales now!


Customer Reviews:

"Wow! The ad is currently showing a click through of about 20%. ....26 click throughs to my sales page is a lot of traffic for the very first day, especially since these are highly-targeted prospects. You get a lot of traffic. Impressive!"

Daid Petersen, Owner
Wasauna.com


"The American Plywood Association (APA) has been on board with AsktheBuilder.com for seven fruitful years. The partnership has proven valuable not only in driving traffic to our website, but also through increased exposure in Tim's other media avenues such as radio and newsletters. We have measurable results in hand."

Kevin Hayes - Ad and Publicity Manager
APA - The Engineered wood Association

Do you have any Questions? Contact Ad Sales now!

Geology Homeschool Tips – Lots of Links

Geology Homeschool Tips - From a Real Geologist

My college degree from the University of Cincinnati was in geology. I loved everything about it. Here's a colorful geology map of eastern Cincinnati, Ohio.

geology topo map

Each color on the map represents a different rock formation.

Why is Geology Important to a Homeowner?

Your house is built on soil or directly on rock. You need to be aware of flooding - rivers are a part of geology.

You need to be aware of groundwater. Groundwater floods basements and crawlspace.

CLICK or TAP HERE to discover how to STOP basement or crawlspace flooding.

Those are just a few of the reasons you need to be cognizant of the geology of your area.

What are Soil Maps?

Soil maps show the exact soil under your home. They list all the characteristics and you can get them for free.

CLICK or TAP HERE for more information about soil maps.

Does Geology Provide the Truth About Climate Change?

You bet it does! When you immerse yourself in geology, you discover in the first few days the concept of Deep Time. Deep Time allows you to look at geologic events across the vast expanse of time, not just the past 100 or 200 years, silly!

CLICK or TAP HERE to discover the TRUTH about climate change. Clue: The climate is constantly changing. Mother Nature is a patient woman unlike many others I know that are antsy!

Here's a fascinating geologic map showing the glacial moraines in Ohio that were created by the last huge continental glacier:

glacial geology map of the state of Ohio

This is the glacial geology map of the state of Ohio. It shows the different geologic evidence of the massive continental glaciers. Copyright 2018 State of Ohio

Ms. Anna E. Watson and Dr. John Kiefer, geologists who work with the Kentucky Geological Survey, appeared on my radio show on July 24, 2004. Ms. Watson compiled the following list of helpful websites:

Landslide Information

A Karst Topography .pdf file

Institute for Business and Home Safety Building Codes

U S Geological Survey FAQs

Earthquake Hazards Maps and Information

Kentucky Geological Survey

Ohio Geological Survey

Indiana Geological Survey

Master List of Links to all US State Geological Surveys

Geologic Road Maps from AAPG

Here are some cool photos courtesy of Dr. Kiefer:

The I- beams are being used to stabilize the church.

The I- beams are being used to stabilize the church.

The following three photos show a foundation sliding out from under a house. The hillside gave way and gravity ruled the day.

This house made it...to the bottom of the hill!

This house made it...to the bottom of the hill!

Water in a sinkhole, not a flood.

Water in a sinkhole, not a flood.

Look at the landslide crack.

Look at the landslide crack.


Ouch! Watch the Kope and Lower Fairview formations!

Ouch! Watch the Kope and Lower Fairview formations! This small house is being destroyed by the slippery clay soil produced when the Kope and Fairview shale turns into soil then gets wet.

KDOT's worst nightmare.

KDOT's worst nightmare. This is a giant sinkhole opening up under a roadway.

Watch for falling rock, no try monster rock!

Watch for falling rock, no try monster rock! Rocks tumbling from hillsides are real. Watch these videos:


Outdoor Kitchen Countertops

outdoor countertops

Outdoor Kitchen Countertops | All of these materials will last outdoors. The smaller pieces of material are sitting on my granite bar top. The largest of the small pieces is a piece of solid surface material. The beige square is ceramic tile. The black and red pieces are solid slate.

DEAR TIM: I need a recommendation for the finished surface of a small 42-inch-long and 20-inch-deep exterior potting bench and a somewhat larger outdoor kitchen top. I am on a limited budget and need a surface that is smooth and is more decorative than wood. My daughter would prefer pink if possible. The winters here can be bitterly cold so I want these tops to be maintenance-free if possible. John C., Hartland, WI

DEAR JOHN: You can possibly get what you want and still be within budget with at least one of the tops. The potting bench top might be resting in the boneyard scrap pile of a local solid-surface countertop fabricator. I've seen more than one pinkish-cast solid plastic countertop material that would be an ideal outdoor countertop surface. The craftspeople that make solid-surface countertops frequently end up with a variety of leftover scraps they sometimes sell for a song.

What Are the Best Outdoor Kitchen Countertops?

Actually, you have quite a few options for both of the tops. Ceramic tile, granite, marble, slate, and a few other natural stones will produce the durable surface you need, but the color and cost may burst your budget.

Pink ceramic tile will be your best bet with respect to cost and durability, but it is going to take a little work to construct a stable surface on which to install the tile. There are gorgeous pink granites and if your daughter can compromise to a deeper shade of red, slate may be the perfect material.

CLICK or TAP HERE to get FREE BIDS from local countertop contractors.

Is Concrete a Viable Choice?

Depending upon how handy you are, you can get exactly what you and your daughter want, but the tops will be made from a material you may not have even considered: concrete. You can add permanent pink powdered pigments to Portland cement, get pinkish sand, and even small pink stones for the aggregate to make the concrete. I'll wager that with a little experimentation, you will produce stunning pink countertops that will withstand countless Wisconsin winters.

Do Color Tests

Experimentation is necessary to determine the final color of the cured concrete, once it has dried for 30 to 60 days. The concrete will almost always look several shades lighter once dry than when it was first mixed. The degree of final smoothness of the finish will also affect the color.

Smooth countertops are easier to maintain and believe me, it takes some practice to learn how to wield a steel trowel like a pro. Fortunately, the cost of the raw materials to make the concrete should be minimal and if your experiments produce just one cubic foot of mixture each time, you will waste very little money.

Is Natural Stone the Way to Go?

Yes, natural stone is the best way to go. You already know that natural stone by its very nature can resist damage from ice and snow.

If you decide to use a natural stone material or ceramic tile, you need to make a base for these materials to rest upon. Indoor tops differ from outdoor tops because builders know they will stay dry. But your tops are sure to get wet and water will eventually seep under all of the countertop materials. This water and changes in humidity and temperatures can cause untreated wood to rot, swell, twist, expand and contract. This deterioration will lead to delamination of or cracks in the finished surface materials.

CLICK or TAP HERE to get FREE quotes from local companies that can build your outdoor kitchen.

What is the Best Wood to Use for a Base?

I would consider using treated plywood as the foundation for ceramic tile and natural stone tops. Chemically treated plywood will not rot if it comes into contact with liquid water. If you can't get treated plywood, buy special powdered chemicals that contain borates.

borate wood preservative

CLICK or TAP HERE to order this great BORATE wood preservative.

Dissolve these into water as directed and saturate the regular plywood with the solution. Once dry, the wood will have superb resistance against rot and decay.

What Else Can I Do to Prevent Rot?

It sounds crazy, but I would cover the wood with 15-pound felt paper and let it drape over the edges. Fold the felt paper under the plywood 6 inches on each edge and secure it with staples. I would then screw one-half inch-thick cement board to the treated plywood. The natural stone or ceramic tile will then be permanently bonded to the cement board with Portland cement-based thinset.

What Size Tile Should I Consider?

Keep in mind that the ceramic tile or natural stone products that are somewhat affordable are often found in uniform sizes such as 6 x 6 inches or even 12-inch squares. The spaces between the pieces are filled with sanded Portland cement grout that may or may not be epoxy-fortified. Regular sanded grout will work fine so long as you do not use too much water when you mix the grout and when you finish the joints. The water will dilute the cement in the grout and it will rapidly deteriorate.

Is Water the Real Enemy?

Water is indeed the fiercest opponent that outdoor countertops face, especially in cold climates. The water can freeze and blast apart the countertop. The most common damage is delamination of the finished materials from the concrete base.

How Do You Work With Thinset?

Pay attention to the directions on the thinset. Mix only as much thinset as can be used in 20 minutes. The cement board and finished countertop materials must be dust free. If you can slightly dampen them with water just before applying the thinset, you will greatly enhance the bond between the cement board and the finished materials. Once you spread the thinset onto the cement board, cover it with a piece of finished top material within three minutes if possible. If at all possible, erect a temporary shade shelter to avoid working in the sun.

Vocational Education a New Priority

These young adults will probably end up being true leaders in their fields. Never underestimate the power of desire. They *want* to be the best. That is why they have chosen a vocational education track. PHOTO CREDIT: SkillsUSA

Vocational Education | These young adults will probably end up being true leaders in their fields. Never underestimate the power of desire. They *want* to be the best. That is why they have chosen a vocational education track. PHOTO CREDIT: SkillsUSA

DEAR TIM: I was a teacher for 35 years and wonder why more residential construction workers are not formally educated. It seems we are failing our children by fostering a throw-away society. There is dignity in labor. It seems the houses I see built today are of lower and lower quality all of the time. What can be done, if anything, to energize vocational education? Therese A. New Hyde Park, NY

DEAR THERESE: You have hit upon a subject near and dear to my heart. I couldn't agree with you more about the declining level of quality in residential construction. There is a constant erosion of the quality standard in all aspects of residential construction. The terrifying thing is that for a long time the degradation of standard was slow, but for several reasons the rate seems to be accelerating.

Several years ago, I was very fortunate to become associated with vocational schools on a local basis in my own city and then on a national basis as a member of the national technical committee for an annual competition that picked the best 4-person teams of students who worked together to build a project. It was so refreshing to be surrounded by young people who wanted to learn, who wanted to build things the right way and who had an unquenchable thirst for the latest products, tools and construction techniques employed in the residential construction industry.

I agree with you 100 percent about dignity in labor. For the twenty-plus years I worked each day in the field, I was proud to be a master carpenter, licensed master plumber and a master roof cutter. I tried to constantly work smarter, not harder and took enormous pride in a job well done. Customers of mine knew they were getting work that in many instances would last a lifetime. More importantly, I discovered there are consumers who recognize high quality and they are willing to pay a premium for this type of work. But all too often, many workers out there don't seem to care, or they are motivated to cut corners so they can make more money.

I am by no means an expert in knowing exactly how to reverse the trend of lower quality and promote the awareness of vocational education. But I do know a couple of places we can start. We can begin by mimicking our neighbors in European countries. Students in Europe who decide on a job track that is not white collar are treated with as much respect as those people who decide to be managers and thinkers instead of one who works with their hands. It makes sense because all of those people who work in offices and other places need a roof over their head, a toilet that works and plenty of reliable power for all of the computers and printers they use during the course of a workday. What's more, these same people need all of these things and more when they go home at the end of the work day.

I firmly believe grade school educators in the USA can try on a regular basis to focus on the importance and need for all workers who build things for all of us. We need all sorts of people in this world to do all sorts of things. Any top-paid corporate chief executive officer who thinks for a moment he or she can run the company without skilled labor, better think again. Perhaps he or she should stay late one night at the office to see who cleans up, who changes light bulbs, who installs new faucets in the company facilities and who is responsible for making elevators go up and down.

Product manufacturers, in my opinion, need to step up to the chalkboard as well. It is crucial that their products be installed correctly. This happens when there is a well motivated and well educated work force. Some companies understand this and support vocational education, but there is room for hundreds - no thousands - of more companies.

Building product manufacturers can fund grants, make large donations, help build new schools and support those schools that are already producing our future craftspeople. These same manufacturers can also work with any number of unions in different parts of the nation that have apprenticeship programs that help introduce young people into the many different crafts in the building trades.

Anyone who wishes to help advance vocational education can start by looking for vocational schools within their own state. These centers for intense learning exist in all 50 states and many of the schools are affiliated with a fantastic non-profit organization called SkillsUSA. I had the good fortune to work with people from this organization for four years.

SkillsUSA defines its mission as helping its members become world-class workers and responsible American citizens. They do this by helping guide local vocational schools with respect to what should be taught so that today's workers are prepared for tomorrow. SkillsUSA fosters inclusion among manufacturers and welcomes all who wish to help make Americas workers some of the best on the planet.