Tile Setting on Cold Surfaces

DEAR TIM: I want to install ceramic tile on a concrete floor under a free-standing fireplace and on the drywall behind the fireplace. I live in a colder climate and the floor is very cold to the touch. Can I successfully install the floor and wall tiles if the surfaces are cold to the touch? If so, how? I have fears of the tiles popping loose and falling down one-by-one over time. Rhonda S., Manitowoc WI

DEAR RHONDA: To set your mind at ease right away, you can easily and successfully adhere the tiles to the floor and wall surfaces if they are above 45 F. Concrete and wall surfaces can often feel very cold but believe it or not, the actual surface temperature is well above 45 F. There are bigger issues, however. You must use the correct adhesives to make sure the tiles stay put and will not crack. What's more, there may be serious building code issues involved with respect to the distance the fireplace is away from the wall.

two different ceramic tiles

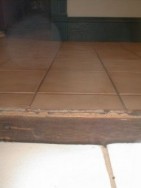
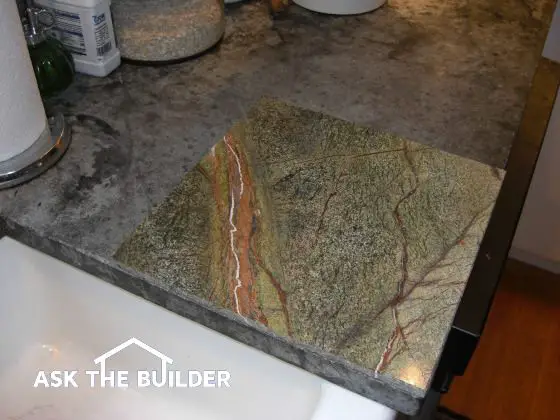
These two different ceramic tiles are installed over two separate layers of plywood. The total thickness of the plywood is 1 and 1/4 inches.

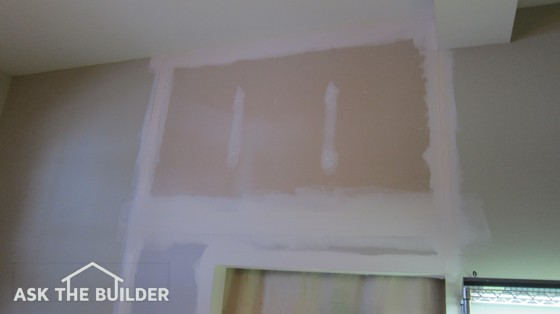
The first thing I would do is consult with the building department officials in your town to make sure you have the necessary fire and heat protection in place. I realize you have drywall in place right now on the wall, but it may be prudent to attach an additional sheet of fireproof one-half inch thick cement board over the drywall immediately behind the area you plan to install the tile.

Doing this will create a minor finishing detail problem as the edge of the cement board will be clearly visible. But you may be able to hide this edge with trim ceramic tiles or a decorative wood strip. If you decide to use wood, be sure that the code permits this as wood is a combustible material. Often there are minimum distances that combustible materials must be placed from wood stoves.

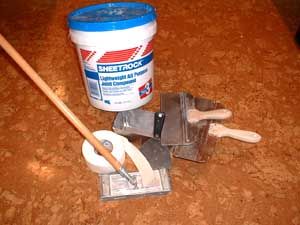
The concrete floor is an excellent substrate for your floor tile. I would use cement-based thinset as the adhesive for the floor tile. This product is readily available at many tile stores. Once mixed with water, the thinset has the look and feel of brick mortar. It is often available in gray or white color. Another advantage of using thinset is that it dries rock hard. This is very important as the legs of the free-standing fireplace will create a concentrated downward force on the fragile tile. If you were to use the organic adhesives that look like cake icing, the tiles could crack. The organic mastics do not dry as hard as the thinset.


If you're putting ceramic tile in your home, check out my Ceramic Tile Installation Checklist to learn exactly what you should know about the process. Avoid making costly mistakes with the help of this document. I offer a 100% Money Back Guarantee.


The cool concrete surfaces are actually ideal to work on. This temperature slows the set time of the thinset. Hot surfaces speed thinset setting time. In fact, if a surface is too hot, the thinset may skin over or partially dry before you have a chance to set the tile. If you feel the surfaces are too cold to work upon, simply use a space heater that can temporarily heat the surfaces slightly before you are ready to install the tiles.

Once the tiles are in place, you can then operate the space heater once more to keep the tile, thinset and concrete/cement surfaces between 45 and 70 F for a period of 12 hours. This is plenty of time for the thinset to activate and bond the tiles to the cement surfaces.

Be sure the concrete and cement board surfaces are sound, dust-free and slightly damp before you spread the thinset. Doing this will insure the highest level of bonding. I also recommend that you precut as many tiles pieces as possible before you start. Once the thinset is mixed and spread out, you want to place the tile within 10 to 15 minutes. If you wait much longer, the thinset loses its ability to create a permanent bond.

Column 438

Scheduling Finish Work

DEAR TIM: I am undertaking lots of redecorating work before the holidays. All the workers are tentatively scheduled, but there is disagreement as to who should do what first. The hardwood floor refinisher wants to show up last but the painter and wallpaper hanger say they can work on finished floors with no problems. Who should show up first? What is the best way to schedule the workers to minimize errors? Betty D., Montgomery, OH

DEAR BETTY: Although you would think the answers to your questions are fairly straightforward, there are several things to consider before you finalize the scheduled start time for each worker. I realize the painter may work around finished floors on a regular basis, but accidents can and do happen. It is my preference to minimize damage to finished surfaces as much as possible. To that end, I look at what is the hardest and most expensive thing to replace when I schedule work.

wainscot

Depending upon the type of wallpaper you have selected, this aspect of the job deserves the highest amount of scrutiny with respect to scheduling. For example, my wife recently had me install wallpaper in our dining room. After looking at hundreds of pattern books and paying for nearly 20 actual samples, she selected a paper that cost nearly $90.00 a roll! Don't get me wrong, I love the paper and it is indeed gorgeous, but if someone were to gouge it with a handle of a floor sanding machine or splatter some paint on it, heads would roll and mine would undoubtedly be first.

Wallpaper is perhaps the most difficult thing to repair. Even professional paper hangers can be challenged to remove and install one strip of paper in a room that was recently papered. For this reason, I feel that the wallpaper hanger should be the last worker on the jobsite. Believe it or not, he may also be the first person to arrive as well. All walls that are to be papered need to have a special primer/sealer (sizer) applied. This paint-on product should be applied to all walls that are to be papered. If this product gets splattered or spilled on the wood floors, it is not the end of the world as the floor refinisher will sand away all paint that dries on the surface.

Once the walls have been sized with the special sealer paint, you can have the painter show up. He should do all of the required painting and cleanup as well such as scraping of paint from windows, etc. Be sure he leaves behind extra paint that was used on all walls and woodwork. It will be needed for small touch-up jobs as the work progresses. If you are installing new toe strip where the baseboard meets the wood floor, have the painter prefinish these wood strips now. They should be stained and urethaned before they are installed.

Once the painting is complete, it is time for the floor re-finishers to show up. They will monopolize the rooms for probably three to five days. The sanding of the floors happens the first day. Depending upon the amount of work to be done, they often will stain or apply the first coat of urethane before they go home on that first day. If you are using oil-based urethane, you can apply one coat per day on each of the successive days. The schedule can be compressed drastically if you choose water-based urethane. Multiple coats can be applied the same day. I would recommend a minimum of three coats of oil-based urethane and four coats if you chose a water-based product.

The urethane floor finishes need to cure for several days, sometimes a week, to achieve a durable hardness. I would not allow any significant foot traffic on the floors for a minimum of three days. Do not cover the urethaned floors with any tarps or area rugs during this time period. The floors need to be exposed to the air in order to cure properly.

After the wait period is complete, have the painter come in and do any necessary touch-up work. The carpenter should then show up to install the new toe strip. As soon as this is complete, it is time for the wallpaper hanger. Be sure he covers the entire floor with clean dust-free tarps. It is also a good idea to check the feet of his ladders and pasting table. Make sure they have rubber pads or tips that are in good condition. Rough ladder or table legs can cause scratches even though the floors are covered.

Column 440


Concrete In Cold Weather

thermal blanket concrete cold weather

This worker is using a waterproof insulating blanket to cover a freshly poured footer. The heat produced by the chemical reaction of hydration within the concrete will be retained within the concrete by using the blanket.

DEAR TIM: I am one of the lucky snow birds that commutes back and forth between my winter home down south and my summer home up north. I need to have a sidewalk replaced at my northern home immediately due to a water main break. Cold weather is just around the corner. Is it safe to pour concrete this late in the season? One of the bidding contractors says it is no problem as they add calcium chloride to the mix. Is that going to work? Will I have problems in the future? Greg H., Chicago, IL / West Palm Beach, FL

DEAR GREG: Isn't it wonderful that we are lucky enough to live in a nation that is so large that you can escape from the cold biting wind and snow during the dreary winter months? You are lucky indeed! But you will need much more than luck to insure that you will not be installing that sidewalk a second time in the spring or next summer when you flutter back north. You need a skilled concrete mason who knows exactly how to order, place and protect concrete that is being poured in cold weather.

I have always felt that concrete is an amazing building material. Its ingredients are basic: sand, gravel, water and Portland cement. Yes, there are other additives and ingredients such as fly ash, plasticizers, accelerators, etc. that can be mixed with concrete. These extra ingredients often allow concrete masons to pour and finish concrete in extreme weather conditions. The calcium chloride mentioned in the one quote is an accelerator that makes the concrete get harder faster.

Freshly mixed concrete is a plastic liquid. In fact, as soon as water is mixed with the Portland cement, a chemical reaction called hydration begins. This chemical reaction causes microscopic crystals to grow between the sand and gravel interlocking them together. As more and more crystals grow, the concrete gets harder and harder. But this reaction is temperature sensitive . In very warm or hot weather, the reaction happens quickly. In cold weather, the reaction slows down.


Want perfect concrete work? Find a pro by using my Concrete Work (Sidewalks, Driveways, Patios & Steps) Checklist. I offer a 100% Money Back Guarantee.


The challenge in your case is to get enough crystals to form so that the concrete can resist destruction caused by rain and snow melt water that soaks into the concrete surface and then freezes. The freezing water expands and can fracture the crystals that are holding the sand and gravel together.

There are all sorts of things the concrete mason should do to insure that your concrete will last for many years. First, the ground upon which the concrete will be poured must not be frozen. In fact, it would be ideal if the contractor could suspend some tarps over the area and run a heater to raise the ground temperature. The warmer the ground the better. The ready mix concrete company will very likely mix the concrete with hot water. If the sand and gravel can be pre-heated, all the better. Special Portland cements can be used that are made to develop an early strength. Boost the amount of cement in the mix slightly. Demand that you have a 4,500 or 5,000 psi mix. For your small pour, it may only add $40.00 to the cost for the extra cement. Be sure air is added to the mix as well.

As soon as the concrete is placed and finished, make sure a liquid curing compound is sprayed on the surface. This liquid insures that the water added to the mix does not evaporate from the concrete. The water added at the ready mix plant is needed to fuel the chemical hydration reaction that will continue to happen all winter long while you are busy getting a tan.

Finally, insulated blankets must be placed over the concrete. Fortunately, the chemical reaction that is happening actually produces heat. This heat is desperately needed to keep the concrete from freezing before it achieves the necessary strength to resist Mother Nature. The insulated blankets will keep the heat inside the concrete where it is needed so long as the edges of the blankets are weighted down. Cold winds that get under the blankets can rapidly steal heat from the concrete. Make sure the contractor leaves the blankets in place for a minimum of four days.

Column 441

Free Standing Shelves

DEAR TIM: I have storage shelves on the walls in a room in my home, but I need more storage space. The center of my storage area is wide open. Is it feasible and practical to build free-standing storage shelves in the center of the room? How does one proceed? What are the easiest materials to work with? Brad G., Boston, MA

DEAR BRAD: Storage shelves or the lack thereof seems to be a very popular topic during the holiday season. It is a busy time of year in my own storage room as my wife Kathy makes repeated trips to and from the room to retrieve her holiday decorations. Unfortunately, each year there are more decorations to store as her Santa collection grows and grows. Recently I had to add more shelves in my own home and I decided to do exactly what you have in mind - build shelves in the center of the space.

simple shelves

These simple shelves were in my own basement. But they were removed, so I could build a glass block greenhouse for Kathy!

It is both feasible and practical to build shelves in the center of a room. Visit any grocery store or home center and you will readily see free-standing shelving. The shelving you see most often is made from steel. There are factory-built steel shelving solutions available but I chose to use wood for many reasons.

Using standard sheets of plywood, I was able to construct a system of stacked shelves that were four feet wide. Because Kathy can access the shelves from any side, the shelves - on their long side - effectively become two feet deep. This is a very convenient size for boxes that hold wreaths and other large decorations. The large platform shelf design also is handy in case you have an enormous item to store such as a box that contains an artificial Christmas tree. I use the top shelf of my system to store these large boxes. Upper shelves that are hard to access should always be used to store things that are needed on an infrequent basis.

The shelf system I designed is made using one half inch thick plywood for the shelf surface, 2x3 dimensional lumber for the shelf support frames and 2x4 dimensional lumber for the legs that support the entire system. I used coarse thread screws to fasten all lumber. Three inch and one and one-quarter inch screws are all that is needed. Screws hold much better than nails and allow you to easily disassemble the shelving system in the event it needs to be moved in the future.

Kathy preferred to have a three-foot wide aisle between the free standing and wall mounted shelves. If your room is long enough, you may be able to use an entire 4 x 8 foot sheet of plywood for each shelf. The 2x3 lumber is fastened together using the three-inch long screws as you would frame a wall. The studs are placed on their narrow edge on two foot centers. Four eight-foot long pieces of 2x3 lumber are sufficient to make the outer frame of each shelf platform and provide one long center support down the middle of the shelf. The shorter screws are used to attach the plywood to the frame.

Working with standard lumber, you only need to make three cuts for each shelf platform. One of the 2x3s will get cut into two pieces 45 inches long. Another 2x3 is cut down to 93 inches for the center shelf support. The two eight foot long 2x3s overlap the 45 inch long pieces at each corner. The 93 inch long center support 2x3 fits in between the two short pieces of 2x3 and runs parallel with the outer long legs of the frame. The resulting rectangle frame measures 48 by 96 inches. This is the exact same size as the piece of plywood that is attached to the frame.

The shelves are attached to the 2x4 legs with three-inch long screws. Use two screws at each leg. I like to place the bottom of the first shelve unit 18 inches off the floor. This allows me to slide five gallon buckets under the shelve system. The plastic buckets are waterproof and anything stored inside them is safe in case the floor experiences a shallow flood. The shelves stacked above the first shelve have 14 inches of free clearance space between the top of the plywood surface and the bottom of the 2x3 that creates the frame for the shelf above.

Be sure the vertical support legs are long enough so that they can attach to the floor joists above or to blocking that runs between the floor joists. These connections add enormous stability to the shelving system. Without these connections, the shelving system might collapse over time if it becomes overloaded. These connections are absolutely necessary if you build the system in an area subject to earthquakes.

Column 443

New High Performance Vapor Retarders

High Performance Vapor Retarders

DEAR TIM: I am building a new home. The floors of some of the finished living space will be concrete slabs poured directly on the soil. What is the best material to use to prevent water vapor from passing into the living space where it can fuel mold growth and ruin finished flooring materials? Is the common clear poly vapor barrier good enough? I also own a summer home with a crawl space. Will the same product stop the musty smell in that home? Cindy M., Ocala, FL

DEAR CINDY: You need one of the brand-new revolutionary vapor retarders. Many people call vapor retarders vapor barriers. The term vapor barrier has been misused for many years. A true vapor barrier would block all water vapor. The clear plastic products sold in most home centers and building supply businesses allow huge amounts of vapor to pass through them. What's more, some of these products can actually degrade over time. Many soils contain alkali and other chemicals that can cause the readily-available clear plastic products to fail.

vapor retarders

The home building industry has experienced tremendous advancements over the past 25 years. Many of the advancements have made houses much tighter and more energy efficient. But these advancements have a price tag attached to them. Because older homes were drafty, they could more easily dissipate water vapor that seeps in through concrete slabs and foundations. Small or moderate amounts of water vapor that raised indoor humidity levels slightly years ago in an older home may cause dangerous mold growth and buckled wood or laminate flooring in a tight newer home. Excess water vapor can sometimes cause water-based flooring adhesives to mold and degrade.

In light of these problems, manufacturers from the flooring industry and those that made vapor retarders worked with independent testing officials to develop a standard by which high quality vapor retarders can be measured and rated for effectiveness. In 1997, ASTM standard E 1745 was established for just this purpose. The bottom line for homeowners such as you and me is simple: you want a vapor retarder that meets this standard. These vapor retarders allow minute amounts of vapor to pass into your home, they resist chemical attack and they are very resistant to punctures during installation and the placement of the concrete over the retarder.

It is absolutely essential that you install the best vapor barrier under concrete slabs as well as any walls that also require vapor protection. The reason is straight forward. It requires an enormous amount of work and expense to re-install a vapor retarder after the fact. You must get it right the first time. The vapor retarders that pass the ASTM E 1745 standard only cost several hundred dollars more for a roll that contains 3,000 square feet of product. This is a small price to pay for long-term moisture control and peace of mind.

Homes with crawl spaces also need these wonderful vapor retarders. When installed according to all manufacturers' specifications, they block the water vapor that is fueling the offensive aromatic microscopic mold growth in your summer home. The manufacturers of these high quality retarders also make special tape that is used to seal seams that may be required should you not be able to place one giant sheet of material under the home. It is vitally important to seal seams with this special tape.

Be sure your builder installs the under-slab vapor retarder correctly. A common mistake is to cut the material carelessly against the foundation. The vapor retarder should actually lap up onto the foundation so that the concrete slab is completely isolated from the soil and the foundation. The special seam tape should also be used to seal the retarder to any pipes or other objects that penetrate through the retarder and the slab. Without the tape, water vapor can escape past these objects.

These high quality vapor retarders are not hard to locate. The best places to find them are businesses that sell concrete supplies to contractors. Look in your Yellow Pages under the heading Concrete - Supplies. Be sure to verify that the vapor retarder you are buying meets the ASTM standard.

August, 2004

The August 2004 edition of Professional Builder magazine (vol. 69, #8, pp. 57-60) had an interesting article on "Choosing Insulation" that touched on vapor retarders. In it the author, Glen Salas, brought up a good point that vapor retarders should not be used in warm climates such as the deep South of the USA. In those areas it is thought that unfaced fiberglass batts should be used in walls.

Glen also says that if you are inclined to add an additional layer of insulation, never install a vapor retarder in between layers of insulation.

One point I disagree with in his article is the placement of a vapor retarder in a ceiling. I feel it is not a good idea and he seems to think it is okay to do this. Glen also says to place a vapor retarder on the room side of insulation above a crawl space, but I feel it is better to stop the water vapor at its source and place the best vapor retarder on the soil and close off the vents to the crawl space to block atmospheric air from entering the crawl space.

Related Column: Stop Water Vapor Now


Author's Notes:

I received this email from Michael P, Cincinnati, OH.  Here's how he helped with his crawl space problem.

"I live in Turpin Hills and wanted to thank you for your advice for sealing a crawl space.  This is our third winter in our home and the basement is always much colder than previous basements from other homes.  I did as you suggested and put heavy duty, thick plastic on the gravel and put doors on the opening of the crawl space.  It's been a few weeks and I can see water droplets forming under the plastic.  I may put a second layer of plastic for good measure.  The basement is warmer and so is the room above the crawl space.  I don't smell the mustiness either.  Thanks again for the tip."

Here's another one from Marilyn W. in Troy, MI with a similar issue.

"I read your answer concerning musty smells coming from crawlspace and slab foundations. The musty smell is in our cottage. Part is a slab and part is a modified crawlspace that we can not get under. The space is too small and there is no entry. If we remove the carpet and spray the the floor with the liquid water vapor barrier, would this take care of the smell? It is closed a good part of the year, and when we do open and use it, the smell permeates everything including our clothes, hair etc. Please help us make our cottage usable. Thanks!"

Column 445

Radiant Barrier Chips Save Money

DEAR TIM: I have to do something to lower my heating and cooling costs. It can get very hot in the summer and my air conditioner runs non-stop. The winters can get bitter cold as well. I have added insulation in my attic and that seems to help but what else can I do? I have seen some radiant-barrier foils advertised as miracle products. Are these exaggerated claims? Is there a way to stop the heat from getting into my house in the summer and stopping it from leaving in the winter? Stephanie B, Minneapolis, MN

DEAR STEPHANIE: Wow! Talk about a complicated subject. Controlling heat loss and heat gain by creating a barrier that helps you lower your energy costs is not much different than a quest for the Fountain of Youth or the Holy Grail. But I may have shocking news. The map with the big red X may have been discovered. I believe I have uncovered a product that holds enormous promise for real long-term energy savings.

To watch the entire video, please Click Here .

Maintaining a comfortable interior climate in a home is a daunting task. This is especially true if you live in a part of the world that has weather extremes. For example, talk to a person who lives in the high desert of California or just about anyone in the Southwest and they will tell you how hot it can get on numerous summer days. Afternoon air temperatures above 100F are common. Attic air temperatures can soar to 145F or greater. If you want the inside of your home to be 78-80F, air conditioners can work long and hard to maintain the comfort zone you select at the thermostat. The same scenario is true in places that experience bitter cold temperatures for months on end.

When an object such as the sun, your furnace or boiler creates heat, it can radiate this energy in the form of infrared (IR) electromagnetic energy waves. This IR energy travels through space and in and around the inside of your home at the speed of light. The waves themselves are invisible and carry no heat, but when they strike a surface the energy begins to vibrate the molecules of the object. Those vibrations create friction which in turn creates the heat we feel when sunlight strikes our skin or when we touch an object that is warm or hot.

It stands to reason that if you intercept these IR waves with some type of barrier and simply bounce them back to where they originated, that the heat would not be transferred. An effective radiant barrier would indeed make your house much cooler as you reflected the heat back outdoors. This same radiant barrier would reflect the IR heat your furnace creates right back into your home.

This technology has been around for a very long time. Surely you have seen a cook wrap a hot dish with aluminum foil to keep the contents warm. Older thermos bottles have highly reflective coatings that keep liquids warm or cold. Firefighters use custom metallic foil suits to keep them cool. Our astronauts in space have special suits that have 17 layers of reflective material that keep them comfortable from extreme heat and cold at the same time. Radiant barrier materials work and they work well. The trick is making them work in a typical home.

The best radiant barrier products are the ones that have the highest amount of reflectivity. It only makes sense as they directly reflect more of the IR waves away. Anything that dulls the surface of the radiant barrier film significantly reduces its reflectivity. Many traditional radiant barriers for homes are foil laminates that can be stapled up in an attic or even laid flat on top of insulation. These offer only one layer of protection. They work well until they become covered with dust. As the dust builds up, their effectiveness goes down.

Two years ago, I had special radiant barrier chips installed in my attic. There are hundreds of thousands of randomly overlapping highly reflective foil pieces that bounce heat back to its source. In many places the chips may be ten or fifteen layers thick. I am not concerned with a dust buildup. The exposed layers I can see may get dusty, but just below are several layers that will always reflect the heat back to its source.

Those who build new homes have several additional options. Roof sheathing attached to roof trusses is available with built-in radiant foil on the underside. It would take years for that surface to become dust covered. You or your builder can buy drywall that has foil facing on the backside. This drywall can be used in all rooms that have walls or ceilings that are exposed to the elements. Of course, once the final attic insulation is installed, the radiant barrier chips I used can be installed to give the highest level of protection.

Column 447

Granite

granite countertop tile
DEAR TIM: I have read a great deal about granite countertops and I am very confused. Will granite stain? Does it have to be sealed?

Is it better or worse than the solid surface tops that try to look like granite? Is granite child-proof? I am moving into my last home, I hope, and I do not want to make a mistake. Maj. Brian McK., Quantico, VA

DEAR MAJ. BRIAN: I have seen several horse races in the past that required a photo finish result to determine the winner. There is no doubt in my mind there have been other past horse races that have ended in a dead heat with no clear winner. That is how I feel about the comparison between granite,solid surface and the new stone composite countertops. All of them are top-of-the-line products that have their own nuances.

Both granite and solid surface countertops have been installed on many of my past jobs. I have granite tops in my own home. I have never heard a complaint from any of my past customers regarding the beauty or functionality of the tops. In fact, my past clients continually gush about the wonderful countertops they own. In my own case, the fix was in. My college degree is geology and I happen to be very partial to natural stone products. I have yet to find a man-made countertop material that even comes close to what Mother Nature can produce on her worst day.

What are Natural Stone Composites?

Before I digress further, let me describe a countertop material you may not know about - natural stone composites. Several manufacturers are making a countertop material that is a blend of natural stone and synthetic resins that hold the stone chips together. These new products are very eye-catching and sport many of the positive attributes of both natural stone and solid surface countertops. My only complaint with these tops is that a side-by-side comparison with real granite will quickly indicate to you that this new product is an impostor. But, you should definitely give it a serious look before you make a final decision. It may possess the exact look you and your family desires.

Do Countertops Stain?

Does granite stain? I think the better question is: Do all countertops stain? The answer is - Yes to all. Granite, by its very nature, contains micro fissures where the quartz, mica and feldspar minerals interconnect. Some granites are more porous than others. But the highly polished granite is highly resistant to staining, especially when it is sealed. The biggest enemy to granite happens to be oil. Cooking oils, olive oil, bacon grease, oil that seeps through pizza boxes, etc. are to be treated with respect. Oil that seeps into granite can be removed and sometimes it dissipates on its own over time. But once again, regular sealing will almost always stop oil from damaging the top.

How Do You Seal a Granite Countertop?

Sealing granite is simple. The clear sealers are applied with a cotton rag and simply rubbed into the surface. Often it only needs to be done twice a year. Sealing granite is by no means a hardship and it takes just a few moments of your time. I feel it is a very small price to pay for the beauty and durability you get with a granite top.

If you want a child-proof countertop, perhaps you better get a military surplus piece of armor plating from a tank or warship. I have seen firsthand damage caused by both children and adults to all countertops. Often people panic when a granite top is chipped or a small corner cracks off. They throw away the chunks or chips of stone in frustration after the accident happens. Never discard any of this debris. Bag it up carefully and call your granite fabricator. They have fantastic clear colored epoxies that can be used in conjunction with the granite chips to rebuild the top.

Perhaps this will help you. My wife and I are about to remodel our own kitchen. We have several different countertop areas in our kitchen. Do you know what kind of material we plan to install? In all likelihood it will be a blend of materials. There is a good chance that we will use several types of natural stone along with a few pieces of solid surface countertop in strategic locations. I have done this before on several jobs. If you pick materials that blend well together, the look is stunning.

Column 448

Modular Homes Surpass Stick Built Homes

DEAR TIM: I have heard horror stories about custom homes that have taken forever to build. Framing lumber exposed to the elements can support mold growth.

Construction delays can create extra loan interest and living expenses. What can I do to make sure my new custom home gets built quickly but with no sacrifice in quality? Is there an alternative method to achieve my goal? Ted S., Lumberton, NC

DEAR TED: If you would have asked this question ten or fifteen years ago, I would have told you that you have little hope. Don't get me wrong, there have always been highly skilled and productive builders in the marketplace. You can find them in just about every city or town. I will grant you, however, that they are a very small minority. The good news for you, and many others, is that cost savings, high quality, and lightning-fast construction are present in today's new home marketplace.

pre-built home

Yes, this home arrived at the jobsite pre-built on the back of several flatbed tractor trailers. You would never think it was possible when you walk up to it and inside of it. I did both as this fantastic home is just several miles from where I live.

Let's talk about conventional home construction practices first. Understand that many builders have never had extensive formal training with respect to manufacturing processes. After all, they are manufacturing a product. It is common for builders to start off in their careers as carpenters who transform from a subcontractor into the person who runs the show. Many of these individuals do not have strong technical and business skills in the actual art of planning and management. I know there are builders who have strong college business degrees, but I believe you will find that many smaller custom builders have minimal college level business classroom experience.

Add this to the mix of subcontractors who have work commitments with other builders, weather conditions that can hamper construction, scheduling and ordering mistakes on the part of the builder and a myriad number of other variables and you can see why a five month construction time frame can become a bloated nine or ten month fiasco.

If you decide to use a traditional custom home builder, you can tighten up the schedule and possibly get the job done on-time if he is familiar with critical-time-path planning. A home building project can be represented on a chart that shows each task that must be completed, the amount of time it takes to do that job and when certain tasks can happen simultaneously. If the correct data is put on this chart and all sub contractors hit their mark, you can get a traditional home built in a minimal amount of time. But that being said, always remember that Mother Nature bats last. She can throw multiple curve balls that will retire the side causing weeks of delay.

Imagine if I told you that you could actually save considerable money, get your home built in weeks instead of months, and have just about every item in the house you want all with no sacrifice in quality. Millions of people such as you can get a new home that looks and is identical to any traditional site or stick built home but believe it or not, it is trucked in cubes or modules to the jobsite. I urge you to begin talking with a modular builder in your city or town.

 two-story modular home

Check this out! A two-story modular home. It looks as retro as can be. You would think this home is 90 years old based upon its style and architecture. But is is modular and less than one year old.

Modular homes are built in factories that are climate controlled. The homes are assembled with enormous precision and quality. The same or better materials are used that a traditional site builder might use. The work force shows up on time each day at the modular factory. They are team players that know exactly how each home is to be built. The entire process is computer controlled down to the hour. Modular homes meet or exceed just about every local building code. Incredible as it may seem, the interior of each module is finished before it is trucked to the jobsite. Walls are painted, cabinets and tops are in place, flooring is complete, etc. I suspect if you asked for it, the factory might even stock the pantry with dry foodstuffs!

I have inspected many modular homes. The workmanship astounds me. The level of quality is higher than a vast majority of traditional site-built homes. Perhaps the most unbelievable aspect is the cost savings. As modular homes get bigger, the price compared to traditional site-built homes goes down. For example, if you plan to build a 4,000 square foot custom home, a modular home that is identical in every way might cost you 20- 25 percent less. That can translate to savings of possibly $80,000.00 - 100,000.00! The break-even point is about 1,500 square feet. If your planned custom home is larger than that, expect to save money and time but no loss of quality.

Column 449

Drywall Finishing Requires Skill

drywall finishing

Drywall Finishing | This small section of wall has just about every drywall finish challenge in it: flat and tapered seams, inside and outside corners, and an archway! Drywall installation and finishing is not as easy as it appears on those fake cable home-improvement shows. Photo credit: Tim Carter

DEAR TIM: My husband and I are on a very tight budget as we complete our new home. I have decided to add some drywall in a garage and unfinished room.

Watching the drywall finisher work in my new home has been fascinating. I am sure I can do what he is doing.

Should I use paper or mesh tape for the seams? Is one finishing compound better than another? How hard is it to get smooth walls and ceilings? What are the common mistakes a rookie finisher makes? Linda B., Racine, WI

DEAR LINDA: Oh, I am quite sure you can do what the professional is doing, but I am not yet convinced you can do it as well or as fast. Don't let your eyes or home improvement television shows fool you for a moment. Great skills and techniques are being employed by the finisher you observed. It may have taken years for him to acquire the talent he possesses. Don't despair, you very well may get wonderful results, just be realistic with respect to the amount of time and effort it will require.

drywall finishing tools

Finishing drywall is a very interesting job. Before you start, you need the right tools. For the most part, finishing drywall requires very simple and inexpensive tools. Can you think of another trade where you can get virtually all of the professional level tools you need to do the entire job for less than $75.00? You can buy plastic impostor tools for far less, but professional high-quality stainless steel mud pans, an assortment of stainless steel broad knives and pole and hand sanding equipment will help you get the pro results you are striving for. These great tools can often be found at drywall supply houses- businesses that sell drywall to home builders and professional installers and finishers. Check your phone book Yellow Pages for a list of these well-hidden companies.

I have used both paper tape and the adhesive open-mesh tape. Both tapes work well for flat seams. But I happen to prefer the traditional paper tape for corner seams. Unless you have great coordination, the mesh tape can give you fits as the knife blade bumps across each of the pieces of fiberglass that make up the tape. Paper tape is amazingly easy to work with and yields wonderful results. Thousands of professionals swear by it, not at it.


Finish drywall like a pro! Learn the secrets to great drywall installation in this Drywall / Plaster Installation Checklist. I offer a 100% Money Back Guarantee.


Drywall manufacturers typically manufacture the finishing compounds for their drywall. I have used different brands all with great results. I happen to prefer the lightweight pre-mixed drywall finishing products. They are very easy to sand.

Smooth seams on both walls and ceilings comes with practice. The key is to have a finished thickness of joint compound about one eighth of an inch thick over any given seam. If you use paper tape, half of the joint compound should be under the tape with the remainder of the creamy mixture floated and feathered out to disguise the buildup of material. The adhesive mesh tape is completely covered with joint compound since it is applied to the drywall before any compound is applied.

Perhaps the most common mistakes are working with joint compound that is too thick and lumpy. I have found that adding a very small amount of water to the pre-mixed compounds and whipping them with a mixing tool attached to a power drill creates a mixture that resembles creamy cake icing. Blisters can form in taped seams if you press out too much joint compound out with repeated strokes from the taping knife. Remember, the joint compound is an adhesive and a 1/16th inch layer must remain between the tape and the drywall surface.

Another common mistake is trying for perfection as you apply the second coat of joint compound on flat seams. A slight ridge of material can remain at the center of these wall and ceiling seams. Once dry, you can lightly sand this ridge away before you apply the final third coat. Rookies often try to finish both sides of a corner on the same day. The opposite side of a corner can only be finished after the first side is dry. Beware of the temptation to use a 90 degree angle corner knife. These knives appear to be made to finish both sides of a corner at the same, but using them requires enormous skill and patience.

Column 450

Replacing EIFS with Traditional Cement Stucco

DEAR TIM: I own a six-year old home covered with EIFS synthetic stucco. Even though I have the home inspected each year for moisture intrusion, I am convinced I will replace the EIFS with a mixture of real cement stucco, artificial stone and possibly brick. Can these products be installed over the existing EIFS? If it can, is it a good idea? If you were running this job, what other things would you do to make sure this is a permanent solution to moisture infiltration? Lynne McD., Arlington, TX

DEAR LYNNE: Another one bites the dust. I know you are not the first nor will you be the last person who abandons the EIFS cladding on their homes. While moisture can get behind just about any exterior surface on a home, the plastic nature of the EIFS synthetic stucco coatings tends to trap moisture. This trapped moisture is the match that lights the mold growth and wood rot fuse. When enough of either grows, you can have an explosive repair bill.

stucco house

Perhaps the best thing to do is be pro-active. Replacing rotted structural framing members and hiring people who work in moon suits to remove mold can be an expensive proposition. If you have neither at this point, thank your lucky stars. Some people may get relief from insurance policies, but that income stream is rapidly drying up. Insurance companies no longer wish to take the fall for poor workmanship and unforgiving building materials.

The EIFS synthetic stucco system must be removed for any number of reasons. Even if you could leave it on, it would pose an enormous hidden risk. Imagine what might happen when water gets behind your new cement stucco, brick and stone. If it then traveled behind your current EIFS cladding, you would be no better off than you are today. Furthermore, the detailing around windows and doors becomes very difficult if these openings are recessed too far behind the exterior surface.

If I were in charge of this job, I would want to inspect all of the exterior sheathing and framing that was covered by the EIFS stucco. The specter of mold and wood rot would have to be removed from my mind as a builder. If I discovered either, now is the time to repair any and all damage.

Removing the EIFS system also gives me access to the windows and the doors. There is a very good chance that these items were probably not installed with the best flashings. Furthermore, window and door flashings and their nailing fins must interface a special way with the water barrier that covers the wood framing and sheathing. I would not hesitate to use traditional 30 pound felt paper as the primary water barrier. It is a superior product that has yielded the spotlight to the glamorous air and water infiltration house wraps.

If you decide to use brick, you may need to employ a structural engineer. This professional will create a detailed plan that shows what structural elements are necessary to support the brick load. The weight of the stunning artificial stone and stucco does not concern me. Both of these stunning exterior finishes can be easily attached to the wood-framed structure.

I would give serious consideration to the creation of a hidden drainage plane behind the new stucco, brick and stone. Once the 30 pound felt paper has been properly attached to the home, you can fasten vertical strips of one half inch thick by two inch wide pieces of treated plywood to the outside of the home. The stucco and artificial stone may be applied to stiff galvanized mesh that is fastened to these strips. Water that gets behind these materials now has a large and direct pathway down to the ground. This system also allows air to readily circulate behind the masonry materials. Dry is good as water fuels mold growth.

Finally, consider tinting the stucco you apply. If you chose a color that compliments the stone and brick, exterior painting may be limited to a few trim boards. Be sure to have the stucco mason do a test panel. The stucco color often changes as it cures. Try to arrange for the stucco work to take place when outdoor temperatures are in the 50F range if at all possible. Extreme weather conditions of any type can cause all sorts of stucco installation problems.

Column 453