Brick Wall Leaks Driving Rain TIPS
- All brick walls leak water
- Water must be captured and released back to the outside
- WATCH brick wall construction video below
- Silane / siloxane sealers can stop most leaks in existing walls
- CLICK HERE to Get Tim's FREE & FUNNY Newsletter!
DEAR TIM: As result of Hurricane Irma, I had a leak in the ceiling in the bay area of our kitchen. It happened in the past with other intense storms.
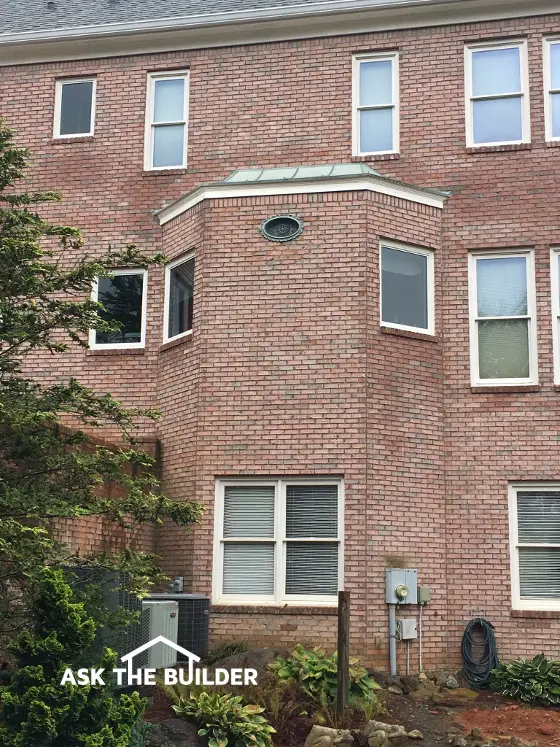
I suspect the problem could be water penetrating the brick and/or wind driven rain entering under the facia and over and down the inside of the inside face of the brick. The brick lentil spans across the bay, so if water is making its way in, it has nowhere to go but to the drywall ceiling in the kitchen.
Before I dig into this and hire contractors, I’d like your opinion. What’s going on and what’s the best way to fix it? How could this leak have been prevented when my house was built? Jim McV., Cumming, GA
DEAR JIM: You and thousands and thousands of other homeowners suffered damage from wind-driven rain from Hurricane Irma.
Physics Formula
All you have to do is recall your high school physics class and it starts to make sense. Remember the simple formula: Force equals mass multiplied by acceleration?
F = ma
Water is heavy. If you need a refresher course on this, just open up your car window as you drive in a gentle rain shower and see what the drops feel like hitting your hand at only 50 mph much less 100 mph or greater!
Free & Fast Bids
Each Drop A Hammer Blow
Each water drop that smashes against the side of your house is like a hammer driving the previous water drop deeper into any crack, opening or other tiny space where normal down-falling rain causes no issues.
The fable about the three little pigs and brick homes didn’t cover wind-driven rain! ©2017 Tim Carter
All Brick Leaks
Brick walls leak water. It’s been a known fact for well over 100 years.
Builders and brick masons many decades ago realized this and used two different bricks to construct exterior walls. The entry point of most of the water is the vertical mortar joints that are called head joints.
Old Buildings Had Soft Inner Brick
While to the naked eye it seems that the mortar and brick make an impenetrable barrier, such is not the case. Old brick buildings had a softer absorbent brick that was used on the inside of the wall.
This brick was designed to soak up the leaking water and then immediately release it back to the air once the sun came out and the breeze pulled all moisture from the wall.
The soft inner brick was made by not firing the brick in the kiln as long as the harder outer layer brick that had to be more weather resistant. The hotter and longer you fire a brick in a kiln, the more weather resistant the brick becomes.
You can fire some brick so long that they become almost as hard as granite and as durable. Many older streets in cities and towns had these super-hard brick laid as roadways. You can still see them in downtown Athens, Ohio at the entrance to Ohio University.
Brick Wall Video
This is a pretty decent very BASIC video about brick wall construction. In parts of the video you can see the wall is two brick wide. Imagine if this were for a home and the inner layer was a different softer brick.
Modern Brick = Niagara Falls
Modern brick veneer construction discarded this wonderful system that’s worked for ages. Now the water that leaks into the wall, as you’ve already surmised, runs down the back of the brick much like the water over Niagara Falls. It’s easy for it to find a way into most homes as you’ve discovered.
Multiple Flashings
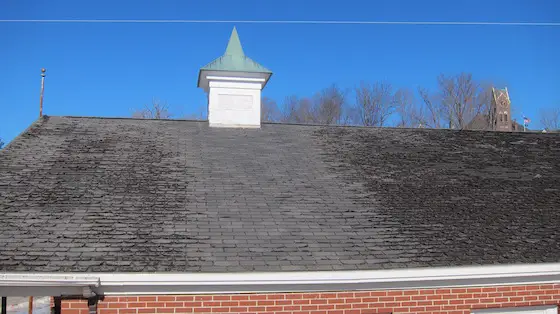
Modern builders who use brick veneer are supposed to install flashings at every horizontal break in the brick wall. This means there needs to be a flashing at the lintel that’s hidden behind the roof of your kitchen bay, above and below every window, door and any other thing on the wall that’s not brick.
Wood Walls Need Protection
The wall framing must be covered with a waterproof material that overlaps like roof shingles so any water that ends up touching it can’t get to the wood framing of the home nor to the interior wall and ceiling systems.
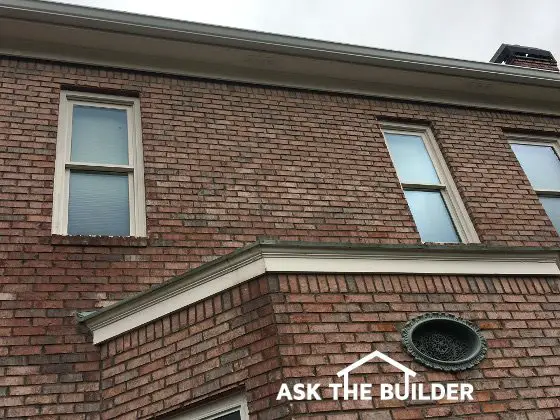
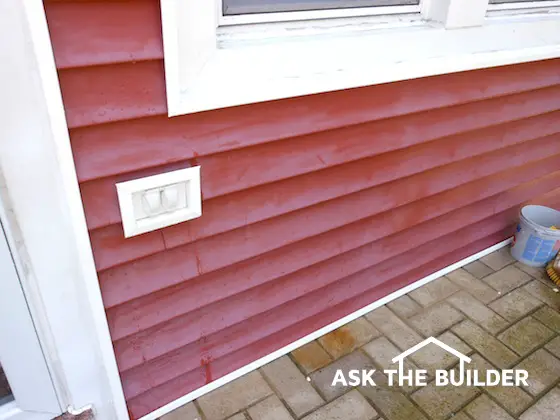
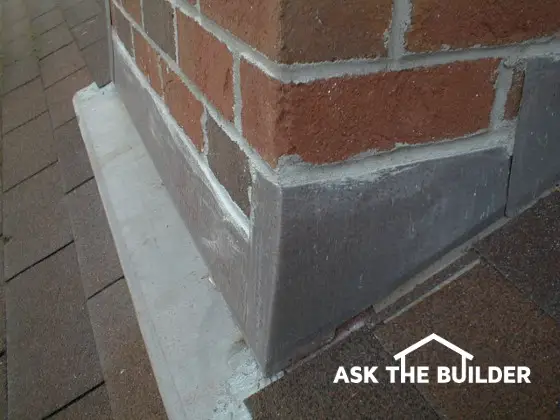
Photo Credit: Tim Carter
Base Flashing
At the base of the brick wall, there needs to be a flashing that captures all the water and redirects it to the outside of the house. This means there needs to be plentiful weep holes, and there needs to be a mesh product or some other system behind the wall that ensures wet mortar that falls behind the wall can’t interfere with the movement of the water to the outside of the house.
Great Skills & Magic
It takes great skill to install all these flashings and membranes. The Brick Industry Association has many detailed technical publications showing how all this is supposed to happen during construction. But for you, it’s now a moot point. You need to go to plan B.
Wall Water Repellent
Your job now is to apply the best silane siloxane water repellent money can buy.
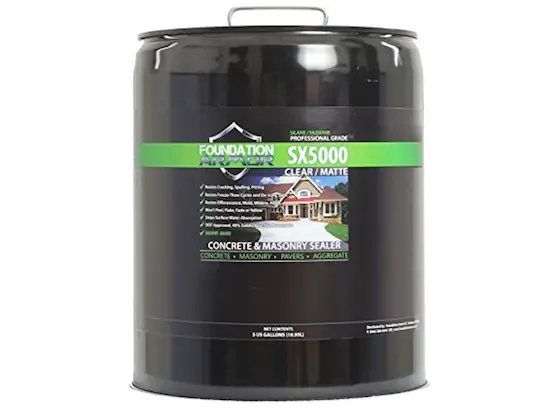
This is a magnificent silane - siloxane water repellent that soaks into brick and mortar joints. CLICK THIS IMAGE NOW TO HAVE THIS DELIVERED TO YOUR HOME.
It may require two coats. What’s more, these two applications need to happen within minutes of each other. If you wait too long between coats, the first coat could block the second coat from penetrating the mortar and brick!
The best of these clear sealers have microscopic solids that can help plug up the minute passageways that water is using to cause your leaks. It’s going to take a little research on your part to locate the best sealer.
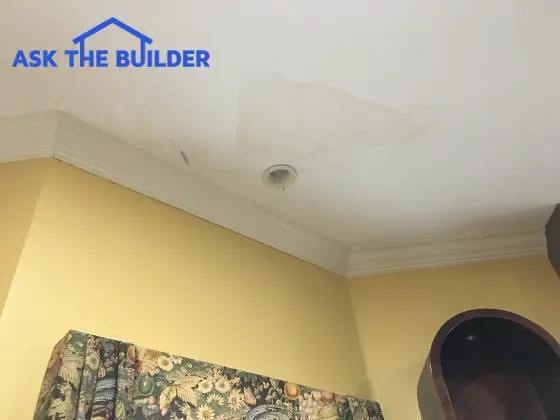
Water damage to the ceiling, due to driving rain. ©2017 Tim Carter
Two People & Blower
When you apply it, be sure two people are working as a team. One will be equipped with a backpack leaf blower.
This is a fantastic backpack leaf blower. I own this one and love it. CLICK THE IMAGE NOW TO HAVE IT DELIVERED TO YOUR HOME.
As the person with the spray wand applies the sealer, the worker with the blower directs the wind blast right at the wall driving the wet sealer deep into the brick and mortar joints just as Irma did with the rain. You want the sealer to penetrate deep into the wall.
Sun Degrades Brush-On Sealers
Years ago I ran across a milky liquid you could brush on the mortar joints and a small amount of the brick. It would dry clear and act as a barrier to the driving rain. But recent research of mine while writing a book about defective asphalt shingles indicates this product will no doubt break down with exposure to direct sunlight. While it may work for a while, eventually the ultraviolet rays of the sun will destroy the film.
Column 1214