Sliding Door Leak Repair

Sliding Door Leak Repair

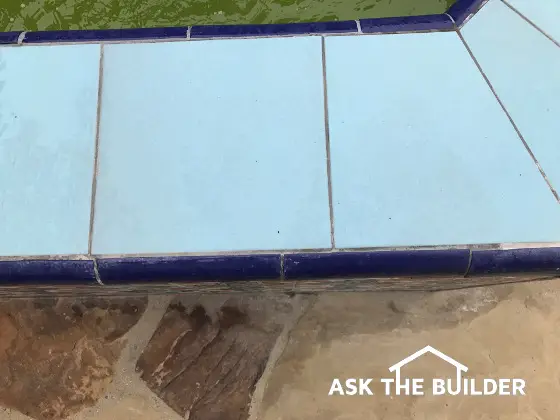
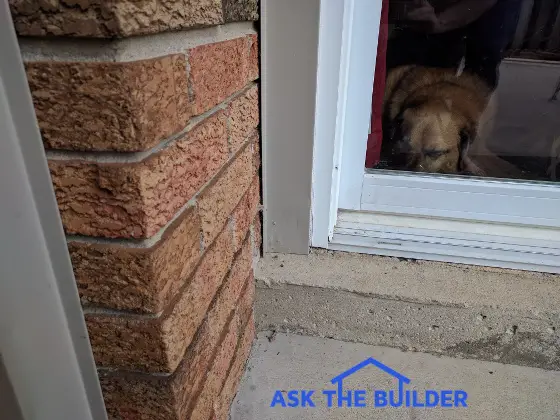
This is the lower corner of a sliding exterior door. How many places can you see where water can enter the house? (C) Copyright 2017 Tim Carter

Sliding Door Leak Repair Tips

DEAR TIM: I’ve got a sliding patio door on the back of my home. There’s a moisture problem directly under the door in the basement. The gutters are clear and the patio is level. I plan to seal between the bottom aluminum threshold and the concrete curb and caulk the gap between the side trip and my brick. I know I need to install a concrete overlay to get my patio to drain. Is that all I have to do? How would you repair my sliding door leak? Doug T., Windsor, Ontario, Canada

DEAR DOUG: You’re suffering like many other homeowners. Not a week goes by that I don’t get a request for help from one of my newsletter subscribers or a visitor to my AsktheBuilder.com website. When each homeowner sends me photos as you did, it’s almost always crystal clear that many builders, remodelers and carpenters are clueless with respect to flashing exterior doors.

I regret to inform you that your plan of attack may not solve the problem. What’s more, caulk is not a permanent solution no matter what the warranty on the label of the tube states. I’m beginning more and more to think that caulk manufacturers are using warranties more as a marketing gimmick rather than a factual statement as to how long the product will really perform without failure.

Your photos show that you’ve got a brick exterior with raked mortar joints. This method of dressing the mortar creates a small shelf on top of each horizontal row of brick and it’s the least waterproof mortar joint. The most weather-resistant mortar joint is one that’s been created with a convex rounded tool. When the bricklayer uses the tool on the soft mortar, the resulting shape is a slightly concave mortar joint where the edges of the mortar touch the outer edges of the brick.

Water flowing down the wall during an intense wind-driven rainstorm is automatically forced down the wall by the concave joints. With your raked joint, water can collect to a slight degree on the small shelf. If a brick or two or three has a backwards tilt, the water can begin to seep behind the brick.

Your photos also scream at me that your builder or the carpenter didn’t put a proper flashing under the door threshold. This flashing is designed to shed water to the outside of the concrete step beneath the door threshold.

Think for a moment how overlapping shingles work on a roof or lap wood siding works on the exterior wall of a house. Each successive shingle or piece of siding overlaps the one below. This is no different than the way feathers work on a bird. Gravity pulls the water over each shingle, piece of siding or feather and the water never can get into the core of the building or bird.

In your case, if you look at your threshold, water can get behind the concrete curb that’s under the door threshold. While there might be a hidden flashing behind the concrete curb, how is it possible for the water to get back out on top of the patio and drain away from the house? The concrete curb is acting like a dam.

My advice to you is to carefully remove the aluminum trim that’s covering the wood trim that surrounds the sliding patio door. You’ll then remove any wood trim around the door. You need to first determine if the top and sides of the door have proper flashing.

As drastic as it sounds, you also need to remove the simple concrete curb that’s under the door threshold. While this may seem like a difficult task, I’m quite sure it’s only going to take an hour or less using a four-pound hammer or even less time if you rent an electric demolition hammer from a tool rental business. Be sure to tape thin sheets of plywood over the glass to protect the door from flying pieces of concrete.

Once you’ve exposed the top, sides and bottom of the door you can do an assessment of what needs to be done to make the door waterproof. I’m hoping that you discover the builder or carpenter installed a proper flashing pan under the entire door threshold. That’s the first step that should have been done even before the door was lifted into the rough opening.

If there’s no flashing pan under the door, I’m afraid that you need to remove the entire door from the opening and start the entire installation process over from scratch. There are pre-formed plastic flashing pans that you can use under the door or you can create one with thin sheets of lead or the modern rubberized-asphalt-based flashing tape. There are countless videos online that show you how to install these flashings under a door or window.

The ultimate goal is to create a series of overlapping layers of flashing material so that any water that gets behind the door trim from above the door or along the sides is captured and redirected back out to the front face of the house below the door threshold.

Years ago builders used soldered sheet copper or tin-coated steel. The flashing issue is mission critical in homes that are framed with wood. It’s unacceptable for any water to gain access to the wood framing behind brick, siding or stucco. The technology to achieve this goal has been known for hundreds of years, but unfortunately many modern builders don’t study old buildings to see how the master builders of old kept houses dry.

Column 1212
Clean Hard Water Stains Tile

shower floor hard water stains

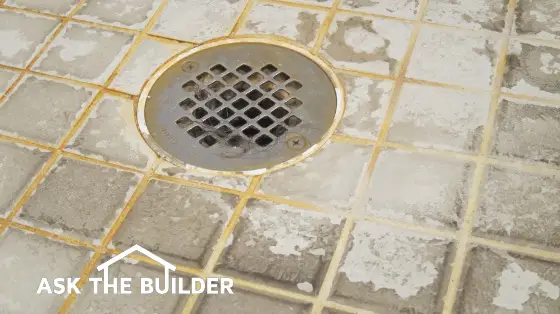
Clean Hard Water Stains Tile | This tile shower floor has nasty hard water stains. They can be cleaned easily with time and some household vinegar. © 2021 Tim Carter Builder

Clean Hard Water Stains TIPS

DEAR TIM: I’ll admit it. I’m not the best housekeeper and I’m frazzled. My tile shower floor is filthy with hard water stains. I don’t like using harsh chemicals for a number of reasons and because the stains are so hard to clean, I’ve neglected the floor.

Is there an easy way to clean hard water stains from tile? How is is done?

Or, do I have to rip out the tile and start over? Is there a way to prevent the hard water stains once I get the tile clean again?

Thank you Tim! Tom Y., Tampa, FL

DEAR TOM: Many people place a low priority on cleaning their homes for any number of reasons. Some are unable to do it, some are just too busy and some may not even see the dirt. The good news is that with minimal effort and a bottle of something you most likely have in your kitchen pantry and eat on a regular basis, you’ll have gleaming and clean tile in less than a day!

What is the Best Product to Remove Hard Water Stains?

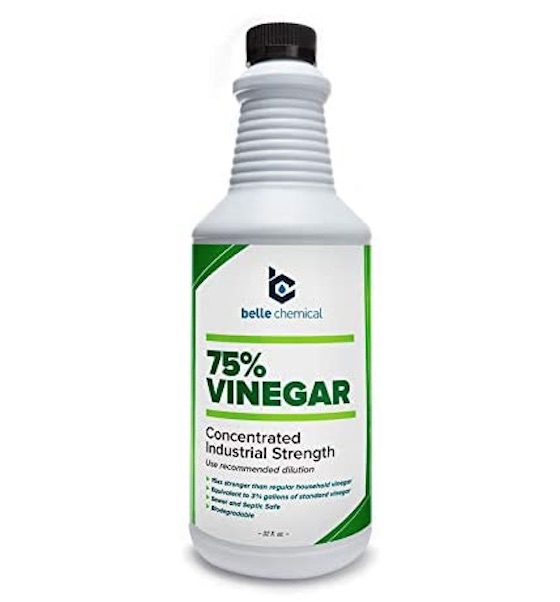
The best product to remove pesky normal hard water stains is white vinegar. You can buy it at your grocery store in gallon jugs. You can have concentrated white vinegar solution delivered to your doorstep.

concentrated white vinegar

This is strong concentrated white vinegar. It will do a fantastic job of removing hard water deposits. CLICK or TAP HERE to have it at your doorstep in days.

Before I tell you how to clean the hard water stains from your tile floor, allow me to explain how they form. Once you understand this, then you’ll realize how easy it is to prevent them from happening in the future.

Free & Fast Bids

CLICK HERE to get FREE & FAST BIDS from local cleaning services who'll keep your tile looking great or will RESTORE it.

What Causes Hard Water Stains?

Hard water stains are caused by minerals in your water. Just about all tap water from your house faucets has dissolved minerals in the water similar to sugar being dissolved in coffee or salt being dissolved in water. Once the water dries, the minerals are left behind.

In many places in the USA, and across the world, the water coming from wells and municipal water pipes has dissolved minerals in it. The most common elements in these minerals is calcium and magnesium.

Do Minerals Make the Water Hard?

Dissolved minerals make the water hard as opposed to soft. Soft water feels slippery when you rub your hands together. You don’t have this sensation with hard water, thus the descriptor.

The hardness of water is measured in grains with one grain equal to one seven-thousandth of a pound. To put this in perspective a typical grain of wheat weighs the same and evidently it takes about 7000 grains of wheat to equal a pound. But I digress.

Why Do I See the Hard Water Deposits?

When hard water containing calcium and magnesium evaporates, the water component goes into the air as a vapor leaving an ultra-thin coating, often invisible, of the calcium and magnesium on the surface. You can test this easily if you have a dark countertop or piece of dark plastic.

Allow a drop of water to dry and you may see a very faint white ring of the crystals marking the outline of the drop as it shrinks and evaporates.

Do Hard Water Deposits Build Up in Layers?

Hard water deposits build up in layers each time you allow water to evaporate on top of an existing hard water deposit.

If you don’t clean off these deposits on a regular basis in a shower floor, each time you get into the shower with dirty feet, you press tiny dirt particles into the fresh mineral crystals.W

hen you get out of the shower and the water on the floor dries another layer of new crystals locks in the last layer plus the new dirt. Can you see what happens if you do this for months on end? You end up with a layer cake of hard water deposits and dirt.

Will Mild Acid Remove Hard Water Deposits?

Yes, mild acids like citric acid and acetic acid will dissolve hard water deposits. White vinegar is a mild acetic acid.

I’d like you to now recall some of your high school chemistry. The hard water deposits are alkaline in nature. This means they have a pH greater than 7. If you pour an acid which has a pH less than 7 onto the hard water deposits, they’ll soften and start to dissolve.

But as you indicated, you don’t want to use harsh chemicals and many acids are harsh. Guess what? Common white vinegar that you use to cook with and put into your body is a mild acid. It’s safe and non-toxic.

How Long Should the Vinegar Soak?

The white vinegar should be allowed to soak for hours. The best thing is to do an overnight test.

Here’s all you need to do to remove the hard water stains from your shower tile floor. For real impact, I only want you to do this on half the floor. Make sure the tile floor is dry.

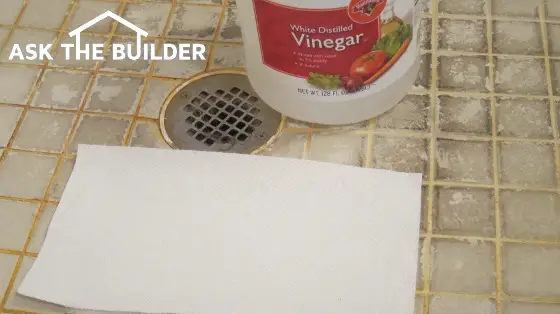
Put a double layer of dry paper towels on half the tile. Saturate the towels with pure white vinegar. Really soak the paper towels with the vinegar.

hard water stains

The paper towels have been spread and the vinegar is about to be poured! It's best to let the vinegar soak on tiles like this for at least eight hours. © 2021 Tim Carter Builder

How Do You Apply Vinegar to Wall Tile?

You apply vinegar to the wall tile by saturated paper towels with the vinegar. Then press them against the stained wall tile pressing out all air bubbles. Just imagine the paper towels are wallpaper.

IMPORTANT TIP: You'll have to spritz the paper towels with fresh vinegar every 30 minutes as gravity will pull it out of the paper towels to the floor.

How Long Should the Vinegar Stay on the Wall Tile?

Allow the vinegar to sit on the tile for at least eight hours, possibly more. At the end of the wait period, squeeze out the paper towels and throw them away.

Before you get into the shower, scrub the floor with a stiff scrub brush where the paper towel was and around the towel.

Dramatic Before, During & After Photos

A wonderful woman, Saskia, who lives in Palos Verdes Estates in California read all of my hard-water-stain-removal columns. She decided to try the white vinegar method. Here's what she sent to me:

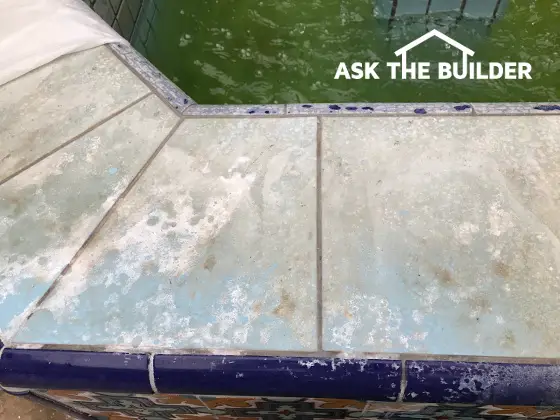
"I cannot thank you enough!  We moved into our new home 7+ years ago. We have a lovely fountain in our entrance. Over time, the tile became whitened and crusty. I don't think we paid much attention at first--it happened gradually.

Recently, after a trip, I looked at it and was horrified. I googled how to clean tile and was directed to your site. My husband thought the discoloration was from the bleach we used to keep the fountain pool water clean, but I knew it was calcium.

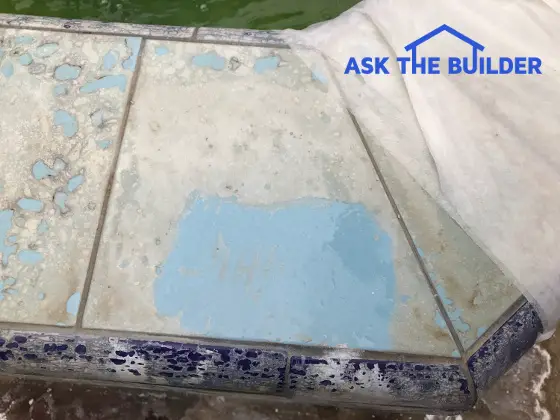
The first picture is of the original tile. The second is after 24 hours of a sponge sitting on the tile, soaked in 100% vinegar, per your instructions.

The last is our final result after a month(!!!) of soaking and some gentle scraping with a razor blade at a 30-degree angle.

You're the very best. I was ready to use some nasty corrosive stuff, but this was so much better and did the job beautifully.

THANK YOU!"

Saskia - Palos Verdes Estates, California

Fortunately she took photos of the process. Here they are:

hard water stains

Here's Saskia's fountain edge. This is before she started to work with the vinegar. Copyright 2021 Tim Carter

hard water stains

You can clearly see where the sponge rested all night. Don't you wish you would have paid more attention in your high school chemistry class? Copyright 2021 Tim Carter

hard water stains

What a transformation!! Harsh acids could have RUINED the tile and grout. Patience is everything. Copyright 2021 Tim Carter

CLICK HERE to get FREE & FAST BIDS from local cleaning services who'll keep your tile looking great or will RESTORE it.

Will Vinegar Create a Slippery Scum?

Sometimes vinegar can react with soap scum and create a slippery mess and you could fall if you don't clean it before stepping on the slime. Be sure to rinse well and check the area with your hand to ensure it's not slippery.

After scrubbing, the tile might look like new or there should be far less hard water deposits.

How Do I Get Rid of Tough Hard Water Deposits?

Tough hard-water deposits may require multiple applications of vinegar and multiple scrubbing attempts. If you see progress after the first application of vinegar, you know it's going to work in the long run.

If there’s a great improvement but the tile doesn’t look like new, you just have to repeat the process to get the tile looking perfect. There’s no need to scrub the tile with a harsh abrasive cleaner that can scratch the fine clear glaze on the tile.

Should I Test Vinegar on Marble?

You must test vinegar on marble. Marble is an alkaline stone and it's possible a strong vinegar could etch the surface or reduce the polish level.

Do NOT do this with any marble surface without carefully testing with a cotton swab. Marble is alkaline and the vinegar might etch and remove some of the polish from marble.

Carefully test using any acid on marble. Apply a drop of vinegar in a place not too noticeable and let it set for hours. Rinse and see if the finish of the marble has changed.

How Do I Prevent Hard Water Stains?

Hard-water stains are prevented by removing any water from the tile or other surfaces. I use a squeegee at my home.

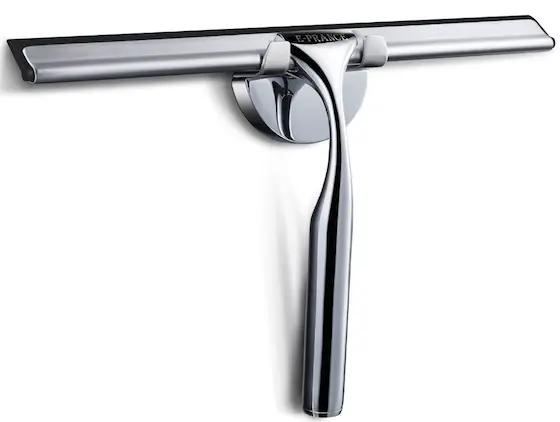
Keeping your tile looking like new from now on after you get all the hard water deposits removed is easy. Purchase a high-quality squeegee with a good rubber blade.

This is a great squeegee. I have it in my own shower at my home. I love the suction-cup holder for it. CLICK THE PHOTO NOW TO HAVE THIS DELIVERED TO YOUR HOME IN DAYS.

After each shower use the squeegee like a window washer cleans glass to remove all the water from the walls and floors. Get as much water as possible into the drain. If there’s no water to evaporate on the tile, there will be no hard water deposits.

How Often Should I Use Vinegar?

I’d also just get in the habit of using the vinegar every two weeks to keep ahead of any minor deposits that may develop because you can’t get all the water off the tile. Let me know what happens. Actually I already know that you’ll have success, but I’d still like to read your joyful email!

CLICK HERE to get FREE & FAST BIDS from local cleaning services who'll keep your tile looking great or will RESTORE it.

Column 1164

Klein Heavy-Duty Wire Stripper Review

Wire Strippers

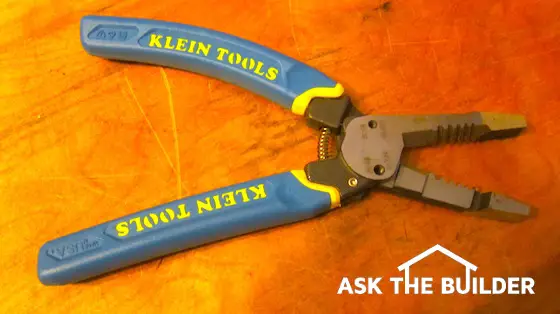
Here it is. This is a wonderful tool. Many features in one handy, comfortable tool. CLICK THE PHOTO NOW to have one delivered to your home in days. Copyright 2017 Tim Carter

Klein Heavy-Duty Wire Strippers

I've lost count of the number of wire strippers I've used in my career.

If you've ever done any new or remodel residential wiring, you know you often need two wire tools to accomplish most tasks.

They are:

  • wire strippers
  • linesman's pliers

The linesman's pliers are used to twist wires together when making a junction. They also have a great heavy-duty cutter that allows you to cut through 12 or 10-gauge romex cable.

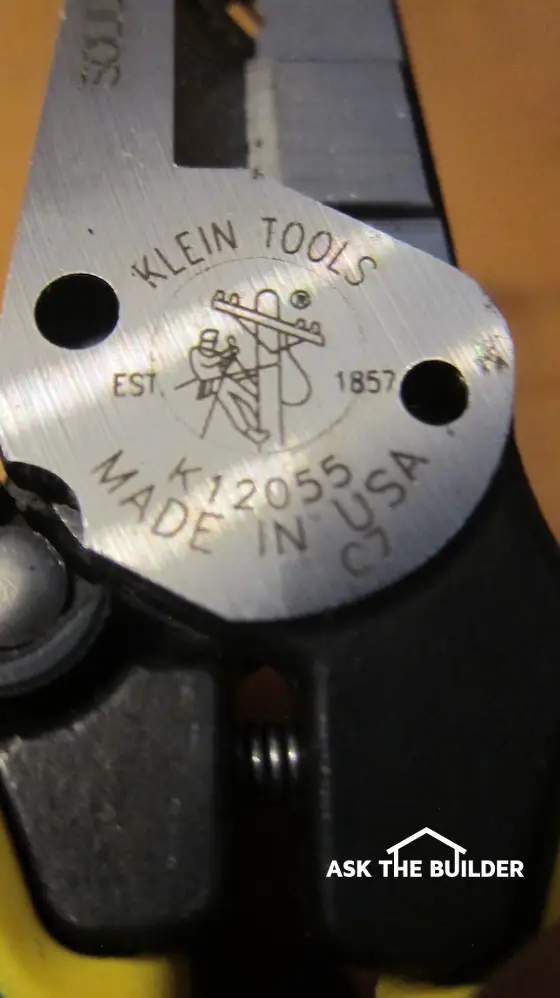
Imagine having one tool instead of two! That's what the new Klein heavy-duty wire stripper is. It's item K12055.

Klein Heavy-Duty Wire Stripper Video

Watch this video to really get a feel for this tool.

Wire Strippers

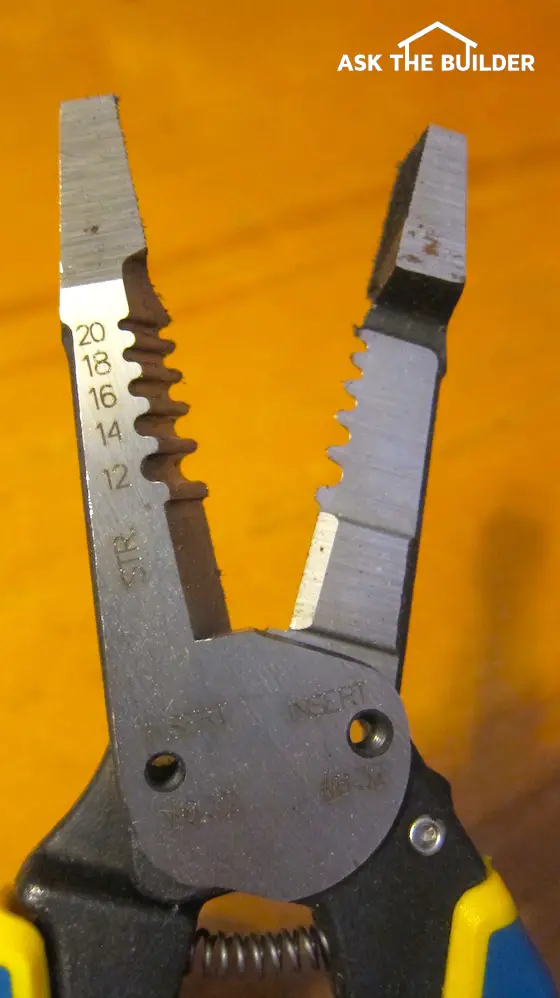
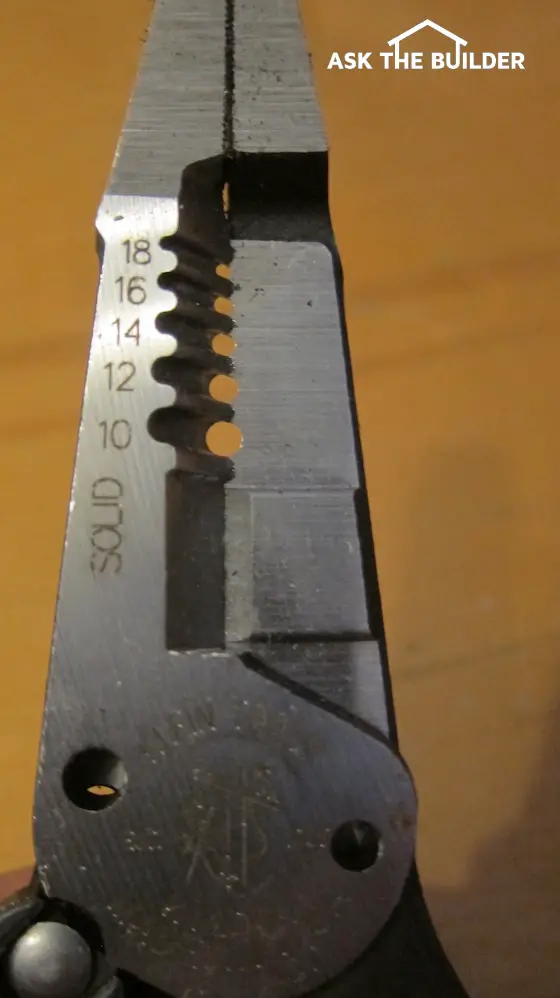
This side is for cutting stranded wire. Flip it over for solid wire. CLICK THE PHOTO to have the strippers at your doorstep in days. Copyright 2017 Tim Carter

Wire Strippers

Flip the tool over and BOOM, you've got the proper holes for solid wire. Clever! CLICK THE PHOTO NOW to have this tool delivered to your casa. Copyright 2017 Tim Carter

Wire Strippers

See the two holes below the Klein logo? those are for cutting off 6/32 and 8/32nds screws. You flip the tool over, thread in the screw to the desired length and squeeze the tool handles to trim off the screws without ruining the threads! CLICK THE PHOTO NOW to have this tool in your hands in just 65.8 hours. Copyright 2017 Tim Carter

Paslode Framing Air Nail Gun Review F-350P

air nail gun

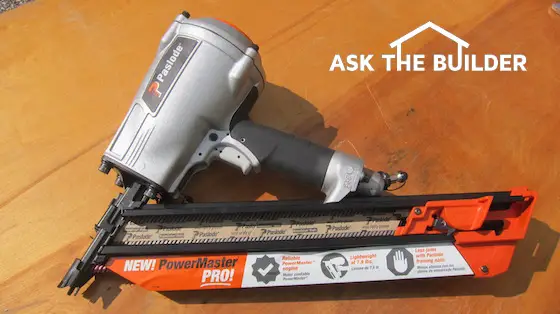
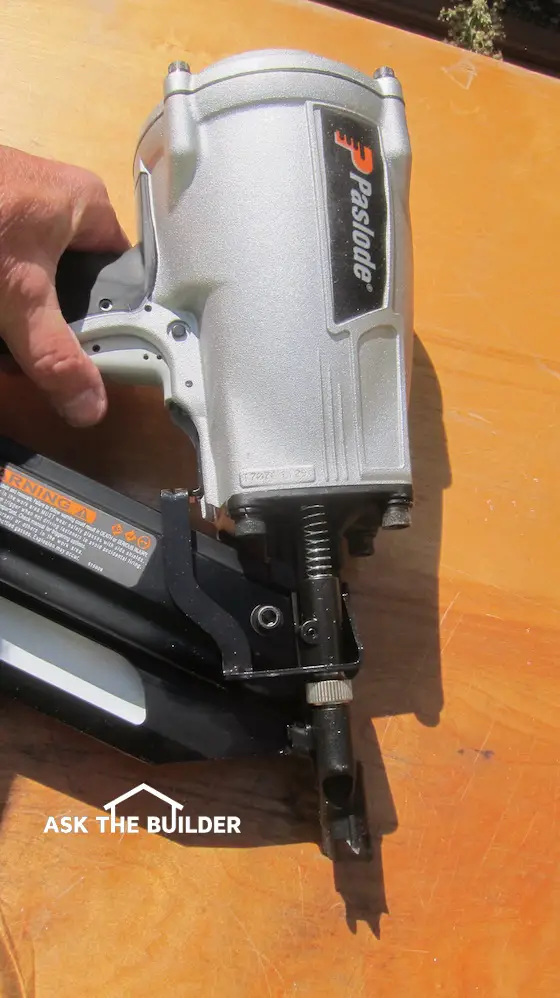
Here she is. She's slim, thin and a gorgeous piece of eye candy. So beautiful you may not want to scuff it up. CLICK THE PHOTO now to have one delivered to your home.

Paslode Framing Air Nail Gun

The first air nail gun I even owned was a framing nailer.

I bought it in the late 1970s. It was gray and one would think it had a lead skin it was so heavy.

What a dream it was to pick up this Paslode F-350P out of the box to discover it's a lightweight compared to most framing nailers.

It tips the scales at just under eight pounds. Believe me you'll appreciate this at 4 pm on a hot July day after shooting nails and lifting walls up all day.

Finally - Read To Use!

You know what I really liked about opening the box up? I was so happy to discover that Paslode gets it.

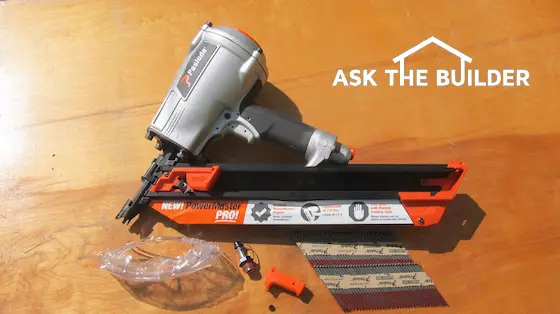
Not only do they include two strips of nails, but they also included the male air fitting that already has pipe-threading compound on it. You just start to screw it in the tool and tighten with an adjustable wrench. THANK YOU Paslode for making the gun READY TO USE OUT OF THE BOX!!

Air Nail Gun

This is everything you get in the box. I left out the clear and concise owners manual. Safety glasses, air fitting, bounce nailing adapter and two strips of nails. #PaslodeROCKS Copyright 2017 Tim Carter

Performance

You'd expect nothing but perfection when connecting an air hose to the tool. You'd expect the gun to fire and not jamb.

Well I wasn't disappointed. I just love it when power tools work as they're supposed to.

Air Nail Gun

Here's a handy tool belt hook that swivels out of the way when you don't need it. Copyright 2017 Tim Carter CLICK THE PHOTO to have this tool delivered to your home.

Air Nail Gun

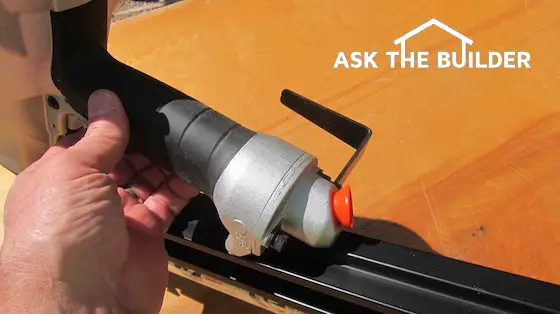
This is the business end of the Paslode framing gun. Inside that shapely head is the reliable PowerMaster engine that's going to make you lots of sweet moola. You'll be happier using the gun, you'll work faster and when you shut off your compressor, you'll hear the lamentations of your competitors. CLICK THE PHOTO now to get this tool. Copyright 2017 Tim Carter

What happens if you are too lazy to get the proper tools? Read what happened to me in my June 16, 2009 AsktheBuilder Newsletter.

Joist Hangers

joist hanger

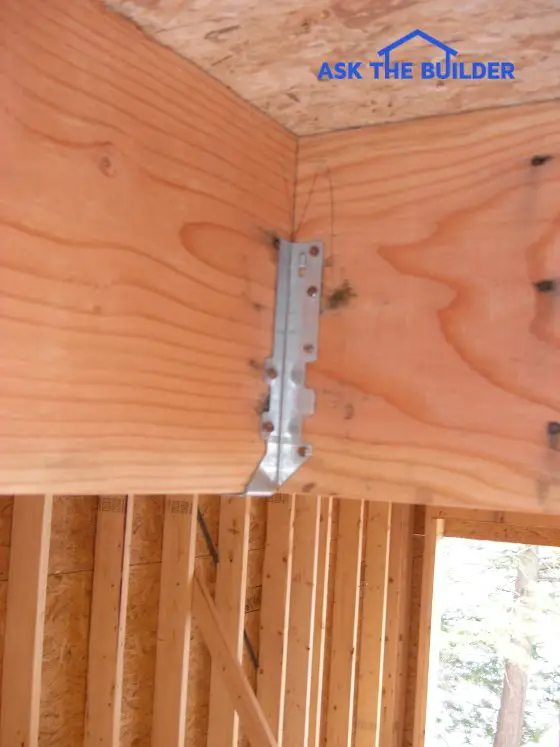
Joist Hangers | This joist hanger is made from galvanized steel and can support a significant amount of weight when installed correctly. WATCH THE VIDEOS JUST BELOW. PHOTO CREDIT: Tim Carter

Joist Hangers TIPS

  • Get new joist hangers approved for high-copper-content treated lumber
  • Structural screws are better than nails
  • WATCH joist hanger screws video below
  • NEVER use roofing nails - they're deadly
  • CLICK HERE to Get Tim's FREE & FUNNY Newsletter!

DEAR TIM: The carpenter that built my deck used joist hangers to hold up the joists along the house and at the end of the deck. Are these steel joist hangers approved and will they stand the test of time?

I’m worried that the joists will fall out of the hanger or pull away from the house. Is there a right and wrong way to install these framing connectors?

Is there a way to build without using joist hangers? Sally P., Richmond, IN

DEAR SALLY: If the joist hangers your carpenter used are approved for use with the newer ACQ treated lumber, you should have nothing to worry about.

The Weakest Link

These metal framing connectors have been around for years and they're code approved. The biggest problem I’ve seen with joist hangers of all types is using the wrong nails when installing them. The latest advice from the top metal framing connector manufacturer in the USA, Simpson Strong-Tie, is to use structural screws instead of nails.

Roofing Nails = Death On A Stick

All too often rookie carpenters or do-it-yourself homeowners will install joist hangers using roofing nails. That’s a recipe for disaster as roofing nails are not structural nails.

Roofing nails don’t have the inherent strength to support the weight of a deck or any framing member. Not only are the shafts of roofing nails too small, but the heads of roofing nails can also easily pop off when subjected to low amounts of tension.

Free & Fast Bids

CLICK HERE to get FREE & FAST BIDS from local carpenters who will install the best deck screws in your deck.

Approved Thick Nails

Most of the manufacturers of high-quality joist hangers sell their own approved nails. Not only are the nails heavy duty, but they also have a special galvanized coating that’s designed to resist rust and corrosion from chemicals found in modern-day treated lumber.

I would have your carpenter show you the box that the nails came in to make sure they’re approved. The labeling should show that the nails are approved for outdoor use and have the level of protection on them.

Screws Are Best

The new advice to use screws instead of nails is simple. Over time nails can loosen and work their way out of the wood.

This happens because of the repeated wetting and drying of the treated wood. Wood is hygroscopic and expands and contracts when it gets wet and then dries out. If you use approved structural screws instead of nails, the screws will stay snug in the wood.

Joist Hanger Screw Video

I show you in this video the structural screws and how they go into a typical joist hanger.

Small Support Shelf

I can see why you might be concerned about the joists pulling away from the house. The small metal shelf or seat at the bottom of the hanger that each deck joist rests on seems insufficient. The truth be told, that’s plenty of support assuming that your deck is built correctly.

CLICK HERE to get FREE & FAST BIDS from local carpenters who will install the best deck screws in your deck.

Diagonal Holes In Hanger

If your carpenter used high-quality decking joist hangers and the correct nails, you probably will have no problems. You should be able to see on the face of the joist hanger that’s on the actual joist several small holes. These holes are punched at an angle and are meant to accept 3-inch galvanized nails or screws that pass through the joist into the structural band board that’s bolted to your home.

Anchor Effect

As these nails are installed on each side of the joist, they create an anchoring effect because the nails are driven at opposing angles. The key is to make sure the carpenter used 3-inch or longer nails. I would randomly remove several to make sure you have the correct length.

Available Locally Or Online

If you want to buy joist hangers to see all the different sizes, shapes and configurations, I would visit a traditional lumber yard. Traditional lumber yards tend to have a larger selection.

You can find them at home centers, but some of the most unusual hangers, including stainless steel joist hangers, can often be found at a full-service lumber yard. You may even find large timber joist hangers for massive pieces of lumber.

joist hangers online

This is a PARTIAL screen shot from Amazon.com showing just a tiny fraction of the hundreds of joist hangers and metal framing connectors that you can use. CLICK THE IMAGE NOW to have any of them delivered to your home.

Framing Flexibility

Joist hangers give carpenters all sorts of flexibility. They allow you to install floor joists in the same plane as a beam. There are ways to do this without joist hangers, but it can be more time consuming.

Perhaps one of the most traditional ways to frame without joist hangers is to have the joists rest on top of a beam. There’s nothing wrong with this method, but realize the top of the beam will be at the bottom plane of the floor joists.

You may have this situation inside your own home where you have two rooms that have a partial wall between them. At the ceiling you’ll notice a short wall that hangs down about a foot. Often this is a beam supporting the floor joists above.

Hide The Beam

Using joist hangers you could possibly tuck this beam up into the ceiling making for a much cleaner look with a continuous ceiling plane going from room to room.

Put Joist In Early

Be careful about installing joist hangers and nailing both sides to the band board without the joist being in place. It’s easy to install the hanger too tight and you can’t get the joist into the hanger. There are special tools that create the correct spacing.

Joists & Beams NOT Same Height!

Installing the hangers before the joists are in place can also cause height issues if the joists and the beam are not the same heights. Believe me, there can be up to one-quarter inch in difference. Welcome to the world of rough lumber!

Joist Height Video

Watch this video to see what I mean about the height of a joist to a beam.

CLICK HERE to get FREE & FAST BIDS from local carpenters who will install the best deck screws in your deck.

Column 858

August 30, 2017 AsktheBuilder Newsletter

I'm a little bummed out today. It started yesterday after talking to an old friend on the phone.

As happens sometimes, you can drift and get out of touch. That's bad.

I've known this wonderful man for over 40 years. He's five years older than I am and is one of the most considerate and understanding men I've ever met.

He retired about five years ago and shortly after doing so he encountered some health issues that have kept him from doing his favorite pastime.

After hanging up the phone, I thought about how I'm currently in great health and don't have any of the challenges he has.

The alternative ending to the movie Titanic flashed in my head.

Do you remember what Old Rose said to Mr. Lovett as he was admiring the Heart of the Ocean diamond pendant in his hand?

CLICK HERE and watch the video clip.

At the end of the short video, stop and think about what you're going to do tomorrow or next week.

Compact Ladder Review

I had the good fortune to test out a very nice lightweight step ladder yesterday.

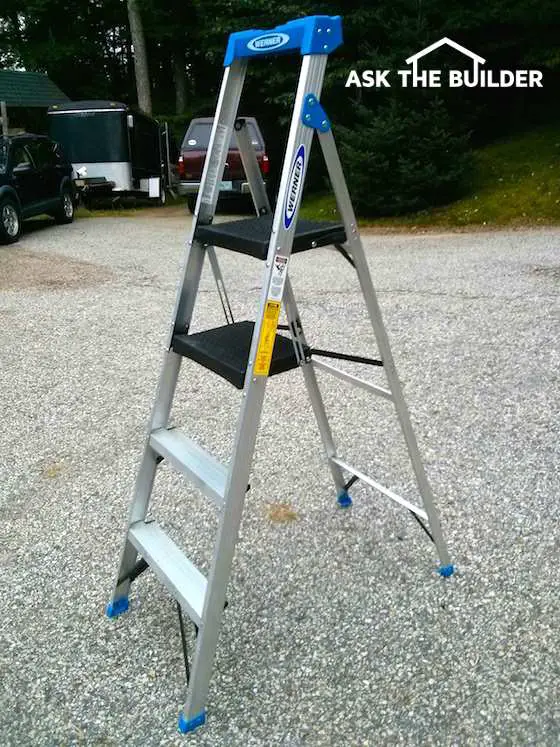
Werner ladder


It's fascinating to me to see products evolve. I clearly remember how wood step ladders used to be.

When they attempted to make them lightweight, they became unstable.

You'll be amazed at how light this ladder is. You'll also be amazed at its stability.

CLICK HERE to see more photos of the ladder.

Lumber Shrinkage

Over the past two weeks, I saw some photos of a fence gate a person built. He was proud of the gate and the wood slats touched one another to make a solid sheet of wood.

But then ten days later, he posted a very cool photo showing the shadow of the fence gate with sunlight slivers in the shadow.

The lumber was shrinking and creating unwanted gaps!

lumber sinkage

Did you know that lumber shrinks in strange ways?

CLICK HERE NOW to read a short column and to peer at a larger version of my crude illustrations.

Crawl Space DIY Vapor Barrier

Do you have a crawl space? Bare dirt?

You better CLICK HERE NOW. You MUST STOP the water vapor from rising out of the soil and entering your home.

If you're building a new home, or pouring ANY INTERIOR concrete slab, CLICK HERE and read the column!!! You need the special vapor barrier!!! NOT standard crap 6-mill poly.

Roofing RIPOFF Update

Back in April I published my long-awaited book Roofing Ripoff.
Roofing Ripoff Book
If you're re-roofing your home or building a new home or light commercial building with an asphalt shingle roof, you should really read the short book.

While completing the research for the book, it turns out I was the first person in the world to discover that copper ions slow down to a crawl the oxidation of asphalt.

The oxidation of the asphalt up on your roof is what causes the shingles to lose the colored ceramic granules and to curl up like a dried tobacco leaf.

If you install copper strips up on your ridge and your hips you can get asphalt shingles to last 30, 40 and possibly LONGER.

If you have a NEWER asphalt roof, say less than five years old, you MUST INSTALL THE COPPER immediately to prevent your roof from going bad in just a FEW YEARS.

Click here to purchase copper roof strips for your roof from the AsktheBuilder store.

That's enough for today. I'm off to fill a bunch of the small sample sizes of Stain Solver.

What's Stain Solver???? CLICK HERE.

That's enough for today.

Tim Carter
Founder - www.AsktheBuilder.com

Do It Right, Not Over!

Werner Compact Ladder 5.5 Feet Review

step ladder

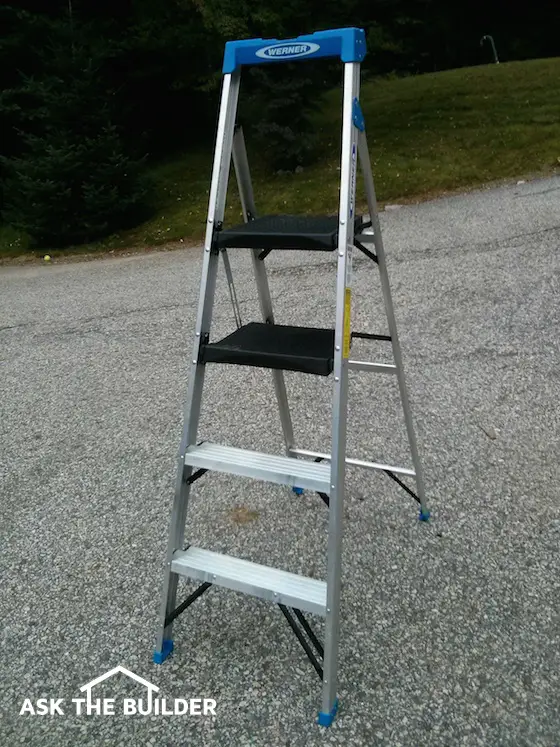
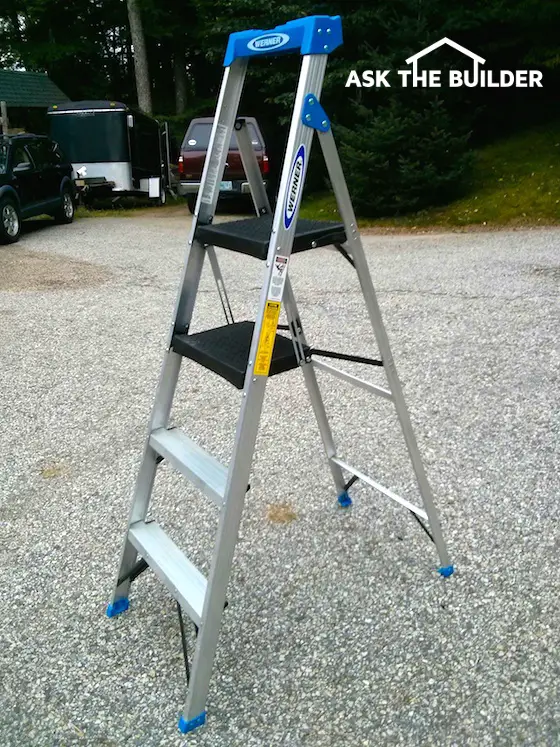
Here's the ladder. She looks great and it's easy to climb up to the black platforms. It's model # ACS386 Copyright 2017 Tim Carter

Werner Compact Ladder

Over the past year or so, the new trend in step ladders is to make them slim and light.

This is my second review of a ladder like this. About a year ago, I looked at the Gorilla slim ladders.

I've owned Werner ladders for years and never had any issues.

The first thing I noticed when I lifted the ladder is it's indeed lightweight.

Less weight is good!

You can stand on both black platforms and since they're nice and wide, they're very comfortable.

step ladder

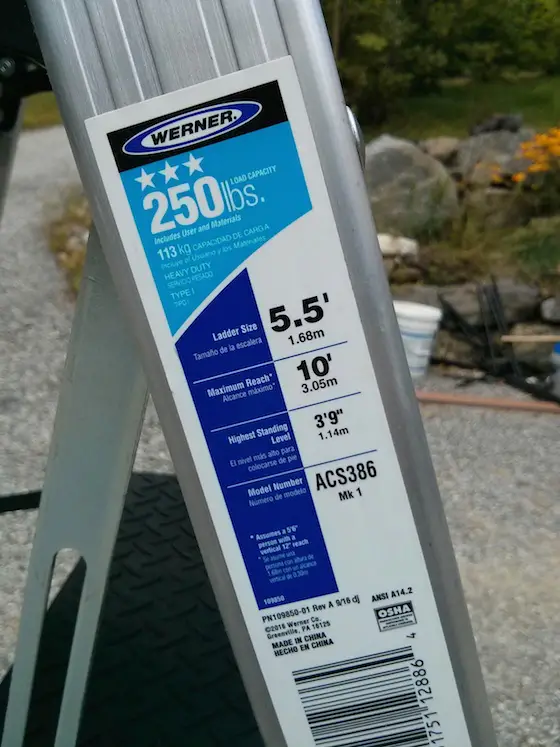
Many want to know the specs. Here you go! Copyright 2017 Tim Carter

step ladder

This is the top step of the ladder. This platform is about 4 feet off the ground. NEVER EVER think of standing or sitting on the top blue tool platform. Copyright 2017 Tim Carter

step ladder

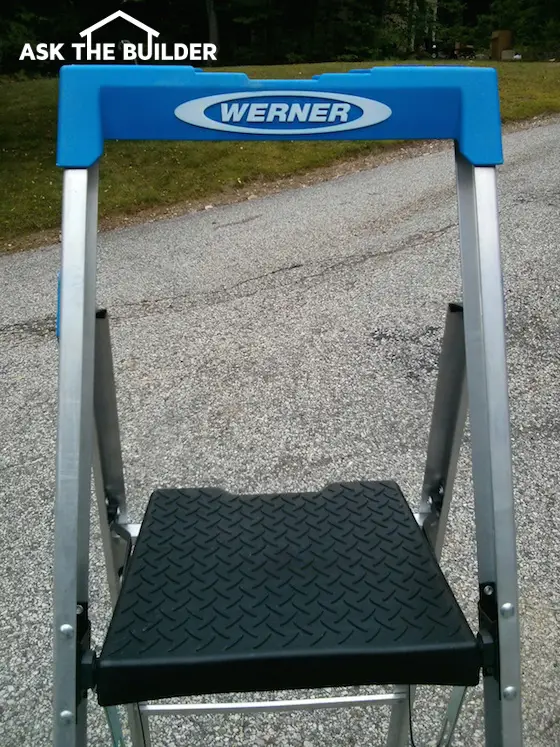
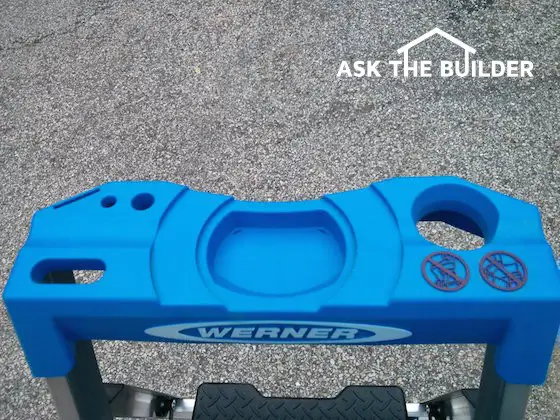
Here's the top of the ladder. The hole in the upper right is for your drill or impact driver. The larger recessed center areas are for quart and gallon paint cans. The thin slot in the upper left corner is for a putty knife. The two smaller holes are for screwdrivers or any other pointed hand tool. The oblong hole in the lower left is a mystery to me. I can't think of any tool I own that has that shape for a handle. Note the DANGER illustrations in the lower right: NO SITTING or STANDING on the blue top. Copyright 2017 Tim Carter

step ladder

This shot shows the spread of the ladder legs. It's got a normal footprint offering lots of stability. At the time of this review, Lowe's twisted the arm of Werner and you can only buy it there. That's why the top and feet of the ladders are Lowe's blue. DUH! 😉 If you go to the Lowe's website be sure to type Werner ACS386 into their search engine. At the time of this review it doesn't show up in a general search of step ladders. Go figure. You can't find this ladder on Amazon.com. The ones you do find on Amazon are priced higher than you can find this Werner ladder at the time of this review. Copyright 2017 Tim Carter

This ladder was featured in the August 30, 2017 AsktheBuilder Newsletter.

Crawl Space DIY Vapor Barrier

crawl space vapor barrier

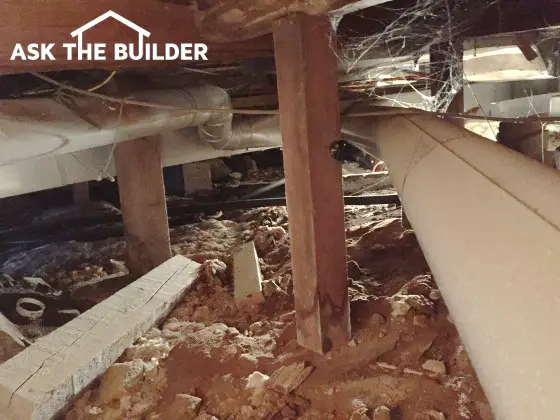
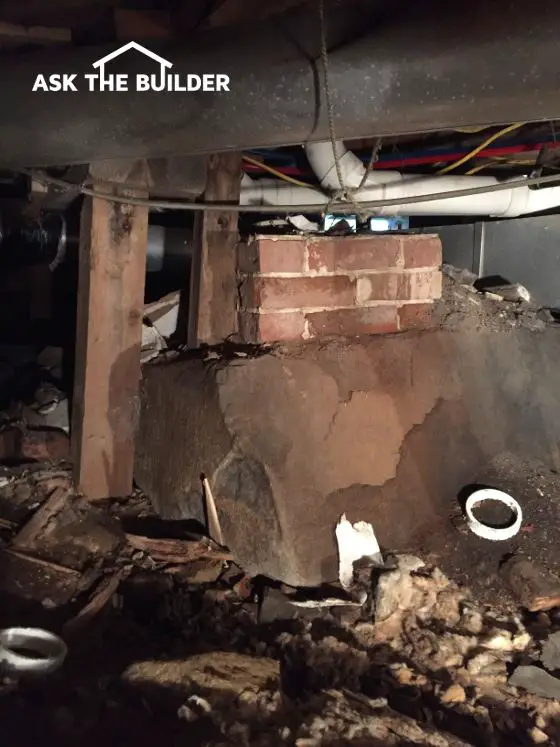
This is a pretty normal creepy crawl space. Invisible water vapor rises from the soil like smoke from a campfire. (C) Copyright 2017 Tim Carter

Crawl Space DIY Vapor Barrier TIPS

DEAR TIM: The crawl space under my 1910 home is just exposed dirt and leftover building materials. I need to add a vapor barrier and wonder about the best one.

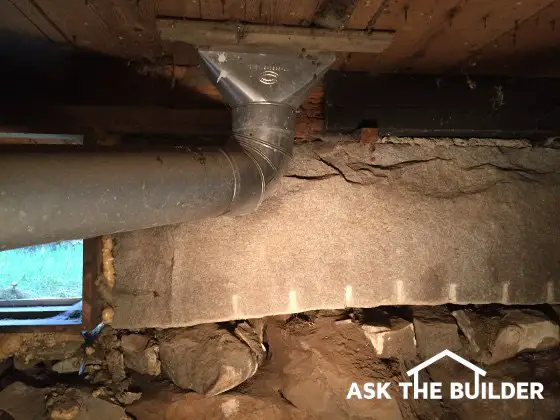
The foundation consists of granite slabs and rubble stone. It’s got small gaps in it where I see daylight.

How would you go about converting this creepy place into one that’s an asset instead of a liability? Any and all tips, suggestions and warnings are welcome. Suzanna S., South Bristol, ME

DEAR SUZANNA: I’ve been in quite a few creepy crawl spaces such as yours. It’s always an adventure.

Tight Spaces

I can get a little anxious much like the character Danny the tunnel digger in the classic movie The Great Escape if the distance between the dirt and floor joists is less than 20 inches.

Big Payoff

The job you’re about to undertake is going to yield big rewards if you add one more facet to it. I’d add insulation to the underside of the floor as part of the scope of work, but we’ll talk about that in a little bit.

Free & Fast Bids

CLICK HERE to get FREE & FAST BIDS from local insulation contractors that can do vapor barriers.

Clear Clutter First

If I was helping you do this job, I’d suggest the first thing we do is get rid of all the old building materials and any scrap who-knows-what that’s in the grotto. Be sure to wear goggles, not safety glasses, while doing this.

I’d also suggest you don the best face mask you can afford to block the smallest particles of anything from getting into your lungs. People have contracted serious lung infections from inhaling bad things that get airborne as you start to move things around and disturb dust as you work.

Remove & Level Dirt

The second step would be to try to remove any high spots of loose dirt and do anything that’s possible within reason to increase the amount of distance between the dirt and the floor joists. It’s ideal to have about 30 inches of space, but that may be a vast undertaking to remove that much dirt.

At the very least, you want to get rid of any sharp rocks or anything that would puncture the vapor barrier you’ll be installing. The flatter the ground is, the easier it’s going to be to install the vapor barrier and tape the seams.

Tuck Point Foundation

After you have the dirt prepared, then it’s time to fill in all the open spaces between the granite and rubble stone. It’s going to be easier to do this outdoor than on your belly or back in the crawl space. But I’d recommend you try to fill from both sides.

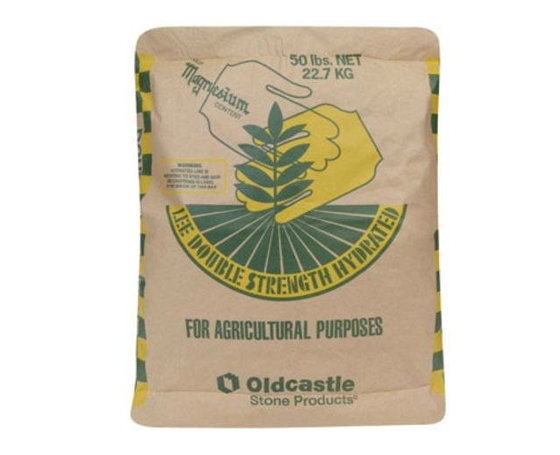
I’d mix up a rich mixture of fine sand and hydrated lime for this job. Hydrated lime is easy to get online. CLICK the bag just below.

crawl space vapor barrier

This is great hydrated lime. It's label for use on farms, but believe me it's GREAT to use for brick, stone mortars and whitewash. CLICK THE PHOTO OF THE BAG NOW TO HAVE THIS DELIVERED TO YOUR HOME IN DAYS. http://amzn.to/2FJJlOY

1:1 or 2:1

I’d blend one part sand to one part lime for the inside mixture and fill the voids using a mortar bag that’s similar to what bakers use to decorate cakes. The mortar mixture needs to be very rich, smooth and wet to flow through the bag and not clog the tip.

The outside mix can be two parts sand to one part hydrated lime. Just use a pointing trowel or whatever tool you can manage without smearing the mortar on the stone. It’s very important to fill all the gaps because I don’t want any rain-driven water to get on top of or under the vapor barrier.

Best Vapor Barrier

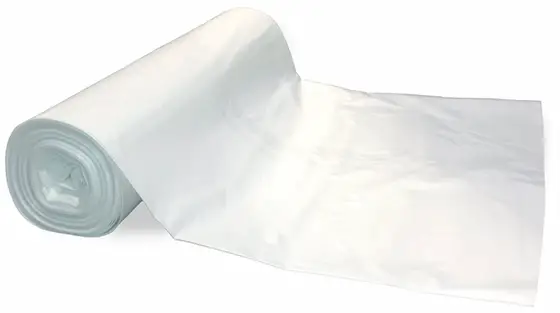
It’s now time to put in the vapor barrier. You’ve got lots of choices. Often people select standard 6-mil clear plastic you see at the big box stores. It will work, but it’s not the best product.

I’d go with a cross-laminated vapor barrier that’s often specified for commercial and institutional work. Find one that meets or exceeds the ASTM E 1745 standard. These allow very little amounts of water vapor to transfer through the membrane.

CLICK HERE to get FREE & FAST BIDS from local insulation contractors that can do vapor barriers.

crawl space vapor barrier

This is the special vapor barrier that meets the ASTM standard. CLICK THE IMAGE TO ORDER IT.

Purchase a vapor barrier that has its own special tape that bonds to the plastic so all the seams are sealed. Don’t count on cheap duct tape to stand the test of time. You want to lap the vapor barrier up the foundation walls and attach it to the wood sill plate the floor joists rest upon. Use long pieces of thin wood lath to secure the vapor barrier to the sill plate.

Wrap The Posts

You’ll have to get creative around any vertical wood posts or masonry columns. It won’t take you long to figure out how to add pieces of the vapor barrier that run up the vertical structural members and then lap down onto the flat vapor barrier that’s on the dirt. Just tape all overlaps well so no vapor can escape into the crawl space.

Wrapping Posts Video

Watch this video to see how to wrap posts and piers in a crawlspace.

crawl space vapor barrier

Add Insulation

Once the vapor barrier is in place you can then add insulation in between the floor joists. Avoid the temptation to use an expanding foam. One of my website visitors had a company do this and the expanding foam detached all the ductwork from the floor joists causing a disaster.

crawl space vapor barrier

I’d just stick with time-tested un-faced fiberglass batts. I’d put in at least 6 inches and if you can afford 9 inches you should do that because of your extended harsh winters. Your feet and checkbook will appreciate it. Not only will your floor be much warmer, you’ll use less heating fuel on those frigid nights.

CLICK HERE to get FREE & FAST BIDS from local insulation contractors that can do vapor barriers.

Column 1211

Super Washable Wall Paint

Washable Wall Paint TIPS

DEAR TIM: I have a husband with dirty hands and children who think walls are painting canvases. Recently I purchased an interior wall paint that claimed to be washable.

It was washable to some degree but tough stains did not release from the paint. I really need to be able to wash my painted walls but I don't want a semi or high gloss interior finish.

Is there a magical paint that really does release stains? Susan K., Pottstown, PA

DEAR SUSAN: The quest for a flat washable interior wall paint is over I believe.

Washable Paints Are Reality

I think I've found a paint that will meet your tough requirements and allow you to have clean walls without periodic repainting. The solution to the problem was reformulating some of the components of ordinary wall paint.

Keep in mind that interior wall paints, and most paints for that matter, are simply colored glue. The chemistry of paint is very close to that of regular adhesives.

washable paint

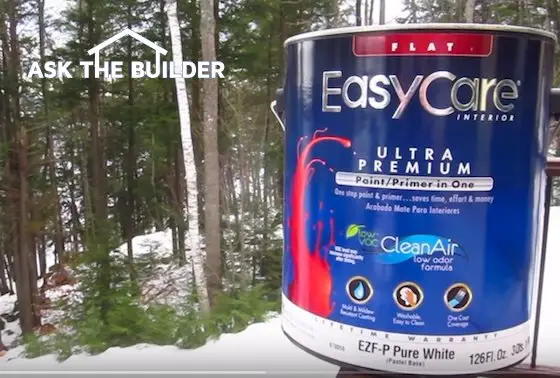
Here's a washable wall paint. I tried this in my bathroom and it cleans easily. CLICK THE PHOTO NOW to have this delivered to your home.

Free & Fast Bids

CLICK HERE to get FREE & FAST BIDS from local painters who can do a great job for you.

Paints = Colored Glue

Paint sticks to your skin, clothes and walls just like any glue. Coarse pigments are added that allow paint to hide other colors and produce a film over the surface you are painting. Traditional wall paints often use extender pigments to help with this task of hiding colors and marks on the wall that is being painted.

Sand & Clay Ingredients

But these traditional extender pigments are porous and are usually made from finely ground silica sand or Georgia Kaolin clays. These particles can be very uneven with respect to size and when viewed under a powerful microscope they look like a coarse sponge.

Unfortunately for you and many other homeowners, this coarse texture is an excellent place for stains to attach themselves.

Washable Wall Paint Video

Watch this pro video about a major brand's washable wall paints. I've used this paint and had great success with it.

Cleaning Cheap Paint Polishes It

When you attempt to remove a stain or mark from paints that contain these extender pigments, a majority of the stain will lift from the paint but a certain amount stays hidden in the deep pores of the pigments.

Vigorous scrubbing will remove the remainder of the stain but it also burnishes, or polishes, the paint making it appear shiny. This shiny spot is often as unsightly as the original stain.

Ceramic Microspheres To The Rescue

A new flat wall paint can be purchased that eliminates this problem. Have you ever used a pencil or a washable marker pen on glazed ceramic tile?

A wet paper towel immediately lifts the marks from this glass-like surface. An ingenious chemist at a paint company decided to incorporate this same principle in a flat wall paint.

He substituted tiny ceramic microspheres in place of the coarse extender pigments. The result is a unique flat wall paint that is indeed washable. I tested this paint's washability characteristics against some of the leading washable wall paints and was amazed at how well the paint performed.

CLICK HERE to get FREE & FAST BIDS from local painters who can do a great job for you.

Rapid Response

As with any stain, the trick to removal lies in rapid response. The sooner you act, the better your chances of completely removing a stain.

Oxygen Bleach

Stain Solver is MADE in the USA with USA ingredients that are food-grade quality. CLICK THE IMAGE to order some NOW.

I've had the best luck with certified organic oxygen bleach. Stain Solver is my preferred brand.

Stain Solver is non-toxic, it's made in the USA with US ingredients and it's a pure powder you mix with warm or hot tap water.

Stir until the powder is dissolved and then put the solution in a spray bottle. Spritz the stain, wait about five minutes and wipe clean!

Liquid Soap Not Bad

Mild liquid dishwashing soaps also go a long way in helping to emulsify and lift stains from any interior wall paint. Stains that have dried out need to be rehydrated. This means you need to add water back to the stain.

Soak the stain for a few minutes to bring them back to their original wet or hydrated state before they will completely release from the paint film. I do this by getting a paper towel wet and press it onto the stain like you're hanging wallpaper.

Save Original Paint

In case you can't remove a tough stain from this new or any other wall paint it is a good idea to keep some of the original paint on hand. You'll have to wash the entire wall to get a perfect match. Often you need to paint the entire wall to not end up with a spot where you see the touch-up paint. Sunlight can alter the color of paint.

Storing Paint

If you have a partial can of water-based paint, transfer the paint into a container where there will be a minimal amount of air on top of the paint. If you have a gallon paint can with only a quart of paint in it, you'll get a nasty skin on top of the paint.

Always pour a small amount of water on top of the water-based paint in the can before you hammer or screw the lid in place. This water film will often prevent a skin from forming on the surface of the paint while it is stored. If it's oil-based paint, pour some mineral spirits or paint thinner on top of the paint.

Use Stain Blocker

When touching up a stained spot on a wall you may have to use a stain blocking primer if the stain bleeds through. To completely mask the stain, you may also have to completely repaint just the wall and not the entire room.

CLICK HERE to get FREE & FAST BIDS from local painters who can do a great job for you.

Column 369

Lumber Shrinkage

Lumber Shrinkage

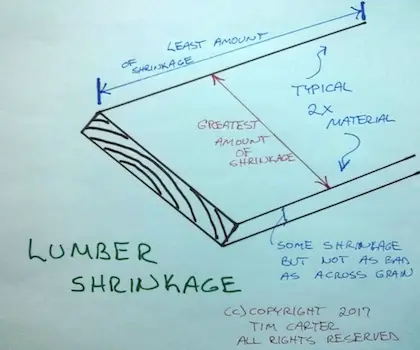
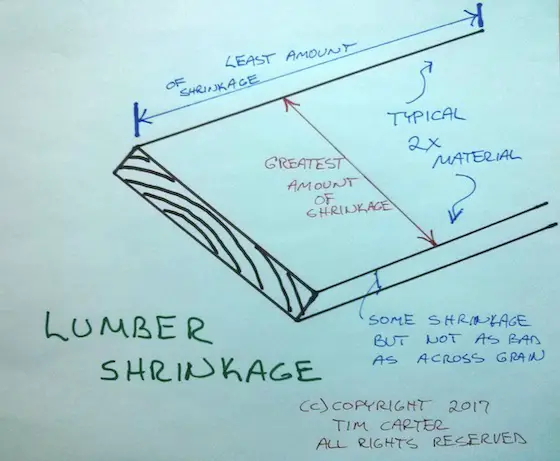
Lumber Shrinkage - Imagine this is a 2x4 or a 2x12. It's a crude 3D drawing I made, but I think you can make sense of it. (C) Copyright 2017 Tim Carter

Lumber Shrinkage TIPS

If you've never built a new home before, you may be in for a surprise three to six months after you move in. If your house was built during a wet time of year, the surprise you will get will be even bigger.

House Settlement Explained

Homes which are built with wood almost always develop cracks in any number of places that all too often are blamed on foundation settlement. The truth of the matter is the house is indeed settling down, but the foundation is not moving.

Lumber Shrinks

There's a really good chance your home is going to be built with a considerable amount of lumber. If your home is two stories and the builder uses regular dimensional lumber such as traditional 2x10's or 2x12's, this dimensional lumber is going to lose moisture which translates to an actual change in size.

As the lumber gives up this moisture, the change in size can be dramatic. But it's important to know that a standard piece of lumber does not shrink the same amount along all of its dimensions. The greatest amount of shrinkage occurs across the face of the grain.

This happens because almost all wood, except for the densest species, is hygroscopic - it readily absorbs and retains moisture.

This moisture can be either liquid or in a vapor state.  Most wood will change its dimensions depending on the amount of water it has absorbed and the cellular structure of the wood.

Shrinkage Not Equal

To help visualize this, let's talk about a standard 2x4 that's 8 feet long the moment it is cut at the mill. For the sake of discussion, let's assume the piece of lumber will be exactly 96 inches long, 1.5 inches thick, and 3.5 inches wide.

Once the 2x4 has been in your house for 6 months and had a chance to acclimate and dry out if it was wet, it will still be nearly 96 inches long. There is very little shrinkage along the length of the lumber.

The thickness of the 2x4 will change slightly, but not by much. But the width of the 2x4 will experience the greatest shrinkage. It may only measure 3 and 3/8 inches in width. Imagine how much shrinkage might happen with a large 2 x 12?

Proof At My Home

This shrinkage happened at my own home and it was dramatic. I built a three-story Queen Anne Victorian home and installed the tin chimney flashing myself.

The flashing was 26 feet above the top of the foundation. When I cut the angled counter flashing that comes down the face of the brick and stops at the roof, I left a 1/4-inch gap.

One year later that gap was 2 inches! Two things could have caused this.

The chimney, which weighed about five tons, could have grown and lifted out of the ground or the lumber between the foundation and the roof could have shrunk. A combination of both is also possible.

No Way It Was The Chimney

I can tell you for a fact the solid masonry chimney did not rise up out of the ground.

Wood Shrinkage Video

This is a longer video, but I guarantee you'll discover some important information.

Plan For Shrinkage

So how does this relate to your new home-building experience? If you want to minimize cracks in ceramic tile, cracks between back splashes, and countertops, maddening cracks in drywall, squeaks in flooring and staircases, etc., then you might see if there is some way you can slow down the construction process once your home is under roof and weather tight on the outside.

Not Realistic

I realize this goes against everything you, your builder and your lender want to happen, but the longer you let the house dry before the finishing treatments are applied, the better the long-term fit will be.

Builders want to finish a house quickly so they can move on to another job. You may have a deadline to move from your existing home. Construction loan interest keeps adding up. All of these things are reality, but so is lumber shrinkage.

You can minimize some of this shrinkage by using different materials - ones that are less susceptible to shrinkage. Engineered wood I joists that resemble steel I beams, floor trusses, and even metal floor joists are very stable. Talk with your builder to see if these are viable options for your new home.

Steel Studs

You may even want to use steel studs in areas where you can't afford shrinkage or want perfectly flat walls. The shrinkage can also cause today's hybridized lumber to warp and twist.

Column NH060