Sewer Gas Smell – There are Many Sources


sewer gas smell

Sewer gas smell often comes from a floor drain like this one. Sewer gas smell can also come from a rooftop vent pipe and I show HOW TO SOLVE the problem on this page. This is a floor drain inside a Men's Room at a hotel. Under the metal grate is a water seal you can't see. Water evaporates allowing the gas to enter the room. Custodians and cleaning personnel need to pour a gallon of water into floor drains like this at least once a week. Copyright 2018 Tim Carter

Sewer gas smell is caused by invisible gas that enters your home from your plumbing pipes. The most common source is dry floor drains. The second-most common source is a bad wax seal under a toilet.

Sewer Gas Smell Tips

  • Source of the odor is usually where it's strongest
  • What happened just before you started smelling the odor?
  • Did you get a new washing machine or have a drain cleaned?
  • Does something happen just before you smell the odor?
  • CLICK HERE to Get Tim's FREE & FUNNY Newsletter!

DEAR TIM: My daughter's house has a chronic sewer gas smell problem. The odor is strong when it rains and the furnace or air conditioner is operating.

The odor gets so bad my daughter and her family evacuate the house. Three plumbers have not been able to solve the problem and we have checked all plumbing fixture traps, caulked where the basement floor meets the foundation, etc.

My daughter is ready to sell the house for a loss. Can you help? Dave S., Shelby Township., MI

DEAR DAVE: Sewer gas can be a vexing problem to solve, but it is by no means impossible. As much as I hate to say it, the three plumbers that were consulted are either inexperienced or they do not keep up with technology.

The good news is I doubt your daughter has to move and take a loss. It is my guess the source of the odor can be found and repaired for less than what a moving company would charge just to move your daughter and her family.

stop sign

Before you read more of my answer, I can SOLVE your sewer gas problem on the phone in less than 15 minutes. I've been a master plumber since age 29 and have solved hundreds and hundreds of sewer gas problems.

satisfaction guaranteed

I've helped HUNDREDS of suffering homeowners just like you and the odor goes away in hours.

CLICK or TAP HERE to order a phone consult from me now.

Tim Carter, Master Plumber and Founder of AsktheBuilder.com

Free & Fast Bids

CLICK HERE to get FREE & FAST BIDS from local plumbers to stop sewer gas.

sewer gas smell

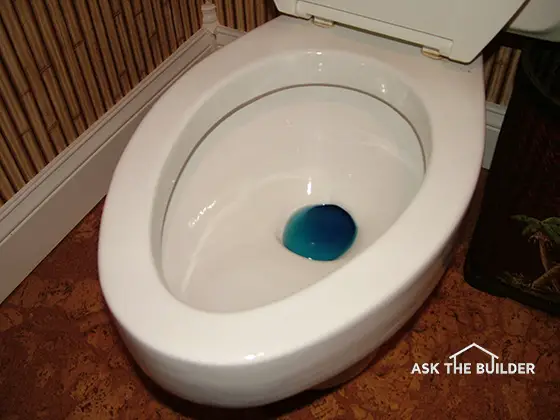
Sewer gas smell can enter a room if the water level in a toilet bowl drops this low. Always keep the toilet bowl filled with water to its normal level. Read Sewer Gas Smell in the January 4, 2011 Newsletter. © 2017 Tim Carter

What Causes Sewer Gas?

Sewer gas is created by the decomposition of waste materials that are found in public and private sewer systems and private septic systems. The characteristic odor can be overpowering and it is toxic. To add further insult to injury, the gas is explosive as it often has a methane component.

Are Plumbing Pipes Designed to Prevent Smell?

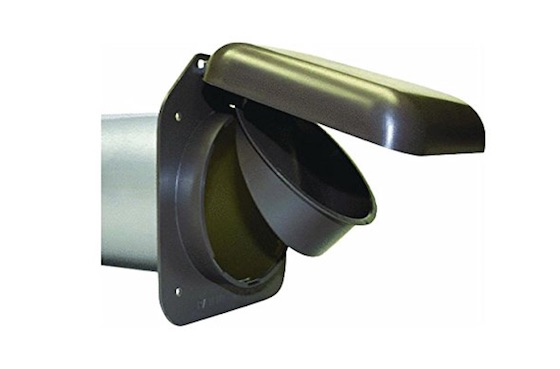
Plumbing drainage systems are designed to keep this sewer gas inside the pipes and any that does exit to the atmosphere happens outside the home through the vent pipes that poke up through the roofs of houses.

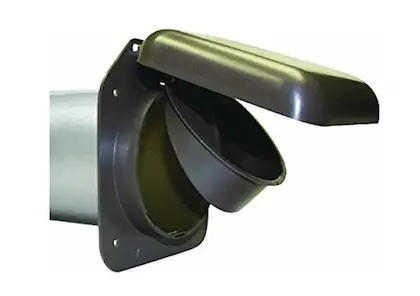
Are Roof Vent Pipes Sewer Gas Exhaust Pipes?

No. Vent pipes on the roof are intake vents, not exhaust vents as most people believe.

When a large volume of water enters a plumbing drain pipe it pushes air in front of it towards the sewer or septic tank. This air must be replaced and it is sucked into the plumbing system through the roof vents.

Can a Dry Trap Cause Sewer Gas Smell?

Yes, a p trap under a fixture that has dried out and lost its water seal will cause sewer gas to enter your home.

The source of the sewer gas can be plumbing fixtures whose traps have gone dry or have lost enough water that the water seal within the trap has broken.

How Fast Can Water Evaporate From A Trap?

Water can evaporate very fast from a trap depending on the temperature and humidity in the house. In the arid Southwest, a trap could dry out in less than a week.

You'd be surprised to discover that water can rapidly evaporate from toilets and the traps below tubs, floor drains and just about any fixture within a few weeks or months in most cases. In fact, when my daughter is away at college I have to flush the toilet in her bathroom every three weeks to keep the bowl filled with water.

If I don't keep the toilet seat down, I have to flush the toilet weekly as some household pets seem to love to drink water from clean toilet bowls.

Is the Wax Gasket Under Toilets a Source of Sewer Gas Smell?

A common source of sewer gas smell is a failed wax gasket seal under a toilet. The wax gasket, when installed correctly, forms both a water and gas-tight seal between the toilet and the plumbing drainpipe system.

Wax Gasket

Sewer gas smell can leak into your home if this wax gasket has detached from the underside of your toilet. Copyright 2018 Tim Carter

A toilet that rocks back and forth as you sit on it is a clue the sewer gas is leaking past a failed wax gasket. Toilets should never move and should have tile grout between them and the floor. Caulk is an inferior sealant because it's flexible.

Can Cracks in Pipes Cause Sewer Gas Odor?

Cracks in either plumbing drain lines or vents pipes are the other source of sewer gas leaks. If the crack is in a drain line, you often see an associated water leak.

But vent pipe cracks are far more elusive. They can leak vast amounts of sewer gas and you might not be able to locate the source easily without a special machine.

Can an AC Drain Pipe Cause Sewer Gas Smell?

Yes, an AC condensate drain pipe can create a foul sewer gas smell. A rancid biofilm can form on the inside of the pipe.

The furnace and air conditioner clue tell me the leak might be in a vent pipe that is close to a return air duct. The leaking sewer gas is being sucked into the return air system and then broadcast throughout the entire house by the air handler in the furnace.

STOP!

Before you read more of my answer, understand now I can SOLVE your sewer gas problem on the phone in less than 15 minutes.

I've helped HUNDREDS of suffering homeowners just like you and the odor goes away in hours.

CLICK HERE to order a phone consult from me now.

Tim Carter, Master Plumber and Founder of AsktheBuilder.com

Can a Smoke Test Find the Sewer Gas Leak?

Yes, sewer gas leaks can be quickly discovered by a plumber who owns a very cool machine that generates artificial smoke. The smoke is simply visual and does not create a lasting odor nor does it stain any surfaces in a house.

The plumber connects the smoke generation machine to the plumbing drain system and then blocks off the drain pipe leading to the sewer and caps off all roof vent pipes.

Once the smoke machine starts, it begins to slightly pressurize the plumbing system. If there is a cracked pipe or a fitting joint that is loose, the smoke readily exits at that point before it would bubble up through a fixture trap filled with water. Usually, the source of the sewer gas leak can be discovered in less than one hour.

CLICK HERE to get FREE & FAST BIDS from local plumbers to stop sewer gas.

Can Vent Pipe Clogs Cause Sewer Gas Smell?

Yes, sewer gas problems can also be caused by plumbing vent pipes that are clogged. This can happen in old homes where a cast iron vent pipe gets clogged by years of rust scale that falls off the inside of the pipe and clogs a 90-degree bend in the pipe.

Tennis balls, leaves, and all sorts of other debris can clog plumbing vent pipes. When a vent pipe is clogged, the replacement air needed by the system will get sucked into the pipes through a fixture inside the house.

When a large amount of water is placed into the drain pipes by a toilet or a powerful washing machine pump, it can readily suck the water out of a nearby bathtub trap or even a kitchen sink trap. Once this happens, sewer gas immediately enters the room through the dry fixture trap.

What Can Be Used to Slow Evaporation in a Trap?

Mineral oil can be used to slow evaporation in traps.

Fill them with water and then slowly pour four ounces of mineral oil into the fixture or floor drain. This mineral oil will evaporate far more slowly than water and the trap will remain wet for many months.


CLICK HERE to get FREE & FAST BIDS from local plumbers to stop sewer gas.


Author's Notes:

I received these emails after my column was printed.

"Tim:

In regard to the sewer odor problem in Shelby township Michigan: If they have a sump pump in the basement and have a french drain around the perimeter of the house, there could very easily be a broken sewer pipe right outside the basement wall. When it rains, tainted water gets in the drain, goes to the sump, odor is in basement, return air to the furnace distributes odor throughout house.

Enjoy your column in the Telegraph Herald."

Dave B., Dyersville


"Hi Tim:

My name is Gary Whiteman of Whiteman Land Service, Curtice, OH. We do pond construction and new home site development.

I read your article in the Toledo Blade, Dec. 18 and noticed that there was no mention of possible sewer gas from homes that have a leach field system. We have had many people complain of sewer gases from their basements. We have found that the cause was due to other contractors who did not remove previous farm drainage tile from under the leach field area and to the home foundation or basement.

Thus, the waste water travels through the farm tile under the leach bed to the drainage tile around the footer and into the sump crock inside the basement. To solve this would be to remove the farm tile between the leachfield and home.

Contractors excavating for the basement or foundation, and also the leach field, should remove these tiles at least twenty-five to thirty feet away from the home area. I hope this info will be helpful.

Regards,"

Gary


"Dear Tim,

We had a perplexing sewer gas odor in our home. After spending over $3,000 in fees with plumbers, locators and other experts, we still had no answer.

Finally a very knowledgeable plumber discovered an illegal connection in our drain system. The person who installed the condensate drain line from our air conditioner installed it without a vent line. Each time our washing machine would pump water into the drain system, the rush of water would siphon out the water in the small trap of the condensate line.

The sewer gas from the main sewer line would then travel up through the condensate line and into the actual air conditioning air handler. When the air conditioner would run, the moving air would suck vast amounts of sewer gas into the ducts and broadcast it through all of the air vents in our home.

Once the condensate line was disconnected from the drain line and piped directly outdoors, our sewer odor disappeared immediately."

Sandra Farmer, Paradise Valley, AZ

Column 599

Ten Secret Drywall Finishing Tips

drywall finishing

How to finish drywall you ask. Drywall finishing may look easy, but it requires a deft touch. This small section of wall has just about every drywall finish challenge in it: flat and tapered seams, inside and outside corners and an archway! Copyright 2018 Tim Carter

"Drywall finishing requires hand-eye coordination. Some people have it and others simply don't. One of my employees couldn't finish drywall to save his life."

Secret Drywall Finishing TIPS

  • The joint compound must be creamy like pudding
  • Leave 1/16-inch layer of mud between drywall and paper tape
  • Don't try for perfection during second coat
  • WATCH my drywall finishing videos below!
  • CLICK HERE to Get Tim's FREE & FUNNY Newsletter

How To Finish Drywall?

You finish drywall with great skills. It takes lots of practice to get professional drywall finishing results. Even if you follow my ten drywall finishing tips that follow, you may not get professional results.

Why? Drywall finishing requires hand-eye coordination.

Some people have it and others simply don't. One of my employees couldn't finish drywall to save his life. I tried and tried to get him to hold the broad knife the right way, but he never could get just the right smooth gliding motion with that knife.

Related Links

Drywall Taping Blisters - Second Biggest Rookie Mistake

The Truth About Drywall and Wet Locations

CLICK HERE to get FREE & FAST BIDS from drywall finishing pros in your town.

How Are Drywall Taping and Mudding Skills Acquired?

Drywall taping and mudding skills are acquired by lots of practice. You need to be trained by a professional or watch a few of my videos below.

It's important to realize this is a talent that's acquired. It's much like driving. You get to where you know the feel of a car and a road surface.

Finishing drywall is the same. You get a feel for the flexibility of certain tools and the consistency of the joint compound. I say we give it a try. Here are my Ten Tips:

Does the Drywall Need to be Hung Well?

Great drywall finishes begin with superior hanging jobs. The drywall must be tight against the wall studs or the ceiling joists. All screws need to be countersunk just enough to where they do not tear the paper.

There need to be enough fasteners. I like to see screws every 16 inches on walls and every 12 inches on center on ceilings. Tapered seams should be tight. Corner joints or other joints should have a gap of approximately 1/4 inch. A tight seam is best but a slight gap is acceptable.

How Do You Mix the Mud?

You mix drywall mud by adding a small amount of water and then stir it with a paddle attached to a power drill.

joint compound mixing paddle

This is my joint compound mixing paddle. It has a long shaft that you insert into a drill. CLICK THE PHOTO NOW to have one delivered to your home. Copyright 2018 Tim Carter

Most people use pre-mixed mud in a bucket or a box. This mud is simply too stiff to use. You need to add a little water and whip the mud up to the consistency of creamy cake icing.

It must be lump free. Be careful not to mix too much air into it. If you do, sometimes you get tiny air bubbles in your seams as you apply and finish the mud. Just try to mix the mud slowly. Do NOT add too much water.

Watch this video to see what the mud should look like:

Paper or Mesh Tape?

I have used both. I prefer to use the paper tape in corners and the self-adhesive mesh tape is superb for tapered seams. I will use paper for both with no hesitation. If you have lots of taping to do, fabricate a belt holder using a coat hanger that holds the roll of tape. Or you can buy a handy holder at a drywall supply house.

What are the Best Drywall Finishing Tools?

The best drywall finishing tools are:

  • a stainless-steel mud pan
  • a 10-inch stainless-steel broadknife
  • a 5-inch wide taping knife
drywall finishing tools

These are my favorite drywall finishing tools. CLICK THE PHOTO to have them delivered to your home. Copyright 2018 Tim Carter

I prefer stainless steel broad knives for finishing. I have 10 and 12-inch knives. For taping, I use a flexible steel blade that is about 5 inches wide. My trusty one that's over 25-years old is not stainless steel, but you can now get them.

It's important to use a file to slightly round off the corners of your taping knife. A brand new knife has very sharp corners and they will tear the paper tape as you glide it down a corner seam.

CLICK HERE to get FREE & FAST BIDS from drywall finishing pros in your town if you're not confident you can do it.

What are the Drywall Finishing Steps?

Here are the drywall finishing steps:

  • tape flat seams
  • do inside corners walls and ceilings
  • tape corner bead corners (see video below)
  • coat corner bead
  • second coat
  • light sand second coat ridges
  • third coat and skim

I do all of my flat seams first and run the tape to within one-half inch of the corners. I then do the inside corners last so that this tape overlaps the flat seam tape. Before you start to tape, all metal and curved corner bead should be nailed in place.

How Do You Tape Drywall by Hand?

On flat seams, I will apply mud to just about four or five linear feet of seam. I do the same in corners.

I press the tape in place and start to scrape the seam to remove excess mud. I stop about six inches from the end of the excess mud. I then apply more mud to the drywall to proceed.

When Do You Apply the Second Coat of Mud?

You can second coat immediately after you have finished taping. The tape does not have to be dry. It will dry out as the second coat dries.

How Do You Second Coat Inside Corners?

You second coat inside corners one side at a time.

You can't apply the second coat of mud on both sides of a corner at the same time. You do one side on one day and then the other side on day two or after the mud is dry.

You can finish three corner surfaces where a ceiling meets the inside corner of two walls at the same time. If I was looking at an inside corner I could do the right side vertical wall seam of the inside corner, the ceiling side of the right wall/ceiling intersection and the top wall side of the left wall/ceiling intersection.

On the following day, you would coat the remaining three corner surfaces. Corner tape should have a 1/16th-inch layer of mud over the tape once complete.

Does the Second Coat Have to be Perfect?

No, the second coat of mud does not have to be perfect. You should have a slight ridge in the center of taped seams. This ridge gets sanded off later.

Everyone tries to get the second coat perfect! Big Mistake!

The feathered edges where the mud stops and the drywall paper begins must be clean with no excess and the mud must build up from there to a high point at the center of wall and ceiling seams. You will see this ridge line and any lift marks where you pull the knife away from the wall.

Once the mud dries you will quickly sand these off before applying the third coat of mud.

Should Drywall be Primed and Sealed?

Yes, finished drywall should be primed and sealed. This paint coating evens out the porosity and texture of the drywall so the finished paint looks superb.

After you have third coated and finally sanded the seams, corners, and nails, you MUST apply a superb sealer/primer to the walls before you paint. USG Corp makes a fantastic inexpensive paint called First Coat®.

It's ideal. It eliminates joint banding and texture problems that happen when the regular paint is applied to freshly finished drywall. The primer sealer is applied like any other paint and looks milky as you roll it.

But somehow an hour later the wall is snow white! Failure to apply a primer/sealer before painting will negate all of your hard work.

CLICK HERE to get FREE & FAST BIDS from drywall finishing pros in your town if you're not confident you can do it.

Column B387

How to Toilet Repair

Toilet Repair TIPS

  • Partial Flush - flapper dropping too fast
  • Phantom Flusher - toilet fills by itself
  • Noisy Filler - sediment in filler valve
  • Poor Flush - sediment clogging syphon jet or under-rim holes - see below for EASY DIY fix
  • CLICK HERE to Get Tim's FREE & FUNNY Newsletter

Weak Toilet Flusher Solution - Easy Cheap Fix

Your weak flushing toilet could be a first-generation 1.6-gallon flush toilet that had horrible engineering. Look inside the tank for a manufacture date stamped in the clay. If it was made during the time period from January 1, 1994 to mid-1997, this could be the problem. No matter what you do, it will not flush right. You may need to install a new toilet.

Newer toilets built just before and after 1998 were much better and allowed the water to flow from the tank into the bowl faster. This is what produces a great flush. 

You need LOTS of water to flow into a toilet bowl fast for a toilet to have a vigorous flush. That's why toilets in commercial buildings with a pressurized connection to the water supply system flush so well you think you'll be sucked into the sewer too!

If the toilet was made before 1994, hard water deposits in the siphon-jet hole at the base of the bowl or the angled bowl-rim swirl holes may be the source of your frustration. These deposits reduce the size of the openings and SLOW the flow of water from the tank to the bowl.

You can try to clean them out with wood sticks and oversized toothpicks, but a muriatic acid wash will really do the job.

Watch this video to see the siphon-jet hole and under rim holes:


Here's how to get the old toilet choked with hard-water deposits to flush like new:

  • Pour four gallons of water AS FAST AS POSSIBLE into the bowl to get most water out of the bowl
  • With water level low in the bowl, pour in pure muriatic acid into the bowl up to the normal fill level
  • Allow acid to work for hours or overnight if possible - put lid down to keep pets safe - open a window for fresh air
  • Neutralize acid by slowly adding small amounts of baking soda to the toilet bowl before you flush toilet
  • Use a small wood stick to scrape soft deposits from the siphon-jet hole at bottom of bowl AFTER acid is flushed away

IMPORTANT NOTE: Muriatic acid is toxic. Read all safety warnings on the bottle. It will NOT HARM the toilet. If you neutralize it after it works for hours, it will NOT HARM the plumbing pipes nor city sewer system or your septic tank.

Muriatic acid

Muriatic acid is powerful and needs to be treated with lots of respect. CLICK THE IMAGE TO ORDER SOME NOW.

You should immediately hear fizzing and such. BE CAREFUL of the fumes! Run the bath fan, open a window. DO NOT splash this solution on you, in your eyes, on your clothes, on the carpet, etc. It will not hurt the toilet at all.

Septic System Harm?

You may wonder if the muriatic acid will harm your septic system. The answer is NO if you neutralize it before flushing it out of the toilet.

Let the acid work for hours if possible.

After working to dissolve the hard water deposits, use small amounts of baking soda to neutralize the acid. Add the powder until you no longer see fizzing and bubbling.

Cleaning Toilet Bowl Rim Holes

Mix up a quart of acid and water solution. Mix it one part water to one part acid.

Pour this solution down the overflow tube as fast as you can using a large funnel. Do NOT splash this on you! 

The solution you put down the overflow tube in the toilet tank will help open the small holes under the rim of the bowl. These get clogged with hard water deposits too.

CLICK HERE to get FREE & FAST BIDS from local plumbers to fix your toilet.

Strong but Partial Flush

The flapper valve may be waterlogged and dropping too fast. Observe the flapper valve during a flush. It should stay up until about 80 percent or more of the water has drained from the tank. If it drops sooner, install a new flapper.

Phantom Flusher

This is really a phantom filler, as the toilet tank fills with water as if it was just flushed. It simply means that the tank is leaking water. The food coloring dye test will confirm this. Add food dye to the tank after all water has stopped running into the tank. After 5 or 10 minutes, look at the bowl water to see if it is colored. If it is, the flapper is not sealing completely. Time for a new one! CLICK HERE to get the BEST FLAPPER VALVE. Easy DIY install!!!!

toilet repair kit

The flapper valve is the red item. The blue and black part is the fill valve. You might as well replace both for years of TROUBLE-FREE toilets! CLICK the IMAGE TO BUY IT NOW.

CLICK HERE to get FREE & FAST BIDS from local plumbers to fix your toilet.

Bowl Water Level Drops

You flush the toilet and all is well. After a period of time, a significant amount of water has left the bowl. Two things may be wrong. Water could be slowly siphoned from the bowl by a partial clog of toilet paper up in the colon of the bowl. You can demonstrate this phenomenon by filling a small soup bowl with water and putting it in the center of a cooking jelly pan. Drape a strip of paper towel from the bottom of the bowl, over the bowl edge and into the jelly pan. Watch what gravity and capillary attraction does in several hours. The bowl will be nearly empty. To see if your toilet has a rag, toilet paper, or something else causing the drainage, empty the bowl of water and then use a flashlight and a mirror to look up inside the colon of the toilet.

In rare cases, the bowl may actually have a crack in the interior colon or piping of the bowl. This problem can only be solved by installing a new bowl.

Double Flusher

The water level in the tank may be set too high. Lower the level and look for improvement.

Whistling Tank Fill

You must have an old technology ball cock valve with a ball float on the end of a rod. As the ball floats higher it begins to slowly close the water fill valve.

This can cause vibrations and all sorts of noise. Toilet tank fill valves that stay wide open until the tank is filled have been around for over 20 years. They are wonderful and they are inexpensive. I use the Fluidmaster valve. Get the best one, not the economy model. CLICK HERE to get the BEST ONE.

Slow Tank Fill

This problem may be a partially closed shut off valve under the tank. A previous owner or a plumber may have restricted the flow of water into the tank for some reason.

Dripping and Tank Filling

After the tank has filled, you hear dripping. Then several minutes later, the tank partially fills with water and the dripping starts again. Then the tank fills and so on and so forth. This problem can be a syphon problem caused by someone who installed a new tank fill valve.

There is a small flexible tube that runs from the bottom of the valve to the top of the toilet overflow tube. As the tank fills, water is also sent through this tube. It is used to refill the toilet bowl since it lost its water during the flush.

If this tube drops down inside the overflow tube, it can, in some instances, syphon water from the tank. New toilet fill valves often have a clip that attaches to the top of the overflow tube and points the water flow down into the tube without actually having the tube enter the tube. Pretty slick? It works too! Use the clip!

Sluggish Flush

The toilet could have a partial clog or the actual clog could be downstream from the toilet. Fill a 5-gallon bucket of water and dump it into the toilet as fast as possible with minimum splashing. If the water disappears fast, then it's not a clog. If water backs up into the bowl and drains slowly, it is a clog.

If the water does disappear fast, then it means the syphon-jet hole is clogged with hard-water deposits. Older toilets had this hole near the bottom of the bowl. Some modern toilets have it up under the rim of the toilet.

Water is not able to exit the tank fast enough to produce enough energy to produce a great flush.

You can solve this issue by dumping another 5 gallons of water in the toilet FAST. Then put into the toilet bowl 12 ounces of muriatic acid. CLICK HERE NOW to order this great product.

Muriatic acid

Muriatic acid is powerful and needs to be treated with lots of respect. CLICK THE IMAGE TO ORDER SOME NOW.

Put the seat down and don't allow anyone to use the toilet for three hours. The acid will dissolve the calcium deposits.

If the syphon-jet hole is up under the rim, you need to use a turkey baster and squirt an acid solution down into the overflow tube in the tank.

Mix one part acid to five parts water for this solution.

READ all the safety instructions on the acid label.

Suction Sounds in the Tub and Sink

You flush the toilet and gurgling sounds come from your tub and/or bath sink. This means the toilet vent pipe is clogged or partially clogged. A tennis ball, dead bird or twigs thrown by a mischievous son might have dropped down into the rooftop vent pipe may be the problem. Drop a small flashlight that is SECURELY attached to a strong string or wire down the pipe. Look for a clog. Run garden hose water down the rooftop vent pipe to help clear the clog. Be sure you have spotters inside the house who are looking for leaks. You may have to call a professional to solve this problem.

This popular column was shared in the November 20, 2013 AsktheBuilder Newsletter.

Column B332

Installing Drywall In Wet Locations

drywall utility sink

The drywall used around this utility sink should have been the special water-resistant drywall. Instead, the homeowner has had to initiate damage control by sealing the peeling-paint spots on the wall with clear urethane. © 2017 Tim Carter

"Some people think that several coats of high-quality paint will protect the drywall from moisture, but this is not always the best strategy."

Installing Drywall in Wet Locations Checklist

DEAR TIM: My church group is restoring a house and all of the walls and ceilings in the bathroom and laundry area have been stripped down to the wall studs.

How much water-resistant drywall should we install? Is it best to use it just behind the plumbing fixtures and appliances or should all of the walls and ceiling be covered? John G., Detroit, MI

Related Links

Paperless Drywall - Why Use It?

Secret Pro Drywall Finishing Tips - DO NOT SHARE!

DEAR JOHN: There seems to be a significant amount of confusion about drywall, water-resistant drywall, and wallboard that is 100-percent waterproof.

Since you are in the driver's seat at this time and have a choice of what material to use, you can produce a finished result that should last for many years with little or no damage if an occasional splash or drip occur or even if lots of water floods a wall surface.

Free & Fast Bids

CLICK HERE to get FREE & FAST BIDS from local drywall contractors.

What is Regular Drywall?

Regular drywall that most people are familiar with is made with a gypsum-based core that is very strong when it is dry. Typically the drywall panels have a thick-paper wrapping that protects the gypsum core from impact and abrasion damage.

But the paper readily absorbs water and can transmit it to the gypsum inside the panel. When this happens, the panel loses its rigidity and either falls apart or it becomes very mushy.

What is Best Drywall Wet Locations?

With this in mind, I don't like to use regular drywall in areas where I think water might come into contact with the wall surface on a regular or even somewhat-regular basis. Some people think that several coats of high-quality paint will protect the drywall from moisture, but this is not always the best strategy.

If water gets behind the paint where the paint stops and a sink top or cabinet edge begins, you have an Achilles heel and damage to the drywall may start if water finds this entry point from time to time.

What is Green Board Drywall?

Green board drywall is a special drywall that's water resistant. The gypsum core has been treated with a water-repellent similar to silicone and the outer paper is reported to be somewhat moisture resistant.

mmr green board drywall

This is a stack of green board MMR drywall on the left. You can see the light-green color compared to the off-white color of the standard drywall to the right. Copyright 2018 Tim Carter

Green board has been in use for decades. I was first introduced to it around 1975 if you can believe that! Many people recognize it from the green-colored paper facing. In fact, it is affectionately called green board by builders and drywall hangers.

It's not a bad product, but I discovered a SECRET TIP (see below) years ago to make it nearly invincible when it gets splashed with water.

Can Green Board Fail?

Yes, the green board can fail if it gets lots of water on it. It can fail faster if it's not allowed to dry out in between periods of getting wet.

What is MMR Drywall?

MMR drywall is mold, mildew, and moisture-resistant drywall. It's the modern name for green board drywall. Look at the features sticker and note what's above the red line:

mmr drywall sticker

This is the giant label at a home center listing the features of MMR drywall. Note where NOT to use it! That wording means DO NOT use MMR drywall under tile in tub and shower areas. Copyright 2018 Tim Carter

What is the Best Bathroom Drywall?

The best bathroom drywall is green board. I'd install it on all walls and ceilings in a bathroom so long as you follow the manufacturer's installation instructions. On ceilings, be sure to space the fasteners on 9-inch centers.

Use galvanized drywall screws to attach the green board to the wall studs. Coat the green board with water-based urethane before you start to finish the green board.

I've had great success using this green board drywall behind sinks, toilets and on walls with ceramic tile backsplashes. But before I thought about my SECRET METHOD, I had horrific failures when I used it behind ceramic tile in tub and shower areas.

What is the Best Source of Drywall Facts?

The Gypsum Construction Handbook published by USG, Inc. is the bible of drywall and plaster information. It contains all you need to know to pick the best drywall and how it should be installed.

gypsum construction handbook

This is the Bible of hanging and finishing drywall. I recommend you buy this and read the section on drywall. CLICK THE IMAGE to have a copy delivered to your home.

Can Water Vapor Ruin Drywall?

Water and water vapor can readily pass through ceramic tile grout and cause the drywall paper facing to disintegrate. Water-resistant drywall is simply not recommended for areas that are subject to constant moisture. Well, that is unless you think about doing what I've been doing for years. Keep reading!

CLICK HERE to get FREE & FAST BIDS from local drywall contractors.

Can Green Board Sag on Ceilings?

The water-resistant green board drywall is sensitive to stud spacing. If you decide to use the green board drywall for a ceiling, the joists must be spaced 12 inches on center for 1/2 inch thick drywall. If you have 16-inch on-center spacing, then you need to increase the thickness of the drywall to 5/8 inch for ceilings.

Do You Need a Vapor Barrier With Green Board?

Yes, you need to use a vapor barrier with green board. In bathrooms or other wet locations, water vapor will try to penetrate into wall cavities. This will cause wood rot in cold climates.

Some drywall manufacturers also state that a vapor retarder should not be used under the water-resistant drywall if the visible face of the drywall is covered by a product such as ceramic tile or other water-vapor impervious finish. I believe they are very afraid that water might get trapped within the drywall and cause damage. I don't know that I'd follow this advice on exterior walls in a cold climate. You MUST STOP water vapor from getting into wall cavities.


Polyurethane Paint

SECRET TIP is to coat the drywall BEFORE finishing with this amazing urethane product. It WILL STOP water from penetrating into the paper of the drywall. CLICK IMAGE TO ORDER IT NOW.

Can You Make Drywall Waterproof?

Yes, you can make drywall pretty much waterproof if you coat it on all sides and edges with water-based urethane before you install it. After it's installed and finished, then coat it two more times.

The secret tip to making the drywall waterproof is to coat the paper surfaces of the drywall, including the edges, with clear water-based urethane BEFORE you finish the drywall.

This coating soaks into the paper on the drywall so water can't get to the gypsum core and cause deterioration or the delamination of the paper from the core. That's what happens over time is the paper rots away causing the failure you see.

How Soon After Applying the Urethane Can You Mud?

To get the best bond between the urethane-coated drywall paper and the joint compound used to finish the drywall, apply the joint compound within thirty minutes of rolling or spraying on the urethane.

You'll get both a chemical and mechanical bond between the urethane and the glue that's in the joint compound. The bond will be nearly as strong as epoxy if you can do the applications back to back!

Is Urethane a Great Waterproof Coating?

Urethane is a great waterproofing coating. This is why it's used on bar tops and hardwood floors that can get wet.

Any part of the moisture-resistant drywall that's coated with urethane and then painted will do super well. Urethane is extremely sticky. If at all possible, apply the urethane over the drywall that's to be painted and paint/prime within an hour for a chemical and mechanical bond.

What Drywall Fasteners Prevent Rust?

Hot-dipped galvanized fasteners or even stainless steel nails and screws prevent rust. Use these to fasten the drywall panels to the wall studs and ceiling joists. If you use raw steel fasteners, they will rust in time and the wall panels can fall off the walls or ceilings.

At the very least, you will find yourself dealing with unsightly rust stains that appear through the painted surfaces should you cut corners and use the wrong fasteners.

The gypsum core of the water-resistant panels is often treated with a silicone chemical or wax-like substance. You can readily see water bead up if you wet the exposed gypsum core. The problem for years was the failure of the green-colored paper, not the actual gypsum inner core.

Is Mold a Concern With Drywall?

Mold is a concern with any wall covering including drywall. Mold can grow on just about any surface except for solid copper or copper-coated

Because mold is in the forefront of the news, wall and ceiling panel manufacturers are constantly rolling out products that are both water-resistant and even inhibit the growth of mold on the surface of the panel. But as with any new product, always be sure to read the technical literature produced by the manufacturer.

Make sure you use the product as it was designed to be used. Always pay attention to the use of the words: water-resistant and waterproof. Waterproof means liquid water or water vapor will not harm the product. Water-resistant means limited amounts of water will not cause harm.

Can You Create a Waterproof Wall?

You can create a waterproof wall by using a wall covering that is waterproof. Cement board is one option and there are other coverings like fiberglass.

In areas of these rooms that will get heavy concentrations of water, you need to use a waterproof wall material. Remember, the green board drywall is water-resistant, not waterproof.

You can purchase interior panels that match the thickness of regular and water-resistant drywall that are made with cement and sand or a combination of cement, sand and other ingredients.

Furthermore, there are other innovative gypsum core products that are 100-percent waterproof. Use the waterproof wall panels behind the tile and in any location where you expect water to be regularly splashed onto a wall surface.

This column was SO GOOD that I shared with the 31,000 subscribers who read my January 8, 2017 AsktheBuilder Newsletter.

Column 560

January 5, 2017 AsktheBuilder Newsletter

Happy New Year! I hope yours is off to a good start. Mine is.

Three hours ago, I was having breakfast with two friends, Jim and Janey. I worked with both on the scenic train. It was good to see their smiling faces.

We talked about lots of things, but I shared with them a story about some old books I salvaged from an old home I purchased about thirty-five years ago. The home had been owned by an architect.

The books must have been textbooks of his or books he used in his practice. They contain vast amounts of useful information and I've kept them all these years.

For example, the one book has a huge section in it about hydrated lime, how it's made, how to mix it and most importantly WHY it makes such a great mortar for brick and stonework. CLICK HERE to read a column where I talk a little bit about hydrated lime.

I decided to go onto Amazon.com to see if these books had any value. GULP!

Click here to see the one book.

Click here to see the second book. This book shows as out of stock but another seller on Amazon has it for $500.00.

Do you have old textbooks like this around your home? If you don't want them, I'll take them! I'm serious. I'll pay to have them shipped to my home if they're ones I desire to add to my collection.

Survey or Polling Professional

Have you been trained as a professional, perhaps it's in your math or marketing background, to write unbiased survey questions?

If so, I need your IMMEDIATE help. Can you reply to this email and would you let me ask you some questions over the phone?

Work and Hiking Boot Review

How many pairs of work boots do you think I've worn over the years?

I believe my quest to locate the best pair of work boots, and ones you can use for hiking too, has ended.

CLICK HERE to read the my review.

Are You a Flight Attendant or Airline Pilot?

Are you a working flight attendant or pilot / first officer for a domestic US airline? Or currently retired?

My youngest daughter Kelly is thinking about becoming a flight attendant, and I'm wondering if you'd be willing to offer some guidance to her with respect to this career choice.

Simply reply to this email if you're not opposed to answering some of her questions. Thanks in advance.

Cold Air in Bathrooms

David emailed me wondering how in the world to stop the cold air from seeping into his bathroom via his exhaust fan.

bath vent

I think you'll be interested in my answer.

What's more, you may not be aware of a product I discovered that will absolutely stop cold air from entering your home via a bath fan.

CLICK HERE to stay warm!

Judy's Peeling Tub Drain

Judy has a problem with her old cast-iron tub. She did her best to repair it, but was probably sold down the river.

CLICK HERE so you don't make the same mistake she did.

GET FREE BIDS for ANY JOB

Now that the New Year has blown by us, you may be thinking about doing jobs around your home.

I don't care if it's a new roof, new bathroom, furnace repair, concrete repair, painting, etc.

If you want FREE BIDS FAST then all you have to do is CLICK HERE. Fill out the form and magic will happen.

Built-in Bookcase Design Ideas

Harald, who lives in Norway, reached out to me about a project he was about to undertake.

I want you to CLICK HERE to see a photo that will make your eyes pop. You'll also discover one or two tips about bookcases you might not have ever thought of.

I plan to have a BIG SURVEY I'd like you to take this Sunday. I say this hoping a survey pro steps forward to help me craft the perfect questions.

Until then, I remain in your loyal service -

Tim Carter
Founder - www.AsktheBuilder.com

Do It Right, Not Over!

KEEN Utility Braddock Mid Waterproof Review

work boot

This is the most comfortable and attractive work boot I've ever worn. It's also perfect for HIKING. CLICK THE IMAGE to BUY it.

I'm almost embarrassed to say how long I've worn work boots, but thinking about it I feel it adds enormous value to this review.

Who better to review work boots other than a person who's worn countless pairs for over forty years.

I think it's fair to say that I was wearing work boots when I started renovating houses in 1973 as a part-time job in college.

Here's what you need to know right now before you read anything else. The KEEN Utility Braddock Mid Waterproof boot I tested was the most comfortable and best work boot I've ever worn.

One of the most important aspects of these work boots, in my opinion, is they are Made in the USA. The factory is in Portland, Oregon. (See my July 13, 2017 AsktheBuilder Newsletter when I asked for Car Rental Experts.)

Here are the features of this boot:

  • American Built with materials from around the world.
  • Direct attach PU mid-sole
  • Integrated heel cushion
  • KEEN.Dry waterproof breathable membrane
  • Lining with hydrophobic/hydrophilic 2-zone comfort technology
  • Meets or exceeds ASTM F1677-96 Mark II non-slip testing standards
  • Meets or exceeds ASTM F2892-11 EH Standards
  • Not compatible with aftermarket insoles or orthotics

Here's what I LOVED about this pair of work boots:

  • Styling - it's the most attractive work boot I've ever owned
  • Support - the boot is stiff on the upper half, but not so much it restricts movement
  • Super-Grip Sole - Prevented me from falling on my steep icy drive
  • Amazing Laces - seem to be non-slip so they stay tied
  • WATERPROOF! Need I say more?

Here are some other images. CLICK HERE TO BUY a pair now.

Keen hiking boot sole

This is one great sole. CLICK THE IMAGE to BUY the boots.


keen hiking boot heel

The boots are easy to put on. CLICK THE IMAGE TO BUY.

Cold Air Bathroom Exhaust Fan

Cold Air Bath Exhaust Fan TIPS

David Teal lives in Woodville, Ohio.

He has a problem that many people have. Let him tell you:

"A few weeks ago you had a article that discussed sealing and insulating a house. You failed to mention holes in the ceiling. I have five holes in my ceiling for vent fans. 

The flaps inside the fans don't work well at all. When the wind blows the bathrooms are freezing!  Is there something I can do besides taping over the vent holes?"

CLICK HERE to get FREE & FAST BIDS from local handymen that can install the vent hood and foam the pipe.

Here's my answer to David:

Thanks for reading my syndicated newspaper column. As you might suspect, the newspapers limit the number of words I can put in a column. As such, it becomes impossible to discuss each and every aspect of a problem. I usually have to deal with a thin slice of the problem.

The dampers in just about every exhaust fan I've seen are virtually worthless. I believe they're meant to stop animals from getting back into the rooms of homes, not air.

I'd recommend you install a flapper cap that has a double seal.

CLICK HERE to get FREE & FAST BIDS from local handymen that can install the vent hood and foam the pipe.

NoPest Vent

This is the vent cap that goes on the outside wall of your home to STOP all cold air from getting into your bathroom exhaust fan. CLICK THE IMAGE to order it now.

I used the product below at my own home last year and love how well they seal. I've completely stopped all the cold air from coming into my bathroom using this product. CLICK HERE to buy it.

Seal the Pipe

You also need to make sure the seams on the smooth metal exhaust pipe are sealed AND the pipe is insulated. The best way I've found to do this is spray the outside of the pipe with spray-foam insulation. Clean the mill oil off the pipe first with soap and water. Use this foam:


Great Stuff Pro Spray Foam Insulation

I've used this product for years. It's got the right name, that's for sure. Wear old clothes when using it. CLICK THE IMAGE NOW TO ORDER IT.


CLICK HERE to get FREE & FAST BIDS from local handymen that can install the vent hood and foam the pipe.

Bathtub Peeling Around Drain

Judy H. lives in OH. She had a great question.

"Hi, Tim.  Hope you can advise me.  We have an original porcelain bathtub (57 years old).  In 1990, we had it glazed by BathCrest, who are no longer in business.

The glaze has now started to peel around the drain.  I'd like to keep the tub as it would be difficult to remove from our small bathroom. 

I've checked online and Rustoleum has  a product that it claims can be used for repairing the tub. Are you familiar with this; it's called Rustoleum Specialty  and if so what's your opinion?

Aside from having an insert installed, do you have any suggestions or advice?    Thank you so very much for any help you can send.   Happy New Year!!"

Here's my answer to Judy:

Judy, HNY to you too. That's how we shorten it in Morse. I'm an amateur radio operator - W3ATB.

For starters, you didn't have your nice tub *glazed* by BathCrest. You had them come in and paint it. They may have used an epoxy paint.

To have a tub re-glazed, you need to send it back to the factory where it's put in the kiln and new clear silica is fused to the tub. That's what glaze is.

All paints are film formers and eventually will peel. No matter what paint you decide to use, and I've not used the Rustoleum Specialty paint - nor would I EVER use it where it would stay wet like near a tub drain - the paint WILL PEEL.

If you want perfection, then you put in a new tub and use the proper non-abrasive cleaners so it always maintains its gloss.

Good luck in your decision.

Built-In Bookcase Designs

This is a modular built-in bookcase installation made with different hardwoods and special indirect lighting. © 2017 Jay Helms

Built-In Bookcase Design TIPS

DEAR TIM: I live in a 100-year-old wooden house and am doing all the refurbishing and maintenance myself that the laws of my country allow. I’m making floor-to-ceiling built-in bookcases for one of my living rooms and would love some tips. One of my challenges is the bookcase needs to span about 6 feet over a piano. What would you do to support those shelves so there’s no sag from the weight of the books? Any information you can share that would make this project look magnificent and be trouble-free would be appreciated. Harald Skaarn, Tønsberg, Norway

DEAR HARALD: I’ve cut my teeth as a builder / remodeler working on old homes such as yours. I discovered many things during that journey, including that the level of quality, as well as the materials, in these older homes varied to a large degree.

It didn’t take long for me to observe that the pride of workmanship in many of the older homes I worked on was far superior to the level of much of the work I see today. I wonder if it’s the same in your country.

Built-in bookcases are a wonderful project to tackle. I’m assuming you have the needed power tools to make your job easy with respect to cutting and assembling the wood. I’ll also assume you have moderate skills with respect to installation.

CLICK HERE to get FREE & FAST BIDS from local companies that can build custom bookcases.

If you plan out this project carefully, you can build the bookcases in modular sections that interconnect with one another. But when complete, it will appear as if the bookcases were carved out of a solid block of wood or the wall!

STOP - Draw a Plan

You probably already know this, but you need to draw a detailed scale plan of what you want. This plan would show the actual front view of what the finished shelves would look like complete but with no books in them. Think about creating larger areas within the shelves to display art or other things you own that aren’t books but would look fantastic on the shelves.

The plan needs to be larger scale. Draw one section at 1/2-inch per foot to start and see if it has enough detail for you. You want to draw each wall that's going to have bookcases. The plan has to show all the details you can see in your head. If you need to bump up the scale of the plan to 3/4-inch per foot to show what you want, then do it.

Build a Prototype

My first tip may surprise you. I suggest that you start very small. I’d build a prototype small stand-alone bookcase that includes everything you think you want. You’ll want to think about the color of the wood that comprises the sides, back and underside of the shelves. Perhaps you want the bookcases to have two, and maybe three, species of wood for contrast.

CLICK HERE to get FREE & FAST BIDS from local companies that can build custom bookcases.

When you plan to build this prototype, think about how you could make several and butt them against one another to cover an entire wall. It goes without saying that you need to carefully consider the height of the shelves so they’re tall enough for all your books, but not so tall as to waste space. Look at existing bookshelves to determine the sweet spot for the space above the top of books and the bottom of the next shelf above.

This is a side view of the room. These bookcases should give you plenty of inspiration. © 2017 Jay Helms

Indirect Lighting - Add the WOW! Factor

One thing I’d incorporate for sure would be low-voltage indirect lighting to showcase the books and provide softer lighting in the room. You may discover if you use a lighter-colored wood for most of the bookcases that the reflected light provides ample background lighting for the entire room.

CLICK HERE and wander through all sorts of low-voltage LED lights you can use for built-in bookcases.

The use of low-voltage lighting can help you solve your issue with respect to the wide shelves that have to span over the piano. There are many ways to make those shelves stiff and sag-free, with my choice being to incorporate a small beam under the front edge of the shelf.

Small Beams - Big Strength

This beam would be made from a very stiff hardwood species and be about 40mm (1.5 inches) high. When this piece of wood is glued and mortised into the horizontal shelf, that shelf will be very strong.

At the very least I'd build one prototype shelf and test it with what you expect to put on it. It can just be one shelf supported at each end by wood blocking. You don't need to build an entire case to test how strong one shelf it. See if it deflects after you load it and keep it loaded for a few days.

You’ll discover that this vertical piece of wood is an excellent place to put a thin strip of low-voltage lighting that’s aimed down and towards the back of the shelves. Your biggest challenge I believe, should you decide to incorporate the lighting, will be to get the right balance of light. You don’t want too much and you don’t want the lighting to be weak. Your small prototype shelves will help you solve this problem.

This photo is the other end of the room. I can't begin to describe how magnificent these bookcases are. I hope you enjoy these photos. © 2017 Jay Helms

Be sure you take into consideration how you’ll deal with electrical outlets. I don’t know the codes in your country, but see if you can’t put electrical outlets in the toe kick space down by the floor. You may have existing wall outlets in your walls that might have to be moved so they don’t fall right at the same height as a horizontal shelf.

Add Side Scribes

The odds are the walls to your house are not perfectly plumb or in the same plane. This means that the back of the bookshelves should be designed so their’s an airspace between the wood and the plaster. The vertical sides of your shelves would be made deep enough so they can be scribed to the uneven wall surfaces.

Before you start to draw your plans for this project, I’d take lots of time to look at photographs of built-in bookcases. If you live near a large library or older buildings that might have built-in bookcases, go visit them for inspiration. You may see subtle pieces of trim that create a unique look you had not thought of.

Note how the bookcases terminate at the floor and along walls near a doorway where you might need to have a finished side of a bookcase. Pay close attention to each and every detail including how the shelves are supported.

CLICK HERE to get FREE & FAST BIDS from local companies that can build custom bookcases.

Column 1177

Decorative Patio Stones

Decorative Patio Stones

Decorative Patio Stones | Here’s just a small section of a massive patio and sidewalks constructed with decorative stones at the Huntington Gardens in Pasadena, CA. © 2016 Tim Carter Builder

DEAR TIM: I was on vacation before Christmas visiting relatives in southern California. I love outdoor plants so we visited a place called Huntington Gardens in Pasadena. There I saw the most unusual patio and sidewalk paving. Never before had I seen such beauty and thought it was fake. Different small stones that were different colors and shapes were combined to create a gorgeous pattern. How can I duplicate this or at least get close to what I saw? I intend to do this myself. What needs to be done to ensure all the hard work doesn’t fall apart, crack or otherwise deteriorate. I live where we get freezing weather unlike sunny southern California. Mary S., St. Paul, MN

DEAR MARY: I’ve built lots of patios in my life and many years ago built a medium-sized decorative stone-encrusted fishpond for my wife at our second home. What’s more, I’ve walked on that patio you saw in Pasadena. In fact, I photographed it for my own records because it was so unique. I believe I know exactly how the master stone masons built that patio and the connecting sidewalks. While there, I knelt down and studied it.

How hard would it be to recreate the same patio?

If you intend to duplicate exactly what you saw, you’re going to spend quite a bit of money to make the curved pieces of stone that create the border around the rounded white stones you saw. I can only imagine what the price of that might be. If it’s out of your budget, think about going with a pattern that can be done with straight pieces of stone you cut to fit. I agree that the curved border and curved pieces of border that connected the emblems are part of the overall beauty of what we saw.

You’ll also have to source all of the materials you saw in that patio. Besides the curved stone border sections, you just need to locate the smooth white stones and the thin gray rock that was installed on edge in between the white pebble emblems.

It could be very difficult to source these near your home and you may have to substitute other material that looks similar. In fact, you may discover that you can find other stone that has colors that look even better than what you saw. Be sure the stone retailer can prove to you that the stone you choose can withstand freezing temperatures in a horizontal position in the ground. Not all stone can survive these conditions.

Create a Scale Drawing of the Stones

The first thing you need to do is create a scale drawing of what you have in mind. This drawing will help you estimate the number of curved pieces of cut stone for the borders. Be sure you order no less than 20 percent more than you think you’ll need. Some may get broken in transit and you simply can’t afford to run short of this special material.

Based on what I saw at that patio and without doing any forensic snooping which would be very unprofessional since it’s not my patio, I estimate the finished patio covering was about 1.5 inches thick. Both the curved border pieces and the thin stone on edge would be the same height. This makes it somewhat simple to install most of the finished stone.

Beneath the decorative stone you and I saw I’m sure there’s a poured concrete sub-base patio. This is how I built all of my past decorative brick patios. The brick I used happened to be 1.5 inches thick and I set them in about a half inch of cement mortar.

I’d pour the concrete slab 5 inches thick and I’d have one-half-inch steel reinforcing bars in the middle of the concrete in a grid pattern much like common graph paper. The steel should be no more than 2 feet on center in both directions. This steel prevents the concrete from developing wide cracks and it helps keep the concrete all in the same plane over time. It’s important the concrete is poured on well drained compacted soil.

The concrete slab needs to be finished with a sandy or broom-finish and it must be in the same plane. Be sure it has some tilt to it so water drains off the slab and doesn’t puddle. Any water that falls on the patio needs to be able to drain away.

Should the patio have drainage?

Because you live where it freezes, I’d design your patio so it drains water away from the underside of the decorative stone. I’d want the decorative stone to sit on top of small rounded pea gravel that’s about 1 inch thick on top of the concrete. Water that falls on the patio will pass down to the pea gravel stone and then gravity will pull it to the sides of the patio. Be sure the low side of the patio allows this water to drain away through a buried pipe system on the outside edge of the patio. This prevents water from collecting under the decorative stone which will freeze in winter and cause havoc.

The center of the emblems would be installed using pigmented Portland cement mortar and fine sand. I’m sure the masons at Huntington Gardens used pure silica sand and white Portland cement based on my inspection. Silica sand is a great material because it’s a uniform color and quartz is such a durable mineral. You can easily get bags of silica sand where you live.

The rounded stone were set in fresh mortar to hold them in place. I’d make a strong mix of 2.5 parts sand to 1 part Portland cement. It will require some practice to get the mortar so it lays flat in between each rounded stone. I’m sure you’ll have to use a small stick or tool to tap the wet mortar to get it to the required height.

To achieve perfect results, I’d build a small patio first. You can test out your skills there to ensure the materials will all work well together. Don’t underestimate what water will do to the patio system in the winter months. You must engineer a way for rain water to rapidly flow off the top of the decorative stone and from beneath them.

Knee Pads - Get them - Use Them

Be sure to purchase some excellent knee pads as you’ll need them. You’ll spend countless hours on your knees building this patio, but it will be worth it.

Column 1176