August 28, 2012 AsktheBuilder Newsletter & Tips

My shed project is coming along. It's going a little slower than I'd like, but that's because my helpers are no longer here.

Robert Moore was here early in the project for nine days. He and I transformed the site in that short time from eight holes in the ground to a structure with all the rafters in place.

My son Tristan helped before he headed back to school. If I was fortunate enough to have a helper every day for the past two weeks, I'd be painting the siding right now!

The roof was completed last week and looks superb. I used GAF Timberline HD shingles that match those on my house. They were easy to install, and are going to keep the shed dry probably until the year 2050. Asphalt shingles last much longer on steep roofs than they do on low-pitched roofs.

This past weekend, I installed the two magnificent Simonton ProFinish windows. One of the many things I love about these windows is they carry the AAMA seal. This means the windows are among the best ones made on the planet. I've written extensively in the past about the importance of having windows and doors that have the AAMA gold label.

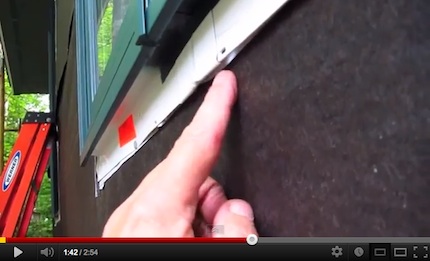
I've lost count of how many videos I've taped, but it's going to be way past 100. Here's one I taped this past Saturday after I was completing the window installation. Many of the videos in the series contain one or more Secret Ninja AsktheBuilder tips like the one you're about to discover.

Click the video image below to discover a very important window installation tip.

DIY Shed Window Installation

IMPORTANT NOTE: If you've already purchased my DIY Shed Video series - either in the past month or when the project was announced on Kickstarter, do NOT read the following. You've already paid for the videos. Go down to the next part of the newsletter.

Do you want to know all sorts of building secrets? Ones that can save you hundreds or thousands of dollars? Tips that can prevent costly repairs down the road? This is exactly why I'm building this shed! I wanted to document many of these tips in a real building situation.

You can have lifetime access to the videos now for just $69. That's less than one dollar per video!!! Hundreds of newsletter subscribers have purchased the video series at this price over the past three weeks.

But as I've said for over a month, the price is going up for the entire series as I get closer to the end of the project. Why? Because each day I tape more videos with more tips. The video series gets more valuable each day. It's not rocket science.

At midnight ET on September 2, 2012, the price for the entire series, purchased at one time, goes up to $89.

Click here now to purchase many AsktheBuilder.com Ninja Building Secrets for just $69!


Paid Tool Reviews

Last week, I had an email exchange with an employee from a major tool company. I had requested a few tools to review for you.

I was stunned when I got an email today from this person asking me if the review I was doing was a regular public relations review or a PAID review. Paid review? You mean there are other home improvement websites or magazines charging tool companies to write reviews?

Did you know that? I sure didn't. Can you tell me if you've read other tool reviews at other websites and seen small print at the bottom of the review saying the author was PAID to do it? I'd love to see that. I'd love to know who's doing this.

Getting paid for the review seems very unethical to me. It seems it would absolutely skew the review as the reviewer would be obligated to give a favorable review.

What other online reviews are like this? Holy molly, who can you trust anymore?


Ryobi ProTip Paint Sprayer Review

Ryobi ProTip Paint Sprayer

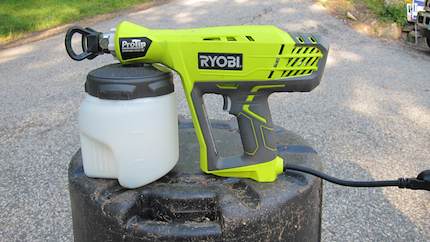
I can tell you for a fact I didn't get paid to review this Ryobi tool. I don't get paid for ANY product reviews I do.

I used this tool to paint some of the soffit boards on my shed. Go read my review now to see how it did!


Turning a Door Around

Russell Young from Maui, Hawaii emailed me with this question:

"We wanted out-swing double doors so we could have more interior grow space in our 12 x 16 greenhouse. Alas, our builder installed in-swing double doors and will not change it. My question is, can I turn the doors around?"

Russell also said he was a little handy which is why he didn't offer to fund a road trip for me to come to our 50th state and do this with him. But I digress. Heavy Sigh!

My reply to Russell suggested he could take out the doors and turn them around, but he'd have major leak issues when it rains.

I said this assuming the french door unit was made as a traditional in-swing door that was designed to shed water towards the exterior. Realize that doors and windows have sloped sills and the entire door system is made to shed water one direction ONLY.

You can purchase exterior doors that are outswing. They're made to shed water the right way.


Paslode Cordless Roofing Nailer

Paslode cordless roofing nailer

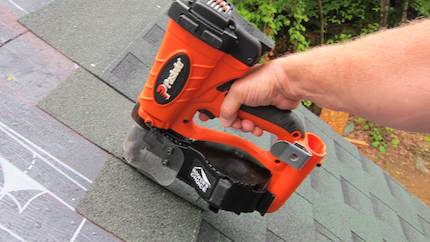
Building the shed is giving me an opportunity to test out lots of great tools. I just finished my tryst with the Paslode Cordless Roofing Nailer. Read all about the steamy details. It was hot and humid while installing the roof.

CLICK HERE to read the Paslode Review


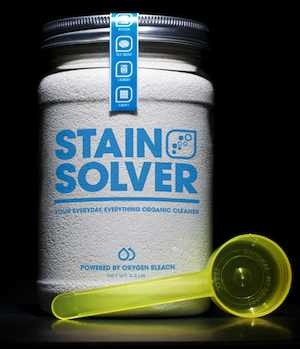
Exciting Stain Solver News

I've been waiting for over a month to share this. It's going to dramatically change the Stain Solver business. CLICK IMAGE to discover more about Stain Solver

Stain Solver bottle

Are you part of a mommy buying co-op like Carolyn? Carolyn and a bunch of her young mom friends are buying multiple bottles of Stain Solver to make cleaning easier in their homes.

Do you give useful gifts away to your customers like Jack Cherco, a Chicago remodeling contractor who's going to give Stain Solver to his clients?

Do you want to give small containers of Stain Solver away to friends and family as gifts?

Do you own or work in a small business like one of these:

  • Wine Shop
  • Dress Shop
  • Furniture Store
  • Carpet Store
  • Tile Store
  • Hardware Store
  • Pet Shop
  • Motel
  • Health Food Store
  • Natural Products Store
  • etc.

That's just a partial list of stores that should sell Stain Solver to their customers. Can you imagine the store clerk at a dress shop handing you a bottle of Stain Solver to you saying, "Here, take this as a gift from us. If you happen to spill anything on your new valuable dress, Stain Solver will safely remove the stain." Carpet salesmen, furniture salesmen, etc. can do the same thing when someone places an order for a large purchase.

I'm pleased to announce the 2.2-pound and 4.5-pound sizes of Stain Solver are now available in multi-packs.

It gets better - much better. They're DEEPLY DISCOUNTED so you can RESELL them if you own a business. Some business owners will give away Stain Solver. Others may just want to sell it for a profit. Either way is just fine. Whatever works best for you.

Sarah at the Cornacopia Bakery and Health Food Store in Bristol, NH is starting to stock Stain Solver. So are Julie and Gary Piehn at Gilcrest Cottages in Thornton , NH. Julie is going to sell Stain Solver to the people who stay at her cottages.

Craig Smith, a co-owner of Twins Ace Hardware in Fairfax, VA just placed his *second* order for twenty-four 2.2-pound bottles of Stain Solver.

Kathy and I have been waiting for this day for years. We've wanted to expand the Stain Solver business and make it available for you locally.

But we need your help. If you're a small business, order some to sell or give away to large customers.

If you don't own a small business but patronize them, suggest to the owner that she/he should be stocking it. That way you'll come in and buy it from them.

Now here's the problem. You knew this was coming didn't you?

Since we didn't know WHICH multi-pack would be the most popular, we only manufactured a certain amount of each size.

I already know we're going to sell out in HOURS in this Ultra-Soft Launch of these three new SKUs. This happens to businesses all the time.

When Apple launched the iPhone years ago, each store only had so many phones. I'm sure you understand I can't afford to make thousands of each SKU and have them sit in a warehouse *hoping* they sell.

This is why I need your help and your patience.

If you want one of the new multi-packs and you go to the store and see the message Out of Stock - Please ORDER it. You'll then be first in line to get yours once we fill all the back orders.

Don't leave the cart saying, "Well darn it. I'll just order when Tim get's more."

Order it *now* so we make enough to satisfy the demand. If you order now, I anticipate you'll have the product in your hands in five weeks or less.

I'm not going to run away with your money. As soon as we get a feel over the next few days how many of each size are selling, we'll get the machines mixing and packaging!

I hid these new SKUs in the AsktheBuilder.com shopping cart for this soft launch.

Don't go to StainSolver.com looking for them. You'll NOT see them there.

Go here:

6 pack of the 2.2 Stain Solver

12 pack of the 2.2 Stain Solver

6 pack of the 4.5 Stain Solver

Thanks so much!

Tar Paper Facts Video

Tar Paper Facts

Hi, I'm Tim Carter and I want to talk about a little about tar paper and how it is a great weather barrier. Tar paper is being installed on the sides of the shed I am building.

Tar paper has been used for well over 100-years as a highly effective weather barrier. It is waterproof and work under any type of siding or brick. It will keep your OSB or framing dry from any water that gets behind the exterior finish. It is affordable and effective. Tar paper is time-tested and it works. Installation is simple and easy.

On other remodeling jobs where I have taken apart some of the exterior, I have found tar paper that is 80, 90 or 100-years old, it may be brittle now, but it is still water repellant. The wood behind the tar paper was as dry as the day the house was built.

Tar paper really works. There are some other newer weather barriers out there, and tar paper might not be the latest, but it still is worth a look on your next project.

The Paint Brush Cover Video

Hi, I'm Tim Carter and I want to show you a neat invention. It may not be the first, something tells me that there are other things out there similar to this. I just got this sent to me and I am using it on a project right now. It will save me some time and money.

This is a plastic case with a hinged lid. This case will fit a one-inch to three-inch paint brush. Currently, I am storing a paint brush with paint in the case. The job I am working on right now, requires that I touch up the paint on some soffit off and on throughout the day. I don't want to be washing the paint brush every time I touch up one of the boards.

This case will hold the brush with the paint. The most important part of the case is the foam rubber around the paint brush handle. These foam pieces keep the case air tight. The paint on the brush will stay fresh because of the humidity inside the closed-case.

The Paint Brush Cover is a neat invention. Since the paint inside stays wet, you can easily clean the paint inside the case. And it will look brand new once cleaned. This is a great little item to have for your next project.

Ryobi ProTip Paint Sprayer Tool

Ryobi-ProTip-Sprayer
I had a queasy feeling the moment I pulled the Ryobi ProTip Paint Sprayer Tool from it's cool green soft-sided case. The tool seemed heavy and off balance, and there was no paint in it yet.

Now I have to be totally honest before we go any farther. I've never been a fan of homeowner paint sprayers because they just don't work like the professional sprayers I've seen on job sites or in factories. I'm not an expert when it comes to paint sprayers by any means, but the really great sprayers, even cans of spray paint from the hardware store, produce a very fine mist of paint.

The paint sprayers I've tested all seem to spit larger globs of paint on the surface, and they make a racket doing so. Are you starting to see where this review is going?

As I do with all new tools, the next step was to get out the Owner's Manual and read it. It was a small paper document that seemingly didn't include any graphics. There were phrases in the instructions that had you turn to the back of the manual to find the illustrations, but believe me, you can overlook these.

Where you'd expect to discover an exploded tool view and detailed drawings at the front of the manual, these were buried deep in the back of the document.

If you're an impatient user and/or a *visual* learner, you'd never find them. You'd gloss over the references to the illustrations at the back of the manual. Once you got to the Spanish language version of the instructions, you'd utter, "Oh great, no illustrations!"

One of the first things you have to do is lubricate a piston. I took apart the tool tip like they said and found, what I thought to be, a tiny metal part that looked like a piston to me. But I wasn't sure.

A link to an online video of the startup procedure would have been ideal. I'm astonished that tool manufacturers do not create videos, simple ones, that show you how to get started with their tools.

Videos like this are essential when you have to perform some mission-critical task like oil a piston. If you get this wrong and lubricate the wrong part, my guess is the tool freezes up and stops working.

Nowhere in the instructions did it say to thin the paint. I was using a top-of-the-line urethane-based paint from Sherwin Williams called Duration. It's thick. I added some water to help lower its viscosity and stirred it well. Even with this added water, the paint was very heavy bodied.

It was time to spray! I poured the paint into the translucent paint container, twisted it back into position, plugged in the tool and picked it up. Oh my, this bad boy was really heavy now, and putting a strain on my wrist because of how long the tool was. Not good.

I pulled the trigger, the pump started to work and the spitting started. Yes, this tool was just like all the previous ones I've tested. It spits paint onto the thing your painting. It's not really a sprayer in my opinion, it's a paint spitter. Now, mind you, the drops of paint are tiny, but they are not like the ones that come out of a spray-paint can. Not even close.

This tool comes with a unique feature that allows you to rotate the tip to unclog the tool. After just three minutes, I needed to use this. The tool stopped spitting, I mean spraying. It drooled a lot with the paint dripping down the front of the canister. Soon, I discovered it was done for the day.

No matter what I did, I couldn't get the tool to start spraying again. After another three minutes, I gave up. I took the tool down to the driveway to try to clean it up and salvage the paint in the container. While at the garage, I got out my trusty roller pan and a roller frame with a 4-inch roller. Within minutes, I was painting.

I was trying to paint flat pieces of plywood I had cut for a soffit installation. I didn't time the first few I got done with the sprayer before it died, but I have to tell you that I'm convinced a paint roller, in this situation, was much faster. It would have been even faster had I used a 9-inch roller frame!

Ryobi makes many other tools that deliver great results. I've used their tools. But this ProTip Paint Sprayer Tool is one that I just can't recommend. Unfortunately it doesn't even rate one hammer. Sorry Ryobi, but it's my job to report what happens when I use tools.

This review was featured on my August 28, 2012 AsktheBuilder  Newsletter.

Tim Carter

Founder - AsktheBuilder.com

The above is an affiliate link. I get a tiny commission if you purchase this item from Amazon.

Which Circular Saw Should I Buy?

DEAR TIM: I want to buy a circular saw for my husband for our anniversary. That way he can build some things for me that I've been hinting I need. However, when I look online at all the different models and types, I'm more confused than ever. The current rage seems to be cordless saws, and the traditional corded saws seem to be very much out of favor. What kind of saw do you have and what are the pros and cons of each type? What would you buy if you were me? Marsha V., Nederland, TX

DEAR MARSHA: Oh my goodness, you've opened up a can of worms! I can hear the wailing and gnashing of teeth now from countless carpenters, circular saw manufacturers and marketing managers! Let's see how well I can navigate through this minefield and give you solid information.

You're correct that the large battles between all the major power tool companies is being fought in the cordless tool trenches. Cordless power tools are exciting, there are major advancements being made all the time, and they're convenient. I happen to own many cordless power tools, several circular saws among them, and am delighted with their performance.

Here are two nearly identical circular saws. The price is nearly the same for both, but they differ greatly. Photo Credit: Tim Carter

But that being said, I have to tell you that there's no substitute for overall performance when using a traditional corded circular saw hour after hour after hour on the jobsite. For over twenty years in the field as I worked each day, I knew I could pick up my corded circular saw, pull the trigger and have unlimited top power so long as there was electricity. Even when there wasn't traditional power, I made my own with a portable generator.

Let's start with the pros that surround cordless circular saws. If you have the battery charged up, and perhaps a second battery, you can saw wood anytime, anywhere under just about any conditions. You just pull the trigger and the saw blade starts spinning. If a battery runs out of stored power, you can have a new battery in the tool in seconds and be back to work.

Cordless saws free you from the cord, and extension cords, that can sometimes get in the way. These saws can be time savers because you don't have to fiddle around with long tangled extension cords.

Now let's talk about a few of the cons surrounding the cordless saws. Understand these are subjective points from my perspective. They may not be generally held feelings by all. First, you can only get unlimited power from a cordless saw if you have multiple batteries and a power source that recharges the batteries. If you have this power source, this could just as easily connect to a corded saw.

The cordless circular saws have been steadily advancing getting more and more powerful each year. But in my opinion, understanding I don't have expensive testing equipment at my disposal, a cordless circular saw can't come close to cutting wood at the same rate in a given amount of time as a traditional corded saw. The cordless saw out of the gate may keep up with, or even cut faster than a corded saw, but within a few minutes of continuous cutting, the corded saw just keeps on going like that cute bunny that beats the drum while the cordless saw slows down and stops.

Realize that when you purchase a corded saw, you don't usually ever have to buy anything else to keep it running. The batteries on cordless saws can go bad. Some batteries eventually wear out and you need to replace them. The price tag on cordless batteries can take your breath away.

There's a subtle difference the rookie tool buyer like you might not pick out between the two saws. Most cordless saws come with a 6.5-inch diameter blade. The traditional corded saws usually have a 7.25-inch diameter blade. This larger blade, assuming both saws are spinning at the same revolutions per minute, produces more cutting power because the larger blade tips are moving faster as they're farther away from the center of the axle. This means more power when the blade contacts the wood.

Don't forget that you still need 120-volt power to make a cordless circular saw work. The batteries have to be recharged. If you have lots of cutting to do and not enough batteries, you will stop working. I know, as it's happened to me. That would never happen with a corded saw. As long as you have power, and you keep your finger on the trigger, the saw blade spins.

At the end of the day, and if your budget allows over time, your husband would appreciate having both saws! There are times when I absolutely need and use a corded saw, but then there are jobs where it's great to have the versatility of a cordless circular saw. No matter what you buy, he'll be happy.

Be sure to pay attention to pricing. The saws that cost more generally have better parts and are made to last generations if you take care of them. The more expensive tools tend to be made for pros that use the tools day in and day out. If your husband will use the saw on occasional weekends, a pro circular saw will deliver top performance for decades.

You can watch numerous saw videos that contain secret tips at www.AsktheBuilder.com. Simply type "saw video" into the search engine at www.AsktheBuilder.com.

Column 949

August 15, 2012 AsktheBuilder Newsletter & Tips

I'm reading the book Valley Forge at night before I drift off to dreamland. Usually I can only get about six to eight pages done before I pass out. It's a fascinating book that goes into the enormous suffering and hardship the Continental Army was enduring at that time.

Valley Forge by Newt Gingrich & Wm Forstchen

I'm not an early American warfare expert, but from what I can tell, armies usually took the winter off because it was hard to travel and there wasn't any food for the horses and mules that moved the armies' supplies from place to place. Warfare back then was a fair weather activity. It makes sense as muddy and frozen roads are not easy to navigate.

The British army holed up in Philadelphia just 20 or so miles from Valley Forge. From what I surmise, had they fought just one more battle before taking the break for the winter we'd have an image of the Queen of England on all our coins and paper money instead of past presidents.

George Washington's army was so out of gas, it would have not taken much to completely wipe out the starving and ill-equipped men. The other fascinating thing were the mercenary soldiers, including officers, that came to America looking for work, if that's what you want to call war. It's a good book, you should consider reading it. I didn't realize Washington was so tall!


The GE Dishwasher Recall

I sent out an emergency email to you last Thursday the moment I heard about the fire hazard recall on the GE Dishwashers. You may be in the group of many who reached out with a big Thank You. Here's one that explains why I send out those notifications. It came from Dan Colwell:

Thanks Tim,

We have one of those dishwashers and I don't think I may have known about the recall if I didn't read "Askthebuilder".

No sweat Dan. I'm just doing my job.


Tip of the Week - Clear Urethanes

Urethane floor finishes aren't all the same. There are superb commercial products that are used for gymnasium floors and other high-traffic areas. The urethanes you might find in your home perform really well under normal conditions.

You can still get oil-based clear urethanes. Water-based urethanes seem to be the belles of the ball now because they contain far fewer volatile organic compounds (VOCs). That's what you smell when you put down an oil-based urethane.

Be aware that most water-based urethanes will not yellow over time. They truly stay clear. But oil-based urethanes almost always develop a patina that many people like. They tend to develop a light yellow to orangish coloration over time. This is really important to know if you're trying to match an existing floor finish.


We Have a Winner! - LE Johnson Pocket Door Contest

Congratulations to John Thompson! He got the most votes in the Pocket Door Hardware Contest. Alice Thompson came in second followed by Heidi Halvorson. Thank you for entering, thank you for voting, and thanks to LE Johnson for providing the door kit!

You should really take a look at this page at the LE Johnson website to see what John won. This page has great links to all the instructions that show how easy it is to install a pocket door. Pay particular attention to the trolleys or trucks that support the door.

Does your pocket door jump off the track? I'll bet it's because you don't have the right trucks. CLICK HERE to see what you need if you want your door to stay on the track at all times.

Tell me if you thought you'd see that many wheels on the truck?


50% Back-to-School Advertising SALE

Do you have a great home-improvement product, tool or service? During the month of September you might be able to catch the eye of the tens of thousands of homeowners that read this newsletter. Just reply to this message and change the Subject Line to: Ad Sale. Remember, I have to test the product first and APPROVE it before you can advertise. You know what that means - get me the product or tool pronto!


Deck Stain Test - Partial Results

I started testing sixteen different deck stains back in May of this year. The test pieces are down on my dock getting blasted by the sun all day until about 3 or 4 pm. I'm testing pigmented sealers as well as a few clear ones.

So far, three of the clear sealers have failed, and a fourth one is looking like it's not going to make it until September.

This test is going to run for at least two years. I put the sealers on both cedar decking and traditional treated lumber, as these are two of the most common deck lumbers used here in the USA.


Jeremy Wren and the DIY Shed Video Series

I had the distinct pleasure to have lunch with Jeremy Wren in Wake Forest, NC this past February. I was on my way to a conference and I always try, when I can arrange it, to meet with you and any other subscribers.

Jeremy owns a fantastic niche home improvement business in Wake Forest. He's been a subscriber to this newsletter for some time. I was amazed to hear that he incorporates my tips to help give his employees a competitive advantage.

Last week Jeremy wrote to me about the sale I had on my DIY Shed Series. You just have to read this:

"I missed the $50 price (I was too busy to be able to get to it at the time), but I did just get it at the $69 price level. I plan to use these videos for training videos for the company, so make 'em good! 🙂 "

I replied and thanked him for his purchase. As you might expect, he got back to me with:

"Thanks, Tim. Since I've been following you on Facebook & on your website for several years now that I felt 100% comfortable purchasing them. Your info is always right on, and I use your expertise to review our own procedures and methods.

Shed Building Videos

And $69 is a pretty incredible price!"

Jeremy's right. It's an incredible price. I say this because I know what I've already taped during the past three weeks. What's more wait till you see what I taped over the past few days. If you purchase the video series, you'll be getting Secret AsktheBuilder Ninja Tricks about installing flashings for sun tunnels, plumbing vents, turbine vents, skylights and all the basic asphalt shingle roofing videos.

Just THOSE videos that I shot up on the roof are well worth the $69 I'm charging for the entire series. Tell me, if you goof up a roof flashing or make one little mistake when installing shingles, do you think it will cost MORE THAN $69 to repair the damage?

You know it will. Go here to see all the things covered in the shed building video series.

The price for the entire series is going to go UP next week to $79. When the project is finished, the entire series will absolutely be priced above $100. If you decide to purchase each of the videos a la carte', you'll pay well over $200.

I did get one hate mail from a subscriber who thought that paying that much for building tips was "insane, greedy, highway robbery, etc". This man said I should be providing all the information for free. I reminded him that I already have thousands of pages of free information at my website, and hundreds of free videos. His reply was "That's not enough you money hungry thief!" I'm serious - I couldn't make this up if I tried.


Handyman Online Class and Other Classes

A little over six weeks ago, I offered to teach an online class about starting up a Handyman business. You may have been one of the many that responded. This class would be held online much like live television.

You'd purchase a seat in the class and would be sent instructions on how to login and watch. If something came up or you couldn't attend at the live event, no problem! The class will be taped and you could watch it later countless times at your convenience. If you do attend the class while it happens, you can do live chat and ask questions. It's very cool. If you watch the class after it happens, obviously you can't chat or ask questions.

The reason the Handyman Class got sidetracked is because the shed project kicked in and I simply didn't have the time to pull it together. I'm now ready to prepare to teach the class, but I need to know exactly what you want me to cover. If you tell me what you want to know, I'll be sure to cover that in the class. Just click Reply but *please* change the Subject Line to: Handyman Class

If you want me to offer any other online classes, what would you want? Would you like a series on Basement Remodeling? How about a series on Kitchen Remodeling Pitfalls? Would you be interested in a quick series on Bathroom Remodeling?

Tell me what knowledge you want to extract from my brain!


Milwaukee 28-Volt Cordless Circular Saw - 0730-22

I've been using Milwaukee's sweet 0730-22 cordless circular saw on the shed project. It's a husky saw that's sized much like traditional corded saws. This bad boy has some power.

Milwaukee 28-Volt Cordless Circular Saw

This cordless saw has 28 volts and is very well balanced. I love the hard plastic case that comes with the tool. While soft-sided cases may seem like a good idea, they don't protect tools in the back of a truck where other tools or materials can bang into them.

If you really want to test a circular saw, set it to cut at a 45-degree angle and then try to rip 2x material. I had to finish ripping a southern yellow pine 2x12 and the saw did great. If you've never cut southern yellow pine, let me tell you it's tough stuff.

How To Install Shingles

how to install shigles

This is a small but steep roof. The staggered offset for each row is exactly what the instructions say to do. Photo Credit: Tim Carter

DEAR TIM: Money is really tight, I have a small house and it needs a new roof. I simply can't afford to hire a roofer. My house has shingles on it now and I can walk on it with little difficulty. I've never installed roof shingles before, but now I need to. What will be my biggest challenges? Luckily there's only one plumbing pipe sticking through the roof. The rest of the roof is just shingles. Can I successfully install a new leak-free shingle roof myself? Andy M., Shawnee, OK

DEAR ANDY: The good news is that you absolutely can install a new asphalt shingle roof. What's more, you can probably do it completely by yourself, and it will be leak-free. Your biggest challenge will be the physical aspect of the job. It's hard work under the best conditions. It's unbearable work if you have to do it in blistering hot conditions or in the middle of winter.

The first thing to do is to decide on the shingles you'll use and obtain the written instructions from the manufacturer. It's never been easier to do this with the Internet. Just about every manufacturer has downloadable instructions for each of the shingle products they make. Just days ago, I downloaded a set of instructions for a specialty shingle I was installing on one of my projects.

Pay close attention to what the manufacturer has to say about installing the shingles on top of an existing roof. Talk with your building inspector and see what the code restrictions are in your town. If you're allowed to add your new shingles on top of your existing roof, you'll save an enormous amount of labor. Stripping off an old roof is mind-numbing brutal work.

If you have to remove your existing roof, get a great pair of gloves and wear them. Start at the top of the roof and remove any cap shingles at the peak of the roof. Use a flat spade shovel as a lever under the shingles. Special shingle removal tools are made for this purpose They have aggressive teeth that help lift the shingles away from the roofing nails.

Be sure you have a contingency plan in place. Don't strip off the entire roof leaving it exposed to the weather as a storm or pop-up rain shower could show up at your house and you'll have a real mess. It's possible to strip just half of one side of a roof from top to bottom and re-roof just that section. I did this years ago on the second house I owned. You can also purchase a large tarp to cover the house, but these have been known to blow away if not secured well.

The process of installing the shingles is not hard. Pay attention to the instructions and install the correct underlayment and any required starter shingles. In the old days, felt paper was the underlayment of choice. Now there are large rolls of underlayment and specialized underlayments that prevent roof leaks caused by ice dams and wind-blown rain. Traditional roofing felt paper works just fine as an underlayment. It's got a fantastic track record stretching back well over 100 years.

I strongly suggest you use metal drip edge at the bottom and along the sides of the roof. This product is affordable and when installed correctly it will really help keep you dry. If you use traditional felt underlayment, the metal drip edge goes on the wood roof sheathing first at the bottom of the roof. You then install the underlayment on top of the metal drip edge and over to the sides of the roof. The metal drip edge on the sloped sides of the roof goes on top of the underlayment. This method helps keep wind-blown rain from getting under the underlayment in fierce wind storms.

You need to chalk lines to keep the shingles running straight both horizontally and vertically. The written instructions will show you how to create the needed offset for each successive row as you march up the roof. This offset is mission critical. This is what keeps water from leaking into your home where two shingles meet.

Pay very close attention to the nailing location and the pattern in the instructions. Use the correct length nail as called out in the instructions. Do NOT listen to advice from friends, store clerks, etc. about what to do. The written instructions are your North Star. Remember, if there's a problem with the roof down the road, the warranty depends on you doing everything as stated in the instructions. Don't take shortcuts.

Cutting and fitting shingles around plumbing vents, roof vents, chimneys, etc. is an art and a science. If done wrong, you will have a leak; of that there is no doubt. If you currently don't have a leak at your plumbing vent pipe, take numerous photos of how the shingles are installed under and around it as you remove the existing roof. Peel back one layer of shingles at a time from the top down and snap photos to see how the roofer before you cut and fit the shingles.

You'll discover that as the shingles come up the roof, some of them go under the flashing boot around the plumbing pipe. Then the shingles start to cover the flashing. Try to avoid exposed nails if possible. If you do have to hammer in nails in the lower corners of the exposed flashing to keep it tight to the shingles, put a dab of roofing cement on top of the nail or an approved caulk.

You can watch numerous roof videos that contain secret tips at www.AsktheBuilder.com. Simply type "roof video" into the search engine at www.AsktheBuilder.com.

Column 948

masonry-water-repellent masonry-crack-sealant

The above product links are affiliate links. I get a tiny commission if you purchase these from Amazon.

Paslode Cordless Roofing Nailer

Paslode has done it again.

I'll never forget the first time, many years ago, I drove my first nail with a Paslode gun. It's like your first kiss. I was spellbound by the freedom of no hoses and compressors - and I had been a pneumatic nail-gun user for many years!

I got that same first-time rush yesterday when I drove the first roofing nail with Paslode's Cordless Roofing Nailer. Out of the sleek soft-sided case, the gun drove the first nail perfectly. Not too deep, not proud of the shingle, but just right.

Then it proceeded to drive hundreds more nails through the day as I installed several squares of GAF Timberline HD shingles on a shed roof. Each nail was perfect.

Paslode Cordless Roofing Nailer

I didn't have to worry about tripping over clumsy air hoses up on the roof, nor shouting over the racket caused by a gasoline-powered air compressor. I simply took the tool out of the case, and was working in seconds. Granted, I did have to charge the battery, but that took less than an hour. One battery charge will drive thousands of nails.

This new Paslode Roof Nailer is part of a system. It's 7.5 pounds of precision and gusto. Packed with the gun was a battery, charger and a nice box that contained 720 premium nails and a gas cartridge that has enough fuel to drive all the nails in the box. If you don't waste any nails, you have enough in each box to install two squares of ordinary shingles.

Loading the gas cartridge was easy, as were the nails. You simply open the side door to the drum and drop in the nails. You have to feed the nails to the nose of the tool, but that's as easy as dropping your razor knife to the ground once you're up on a roof.

Paslode Cordless Roofing Nailer

The nails have been designed to have extra holding power. They achieve this with grooves on the nail shaft that increases the surface area of the wood-to-metal contact. The nails also have the trademarked PowerBoost black coating that aids in driving the nail into the wood. I suspect it also helps hold the nail in position as the coating cools down.

There's no doubt that this tool will pay for itself in weeks if you use it on a job. The productivity gain from hand nailing is off the charts. Not everyone is a super fast hand nailer when it comes to shingles. For the average roofer, you'll save vast amounts of time. That time equals more profit per job for you.

My prediction on upcoming improvements to the tool are the following:

  • Hard-shell case to ensure the tool doesn't get damaged in the back of a truck
  • Matching Allen wrenches for every bolt on the tool
  • Lithium-ion battery pack

This Paslode tool deserves five hammers - it's that good.

August 9, 2012 AsktheBuilder Newsletter – Product Recall

This is a Special Alert! A regular newsletter will be sent next Tuesday.

GE Dishwasher Product Recall

A serious fire hazard has been found in certain GE dishwashers.

CLICK HERE to read the recall notice from the CSPC.

I hope you don't have one of the affected dishwashers.

I'll have a boatload of new tips and info next Tuesday for you.

Read my August 15, 2012 Newsletter for a subscriber's email about this news alert.

MB Tractor Excavator Rentals Video

Hi, I'm Tim Carter and I want to talk about renting an excavator from a tool rental place. I rented this excavator for the shed project.

This tractor excavator features rubber tracks so it won't harm a blacktop or concrete driveway. It has full rotation of the cab, an articulated arm with bucket with a thumb. The thumb allows you to pick up rocks or logs. It also has a small dozer blade for working the ground. The blade can be adjusted up and down, and left to right.

It takes about 10 minutes to get comfortable with the controls. But with a little practice, you will be digging holes and trenches on your site. These are great time savers and are affordable to rent.

I want to thank MB Tractors for allowing the use of this excavator to show how easy they are to use. They are fantastic machines. This type equipment can be rented almost everywhere. Just take the time to get a little training and read all the safety warnings so you don't get hurt or hurt someone else.

Remember to call the number for underground utilities before you start digging. It is very important to check out what might be underground before you dig in.