Home Window Repair

Home window repair is not as hard as it may seem. Granted, there are hundreds of different window types, styles, and hardware all cutting across at least one hundred years, but you’ll discover that many home windows repair techniques are the same. I can clearly remember working on a sticky crank mechanism in the original steel casement windows in my childhood home. What’s more, I can remember the first time I took apart a traditional up / down wood sash window to replace a broken rope that connected to the cast-iron weight that counter balanced the sash.

Modern windows have become slightly more complex with the spring-loaded jambs that have taken the place of the clumsy, yet effective, cast-iron window weights. If you have to repair a modern spring balance, you often have to replace the side jamb. These jambs are typically held in place with hidden clips.

If you can’t figure out how to get the jamb out, always visit a local distributor who sells that window. Their service manager can take you to the showroom and demonstrate how to take apart the moving parts of the window.

Home window glass repair is a very common task. Rocks, balls, furniture, etc. can break glass with ease. With old windows, it’s usually just an exercise in removing the old putty on the outside of the window. You’ll then see tiny metal clips or spring-loaded clips that press the glass tightly against the mortised frame. These clips need to be removed to get all the glass out and the new glass panel in place. It’s not hard to get these clips out, but it’s very important to use them when you install new glass. Without the clips, the glass panel can easily be pushed from the inside, and it will pop out of the frame falling to the ground below.

Some window glass can’t be repaired this way. For many years if you broke the glass in an Andersen casement vinyl-clad window, you had to buy the entire sash with the new glass. It’s extremely easy to remove the sash from the hinges, but the price tag of a new sash may take your breath away.

Home window repair parts can be tough to find the older the windows are. You can discover a treasure trove of them if you establish a relationship with the sales manager of a local window-replacement company. Think for a moment. Imagine how many houses a company like that works in each month. The salesmen/women for a window company get inside many houses and may see what you need.

There’s a great chance houses near you have the same windows. If you tell the window-replacement company that you need certain parts, they may allow you to salvage them from windows they take out of a house. You just have to take photos of your windows and any logo information you may see on the window jambs, frames or hinges and take these with you when you visit the window-replacement company.

When it’s time to do a broken home-window repair, don’t panic. Try to be prepared in case you have a catastrophic accident and the window is open to the elements. Have plywood handy so you can cut a panel to protect your home. If repairs are not so imminent, just try to see what the problem is and contact the local distributor who handles that brand of window. Sometimes the name of the window manufacturer is imprinted in the lower corner of the glass, on the crank hardware, on the locking hardware or the hinges.

One thing you need to monitor is the condition of window sills and the lower parts of wood window jambs. Back in the 1980’s, a defective clear wood preservative was used on many window and door products. It was determined this chemical was defective causing the windows to rot. It happened at my own home.

Each spring, test your window sills and jambs with a screwdriver to see if the wood is soft. If you discover soft wood, there are additives that you can impregnate the wood with to strengthen it. If the rot is fairly bad, you can use epoxies to rebuild the wood profile. In any event, you need to make sure the window parts are painted well to ensure water can’t get into the seams where the jamb meets the window sill.

Column QA

Home Maintenance Repair

Home maintenance repair is, in my opinion, a dying craft. Years ago, fathers and mothers would teach sons and daughters home maintenance & repair skills. It was just as natural as doing laundry, cutting the grass, or any other chore. But for some reason in the 1980’s, the home-improvement service industry saw explosive growth. If you want my opinion, it was directly related to the irresponsible expansion of consumer credit that is part of the reason the economy of 2008-2009 is in a shambles. People could easily put a home repair on a charge card, or they took out a home-equity loan. But I digress.

Many folks now are discovering they made a mistake by not trying to do more home maintenance and repair themselves. Not everyone is in this boat, as statistics show that about 25 percent of the population of the USA are do-it-yourselfers. That’s tens of millions of people. My personal statistics show that this group is primarily the under-30 crowd and the over-60 crowd. Both of these groups tend to have limited incomes and lots of time on their hands. That’s a great recipe for sharpening your home-maintenance skills.

If you’ve not attempted any home-maintenance repairs, don’t worry. Many tasks are not that hard, even changing out an electrical switch or outlet. What’s more, as you start to educate yourself, you’ll get enormous satisfaction as you complete small jobs.

For example, let’s say you want to change out an old tubular doorknob. This job may be intimidating if you’re working on an exterior door, so I suggest you start with an interior door. These interior locksets generally have just a few screws that hold them together. Then you just have two screws that hold the moving latch that goes in and out of the edge of the door. Replacing a lockset like this takes just 15 minutes, often less than that. The biggest thing you need to do before you start the job is make sure you get a new one that has the correct backset.

The backset for a door knob is the distance from the edge of the door to the center of the door knob. Usually this distance is 2 and 3/8ths inches for an interior lockset. It can be 2 and 3/4 inches, as this was the size I always used on my own homes and houses I built. This larger size gives your hand more space so knuckles don’t rub against the door jamb.

To improve your hand-eye coordination, you should try to practice at caulking. When I say practice, I mean it. This is an area people make mistakes. They try to do a job they’ve never done before in an area seen by many. So take two pieces of scrape lumber and nail them together along their edges making an inside corner. There will be a crack there, so take some inexpensive acrylic caulk and fill the gap. Use your finger to smooth the caulk and a wet sponge to dress the caulk so it’s as smooth as a baby’s bottom.

If you want to attempt rough carpentry repairs, practice by possibly making a dog house. This sounds crazy, but a dog house requires you to discover how to measure, cut, nail, install siding, cut roof rafters, etc. The possibilities are endless.

Aside from the satisfaction you gain from doing home repairs yourself, you can save boatloads of money. Yes, there is a time factor involved depending upon how much you value your time, but if money is tight, you just can’t always afford the hundreds or thousands of dollars it might cost to hire a pro. Installing a simple water heater can save you hundreds of dollars. The trick is to read up on the process now, practice soldering scrap copper pipe, not the day your heater springs a leak.

Concrete and blacktop repairs are something you can tackle as well. Caulking cracks in concrete and blacktop is easy. To disguise the caulk, always be sure to get some sand that matches the color of the sand in the concrete or blacktop. Use the matching color of caulk as well. After installing the caulk carefully, and I mean just 2-foot stretches, sprinkle the dry sand on the fresh caulk and tap it lightly with your finger to make a great bond. The sand will disguise the harsh caulk line. If the crack is wide, push small stones into the fresh caulk that match stones in the blacktop.

When you start to learn how to paint, start inside a closet. Make all the mistakes in there. Once you have perfected your technique, then move into the main part of the room. Just think where you can test your skills doing the least amount of damage.

Take your time and enjoy yourself. You can do many home repairs if you put your mind to it. Carry a great attitude into the project. Keep telling yourself it’s a church job. Craftsmen of old who built churches always did their best work there for several reasons, not the least of which was that the entire community knew who worked in the church!

Column QA

Home Remodeling and Repair

DEAR TIM: Because of the faltering economy, home remodeling and repair is a hot topic in our family. We can’t move to a different home, and we can’t afford to hire contractors. What home repairs would you recommend we attempt on our own? I believe I can tackle some house remodeling tasks, and I want to add whatever value I can with home improvement. What’s a good strategy to adopt when it comes to do-it-yourself (diy) remodeling? Meg S., Welch, MN

DEAR MEG: If it’s any consolation, you’re not alone. Millions of homeowners are attempting renovation projects, as well as major diy home improvements because money is tight. The truth is many of these projects will probably end in partial failure, but not because the intentions were bad. Remodeling can be tough, it requires many skills, and you’d be shocked at the number of specialty tools you need to do certain tasks.

First, don’t totally give up on contractors. Times are tough for them, and you may be able to get fantastic deals, or at the very least, they may work along side you when you get to difficult parts of a job. When times are good, most building contractors wouldn’t consider smaller jobs or working with homeowners. But in these tough times, all bets are off. Many a contractor is in survival mode, and you just might get his attention with your offer.

The alcoves on either side of the fireplace will soon have simple shelves. PHOTO CREDIT:  Tim Carter

The alcoves on either side of the fireplace will soon have simple shelves. PHOTO CREDIT: Tim Carter

If you don’t have lots of experience working on home improvements, then I strongly recommend that you start with modest home-repair projects to boost your skills and your confidence. Don’t underestimate the enormous amount of time it takes to do what you feel is a simple project like a bathroom remodeling job. A major bathroom remodel can take a professional at least one hundred hours of time. Can you imagine how long it can take you with no experience and limited tools?

When you start projects that you’ve never done before, it’s really easy to get in over your head fast. An example is installing ceramic tile. If you become mesmerized by those television shows you see on cable TV that say how easy it is, beware! It’s not easy to get professional results the first time. I always recommend that you do a small test section on a scrap piece of cement board. You’ll quickly discover the challenges. You even want to try to grout this test panel before you attempt a real grouting job.

The same is true for plumbing or carpentry tasks. Try to solder a scrap piece of copper pipe before you attempt to cut into a real water line. Be sure to read up on the process and watch free online videos about home repairs. When it comes to carpentry jobs, try to take some scrap wood and make practice cuts before you cut into an expensive 16-foot length of crown molding.

As far as which home-repair projects you should attempt on your own, there is an abundant list to choose from. Some simple things that come to mind are door knobs, caulking, installing a storage cabinet or new shelves, etc. I highly recommend that you start with tasks that you can complete in less than two hours. If you attempt tougher jobs that might last all day, you run the risk of getting frustrated. Frustration can lead to cutting corners.

Exterior remodeling projects are also a way to get great exercise and add some value. If you have a smaller one-story home, perhaps it needs a fresh coat of paint. While it takes a while to paint an entire home, perhaps other family members can join in the fun doing all the different tasks like scrapping, washing the house and caulking any cracks. A freshly painted home looks great, and can be a great source of pride.

As you start to have more home-improvement successes, start tackling tougher jobs. Perhaps attempt to replace a sink faucet. If you are really feeling your oats, try to install a patio or a deck. If you want a significant challenge, try to build a small outdoor shed. This project is similar to a room addition, but on a very small scale. A shed requires you to discover what it takes to install a simple foundation, frame walls, floors and a roof and install siding and shingles. You’ll be really proud of yourself if you achieve all those things.

As you attempt more difficult projects, be sure to have Plan B ready in case you fail. This may be something as simple as a tarp to cover a roof you attempt to redo on your own. If you underestimate the difficulty and time it takes to re-roof part of your home, you better be ready to secure the open area with a tarp that won’t blow away nor let in a driving rain.

Take the time to really research how to do things. The Internet has vast amounts of free information, granted not all of it is accurate, that can help you get an upper hand when you sail into uncharted do-it-yourself waters. Many manufacturers’ websites also have instructional videos that show you how to use their products. Watch these so you don’t waste time nor the materials.

Column 768

Home Repairs

Home repairs are part of my DNA. I have memories of me trying to fix things around my house when I was very young. I distinctly remember my Dad and my Uncle Raymond transforming our single-car garage into a bedroom for me. This was a major home repair do-it-yourself job that was a huge undertaking for my Dad, who was a disabled veteran from World War II. I remember trying to drill holes into the concrete foundation wall that were for anchors for the firring strips. It took a long time to drill just one hole. Too bad hammer drills were not yet invented!

In-home repairs are a great way to save money. This is why my Dad transformed the garage, as we couldn’t afford to have a contractor do the work. When you get ready to try home repairs yourself, you absolutely want to start with smaller tasks. When you start to have tiny successes, you’ll be mentally prepared to tackle something a little harder the next time around.

To do home repairs, you must have some decent tools. If you don’t have good tools or the wrong tool, you’ll discover quickly that it takes longer, and you get inferior results. Something as simple as using the wrong-sized Phillips screwdriver is an example. If you use a #1 bit in a screw that’s made for a #2 screwdriver, you’ll struggle. Imagine trying to dig a simple hole for a post using a square-point shovel instead of a round-point shovel or even better, a post-hole digger! You need the correct tool for the job.

Do-it-yourself home repairs can range from fixing a door that swings open on its own (just take the hinge pin out and put a slight bend in it by striking it with a hammer), to installing a gorgeous concrete patio with the help of a few friends. You may even try to install a new garage door. There are thousands of home repairs to choose from, you just have to make sure you don’t get in over your head. That happens more often than not.

Free home repairs may be attractive, because the price is right, but you know the old saying: You get what you pay for. Even if you have friends come to help for free, they may not have the same desire to produce the quality that you have. I was very lucky to have several friends, Roger and Loren, who over the years have pitched in to help me. They always tried to produce professional results. Friends like this are rare, so be prepared for lower-quality work if you go the free route.

If you’re a beginner, some communities offer great home repairs how-to classes or seminars. In fact, I just taught one here in Meredith, NH. It was well attended, and the people who came went away with a new appreciation of plumbing. Plumbing projects are frequently at the top of home repairs improvements that people attempt. I believe the reason is the high cost of plumbers. Homeowners want to save money, so they try to switch out a toilet or change a faucet.

DIY home repairs can be a success right out of the box if you practice first. The biggest problems I see each day as I read desperate emails containing pleas for help from DIY’rs is that they started a project with no experience.

Installing floor tile and then grouting it is an example. The best way to learn how to do this is to buy an extra 3 ft. x 5 ft. sheet of cement board and take some cheaper tile to cover it. The next day get out the sanded grout and grout this panel. Just lay this cement board in your garage or in the room you’re tiling. You want to practice on the small panel you can carry out to the curb for the garbage man.

Home electrical repairs are one area that I often try to discourage rookies from attempting. Electricity is a sinister killer. You rarely hear about people drowning in their own homes from a plumbing leak, but you hear about people dying each week from fires caused by electrical malfunctions. Many of these fires can be traced to electrical repairs done by a person who had no experience or by a person who didn’t follow the electrical code.

When you decide to get serious about your home-improvement repairs, be sure to take the time to research how the job should be done and the correct products to use. Let’s say you just want to paint the outside of your home. Without doing the research at a website like AsktheBuilder.com, you might go to the home-improvement center big box store and walk away with inferior paint. You may also start the job on the sunniest, hottest and windiest day of the summer thinking that’s great weather.

The truth be told, you need a superior paint from a national paint store that has urethane-acrylic resins. What’s more, you want to paint on overcast days where the temperature is between 65-75 F. Paint will adhere best if it’s allowed to dry slowly on an overcast day. NEVER paint in direct sunlight as that can cause rapid drying and blisters. Major home repairs like painting your own home must be done right so you don’t waste time and money.

Column Q&A

March 1, 2009 AsktheBuilder News And Tips

What’s in This Issue?

AFTER I HIT SEND
ZAPPOS STORY
OUTDOOR SHED IDEAS
WINTER IN NEW HAMPSHIRE
ROTOZIP SPIRAL SAWS
VACATION PLANS
THE CABINET FOLKS
LATEST COLUMNS


FOLLOW ME ON TWITTER


After I Hit Send

Each time I click the button that sends this newsletter to you, I sit back and roll up my sleeves. Why? It's simple. You often reply with positive suggestions, ideas and a Thank You. It can take hours to respond to each message I get, and I always try to answer each one. It's so rewarding to get your response as it tells me the effort I invest in each issue is making a difference. I'm grateful that you respond to me.


Zappos Story

About six months ago, I purchased some Ugg slippers from Zappos.com. I discovered here in New Hampshire that you simply don't wear your outside shoes in the house. The sandy soil tracks everywhere, and can ruin hardwood floors. I have the slippers by the door from the garage, switching into them each time I get home. The sheepskin lining in one of the slippers delaminated from the inner sole of the slipper causing the lining to move around and be uncomfortable. That shouldn't happen in my opinion.

I called Zappos and talked with Bobby Colbert. He was a great young man that took care of my problem, even though I didn't have the original box and packing to send the slippers back. I tell this story not so much to toot the horn of Bobby and Zappos, but to show you an example of extraordinary customer service.

This one event has made me a customer for life of Zappos. They didn't have to give me new slippers as I didn't follow their return policy, but the bottom line is that I was unhappy and had a valid claim. Bobby wasted no time in making the right call and putting a smile on my face for the entire weekend.

Perhaps Zappos knows this, but even the phone experience is pleasant. When I was on hold, I was listening to some fantastic acoustical guitar happy music. That kept me very upbeat while I waited. The last thing I wanted to hear was a sales pitch. It only took Bobby a few minutes to complete the return, and he emailed me all the documents and the return shipping label while I was still talking to him. Wow! The only other company I've dealt with in the past that has exceeded my expectations like this is L.L. Bean.

If you're in the market for shoes, clothes and outdoor gear, take a serious look at these two companies as well as their warranties. They're tough to beat.


Outdoor Shed Ideas

A month ago, I was in Florida attending the Sears Editors Conference that featured all of their new lawn and garden tools. One of the editors I met was Ms. Debra Prinzing. She is the author of a great coffee-table book titled: Stylish Sheds and Elegant Hideaways.

I need a shed up here at my New Hampshire lake house to house all of my tools and kayaks. After reading just a little bit of Debra's book, I've seen some great ideas that I plan to use in my new shed. The color photos in this book will make you drool. Some of the sheds in the book are really miniature houses where people go to get away from daily stress and strain. Sheds become a touchstone for peace and tranquility as I believe they take us back to the time when we would play in a clubhouse. Those were carefree times indeed. I have to admit that when I'm in my Queen Anne Victorian shed back at my Cincinnati house, it's a place to hangout and surround myself with tools and things I love.

If you're planning to build a nice shed this year, you should really consider getting a copy of Debra's book. Go here to discover more.


Winter in New Hampshire

I haven't talked too much about my first winter here in New Hampshire. It's almost over, even though a major storm is bearing down on us in less than 24 hours. It's absolutely gorgeous up here. The snow stays white for weeks, and the lake just outside my door is frozen 18-inches thick. I know as I went out on the ice and drilled it. It only got really cold for a short period of time. When a storm happens, it moves out quickly and each day after is usually a brilliant blue sky with calm winds. I've been warned that the bad seasons - mud and black fly - are just around the corner.

If you've never been to New Hampshire in the winter, I urge you to come. Not every year has abundant snow, but you can always check with the innkeepers - see just below for two GREAT ones!. They'll tell you the conditions.

I'll post some photos to a Picasa album and share those next week. After tonight's snow, you'll have a great idea of the snow piles next to my driveway.

If you live near me, please email me if you're interested in meeting at a restaurant or some other place to sit back and chat. Let's get together soon.


RotoZip Spiral Saws

The economy is going downhill faster than me in my wagon down Straight Street years ago in Cincinnati, OH. This means you'll probably be trying more home repair tasks than ever before. I'll be helping you with new columns starting this week, and you can get help with tool reviews here in the newsletter.

One tool I just tried was a robust version of the RotoZip tool that that started its life years ago as a humble drywall-cutting tool. This tool, over time, has since morphed into a multi-purpose hand-held cutting tool that can do many things.

The RotoZip comes with all sorts of accessories, one of them being the X-SHIELD.

You need this precision attachment when you attach some of the new XWHEELS. These are special discs that allow you to cut just about anything.


Vacation Plans

Vacation season is just around the corner. Perhaps you're planning to stay closer to home to conserve cash. If you live in the Northeast, you have to read this. What if I told you that I know of an amazing bed and breakfast inn that's within a two-hour drive of the ocean, 90 minutes from the heart of the White Mountains of New Hampshire, and less than an hour from great hiking, fishing, golf and boating? You can stay at The Maria Atwood Inn using it as your home base for your daily trips as you explore New Hampshire's beauty.

The Maria Atwood Inn is historic, and the food is to die for. Visit their website now, slide to the bottom of the home page, and watch a video of me eating one of Sandi's scones. This Inn was the first and only place I stayed as I hunted for my land and when I made other trips up here to visit the property once I closed on it.

Fred and Sandi Hoffmeister, the innkeepers, have become dear friends. If you live near NH, you should come and spend a restful weekend. If you do come, try to let me know and I'll do my best to stop by and eat breakfast with you. When you book your reservation, make sure you ask Sandi to make the scones for you!


The Cabinet Folks

You might not think that you could successfully purchase kitchen cabinets online. Realize that I'm not talking about kits where you bang them together yourself. I'm talking about precision cabinets that are completely assembled and finished.

You can get high-quality cabinets online with minimal hassle. What's more, a Maine-based company is spearheading this effort. It doesn't matter how many or how few you need, you can get custom cabinets delivered to your door. The wood species you can chose from are plentiful, such as Pine, Maple, Oak, Cherry, Hickory, Alder, Birch and laminates.

My daughter Meghan is using The Cabinet Folks to supply her with the cabinets she's using for her video studio set. They've been ordered, and are just a few weeks away from being delivered right here to our front door. I've been really impressed with how Craig communicates with Meghan to ensure the cabinets will be perfect.

If you're contemplating remodeling your kitchen, a bathroom, adding a basement wet bar, installing cabinets in a laundry room, etc., you should visit The Cabinet Folks and get in touch with Craig. Be sure you ask him about how he consistently beats the prices you'll get quoted at the big box stores, and Craig's cabinets will be far higher quality!


Latest Columns

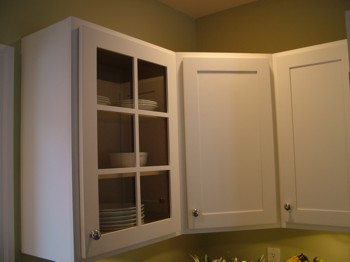
I'll bet you didn't know you can mix and match cabinet doors for a great look.

Have you ever wondered how a dry-stack stone wall can last for hundreds of years?

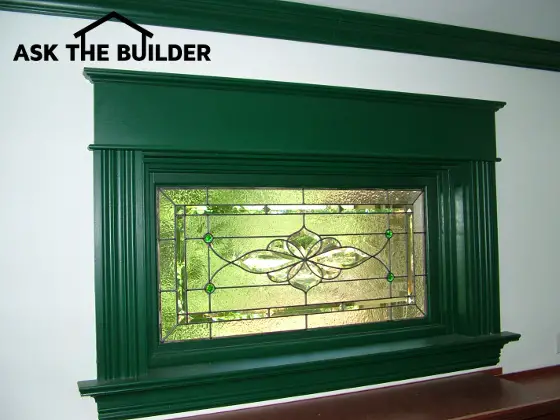
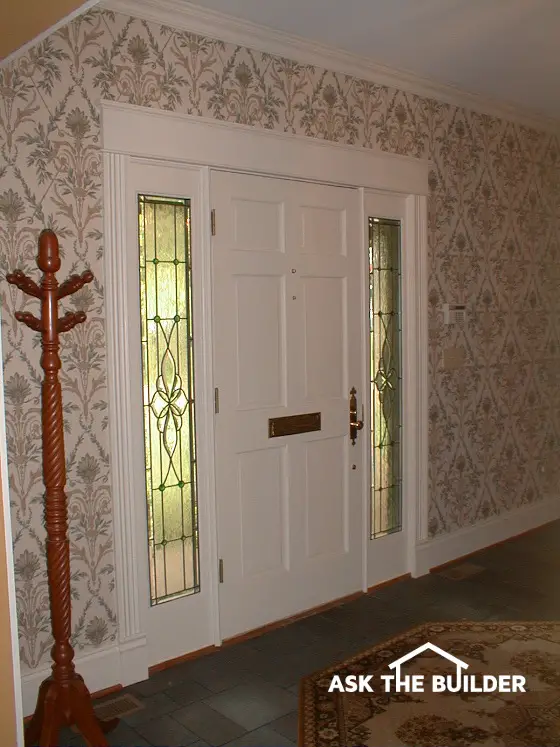
Glass windows - is there any other type - were ripped off and shipped to Colorado and California. Read this little bit of history. You may have stolen goods in your home!

Everyone can use an extra storage cabinet. Here's where you can get one or more for free.

The real estate market is in the toilet, actually it's farther than that, it's headed to the sewage plant. But when it comes back, you better remember everything in this column about your real estate inspection.

Click here to read past copies of my newsletters.

AsktheBuilder.com

Stone Wall

Stone-wall construction is not as daunting as you might think. Sure the stones are heavy, but if you’re to build a stone wall that’s less than 24-inches tall, you may be able to accomplish the task with minimal help and minimal mechanical equipment. The stones for a wall can be just about anything. Here in New Hampshire, rounded granite boulders are used for walls. In the Midwest, flat pieces of limestone are commonly used. Whatever the local bedrock is made from will often suffice.

In Europe, it’s common to have a stone-wall building. Many hundreds of years ago, Europe depleted their vast forests, and the only abundant material to build with was stone and clay that was made into brick. Lumber is an expensive commodity in Europe, but stone is everywhere. The stone just needs to be quarried and transported to a job site.

On my property in New Hampshire, I have a dry-stone wall. This term means that the stones interlock with no mortar. It’s a very common practice used to build stone walls here in the Northeast. It’s also more affordable as a dry-stone wall can be erected faster than the same wall that uses cement mortar.

If you want to discover how to build a stone wall, all you have to do is look at some that are already in place. It’s a great idea to take photographs of many existing walls to see the scale of the rocks used, and how they interlock. Note how the bottom row of stone almost always is partially buried in the soil for stability. When you see how heavy each individual stone is, you can see why a dry wall will stay in place. It takes enormous effort to move the stones.

You can make an interior stone wall in your home with no problems. The most important thing is to have solid bearing. This means the stone must rest directly on a poured concrete slab that has a footing beneath it, or the stone can rest directly on a steel I-beam that’s been designed for the load.

I built a room addition for Matthew Motz in the mid-1980’s in Cincinnati, OH, that had a drop-dead gorgeous limestone wall that was inside the addition. This wall was the entire width of the room addition both in the basement family room and the master bedroom above that. In each wall was a large fireplace. I enjoyed several warm fires in front of these rustic stone walls.

If you decide to build a natural stone wall, even if it’s a stone garden wall, be sure to look at the texture of the stone, its color and ask about it’s durability for where it’s being used. Most rock is resistant to freezing, but you want to make sure. The last thing you want to do is go through hours of grueling work only to discover you selected the wrong stone.

Building a stone wall can be done faster than normal if you incorporate stone wall panels, but this is rarely done on residential work. Large commercial projects can use these prefabricated panels sometimes. You’ll also see a faux stone wall in certain situations where concrete is poured into forms that create a stone-like texture. This is very common on sound walls you might see on an expressway. These might qualify as stone panels, even though it’s not real stone.

You can incorporate stone into other elements in your yard. On the rear patio of our second home, I built a stone-wall fountain. This small fountain was part of a brick wall that transformed into a natural limestone fountain. It was the centerpiece of the patio, and got lots of compliments.

Stone wall construction can be hard on your hands and back, so always wear gloves and steel-toed boots. Don’t try to lift more than you can do without straining. It’s not worth blowing out a disc in your back to show you have some type of super powers. If you do decide to use stone wall mortar, don’t underestimate how heavy a wheelbarrow full of mortar weighs. It can be close to 500 pounds!

If you try to build a decorative stone wall, I urge you to try a small test wall first. Do a sample to get used to working with the stone. When you view the wall, always stand back as far as you would when normally looking at the wall. The appearance of the wall can be different when you stand back 50 feet as opposed to viewing it from 5 feet away.

Column Q&A

February 24, 2009 AsktheBuilder News And Tips

What’s in This Issue?

NOTES FROM AROUND THE WORLD
BATHROOM MILDEW
GREAT RESTAURANT IN BURLINGTON, VT
MORE INSURANCE NEWS
NEW RECIPROCATING SAW BLADE
GREAT NECK 48-PIECE TOOL SET
FOGGED INSULATED GLASS IN RAHWAY, NJ
SAW BLADE SANDING DISCS
NEW VIDEOS
NEW COLUMNS


FOLLOW ME ON TWITTER


Two weeks ago, I got the flu and am now just getting back to full speed. The smallest hint of a head cold is still with me, and my sense of taste and smell is starting to regenerate. Thank goodness for that! There is a ton of news to share, and I have to admit that as I type this, I'm listening to one of my favorite songs - Hysteria, by Def Leppard. That's putting me in a great mood!


Notes From Around the World

Note, cards and emails continue to pour in about my dear mother-in-law. One of the most touching cards to arrive in my Mail Box came from halfway around the world. Valrie Beth from Perth, Australia, had a similar loss, and her handwritten card had me tearing up.

If you reached out to Kathy and I, we can't begin to tell you the power of your message. It's so uplifting to witness the caring and love that's out there, especially considering I've never met you face to face. I'm so blessed to have you as a subscriber.


Bathroom Mildew

Mold and mildew in tub and shower areas is a constant battle. In the grocery stores, you'll see products devoted specifically to this problem. Here's a tip that you might not have tried yet. To minimize or eliminate mildew in showers and tubs, you just have to get rid of the water.

All of that water that's left on the walls and floor is exactly what the mold and mildew need to grow. It takes hours and hours for that to evaporate after you leave the room. You'd be shocked to see how much water is left on the walls. When I squeegee my shower each day, it looks to me that about 2 to 3 ounces of water goes down the drain, maybe even a half a cup.

I've discovered that a squeegee can quickly get the water off the walls, shower door and floor after each shower. If you have a shower curtain, shake it sideways to try to get the water beads to jump off. Leave the shower curtain or the shower door open when you leave the room to help air get to the shower space. This promotes rapid drying. Leave the bathroom door open as well. You want the humidity in that room to drop as fast as possible.

A final idea, though more radical, is to place a floor fan in the bathroom and have it run as you dress. This idea is tough to do for a number of reasons. It can bother others who are still sleeping, it's hard to do, and it can become a fire hazard if you leave the house and forget it's on. There are humidistat controls you can wire in place of the standard on and off switch for your bathroom exhaust fan. This is the safest way to control air movement in your absence.


Great Restaurant in Burlington, VT

When I got back to New Hampshire after my mother-in-law's funeral, I had to drive my son back to college in Burlington, VT. He's a student at Champlain College. We got there at lunch time and grabbed a bite to eat at one of his favorite places, Sadie Katz Delicatessen, located at 189 Bank Street in downtown Burlington.  I got a cup of the Mushroom and Barley soup and half a Reuben sandwich. WOW is all I can say!

What a great place! We got excellent service from a young man named Zack Rouda, and I was fortunate enough to talk with the owner, Glenn Walter, who was in the deli while we were eating. I always try to talk with the manager or owner whenever I get great service and food. All too often, people just complain, so it's really important for business managers and owners to hear when you're happy.


More Insurance News

I was flooded with emails from subscribers who have been sacrificed at the altars of the insurance companies. It should come as no surprise that not one insurance company executive reached out to me. If you've had a non-renewal notice sent to you concerning your homeowner's insurance, I want to hear from you. I'm collecting all the stories and giving you a platform so you can be heard.

I did hear from three insurance agents that confirmed my worst suspicions. Suffice it to say that I'll be following up with a blog post that will explain everything. I've never seen such a breach of ethics in my life. The ethics issue is centered on claims and your deductible limits.   If you have a homeowner's insurance policy, what you think you purchased you DON'T have, and if you attempt to use your policy, you're punished. There's a massive lack of transparency on the part of many agents and insurance companies as to what the real unwritten practices are. The keyword here being unwritten. I'll go into much greater detail in my blog post.

Kimberly, a gracious subscriber, sent me a link to a website that I feel is required reading to all who have homeowner's insurance. Read this article and see if you don't agree that it’s a must-read. Feel free to pass this link to all your friends, neighbors, relatives and coworkers. Thanks Kimberly!


New Reciprocating Saw Blade

Bosch has recently released a new metal-cutting saw blade for reciprocating saws. It's called the Edge. The blade is thicker that helps it produce straighter cuts in thick metal. It also has new tooth geometry that cuts 20 percent faster. Check out the Edge.


Great Neck 48-Piece Tool Set

Before Christmas, I talked about this handy tool set. I wanted to mention it once more because it really has some well-designed tools that come in handy. Just last week, I used different tools in the set for different jobs. This tool set has the absolute coolest, sleekest, and most handsome razor knife box cutter you'll ever see. You have to see it to believe it. If you like red, you'll be all over this tool set and razor knife.


Fogged Insulated Glass in Rahway, NJ

Susan S., wrote me:

"When we bought our house five years ago, it already had replacement windows. Unfortunately, the quality was not very good and most are permanently stained between the double-glazing. My question is do they make a replacement sash for windows that already have a vinyl replacement frame?"

Susan, the answer is maybe and you may not need to go to that extent. Several years ago, I saw a demonstration of a technique developed by a Canadian company that cleans the fogged space inside of insulated glass. I know this process is still around as a month ago I saw a booth at the Boston Home and Garden show that was selling this service. Maybe you should see if someone purchased a franchise in your area by doing a search for "cleaning fogged glass" on the Internet. If you do discover a business does this, I suggest you have them only do one window to ensure that you're pleased with the final result.


Saw Blade Sanding Discs

I get pitched with inventions all the time. Just before I got the flu, I was sent a 10-inch saw blade that had sanding surfaces glued to the faces of the blade. This is a fascinating invention that produces one of those "Why didn't I think of that?" moments. It's called Final Cut. This product consists of sets of adhesive-backed sanding discs that you attach to saw blades you own.

This blade automatically sands the edge of the lumber you're cutting whether it be on your miter saw or table saw. At this time, the sanding discs are only available for 10-inch blades. These products are a must for any finish carpenter. Oh my gosh, do they produce satin-smooth cuts! These discs would have saved me hours of light sanding years ago when I was working with pre-stained woodwork.

If you attach a set to a new blade, you'll be making cuts so precise that your friends and neighbors will think you were abducted by Master-Carpenter Aliens, probed, tested and placed back here on Earth to infect all of us with the best-kept secrets of how ancient temple woodwork was created. I beg you to buy some of these sanding discs from this great man.


New Videos

Want to see me and my color-coordinated Craftsman Snow Blower? No kidding, this is a must-see video.

I got to take the first shot at the Lake Winnisquam Ice Golfing Tournament. Want to see a tee shot that goes about 575 yards? No kidding.

New Columns

Cement siding is great if installed correctly.

If you installed one of Bill Gates Windows products, you might be able to tackle installing windows in your home.

Have you ever wondered what a building inspector does?

Sandstone is a pretty cool rock. Can you use it in your home?

Click here to read past copies of my newsletters.

AsktheBuilder.com

Glass Windows

Window glass is what makes a window. Windows open like doors and allow access to a space, but doors can be solid. When was the last time you saw glass windows sans glass? In other words, a solid panel of wood, plastic or metal in place of the transparent glass? I don't think in my lifetime I've ever seen such a thing. The glass allows you to see through the wall to the outdoors.

If you want to see a window in all its glory, then go to a church, or some other public building, that has a stained-glass window. I grew up as a Roman Catholic and going to church was a regular part of my life. I have vivid memories of being in church during mass looking at the brilliant colors in the stained-glass church windows. Some of the blues, greens and reds were as deep as a discussion on metaphysics. The colors and craftsmanship in each stain glass window still amaze me to this day.

This gorgeous custom-made beveled and stained glass panel is not sandwiched between the insulated glass. It lays on top of the insulated glass and is permanently held in place with caulk . PHOTO CREDIT: Tim Carter

If you like stained glass, you can have a stained-glass window panel made to an exact size that will overlay an existing piece of window glass. My wife and I have had four different stained-glass window panels made to cover two windows in our family room and the tall, narrow sidelights that are on either side of our front door. You get the beauty of stained glass, and the efficiency of insulated glass.

Glass-block windows are another variation that appeal to some. To me, these windows are far more modern and only work with a few architectural styles. Back when I was still building each day for a living, I used to install many glass-block basement windows in place of rotting foundation windows. This was an enormous market back in the 1980's. Glass block then started to move indoors being used in bathrooms for both windows and shower enclosures.

Glass window replacement can be easy or very hard. Many years ago, when windows were single glazed with just one piece of glass, you would chip out the putty, remove the small metal clips that held the glass into the frame and then clean the opening. Installing new glass was not too hard. But window glass repair for modern insulated glass is slightly more complex. Some windows are impossible to repair, and you have to purchase a new sash. This is common on vinyl-coated wood windows.

Antique stained-glass windows are yet another type of window that has a distinct group of followers. Back in the early 1980's, these windows and leaded-glass windows were used heavily in expensive new homes west of the Mississippi River. You can see these houses in ski resorts and other posh developments.

This demand created a market that was satisfied by thieves. The house next to mine had all of it's 100-year-old gorgeous antique stained and beveled glass windows ripped from the frames in broad daylight. I'll never forget how heartsick Ralph Cautley was when he got home from work that night. If you have windows like this in your home, install a security alarm to scare away those losers that prey on good people.

If you do happen to have an antique stained glass window or two, you better take great photographs of them that show every detail and the overall design. You'll need these photos in case you have a catastrophic loss at your home. Without these photos, you'll get into an argument with your insurance adjustor. They'll just say you had regular glass or something very substandard. Don't trust your insurance company as far as you can throw them with no arms.

If you have a home that's loaded with old glass windows, especially larger up-down sash windows that have large pieces of float glass, don't send those windows to the dump. In many older cities, there's a large market for both the glass and the window sashes. You'll note that the glass in these older windows is wavy and often has imperfections. People highly value this glass as it adds enormous amounts of character to older homes. Glass actually flows slowly under the pull of gravity, and can be thicker at the bottom of the pane than at the top.

Don't forget that you can use decorative glass windows in front doors or even in French doors inside a home. I've installed gorgeous decorative glass panels that were custom made to fit an existing wood door that had regular rectangle raised panels and a different door that had octagonal wood raised panels. The amount of light these glass windows let into the entrance halls of these homes was more than you could ever imagine.

Column Q&A

Storage Cabinet

Just about every cabinet in a house qualifies as a storage cabinet. After all, you store supplies and things in the fancy wood box you call a cabinet. But storage cabinets can come in all sizes, shapes, and sources. Some of the best storage cabinets I've used over the years - and still use to this day - were salvaged from remodeling projects. Yes, the cabinets I use were headed to the dump in a dumpster before I saved them!

In the 1950's and 60's, there was a big trend for metal kitchen storage cabinets. Some of these were works of art. In fact when I saw them, I always pondered how in the world they were manufactured with such precision. I had the good fortune about 17 years ago to remodel a home that had many of these metal cabinets. I salvaged each one, as most of them were in excellent condition. The painted finish on them looked like the day they left the factory.

A few of these cabinets are still in use at my house. They make wonderful storage cabinets in garages and work shops. If you ever have a chance to salvage metal cabinets, do so. They're nearly indestructible.

You can't always use salvaged cabinets for everything. For example, if you desire to showcase your DVD collection or even classic vinyl records in a media storage cabinet that will be in a family room or a living room, you'll not do well taking a castaway cabinet. Then trying to modify it with special shelves and dividers. I'm not saying it can't be done, it's just that you might be better off getting a new cabinet for this purpose.

There is a growing trend of people working from home offices. I do that myself. You can purchase office storage cabinets disguised as stock bathroom vanity cabinets. Yes, these traditional vanity cabinets are not as tall as kitchen cabinets, and when screwed together and covered with a simple laminate top, they can look amazingly like a credenza. What's more, they allow you to really have a well-organized office if you take the time and put your most needed supplies as close to where you sit as possible. That way the things you need are at your fingertips.

It would take supreme skills and magic to create a furniture storage cabinet from either wood or metal salvaged cabinets. Perhaps the only way to pull this off would be if you had a room where painted furniture, or the distressed look, was the theme. In that case, you very likely could discover a tall pantry cabinet that is trimmed with crown molding just might work. My customers in the past paid large sums of money for custom painted cabinets, so you could save lots of cash if you can get creative and pull this off.

If you have a boatload of woodworking tools and equipment, you may be able to cobble together a CD storage cabinet or a DVD storage cabinet. These are indeed custom cabinets that require precision measuring and thin dividers. It takes enormous skill to do this, if you're not used to working with small dimensions. In factories, these cabinets are often made from parts milled on computer-controlled machines. When you start working in tolerances of 1/32nd of an inch on a regular basis, you have to be good. That's what the dividers for CD's and DVD's require.

It may be possible to use a salvaged cabinet in a bathroom. If you have a larger bathroom, and the cabinets are painted, a bathroom storage cabinet might do nicely filling one corner. These are great places for toilet-paper storage, extra towels, all of the electric hair tools, and the abundance of personal care products the average person seems to accumulate.

In years past, I often hung a standard kitchen wall cabinet that was 24-inches tall over the toilet. When you add simple crown molding to this cabinet, it can look like a piece of custom furniture. This is a common cabinet used in many kitchens. You may discover a remodeler who has one.

My all-time favorite though are garage storage cabinets. Every single cabinet in my garage is a salvaged one. My most cherished cabinet is a 100-year-old built-in cabinet with glass doors that I took out of a house we remodeled twenty years ago. This solid-wood cabinet is going with me to my barn in New Hampshire. It's a classic cabinet that will always remind me of what it took to get to where I am now.

Column Q&A

Cabinet Doors

DEAR TIM: Cabinet doors are swirling in my head as I approach a major kitchen remodeling job. There are so many different kitchen cabinet doors, I'm overwhelmed with the styles and finishes. I'm afraid they'll go out of fashion and I'll be bored with my choice. What should I look for in wood cabinet doors? Custom cabinet doors are out of my budget, so let's keep that out of the discussion. How would you solve this dilemma? Leslie K., Worthville, PA

DEAR LESLIE: Oh, do I remember those days where some of my customers had the same problem. They were paralyzed with fear fretting about making a mistake they would truly regret. It made perfect sense to me as the cost of the cabinets was often such that it would take the breath away of all but the most wealthy. It's easy to spend a sizable ransom on kitchen cabinets.

My daughter has taught me that these decisions are best made by following your heart. This may sound insane, but I'm a believer in her reasoning. She tells me that when selecting cabinet doors, you should be in touch with your inner feelings. When you see a door style and color that makes you feel good, you're zeroing in on one that will bring you pleasure each day, as you come into your kitchen to brew that first pot of bean juice, better known as coffee.

The biggest mistake you can make right now is trying to select cabinets that will make others think good things of you. This mentality is what keeps designers in business. They constantly are introducing new things trying to tug on the emotions on the those homeowners who try to keep up with the Jones, or who want to have the hippest fashion or style so they impress their friends. Don't fall into this expensive trap.

This glass cabinet door when mixed with a solid door adds considerable interest to the room. PHOTO CREDIT:  Tim Carter

This glass cabinet door when mixed with a solid door adds considerable interest to the room. PHOTO CREDIT: Tim Carter

As you restart your selection process, pay attention to glass cabinet doors. You may want to mix in some of these in your plan. A strategically placed wall cabinet that has glass doors can really add sizzle to your design. Be sure to consider a special glass used by picture-framing businesses that's called conservancy glass. This glass has a non-glare coating that makes the glass appear invisible. The items inside the cabinets appear to jump out at you. Be sure to consider indirect lighting behind these glass kitchen cabinet doors so the objects inside are washed in soft light at night. It's a breathtaking affect.

Don't underestimate the power of cabinet door hardware on the overall look of your new cabinets. The size, color and finish of the knobs, drawer pulls and any exposed hinges can change the look of the cabinet doors. It's mission critical that you pay attention to the hardware as you start to narrow your door choices. Be sure you place hardware samples directly onto the sample doors. Always look at full-size door samples, not a small block of stained wood. Basing your cabinet door selection on small samples of wood is death on a jagged stick.

As you talk with the cabinet company, discuss the attributes of the wood cabinet doors that they have. Not all doors are made the same. If you desire solid wood, make sure that's what you're getting. Some doors appear to be solid wood, when in reality they are composite doors covered with a paper-thin veneer made from solid wood. It's easy to be tricked by these lower-cost impostors.

Oak cabinet doors will undoubtedly be one of the wood species that you'll look at. It's very durable, but has a distinctive heavier grain that may or may not grab you. Oak can be stained a darker color, but beware of dark kitchen cabinets. They can overpower a room and make it appear smaller. If possible see if you can locate a cabinet manufacturer that uses red oak. When coated with a simple clear finish, red oak will take your breath away. You can get the same look, but without the heavy grain, if you use red birch for the wood in your new cabinets.

Be sure to look at new cabinet doors at a specialty business that just sells cabinets and countertops. You'll often see many smaller kitchens setup showing off both base and wall cabinets set up to show you in full scale what a particular door style and finish will look like when you have all the same doors next to one another.

It's vitally important that you make your decision looking at cabinets this way. Don't base your decision on just one door sample or a computer simulation you may see at a home center. You could make a mistake that you'll really regret once the home-center installers show up and throw the cabinets into place.

If oak or birch is not to your liking, take a look at cherry cabinet doors. I've had cherry cabinets for years, and they are a classic look. Cherry is a lighter to medium hardwood, but it reacts to sunlight over time. The wood will darken naturally, so keep that in mind. Try to see if can't locate a home that has cherry cabinets that have been in place for years to see how they look. You can do this by watching real estate open houses that advertise the cabinet wood species in the ad. Some Realtors will mention cherry cabinets.

Column 767