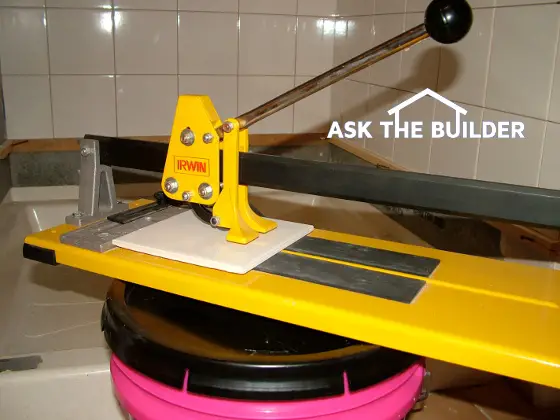
This ceramic tile cutter can make precision cuts on many types of small and large tile. CLICK THE PHOTO to see a wide variety of ceramic tile cutters at affordable prices. PHOTO CREDIT: Tim Carter
Ceramic Tile Cutter Checklist
- Simple cutters score and snap tile
- Porcelain tile is too hard to snap - it needs to be cut with a wet or dry diamond saw
- 1/2-inch pieces are about as small as you can snap
- Clean up snapped edge with a honing stone
Related Links
Cutting Ceramic Tile Quick Start Guide
Marvelous Ceramic Tile Wet Saw - A Dream to Use
DEAR TIM: I've never used a ceramic-tile cutter. Is cutting tile really possible with such a simple tool?
How can such a tool make straight cuts without shattering the tile? What tile-cutting tips can you offer when working with this tool? Is it faster cutting tile by hand, or should I just rent a tile-cutting saw? Steve K., Oak Park, IL
Can a Ceramic Tile Cutter Make Straight Cuts?
DEAR STEVE: You bet it is possible to make highly acceptable cuts with a ceramic-tile cutter. I've done it for many years, and there are tens of thousands of professional tile setters that use this tool each day.
Depending upon the tile being cut, you can make precision cuts with a regular tile cutter that rival cuts made on a wet diamond tile saw.
How Does a Tile Cutter Work?
A tile cutter is equipped with a sharp carbide or tungsten-steel wheel. A lever handle allows you to drag the wheel across the glazed finished surface of the tile.
The wheel scratches and cuts into the glazed finish creating a plane of weakness. When you press down on the handle of the tool, pressure is applied equally to the tile on each side of the cut line. This pressure snaps the tile along the scored line.

CLICK this image and listen to the second call on the podcast. I talked to Greg about what can be done with porcelain tile, including borders to offset certain spaces. Copyright 2018 Tim Carter
How Do You Make Tile?
Many common ceramic tiles are made from clay which is much softer than the ultra-thin glazed surface which has the hardness of glass. While ceramic tile is very strong when you compress or squeeze it, it has less than ten percent of this strength when you apply tension to it.
Bending or pulling is a tension force, and this is exactly what happens when you press down on the handle of the cutter. The tile begins to bend and cracks readily on the scored line. This is why you are often able to tear a piece of paper in a straight line after putting a hard crease in the paper. The crease creates a plane of weakness.
What Ceramic Tile Cutters Make the Best Cuts?
The tile cutters that cost a little more money tend to make better cuts. The extra money you spend will often allow you to get a tool that has better mechanical advantage, cuts perfectly square and is easier to use.
Can You Make Angled Cuts?
Look for ceramic-tile cutters that have rotating guides that allow you to make angle cuts from 0 to 45 degrees. Some tile cutters have attachments that allow you to make circle scribe cuts for faucet valve holes.
Do Tile Cutters Require Lubrication?
Be sure the tool is well lubricated as the cutting wheel needs to rotate freely and the sliding arm needs to move with ease.
Should I Practice Cutting Tile?
You should experiment by making cuts on some inexpensive ceramic tile. It's not hard to cut tile, but a few practice cuts will help you gain confidence.
Can You Snap Porcelain Tile With a Cutter?
Porcelain tile and thicker tile are considerably harder to cut. Porcelain tile has a high quartz content and it snaps unevenly as if you were trying to snap glass. Yes, thin glass will often snap along a clean line, but porcelain tile is a different beast and it's thicker than single or double-strength glass.
What Happens as Tile Gets Thicker?
As tile gets thicker, the thin scored line in the glazing is not enough to guarantee a perfectly straight snapped line in the tile. Porcelain tile often contains a higher amount of crystallized silica and as such it wants to break in an unpredictable conchoidal fracture. You can cut porcelain tile with this tool, but be prepared for more waste.
Can You Make Narrow Cuts with a Tile Cutter?
It is difficult to make narrow cuts on most ceramic tile with ceramic-tile cutters. My guess is you will learn that any successful cuts that are one-half inch or less in width are pure luck. It is best to use a wet diamond tile saw to make narrow cuts.
Does a Tile Cutter Cut Faster than a Wet Saw?
It is far faster to cut tile with a simple ceramic-tile cutter than a wet diamond saw. With practice, you can probably cut three or four tiles with a simple cutter in the same amount of time it takes to cut one tile using an expensive diamond wet saw.
Believe me, I have both tools, but the ceramic-tile diamond wet saw is used to cut thicker tiles, granite, marble, and other things you simply can't cut with a ceramic-tile cutter.
Can You Make L-Shaped Cuts on Tile?
Yes, you can make L-shaped or U-shaped cuts as you work with ceramic tile. On a L-shaped cut you can make the second cut with the ceramic-tile cutter, but the first cut will need to be made with a rod saw or a diamond wet saw. You can also use a nipping tool to help make these cuts. A nipping tool is similar to a pliers, but has carbide edges that bite away at the tile. They are handy tools.
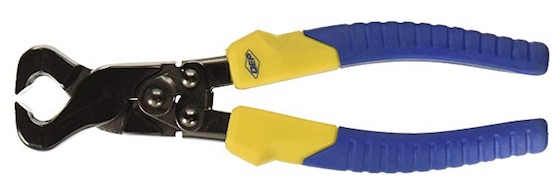
This is a tile nippers. You use it by nibbling away at the tile. Don't take big bites. CLICK THE IMAGE to have this tool in your hands in days.
As ceramic tile gets thicker, the resulting cut edge is rougher. You can use a sharpening stone to dress the cut edge so it is much smoother. This is as very important step if the cut edge will be visible. Some cut-tile edges are never visible. The first tile that butts into an inside corner and is then covered slightly by the second tile that makes the finished corner is an example.
Be sure to test new ceramic-tile cutters to ensure they do cut a square line. Most cutters will produce an acceptable line, but the larger a tile is, the more important it is the cut line is square.
If you plan to keep your ceramic-tile cutter for a long time, be sure to clean it after each use. Store it indoors if possible so that it does not rust.
Column 733


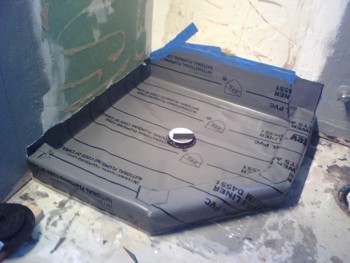 These pictures were taken by Clint Basham, Phoenix, AZ.


 Yesterday I received a letter from the US Congress that started off: