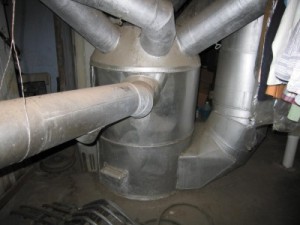
DEAR TIM: We are looking to buy an older house that has a very unusual furnace. The home inspector calls it a gravity furnace, but I think it looks more like an octopus with these large pipes that protrude out like tentacles from the top of the large, round furnace. There is also some white coarse paper wrapped around the pipes, and a 1-inch thick piece of white cardboard on top of the gravity furnace. Is this a good furnace, or should we negotiate for a new one? Stephanie T., Pittsburgh, PA
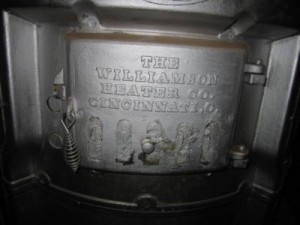
DEAR STEPHANIE: Gravity furnaces are a nearly extinct species. They date back to the late 1800's and early 1900's. The large, round furnaces were almost always designed to burn coal, however many came from the factory equipped to burn wood, oil or natural gas. In fact, it was very common to see these furnaces converted from one fuel source to another. The first house my wife and I owned had a coal gravity furnace that had been switched over to natural gas at some point. As best as I could figure, this furnace was originally installed in the early 1920's. It was still working perfectly in 1975 when I turned it on.
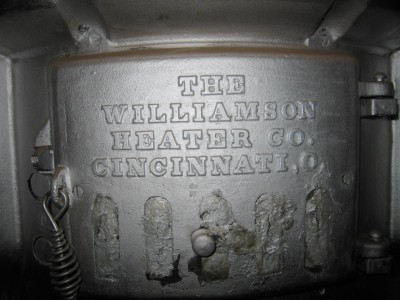
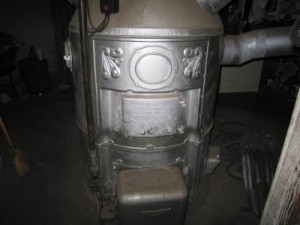
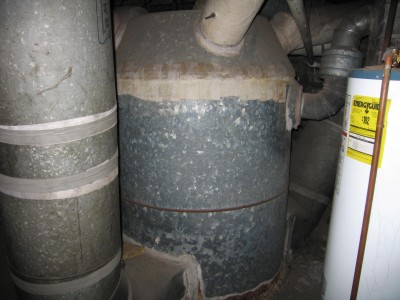
This ancient gravity furnace is still in perfect working order. It wastes enormous amounts of energy, but it still heats the home! The large cast-iron door is where coal would be fed into the furnace. PHOTO CREDIT: Tony White
The furnaces worked by gravity. The most basic ones only had a few moving parts, and those were usually the doors you opened to insert fuel or remove ashes or cinders. As the furnaces got hot, they heated the air around the core of the furnace's combustion chamber. This air floated up through the large pipes into the house. Gravity pulled down the heavier cold air into the base of the furnace. A slow-motion conveyor belt of air constantly flowed through the furnace as long as fuel was burning inside and residual heat remained in the metal parts after the fuel was exhausted.
The heating ducts where the warm air floated up into the rooms were often installed in the wrong locations. My guess is you might find register covers on inside rooms near the central core of the house. Modern forced-air heating/cooling technology has supply ducts and registers located on exterior walls of homes. This placement allows the conditioned air to wash across the wall surface that is either cold in the winter or hot in the summer.
Modern return air ducts should be located in each room on the wall opposite the exterior wall. This allows the conditioned air to be pulled across the room providing even heating or cooling.
The cold air usually entered the furnace through a giant duct often found in the floor or at the bas of a flight of steps that led to the second floor. The gravity furnaces themselves were often located in the basement of a home which helped supply them with cooler air. The basement location also aided the loading of wood or coal through chutes that were at grade level outdoors. Gravity would make it easier to get the fuel down into the storage area near the furnace.
These gravity furnaces were horribly inefficient. I do not have access to actual numbers, but my guess would be that 50 percent or more of the heat generated by the burning fuel went up the chimney. Compare that to today's super-efficient furnaces that often extract 95 percent of the heat from fuel, and you can see why it might be a great idea for you to replace the large gravity beast, even if it still works.
The white wrapping around the pipes is almost certainly asbestos. It was commonly used as an insulator and fireproofing material on gravity furnaces. It is a very dangerous and toxic material. The fibers in the asbestos are known carcinogens. The thick, white cardboard product is probably pure asbestos. It is acting as a shield that keeps the intense heat of the burning fuel inside the furnace. Do not touch or disturb this cardboard or the wrapping around the pipes.
If you decide to purchase this home, I would recommend that you negotiate the removal of the furnace, the proper installation of new ductwork and expert removal of the asbestos by a certified asbestos remediation company. Do not underestimate the seriousness of the asbestos issue. Be sure your realtor includes language in your written offer that ensures a certified asbestos removal company will get rid of the toxic material.
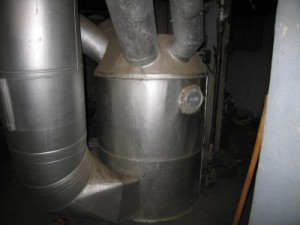
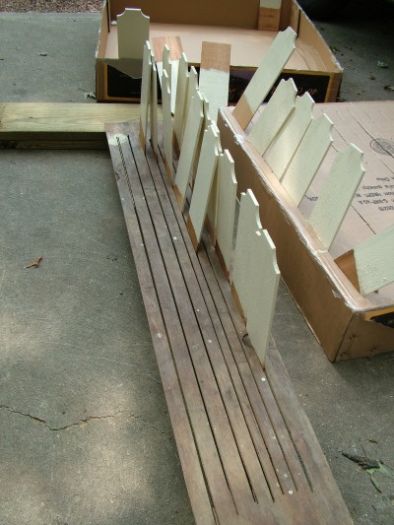
That off-white wrap on the top of the furnace and the pipes is asbestos! It used to be applied damp much like the old plaster-of-Paris casts on broken arms and legs. If you see white wrapping like this on your ducts do NOT disturb it. PHOTO CREDIT: Tony White
Keep in mind that just removing the old gravity furnace is not enough. The ductwork within the walls is almost certainly oversized for each room, and it is in the wrong location. If you want your home to be comfortable, you will need to have new ductwork extended to each room and similar return-air ducts installed to get air from each room back to the furnace. The giant return air duct on the first floor needs to be abandoned, and the floor patched if that is where it is located.
Asbestos facts and removal information can be found at the Environmental Protection Agency's Web site: http://www.epa.gov/asbestos/ . I urge you to read all of the information there and become highly educated about this topic.
There are ways to encapsulate the asbestos, and some companies may advise you about this. However since the furnace is so inefficient, the asbestos has to go out with the furnace. You need to make sure little or no asbestos is released into the air or on other surfaces in your home.
Talk to your realtor about making an offer to buy contingent upon getting several estimates for a new furnace, ductwork and the removal of the asbestos. Be sure the language indicates the purchase price will be reduced by an amount that allows you to hire professionals to do all of the work.
I want to give a huge thanks to Tony White for taking these photos. Tony is an appraiser in Cincinnati, OH and owns White Appraisal, Inc.
Author's Notes:
John Podolinsky, who works for the State of Montana in their DEQ/WUTMB/Asbestos Control Program, was kind enough to contact me after this column ran in the Great Falls Tribune:
"I enjoyed your article in the Great Falls Tribune newspaper on Saturday, September 15, 2007, on gravity furnaces and asbestos!!
It was a pleasure to read such an informative article on both subjects. Fortunately, I do not heat my house with a gravity furnace, but I do deal with asbestos on a daily basis.
In my line of business (asbestos regulatory), I witness much asbestos non-compliance based on ignorance. Your article will hopefully educate!
If you plan to provide additional asbestos information to your audience, especially those who live in Montana, feel free to refer to our website below or me.
Thanks again and keep up the great work,"
John Podolinsky
State of Montana
DEQ/WUTMB/Asbestos Control Program
1520 East 6th Avenue
P.O. Box 200901
Helena, MT 59620-0901
www.deq.mt.gov/Asbestos/index.asp
Column 689