Ceramic Tile Patterns
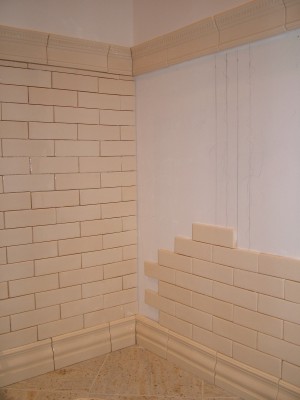
This is a unique ceramic tile pattern. This new tile mimics a pattern that is over one-hundred years old. It is no different than the running bond pattern found in brick walls. PHOTO CREDIT: Tim Carter
DEAR TIM: Regular ceramic tile patterns are uninspiring. My visits to home centers put me in a ho-hum mood. I want a distinctive bathroom ceramic tile that will add value to my home setting it apart from all others when I go to sell. What are some of the most unique ceramic tile patterns you have installed? Something tells me the most interesting patterns will be hard to install. What secret ceramic tile installation tips can you share? Cheryl H., Hazelcrest, IL
DEAR CHERYL: If you think ceramic tile patterns are boring now, you should have seen the somewhat limited supply of patterns just twenty years ago. Go back even further in time and the choice gets smaller. The 4 and 1/4-inch square tiles found in many homes, including an original bathroom in my own home, are giving way to all sorts of interesting shapes and finishes.
In my opinion, your disinterest can be traced to a poor assortment of tile patterns. I suggest you widen your search for distinct ceramic tile patterns and make sure it includes one or two specialty ceramic tile stores that sell nothing but tile, marble and possibly granite. If you have several larger stores like this near you, they will forever change your opinion about the selection of products you find at the average home center.
One of the most exciting things about tile patterns is the ability to recreate certain time periods. For example, different types of ceramic tile both with and without exquisite trim tiles have been made since the late 1800's. If you want a period Victorian ceramic tile, it can be found, even one with a crackled glaze. Crackled glazing has hundreds of random cracks in the thin glazing. Many people love this unique look and pattern. Tiles that resemble 1950's ceramic tile is also available.
Perhaps the most interesting ceramic tile pattern I have installed is one that looks like a brick wall. The tiles are rectangular in shape measuring 2-inches high by 6-inches long. But it gets better. This particular tile comes with a special base tile that looks like a wood baseboard. It doesn't stop there, as you can also order a special cap tile or cornice tile that is a great wall to top off the 2x6 tile when used as a wainscoting in a bathroom where you only want the tile to extend up the wall three or four feet.
You can make your own patterns as well if you have access to a wet diamond saw. Last year my oldest daughter asked me to make a unique geometric pattern from two different-colored granites. One was a jet-black granite with gold specks, and the other was a golden light-colored granite with various crystals in it. I used the saw to cut different rectangles, squares and triangles of all different sizes that fit together much like a jigsaw puzzle. The finished product was exactly what my daughter wanted, and it is installed on the large wall of her tub and shower area.
Some of these unique patterns can be hard to install, while others are no different than the most common ceramic tile. When you go shopping, ask the salespeople if the tiles come with self-spacing lugs on the edges of the tile. These little lugs are small bumps on each edge that create uniform grout lines when the tiles are butted tightly against one another. The line between the tiles often looks very narrow as you install each tile, but because the edge of the tiles is almost always a soft 90-degree angle, the grout line ends up about one eighth-inch wide.
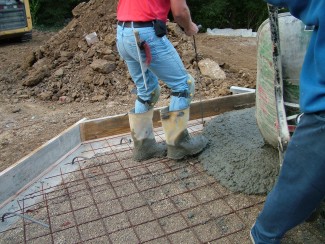
While each ceramic tile seems fairly light, the accumulated weight of many tiles is very heavy. You can tell that when you lift a box of tile. As you install tile, it is best to work from the bottom row and stack tile as you go up the wall. If the first row of tile is not supported by a strip of wood temporarily screwed into the cement or waterproof-gypsum board, then the tiles may slowly start to slide down the wall. You will have a huge mess if this happens.
If you are using a decorative base tile and all of the rest of the tile stacks on top of that, then the tops of the base tile must be set in an absolutely level line. This may require you to trim off the bottom of tiles that are placed on a floor that is out of level.
Pay strict attention to the type of adhesive that must be used with the tile you buy. Some tiles can be installed with organic mastic that resembles thick cake icing. Other tiles should be installed using thinset which resembles bricklayer's mortar. Thinset comes in both gray and white, so use white thinset for light-colored tiles.
Always wait 24 hours after the last tile is installed before you begin to grout tile. The grout should be very firm, not runny. Grout that is properly mixed will be so stiff it will barely slump or droop. Grout mixed to this thick consistency and then troweled into the joints will cure very hard if minimal water is used to clean the grout joints.
Column 681