Bathroom Remodeling Ideas

DEAR TIM: My bathroom remodeling project is about to happen. I am in desperate need for some bathroom remodeling ideas. Since I only have one bathroom in my home, I am at a loss as to how I will survive without a bathroom during the job. Moving out of my home to stay with friends is not an option. Surely I am not the first person to have this dilemma. Julie P., Punxsutawney, PA

DEAR JULIE: Remodeling a bathroom is indeed a traumatic experience. Perhaps this is why my childhood home never had its bathroom remodeled. I lived in a two-bedroom home with one bathroom, and I can only imagine how my mom, dad, sister and I would have coped. Bathroom remodeling plans in situations like yours must be thought out and executed with deft precision.

The bottom line is it is possible to survive this ordeal. Will it be pleasant? Absolutely not, but it could be far worse. The key is hiring the right company and developing a realistic completion schedule before the job starts.
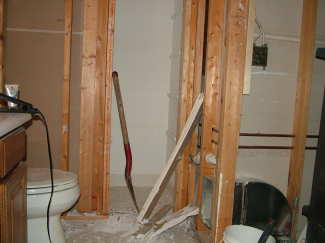
The demolition work in this bathroom can happen in stages to minimize the loss of use of the toilet and sink. PHOTO CREDIT: Tim Carter

The demolition work in this bathroom can happen in stages to minimize the loss of use of the toilet and sink. PHOTO CREDIT: Tim Carter

But long before the temporary bathroom facilities are installed, you need to worry about getting all of the new materials for your job selected, purchased and delivered to your home. The key to a rapid turnaround on your job is eliminating mistakes and material problems. Don't assume a plumbing supply house will have the faucets, sinks and toilets in its warehouse the day your contractor wants to install them. Thinking that the tile, cabinets, countertops, light fixtures and medicine cabinets you want will be stock items at different stores is foolish. Buy your materials and check to make sure they are in good condition and will work on your job. If you can't do this, make sure the contractor does.

The hardest problem to solve--in your situation and in my opinion--is the toilet. You have two affordable solutions. One is to rent a portable outdoor toilet that you commonly see on construction job sites. You will save lots of money with this choice, but you will possibly lose massive amounts of dignity using it. What's more, it may not be safe and practical to use when it is dark. These toilets can be exceedingly uncomfortable to use if the outdoor temperature is below 50 F.

If your remodeling contractor is progressive, he may have a special loaner toilet that can be installed inside your home. This toilet has its own pump that takes the waste and pumps it up or sideways to an existing drain line. A licensed plumber can often connect it to your plumbing drainage system and supply the toilet with water and electricity in several hours.

Your second issue is a shower. A very basic temporary shower with both hot and cold water can usually be installed in a basement or even a garage. Many basements have floor drains that will accept the water, and in a garage, the water can be directed to flow underneath the garage door. A clever remodeling contractor can install temporary walls that will provide privacy.

One idea that is often used in commercial, institutional and governmental construction work is a cash bonus for early completion. Have your bathroom remodeling contractor produce a highly detailed schedule of exactly what work is going to happen each day. Since this is just a small bathroom job, it is very easy to create this flow chart. Ask yourself what it is worth to you for each day you can get back inside the finished bathroom before the scheduled completion date.

If it is worth $150 per day to you not to use a portable toilet in your driveway and a shower in your garage, then offer this to the contractor as an incentive to get the job done faster. The more money you offer, the harder and faster the contractor might work. If the contractor does not finish early, you keep the bonus money.

Invest an hour or so talking with your contractor about any and all options that might allow you to use the bathroom as it is being remodeled. See if it is possible to drape plastic on the unfinished shower walls each night before the contractor leaves. Ask if there is a way to quickly disconnect and reconnect the toilet each day. You might discover the contractor is willing to work with you to make this job as bearable as possible. Smart contractors know the less pain you feel, the happier you will be.

The loss of the bathroom sink is a non-issue for most people. A kitchen sink works fine to wash your face, remove makeup and brush your teeth. But in cases where a custom bathroom top made from granite or marble comes into play, your bathroom might be ready to use, but there is no sink for days on end. Your contractor might be able to install a temporary top with a basic sink and faucet while you wait for the stone top to be fabricated. The plumbing connections to install this temporary sink are simplistic and just take minutes to do. When it comes time to install the stone tops, the temporary sink and top can be removed in less than five minutes.

Modern toilets can also be removed and reinstalled in minutes. This is especially true if the shutoff valve behind the toilet is in good shape and does not leak. A wet-dry vacuum can be used to quickly remove water from the bowl before the toilet is removed. If the work is planned out, the toilet may only have to be removed and reset just three or four times during a remodeling job.

Column 667
Pantry Organizers

DEAR TIM: My kitchen pantry has traditional 24-inch-deep shelves. I think a pantry drawer, or set of pantry drawers, would make finding things easier. Pantry organization is in my top-10 things to do this spring, so tell me what you think is the best way to incorporate storage drawers into my existing kitchen pantry closet. What do I need and how hard is it to get the job done? If I feel it is too complicated, who would I call to do the job? Courtney M., Menominee, MI

DEAR COURTNEY: Shelves that are 24 inches deep work great for sweaters, pants and large boxes, but they are death on a jagged stick for small cans of soup, boxes of cereal, jars of juice and boxes of pasta. Things get hidden behind one another and it is impossible to see what you have in stock. Deep pantry shelves might work great for bulky items like rolls of paper towels and toilet paper, but small items work better when placed on narrow 6 or 9 inch deep shelving.

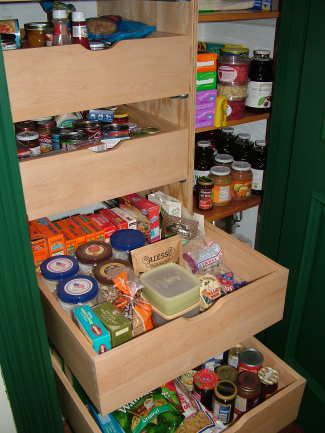
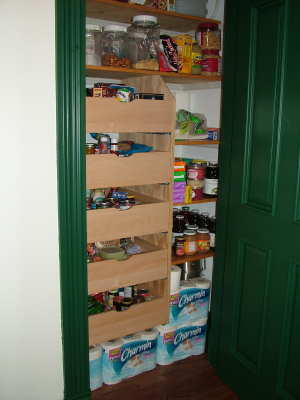
These pantry drawers pull out easily, allow easy access to foodstuffs and are great pantry organizers. PHOTO CREDIT: Tim Carter

These pantry drawers pull out easily, allow easy access to foodstuffs and are great pantry organizers. PHOTO CREDIT: Tim Carter

I love your idea about using a pantry drawer--or even a stack of pantry drawers--to solve your current crisis. Pull-out drawers in cabinets and closets are one of the best pantry organization inventions I have ever seen. One wonders why it took so long for people to use drawers in places where we have stationary shelving, when you think how handy a chest of drawers is in a bedroom or a set of drawers is in a kitchen base cabinet. It makes perfect sense to use drawers in a pantry.

There are any number of ways to include pantry drawers in your kitchen. I can't say that one way is better than another. What I can say is that if you intend to store cans of food, jars of juice and other things like that, the drawers and drawer-glide hardware should be of very high quality. Each drawer full of cans or juice could easily weigh 40 or more pounds, so you don't want the drawers to fall apart or the system to come crashing down on yourself or a small child.

I recently constructed a set of pantry drawers in several hours using one sheet of plywood I purchased from a lumber yard. I ordered drawer-glide hardware and drawers from a regular kitchen-cabinet company. Many kitchen-cabinet manufacturers offer sliding drawers in their cabinets. It is often possible to purchase the drawers and the hardware, but not the cabinets they often put them in.

If you went to a kitchen-cabinet showroom and looked at a kitchen pantry cabinet or a standard base cabinet that has pull-out drawers, you will quickly see how the drawer hardware is just screwed to the sides of the cabinet. The hardware is spaced precisely to securely hold the drawer, and the hardware is installed level side-to-side as well as front-to-back inside the cabinet.

You can mimic the sides of the cabinet with two sheets of plywood inside your pantry. All you have to do is make sure the pieces of plywood are plumb, parallel and square with one another. You can use some of the existing shelving inside your kitchen pantry to stabilize the new vertical pieces of plywood that will be used to support the pantry-drawer hardware glides.

One or two existing horizontal shelves will need to be removed to make room for the new pantry drawer or drawers. Fit the vertical pieces of plywood tightly between the floor and one of the remaining upper shelves. If you screw through the horizontal shelf into the top of the pieces of vertical plywood, you will create a nesting box for the pantry drawers. Small L-shaped brackets can be used to secure the vertical plywood to the floor.

PHOTO CREDIT: Tim Carter

PHOTO CREDIT: Tim Carter

If all of this seems too complicated, you need to hire a seasoned handyman who is also a great finish carpenter. This person can assemble what you need in a matter of hours. Be sure that you work out the spacing between the drawers so you can easily fit tall items in them. But be careful there is not too much space between drawers, as then you will be wasting valuable pantry organization space.

Not all plywood will work for supporting pantry drawers. It is important for the plywood to be least 3/4 inch thick and the pieces straight with no twisting. Plywood that has five or more "plys"--or layers of wood--offers good stability. The more plys in the sheet, the stronger and straighter it will usually be.

Use a framing square to ensure the vertical plywood pieces are square to the back wall of the pantry. It is extremely important that the vertical pieces of plywood are parallel. If they are not, the pantry drawers will bind or they may become unstable if there is too much space between the sheets of plywood that support the drawer hardware.

One carpentry trick is to secure the top of the two pieces of plywood to the upper shelf and then install the lowest drawer to align the vertical pieces of plywood. Then install an intermediate drawer to ensure all of the drawers are working perfectly. Once they are, then secure the bottom of the plywood pieces to the floor using the L-brackets.

Column 666

Spray Painting

DEAR TIM: I need to do some spray painting. Since I have never tried this before, I could use some spray paintings tips. What are the best spray painting systems? Are there specific spray painting techniques that will help me get fantastic results? What about simple cans of spray paint? Will those work for small spray painting projects? Dawn R., Bayside, NY

DEAR DAWN: Spray painting is a fun project. I do it from time to time, and am always pleased with the results. Some objects like wrought-iron lawn furniture, screens, metal fencing and any other thing that would be very hard to paint with a brush or roller are perfect candidates for spray painting.

Actually anything can be spray painted, and it is proven that once the paint starts to come out of the nozzle, it is faster than any other known method of painting. You can also get paint finishes that are as smooth as silk with spray painting techniques.

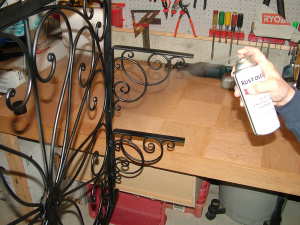
Just about anything can be spray painted, including decorative iron work. This wrought-iron is going to be a bookshelf in a new kitchen. PHOTO CREDIT: Meghan Carter

Just about anything can be spray painted, including decorative iron work. This wrought-iron is going to be a bookshelf in a new kitchen. PHOTO CREDIT: Meghan Carter

As for the best spray painting systems, it is hard to say as it can be very subjective. You have professional-grade systems that use air and airless as well as similar systems made for the casual weekend painter like you and I. The cans of spray paint you see at hardware stores or home centers can also yield fantastic results.

If you are going to invest in a spray-painting set of tools, then try to think how often it will be used and what you intend to paint. You may discover that an electric-powered airless sprayer will accomplish what you need to do. The newer models can do a fantastic job in almost all instances.

Air-powered spray painting requires you to buy a compressor, some hoses and a spray gun with any number of accessories. I have seen professionals use them and spray paint so much stuff so fast you would think they had consumed massive amounts of caffeine. These air-powered systems allow you to spray paint thousands of square feet of surface area in record-fast time.

My recommendation, since you are a beginner, is to start with a few spray cans of paint. Some may disagree with me, but this is an inexpensive way to see how spray painting is totally different than applying paint with a brush or roller. I would also spray paint an object that is of little or no value, since your first spray-painting attempts will probably have a few flaws.

As with any painting, you need to make sure the object being painted is clean, dust-free and dry. Bare wood or bare metal should always be primed. The spray-paint primer performs several tasks, including but not limited to rust prevention, special bonding of paint to the object and consistency of final texture.

Try to use the primer recommended by the finish-paint manufacturer. Pay attention to the time allowed between priming and finish paint. Some spray primers allow you to apply the finish paint almost immediately after the primer is applied. That can be a real time-saving benefit.

You will get superior results if you spray the paint with the temperature between 50 - 90F. Do not spray paint in excessive humidity above 85 percent. It is not a good idea to spray paint if it is windy or there is dust in the air. The dust can settle on the wet paint, and you will have a mess.

The trick to spray painting is thin coats of paint and keeping the spray paint nozzle moving. Do not stop your hand and allow paint to build up in one spot. This will cause runs to develop. Spray paint is often thinner than the regular paint you have used in the past, and it will sag and run if applied too heavily.

It is best to apply two thin coats of spray paint than one heavy coat. Spray paint often dries quickly, and it is often possible to apply a second coat within minutes of the first coat depending on drying conditions.

Hold the spray-paint can 10 - 14 inches away from the surface being painted. Make even side-to-side movements never stopping. Be sure you have good lighting so you can see if you are missing spots. It is best to have each layer of paint overlap the previous layer.

Once you are finished using a can of spray paint, hold it upside down and push on the nozzle. Hold the nozzle down until no paint comes out of the tip. This usually takes five or fewer seconds. This action clears paint from the nozzle so the spray paint can be used in the future.

Column 660

Kitchen Backsplash

kitchen tile backsplash

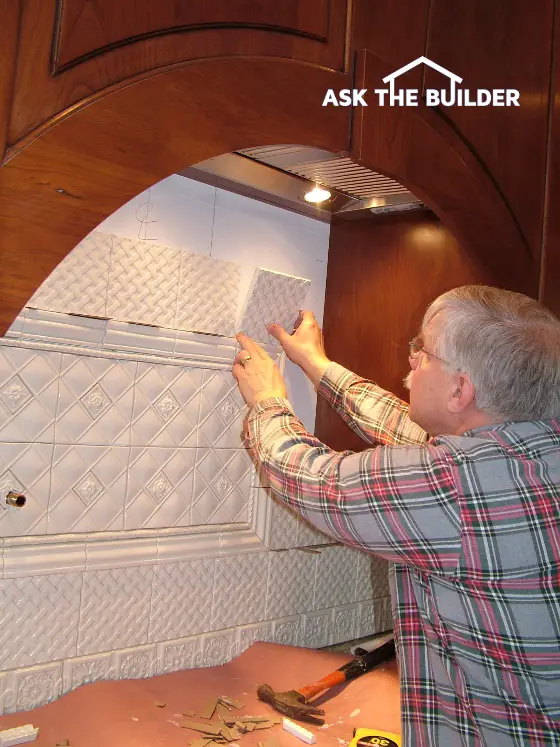
This highly-decorative kitchen tile backsplash was installed in one day. Ceramic tile is relatively easy to install if you have the right tools. PHOTO CREDIT: Kelly Carter

DEAR TIM: My kitchen backsplash is just painted drywall. I am trying to come up with some attractive backsplash ideas, and I keep coming back to a tile backsplash. Do you have to use certain backsplash tiles in a kitchen, or will just about any ceramic tile work? Can you offer any tips and suggestions for kitchen backsplash tile? Dana S., Knoxville, TN

DEAR DANA: It's no surprise to me that you keep gravitating to ceramic tile for your backsplash. A tile backsplash will last for years, and will add beauty to your kitchen. I have installed ceramic tile at backsplash locations between the countertops and the underside of kitchen wall cabinets for years, and each homeowner was dazzled by the final appearance.

Ceramic tile makes sense when you are mulling over backsplash ideas because it is durable, easy to clean, colorful and can add texture to an otherwise dull, flat boring wall space. In recent years, there seems to have been an explosion of new tile colors, patterns, styles and textures, many of which are perfect for areas directly behind a kitchen sink and cooktop areas.

Before you settle on a specific tile for this job, think about cleaning. A frequent mistake made by some homeowners is picking a porous or unglazed tile for the backsplash behind or immediately adjacent to a cooktop. Food and grease can be ejected from pots and pans onto a backsplash. These can permanently stain or discolor some tiles.

To avoid these problems, always install a glazed tile near sinks and cooktops. Glazed tile has a thin coating of glass on the surface allowing food and grease to be easily and completely washed away.

AsktheBuilder Podcast

CLICK this image and listen to the second call on the podcast. I talked to Greg about what can be done with porcelain tile, including borders to offset certain spaces. Copyright 2018 Tim Carter

Take your time when looking for your backsplash tile. I highly recommend visiting a specialty store that sells ceramic tile, granite, stones and a complete line of ceramic tile tools. You will be pleasantly surprised when you see the vast selection of tile and custom-made tile that might be the perfect match for your tastes. All too often, I discover people make one visit to a local home center thinking that is all the tile they can pick from.

Before you make your final decision on the tile you want, ask about the type of adhesive that needs to be used with the tile, and if you need special tools to cut the tile. For example, popular glass tile needs to be glued to your wall with cement-based thinset instead of organic mastic. Glass tile and dense porcelain tiles must be cut with diamond wet saws, not the traditional tile scoring tools that allow you to snap a tile in two.

It is also very important to ensure your current drywall is clean and in good shape. If the drywall has any water damage, you should consider removing it and replacing it with a waterproof material that is the same thickness as the drywall you are removing. You can apply the tile directly to the drywall. This method should be problem-free for years if you make sure the grout is always in good shape, and all cracks are caulked so water can't seep in behind the tile backsplash.

Installing the tile backsplash is a two-part job. You first install the tile, then once it is set and stable, you grout the joints between each tile. The tile you choose may not come with self-spacing lugs on the sides of the tile. These lugs allow you to place the tile in contact with one another and a consistent, narrow grout line is automatically created along all sides of each tile.

But in all likelihood, you will probably select a tile that has no spacing lugs. This means you will have to buy small plastic spacers or create your own spacers using small pieces of cardboard. Since you are just tiling your backsplash, you will only have a few rows of tile. Spacing the tiles can be problematic when you do large open areas such as walls and floors.

Think about installing the tile on a diagonal for an interesting look. Some backsplashes look fantastic when the tile is canted at a 45-degree angle. Also pay attention to ceramic tile patterns that offer accent tiles that are placed in a regular pattern among other tiles that are smooth or have a texture.

It is also possible to hand-paint regular glazed tile for a one-of-a-kind look. If you decide to do this, select a tile that has a satin glaze. Paint the tile with a glossy oil-based paint. You can pre-paint the tile before they are installed, but allow the paint to cure for at least two weeks before cutting or grouting the tile. This wait period allows the paint to get sufficiently hard so that cutting and grouting will not ruin the paint.

Grouting a tile backsplash is not too hard. When you are wiping excess grout from the tile, the grout sponge must have every drop of water squeezed out of it. Excess water will weaken the grout and cause it to crack and crumble.

Column 659

Water Barrier Installation Tips

Water Barrier Installation Tips

If you want to keep water from touching the wood framing members of your house then you need to know a little bit of physics and chemistry. An understanding of gravity and capillary attraction is a must. Let's get to work!

What Goes Up.......

Rainfall or snow is part of a cycle. Water from rivers, lakes, oceans and plants evaporates into the air. It condenses into clouds and when the conditions are right, it falls to the Earth as rain or snow. Gravity pulls it to the Earth and if water gets behind the primary water barriers on your house, it will do everything possible to continue going down.

The water can often take a sideways detour if it hits a seam or horizontal break in a wall cavity. This is why it is often hard to discover the source of a leak. The water may end up 15 feet away from the source of the actual leak.

Capillary attraction can also cause huge problems. This physical phenomenon can actually cause water to flow up instead of down. This happens when two solid objects are very close to one another. The surface tension of the water causes it to cling to the sides of the surfaces and actually flow upwards. If this happens on your home, water might flow up behind siding and the sheathing.

Installing Barriers Water infiltration barriers need to be installed much like roof shingles. Shingles work because they overlap one another. The shingle above laps over the top of the one below. This method of construction stops water from getting behind the lower shingle. Water barriers for walls need the same attention to detail.

The lowest part of the barrier should always lap over the foundation at least 3/4 inch if possible. If you stop it at the top of the foundation, there is a good chance water will leak in over the top of the foundation.

The second row of the barrier should overlap the lower row by at least two inches. Vertical seams should overlap at least 6 inches.

If you decide to use a modern air and water infiltration barrier, be sure to use an approved tape to seal all of the seams. Duct tape is not the answer!

Window Flanges

You must pay attention to details at and around windows. Many modern windows have nailing flanges around the window. The top flange of the window needs to go up under the water barrier. This often means you have to carefully slice the barrier and insert the flange. Be sure to tape the barrier against the flange before you install the primary wall covering. Always think about how you can stop water from getting behind doors and windows. It is critical.

Column B311

Sweat Equity Jobs

Sweat Equity Jobs 

Who doesn't want to save money? It would seem that building a new home would be a perfect opportunity to do just that. Well, looks can indeed be deceiving. The process of building a new home is complicated and for it to go smoothly all of the different jobs and materials need to come together seamlessly. Your builder doesn't want you to hold him/her up.

Low Productivity

If you are able to tackle sweat equity jobs, the weekend is probably the best time if you can't use regular vacation time. Working at night after your regular job will cause you to burn out. Not only will your regular job suffer, but the work on your new home may likely be sub-par.

The biggest problem I see with most sweat equity jobs is the scope of the tasks. Homeowners often underestimate that amount of time a job will take.

An Example

I'll bet you have painted a bedroom or two in your life. You probably knock it out in a long day if it is an average sized room. I can guarantee you that this will not happen in a new construction job. Why? The job will require a minimum of two coats of paint. Secondly you will be caulking, spackling, and sanding for hours.

Imagine this scenario. You have decided to paint the inside of your new home. You are going to use a combination of vacation time, weekends and a couple of weekends when your friends show up. Ah, the ingredients for a disaster! I have witnessed it on many occasions. If you are not in a rush to move in to the new home, it might work. If there is a deadline, you will in all likelihood, move in with unfinished or poorly painted rooms. You don't believe me? Do a simple takeoff for the time it takes to paint one room. Be realistic. I'll bet that you find it will take about 20 - 30 hours to paint just one room from start to finish. If this is so, then do the math to see how many man hours the entire job will consume.

Start Small

If you can get your builder to cooperate with your sweat equity plans, try some small jobs at the front end of the project. Try to install blocking for all of the fixtures that will be eventually fastened to the walls. Perhaps you can move lumber or other materials to specific locations. If the weather conditions are extreme, keep in mind that your productivity will drop, especially if you are not used to working outdoors.

If you are out of shape, try not to tackle physically demanding jobs. If you think you can shovel 15 tons of pea gravel in a day after not having a shovel in your hand for 5 years, you are in for a huge surprise! You may make it through the day, but the next day, it will be payback time!

Code May Block Efforts

The building inspector may get in the way of your sweat equity plans. Some inspectors want all of the work complete - it should be - before they issue a final Certificate of Occupancy. Many people have wanted to build a rear or side deck after they move in to save money. That is not too much of a problem, but the door from the house leading to the deck is a huge problem.

You see, if a person opens the door and walks out to find no deck, they might be on the ground in a hurry. Code officials don't like creating situations like this. Some allow the door to be barricaded, but this creates an egress problem in case of a fire. The bottom line is that your local building inspector may derail your sweat equity schedule. You just might have to complete quite a few projects before you are allowed to take occupancy. Check it out!

Column B306

Wood Ceilings Video

Instead of the traditional drywall ceiling, using beaded ceiling planks can make for a great looking ceiling. These wood planks have a tongue and groove system for interlocking. The tongue and groove makes for a seamless look to the ceiling. To make the job go faster and cleaner, stain and urethane the wood pieces before nailing them to the ceiling. You won't have the urethane dripping into your face!

Drive the mounting nails into the wood at an angle and there will be no sign of the nail heads. Wood ceilings add a lot of flair and character to a room. Consider it on your next room remodeling project.

Roots In Sewer Line Video

This column was SO GOOD that I shared with the 31,000 subscribers as my Weekly Mystery Link in the April 1, 2016 AsktheBuilder Newsletter. Also as the "I Didn't Know That!" in the August 21, 2013 Newsletter.

In the spring, trees start to bloom and grow leaves. But they also have aggressive root growth. These roots can cause problems if they work their way into your sewer line. Try this method to stop the roots from getting in the sewer line.

Use a hand operated auger to dig a 2-1/2 inch diameter hole into the ground. Then using 1-1/2 inch diameter PVC pipe with a pipe cap to drive into the ground. This pipe will be used to insert the root killing copper sulfate crystals into the ground.

Stop the drill about two feet above the sewer line. Extensions for the auger may be required to reach the desired depth. This will allow the crystals to poison the soil above and around the sewer pipe. Once the auger hole is done, drop the PVC pipe down in the hole and place the cap on it. The cap should be flush with the surrounding ground.

Pour the copper sulfate crystals down the tube and pour in some hot water. The water will help dissolve the crystals and spread them into the soil.

Some cautions before starting this job! Contact the local sewer district to help locate you sewer line. Or get a plumber who has equipment to locate sewer lines. Before you drill, be sure to locate all underground utilities, including power, telephone, cable, water lines and natural gas pipes. You don't want to hit any of these utilities. They are costly to repair if you hit one.

Custom Woodwork Profiles

Sample Custom Woodwork Profiles

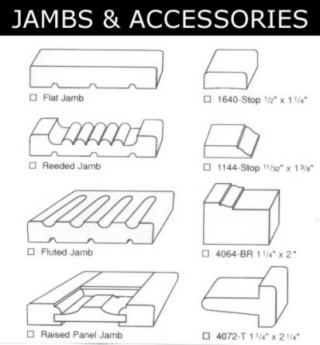
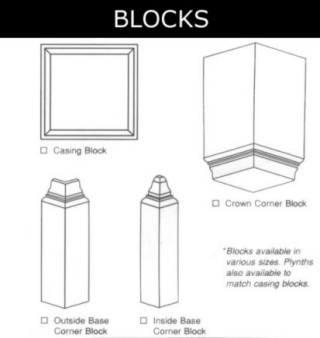
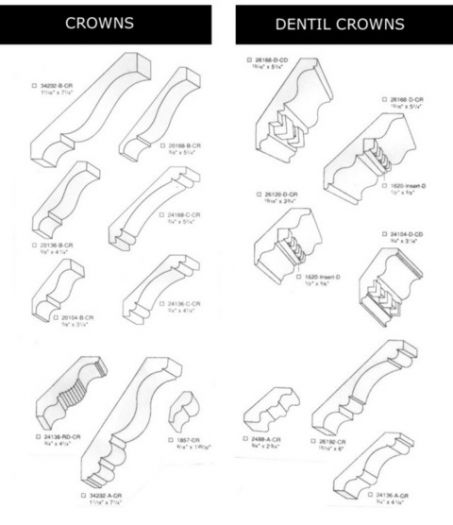
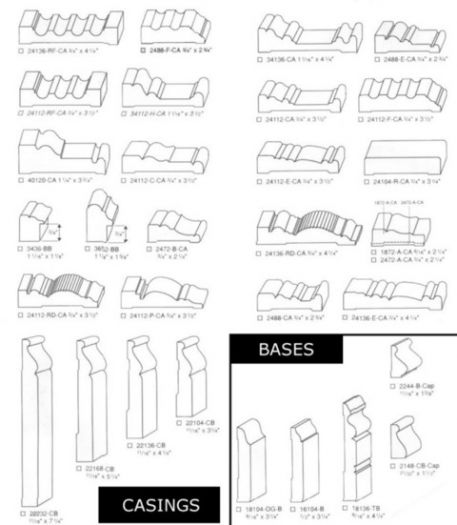
If you can put a pencil to paper and draw curved lines, you can create a profile for woodwork. This is difficult for many people as they have a tough time visualizing what a two-dimensional drawing looks like in three dimensions as a finished piece of trim lumber.

One suggestion is to visit older homes that are for sale in your town or city. Often Realtors hold open houses. Go to these events and drool over the woodwork. Ask if you can take some photos. Who knows, you may find a home you like. Why buy just trim when you can get the finished product already installed. Can you tell I am a licensed real estate broker? Well, I am - I have been licensed in Ohio as a broker since 1986 or so.

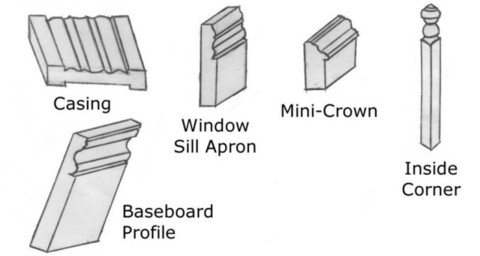
The 3D profiles immediately below this paragraph were drawn by my daughter Meghan. They are scaled down versions of the interior window and door casing in my house, my baseboard, a miniature crown molding that goes on top of a flat head molding that fits on top of the side casings, a window sill apron, and a fancy inside corner piece that eliminates the need to miter corners. A similar outside piece goes at all of the outside corners as well, but it wraps around the corner.

All of the other profiles shown are courtesy of:

Koetter Woodworking, Inc.
Borden, Indiana 47106

www.koetterwoodworking.com
812-923-8875


Column B305

Cobblestone Edging Video

People recycle cans, paper and plastic bottles, but how about recycling building materials. Cobblestones that were used on streets 100 years ago can be recycled and used in your yard. Tim shows some granite cobblestones that are extremely durable. These recycled pavers will hold up to any weather conditions.

One great home improvement project for cobblestones is making a border around your garden or flower bed. Simply lay the blocks on the ground outlining your selected area. This way you can see more of the cobblestones' beauty.

Dig a trench along the driveway and place the cobblestones to created a driveway edging. Recycling Mother's Natures building materials is a great use of natural resources.