DEAR TIM: I've decided to install new ceramic tile in my bathroom. I'll be doing the floors and the walls. Should I do the floors first and then the walls? What tools do I need? How do you start a wall tile job? Do you have any nifty design suggestions? Jaclyn E., Sherman Oaks, CA
DEAR JACLYN: You've selected one of my favorite jobs - ceramic tile.
Fun & A Challenge
I find it to be fun and challenging. It requires preplanning, patience, and plenty of time.
The layout, cutting, and fitting of tiles will make or break the appearance of your tile installation. If you assemble the necessary and affordable tools, you can complete this job to your satisfaction and the amazement of your friends and neighbors.
Full Tile Tool List
Here's a list of tools that I've used for years to successfully install thousands of square feet of ceramic tile.
- tape measure
- pencil
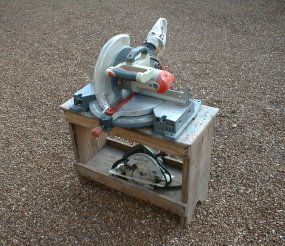
- tile cutter
- nippers
- 1/4 by 1/4 inch v-notched trowel
- a hammer
- some 6d finish nails
- 8 lineal feet of straight 1/4 inch wood lattice strip
- putty knife
- 3-inch wide-bladed scraper
- grout sponge
- rubber grout float
- several buckets
- accurate 4 foot level
Click the image below to BUY all, or some, of the tools in the above list.

CLICK THIS IMAGE NOW TO ORDER ALL THE TOOLS YOU NEED TO DO CERAMIC TILE.
Plumb & Level
Your tile installation is going to look superb if the carpenters who framed the walls and floors installed them plumb and level. High-quality ceramic tile is often manufactured to extremely tight tolerances.
Each piece of wall tile is basically an exact copy of the one before. If a wall or corner is out of plumb then each row of tile will get smaller or larger than the one below. If you have the ability to correct framing defects, do so before you add the waterproof backerboard.
CLICK HERE to get FREE & FAST BIDS from local ceramic tile contractors.
Walls First
I like to install most of my wall tile first. Installing floor tile early in the job makes it susceptible to scratches, chips or other damage as you work on the wall tile above.
Accidents happen and you don't want to do superb work only to have it damaged by working on top of it.
Sanitary Base
You begin the wall tile installation by selecting your base tile. Many wall tiles come with an accessory piece called sanitary base.
The bottom of this tile resembles - to a degree - wood toe strip that you might see on wood baseboards.
Some base tiles are meant to sit on the floor substrate and the floor tile butt into them. Other base tile are designed to sit on top of the finished floor tile.
Calculate Heights
This extra relief built into the tile provides a great finishing touch. The height of this base tile, the thickness of the floor tile, and your first row of wall "adjustment" tile need to be calculated before you begin to install your first piece of tile.
Level Is A Must
Most floors are not level. Ceramic wall tile must be installed perfectly level.
The sanitary base tile may rest on top of the floor tile producing a professional look. If the floor is out of level then wall tile stacked directly on top of the base tile will be out of level.
Adjustment Row
You correct this problem by installing the second row of wall tile above the base tile as your first full sized row. The row of tile between the base tile and the second row is your "adjustment" row. This row is generally only two thirds the height of a standard tile. This usually gives you plenty of room to adjust as the floor rises and falls.
Lattice Ledge
When you start to do a wall, always start at the middle and work both ways. I like to nail a one-quarter-inch-thick piece of lattice molding to the wall. It creates a small ledge my first row of tile rests upon.
This simple support strip prevents the first row of tile from succumbing to the forces of gravity while the adhesive dries. After several hours you can remove this piece of wood.
CLICK HERE to get FREE & FAST BIDS from local ceramic tile contractors.
Spacing Lugs
If your tile has tiny little lugs or spacing bumps on each edge of the tile be sure you push the tiles firmly against one another. The spacing lugs are very normal for most wall tile and you rarely see them for floor tile. Small plastic crosses or plastic discs are often used to create uniform grout lines for floor tile.
Fifteen Minutes
Only spread as much adhesive as you can cover with tile in 15 minutes. Don't worry if the horizontal and vertical cracks between the tile seem a little off.
When the tile is grouted these imperfections disappear.
Once you've installed all of the wall tile above the wood strip on all walls you can then install the floor tile. I say this assuming you're going to use a sanitary base tile that rests on top of the floor tile.
Grout Walls
If there's lots of wall tile, I'd go ahead and grout it before installing the floor tile. Don't allow grout to get under the lower edge of the first row of tile. It will mess you up when you install the adjustment row.
Floor Then Back To The Walls
Once the wall tile is completed and grouted you then can move ahead with the floor tile installation.
After you have that complete and grouted, the last step is to come back and install the sanitary base tile and finally the "adjustment" row of wall tile.
Accent Tiles & Accessories
You can purchase accent tiles that are very attractive. These tiles come in different sizes or sometimes match exactly the size of the tile you are working with.
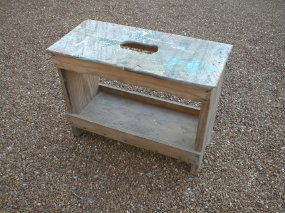
Consider using marble corner shelves in your shower for shampoo and other items. These same shelves work great near a toilet for plants or other decorative items. Use a white colored inexpensive marble that goes with just about any tile color. The marble company will cut these shelves for you with a special diamond wet saw.
Now, thanks to new materials and techniques, it's easier for anyone to get professional-looking results every time. Master tilesetter Michael Byrne's fully updated book explains everything anyone needs to know about tiling in an easy-to-read format.
Setting Tile delivers all the basics tilesetters rely on - plus all the fresh ideas and innovative methods they need to do the job right. This book demonstrates floor, wall, countertop and bathroom tile installation techniques.
It covers the many types of tile--including natural stone, explains tools, setting materials, preparation and layout. The traditional mortar-bed method is still covered, but easy-to-use backerboard and waterproofing membranes now get special attention. Michael did a great job in this book.
Related Articles: Ceramic Wall Tile Tips, Cutting Ceramic Tile
CLICK HERE to get FREE & FAST BIDS from local ceramic tile contractors.
Column 226