November 27, 2011 AsktheBuilder Newsletter And Tips

What's in This Newsletter?

Latest News
Need Help - Old Floor Joist
Wet-Dry Vacuum Trick
Meghan's Gift Guide
Replacing a Window With a French Door
Facebook News

The race is on now that Thanksgiving here in the USA is behind us. It's now less than a month until Christmas. Yesterday I put up some of our outdoor Christmas lights, battling the burned out LED bulbs. Each year I have visions of me starting a company that makes high-quality strands of outdoor lights that work each time you plug them in. But I digress.

My Christmas Gift Guide has now been out a little over two weeks. Thousands of copies have been viewed and downloaded. I thank you for that if you've done so.

But I wanted to just let you know that you using my Gift Guide really helps me. Your support by using the Gift Guide to shop at Amazon.com allows me to continue to offer the thousands of columns and hundreds of videos at AsktheBuilder.com and this newsletter at no cost.

I'm trying my best to expand AsktheBuilder.com in an effort to give you more of what you want and need. I know you need hundreds more videos. I know you need many new tool and product reviews. I know you need more answers, as I get your emails each day.

But to do all that work requires more resources. You can help by just downloading my Christmas Gift Guide and using it to shop. Simply add items to your shopping cart and check out days or a week from now. Thanks very much!


Need Help - Old Floor Joist

I was having a discussion the other day with my kids about how the framing lumber used today is so much different than that used 125 years ago.

The discussion centered around the second house my wife and I owned. I added a full bathroom in a tiny room next to the master bedroom. Part of the job required me to cut off the tail end of a floor joist revealing the growth rings of the tree.

I want to tape a video of this, but that end cut is long gone. Are you a remodeler, know one, married to one, related to one, etc.?

If you come across an old floor joist in a building built just before 1900 or so, can you cut off a 6-inch long piece and send it to me?

Reply back to this email if you can help.  I'll absolutely credit you in the video.

When you see this video and discover what's in it, you'll not believe your eyes.


Wet-Dry Vacuum Trick

There are hundreds of things you can clean using a wet-dry vacuum.  I'm sure you can add to it.

But my good friend Bob from New York sent me an email a week ago telling me how his vacuum saved an expensive call to a plumber.

"I did something that worked unexpectedly and thought I would share it with you.

At home or at a rental unit when I am tackling a clogged drain or just doing preventive maintenance on a drain, I usually use one of those "Zip-it" plastic things first.  They work very well and you don't end up having to use chemicals.

The drain in our home bathtub has been sluggish and the Zip-it did not make things better.

This tub is the one our guests use and with all the exchange students staying with us over the years there must have been a lot of long hair building up in there.

Yesterday, I was using a shop vac to clean up around the fireplace and then gobble up dog hair under furniture.  As I was headed back towards the garage to put it away, I got the idea to put the hose on the bathtub drain.

It was absolutely amazing how much hair got pulled up to the back of the drain guard by the vacuum cleaner.  There was also some septic vapor that came back and I made sure to flush the toilet and run the water in the tub and sinks on the same line so that the traps would be full of water again.

So ... I just wanted to share that story with you. I can't imagine that I'm the first person to do this, but I never heard of trying this before.  Obviously you should not do this if chemicals have been used recently."

Meghan's Gift Guide

Meghan's Gift GuideAre you in need of gift ideas that are not tool related? If so, I believe you'll love my daughter Meghan's gift guide.

It's got 300 suggestions that will fit everyone's budget. This guide has gifts for people of all ages.

It's going to WOW you when you visit it. There's no need to download it, as you can just view it at her website as if you were flipping through a catalog. Once you're there, just click the "Expand" button to make it work.

Click here to get access to this FREE Holiday Gift Guide.


Replacing a Window With a French Door

Susan C. from York, PA wrote:

"I'm having a window at my home taken out of the front room and replaced with a french door. The size of the opening will not change. Do I need additional support because of the lower wall that's being removed to make way for the door?"

Susan, great news for you! Nothing has to change structurally. The lower wall below the window is not involved with carrying the load of the structure above the current window.

Don't forget to watch my video about installing flashing for an exterior door.


Facebook News!

AsktheBuilder on FacebookDo you use Facebook? I've got a Facebook Fan Page that really sees some action during the week.

We have lots of fun there each week. Go look for yourself..

Please go there now and LIKE me so you can start to get FREE tips from me when you login to your Facebook page.

Wallpaper Tips and Tricks

DEAR TIM: My wife wants me to wallpaper a room. I've never done wallpapering before. I'm really worried that I'm going to mess it up. Can you give me the executive summary on some of the most important things to know before I start this intimidating job?

Is it possible to get professional results the first time out of the gate? What are the biggest mistakes you can make? Brad T., Richmond, VA

DEAR BRAD: First, I believe you can get excellent results even though you're a rookie. It's absolutely impossible in this tiny space for me to impart all the knowledge I've gained over the years hanging hundreds and hundreds of rolls of wallpaper. But I believe I can give you some tips that will help you succeed.

 wallpaper light fixture

The light fixture was taken off the wall before the wallpaper was installed. Don't try to cut around things like this. ©2017 Tim Carter

The first thing you need to do is prepare the room for wallpaper. This means the ceiling needs to be painted, all cracks between woodwork and walls need to be caulked, the walls need to be sealed with a special wallpaper primer, and the woodwork needs to be painted.

The actual wallpaper is the last thing that happens in a room that's being redecorated.

The special wallpaper primer is mission critical. It seals the wall surface so the wallpaper glue does not penetrate through to the drywall paper.

CLICK HERE to get FREE & FAST BIDS from local wallpaper hangers in case you're getting cold feet.

This primer will be an enormous help to you as a rookie. It allows the paper to be re-positioned fairly easily after it contacts the wall in case you need to slide the paper slightly. Don't skip this special primer.

I would recommend using a pre-pasted wallpaper your first time out. To activate the paste, use a premixed clear activator. Don't soak the paper in a tray of water to activate the paste.

If you soak too long, you'll dilute the paste. The activators ensure you never dilute the paste. Apply the activator with a new paint roller cover. It's easy.

Once the activator is applied to the back of the paper, fold the paper onto itself so the glued surfaces are touching one another. Wait ten minutes before you try to hang it.

You may panic thinking you'll not be able to peel it apart. Don't worry, it will come apart in ten minutes. This is a mission-critical step that allows the paper to expand and relax.

If you don't do this and apply the paper immediately after you activate the glue, you'll get bubbles in the paper.

The first strip of paper needs to be perfectly plumb. I always try to start the first piece immediately adjacent to the least visible corner of the room.

Be sure one edge of the paper wraps around the corner no more than 1/4 inch. You want to start in this obscure corner of the room because this is where you'll end the job and the odds of a perfect pattern match here are 1 in a million.

Just A Few Tools

Let's get started with the tools. Fortunately, you don't need many tools to wallpaper.

Here's a list that will get you going on this job:

  • retractable razor knife with snap-off blades
  • 4.5 or 6-inch drywall taping knife
  • smoothing brush or plastic smoother
  • 4-foot level
  • grout sponge
  • measuring tape
  • paint roller & pan
  • paint brush

Click the Image Below to get all, or some, of the tools now:

Wallpaper Tools List

CLICK HERE to get all the tools I recommend in one place. It's easy and fast.

Draw a very fine plumb pencil line 1/8 inch away from the other edge of where the paper will be on the wall. I never hang the paper on a pencil line as it can show through the seam where two pieces of paper meet. Just keep the paper the same distance away from the line and it will be plumb.

Use a 6-inch wide flexible drywall taping knife to help you trim the paper at the ceiling and where it touches woodwork. If the knife is new, take a metal file and round off the sharp edges of the tool. Failure to do this will cause the paper to tear if you slide the blade along the paper.

Before you hang a piece of paper, use the blade to scrape off any tiny bumps on the wall. These nibs will show through wallpaper and look like tiny pimples.

CLICK HERE to get FREE & FAST BIDS from local wallpaper hangers in case you're getting cold feet.

Don't stretch the paper as you hang it. As you hang the subsequent pieces and are matching at the seams, start applying the paper at the seam and smooth the paper out sideways and up and down.

Don't trap air bubbles in the paper as you install it. Use a special brush or plastic smoothing tool to smooth the paper. But don't press so hard you squeeze out the liquid paste at the edges!

Be sure to take off all electrical cover plates, wall sconces, anything that you can easily remove from the wall that you have to cut around. This is how professionals get great results. Be very careful trimming paper around live electrical outlets and switches.

Your razor knife can short out against live wires and screws. You can hurt yourself, ruin the paper or start a fire!

To get pro results at all inside corners, you have to only have about 1/4 inch of paper wrap into and around the corner.

This means you have to make a long vertical cut after the paper wraps around the corner and then you overlay the cut piece on the tiny sliver that wrapped around the corner. Be sure to re-plumb this new thin starter strip so all subsequent pieces on that wall face are plumb.

I urge you to somehow practice hanging paper in a very small room or closet first to see how it all works. You'll never regret doing this practice exercise. You need to get comfortable using the tools and seeing how to control the paper on the wall.

CLICK HERE to get FREE & FAST BIDS from local wallpaper hangers in case you're getting cold feet.

Column 910

November 15, 2011 AsktheBuilder Newsletter And Tips

What's in This Newsletter?

Latest News
Loctite Power Grab Adhesive
Replacing Copper Drain Lines
Christmas Gift Guide
Drywall Plug Video
Tiny Titan Water Heater Video
Facebook News

Can you believe that Thanksgiving here in the USA is next week? Wow! It's my favorite meal of the year and Kathy's pumpkin pie is to die for. So is her pecan pie.There's lots to be thankful for this year as I've totally recovered from my spring shingles episode, and everyone else in the family is healthy. Health is really the most important thing, wouldn't you agree?

This past weekend, I was with some of my friends and my youngest daughter shooting guns - all types of guns. I own a piece of land here in New Hampshire where I'm able to shoot.

Several of my friends had never really shot long guns and a handgun. We were fortunate to have in our midst a former police officer who was responsible for all the gun training at his department, so safety was the word of the day. He did a great job of showing all how to respect and use guns.

Everyone loved my Remington 700 .308 rifle. I felt sorry for the empty dog food cans that sacrificed themselves. .

The second day we were at an indoor range shooting four different machine guns. When you see one used in the movies, it's not like that in real life. Quick bursts produce great accuracy.


Loctite Power Grab Clear Adhesive

Locitie Power Grab
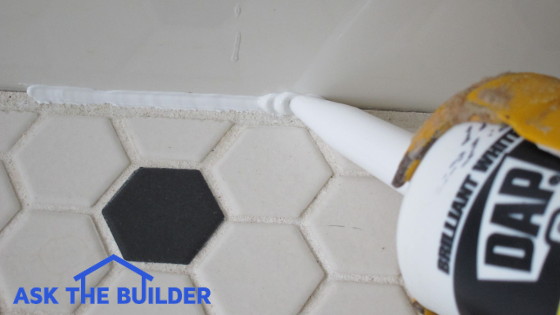
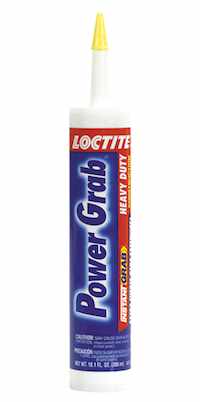
Have you ever wondered if those adhesives that are sold in caulk tubes really work? Did you know there's a clear adhesive you can now get?

I decided to see for myself if the new Loctite Power Grab exterior and interior clear adhesive really does what it says on the label.

I tried it on wood and drywall. They say you can use this for both exterior and interior projects.

You clean up with soap and water, so that's a huge benefit.

I don't have the greatest nose in the world, but I didn't smell any odors like I do with some other adhesives.

It works on all types of surfaces around your home, so this could be a great adhesive for you

The results are in! Please go watch the video and see what I discovered.


Replacing Copper Drain Lines with PVC?

Phil from Cherry Hill, NJ wrote to me asking:

"I'm in the process of gutting my entire kitchen, den and dining room and opening everything up. I have all the walls, ceilings, etc. down to the studs and joists.

My entire house (built in the 60s) has copper drain pipes, 1 1/4 to 4 inch, for the vent pipes going through the roof.
   
A vast majority of the piping is accessible via the ceiling in the kitchen. Does it make fiscal sense to rip all the copper out, recycle it for $$$, and replace it with PVC?
   
If i can make money on the deal the one day investment of time might be worth it, not to mention peace of mind in updating 50-year old pipe within my walls and ceilings. What do you think?"

Phil, I'll tell you what I think. Many people would die to have copper drain and vent lines! I'm a master plumber and copper is the dream piping material. It can last for centuries, is easy to repair, and is MUCH quieter than PVC drain piping.

I would never replace it. What's more, I'm willing to bet that you'll spend more on the new PVC than what you'll get as scrap value for the copper. It's easy to determine this. Just find out what a piece of the drain pipe weighs per foot - do this online - and see what new PVC costs per foot.

The fittings are where you'll see the biggest difference. They are usually wrought copper and are not as valuable as the pure copper drain piping. I'd be stunned to discover you can get more in scrap for the wrought copper than what a new same-sized PVC fitting costs you retail.


Christmas Gift Guide - WOW!

2011 Christmas Gift GuideI announced my new Christmas Gift Guide last week. It looks like it's a huge hit.

If you're looking for stocking stuffers, power tools, or that really special gift for the DIYr that *thinks* they have everything, well my guide is just the ticket.

The Gift Guide is FREE and I'd appreciate it if you would mention it to as many friends, co-workers, relatives , etc. as you can!

Clicking the links in the gift guide helps me a great deal. I'm able to  provide you with this free newsletter, free columns and videos at the website because of the small amount of revenue I get when you purchase something.

If you want AsktheBuilder.com to grow and thrive, please use the Gift Guide and do other Christmas shopping at Amazon while you're at it. Thanks in advance!


Drywall Plug Video

I promised you I'd tape a video about how to make your own drywall plug. I taped it yesterday.

This video does not show installing it. That's another video for another day. But all you have to do is just blow the dust of the edges of the plug and the square hole in the wall.

You then butter the edges of the plug as if you were putting icing on a cake. Then you spread joint compound on the drywall around the hole.

When you press the plug in place the buttered compound fills the gap between the hole and the plug creating a fantastic solid patch.

You just finish the patch as you would any similar tape job. I have two or three other videos at my site that show you how to do this. Just type:  drywall video    into my search engine to see all of them.

Watch the Drywall Plug video now.


Tiny Titan Water Heater

Last week I also taped a video about a great product. It's the Tiny Titan water heater.

This is a compact water heater where you just need a small amount of hot water. Wait till you see how compact this heater is!

Watch the Tiny Titan Water Heater video now.


Facebook News!

AsktheBuilder on FacebookDo you use Facebook? I've got a Facebook Fan Page that really sees some action during the week.

We have lots of fun there each week. Go look for yourself..

Please go there now and LIKE me so you can start to get FREE tips from me when you login to your Facebook page.

Drywall Plug Video

Hi, I’m Tim Carter and today I want to show you how to make a drywall plug. In this example, you can see a hole in a piece of drywall. This hole was created with a hammer. Now the question is how are you going to patch this hole?

You can purchase a drywall plug. That is a piece of drywall cut in a circle with a larger diameter paper facing. These require that you cut a round hole to fit the back of the plug. But some people find it easier to cut a square hole. And if you have a scrap piece of drywall, you can make your own plug.

In this example, I am cutting a square hole around the damaged area about 3-inches square. Before cutting the hole, I marked it with a pencil and made sure that I cut on the outside of the line. This will make the hole in the drywall slightly larger then 3" x 3".

You will need about 1-1/2" of paper around the hole on all sides. Again in this example, you will need a piece of drywall 6" x 6" to make the plug. Draw the 3" x 3" square hole outline in the center of the drywall piece. The areas around that marked area are sections where the drywall will be removed, leaving only the paper behind.

When getting ready to remove the drywall, score the back of the plug on the inside of the 3" x 3" marked area. This means that the plug size will be slightly smaller then the hole that was cut in the drywall itself. This will allow the plug to fit inside the damage wall to be repaired.

Once you have scored the lines, making sure you are marking and scoring on the back side of your plug, snap and bend along those score lines. Then gently peal the drywall core off the paper. We need to save the paper. After pealing, you will have a drywall plug with a 3" x 3" center and 6" x 6" paper size.

Now slide this plug into your damaged wall, and use tape compound to hold the paper down just like you would on any drywall tape. It’s just that simple to make and patch that hole in your drywall.

Tiny Titan Water Heater Video

Tiny Titan Water Heater Checklist

  • easy to install
  • 2.5-gallon capacity
  • electric power
  • compact

Hi, I’m Tim Carter and I am here with Tom Fairbrother of Lakeside Plumbing in Meredith, NH. We are going to install this fantastic, point of use, Tiny Titan Water Heater. It is electric and just plugs in and is really easy to install.

Is the Tiny Titan Water Heater Easy to Install?

The heater is easy to install. It comes with a handy mounting bracket and screws. You just put it on the wall, level it and tighten down the screws. The mounting bracket acts as a French cleat and the water heater just sits down onto the bracket and gravity holds it in place.

What are The Installation Steps?

Now, all that needs to be done is install the cold water supply line and the hot water outlet line. These connections at the heater are standard 1/2-inch iron pipe nipple connections.

Do You Need Female Adapters?

You will need to sweat on a half-inch female adapter on to a piece of copper pipe. That is what Tom has just finished doing.

This one is still extremely hot. You need to solder these on first so you don’t put any unnecessary heat near the top of the water heater.

How Big is the Tiny Titan Water Heater?

This Tiny Titan Compact Water Heater is 2-1/2 gallons. Installation was simple, a wall bracket, cold water supply line, hot water outlet line and an electrical outlet.

Does It Come with a Factory-Installed P&T Valve?

This comes with a temperature - pressure release valve preinstalled from the factory. All you need to do is run a 3/4" copper line from the valve down to the ground, leaving an air gap at the bottom of the line. This line is in case of a pressure malfunction in the water heater, the water comes out of this pipe.

Does the Heater Have an On/Off Switch?

One quick thing - this model has a thermostat with an off switch. You will notice that it is plugged it. But you never want to plug in this water heater until after the water lines are connected and it has water inside the heater.

Since this is an electric water heater and you make a mistake and plug it in before it has water in it and if the thermostat is on, the elements will instantly burn up. So never plug it in until after it has water in it, all the air is out of the system and there are no leaks. Then you can plug it in.

The Tiny Titan Water Heaters are great if you have a need for just a small amount of hot water.

Tub Caulk Tips

tub caulk

The contact point between the tub and floor tile in the bathroom is but one place you need to caulk when sealing a tub correctly. PHOTO CREDIT: Tim Carter

DEAR TIM: The caulk around my tub is pretty gross. It’s missing in places where the ceramic tile meets the tub. What’s an easy way to remove old caulk? What are the secret tips to caulking a tub? What kind of caulk should I use? Where should I caulk? What are the biggest mistakes a person makes when recaulking a tub? Lafawnduh S., Boise, ID

DEAR LAFAWNDUH: Leaks around tubs can often be traced to bad caulk jobs or missing caulk. The trouble is, many people are unaware how to properly caulk tubs. While it’s not hard to do, don’t be fooled by many of those TV shows and smiling personalities that promise you it’s so easy to do! There is some skill involved, and indeed you need to know a few secrets.

Let’s start with removing the old caulk. Using a razor knife, you should try to cut away as much of the hardened caulk as possible. The flat razor scrapers that are used by painters to remove paint from glass work pretty well for this job. Just take your time and slide the blade between the caulk and the surfaces it touches.

Make repeated light strokes with the razor knife, not one cut stroke using lots of force. If the knife slips, you can damage yourself quickly or something in the room. You want the tool under control at all times.

If the caulk is too hard to cut, it can be softened with liquid caulk removers. These work best if you soak narrow strips of paper towels in the solvent and lay them on the caulk. Then immediately cover the paper towels and caulk with a wide piece of blue painter’s tape so the solvent doesn’t evaporate. Come back the next day and the caulk should be easy to remove.

Once the old caulk is gone, then it’s time to clean the tile and tub and dry it. Use small amounts of water and the cleaner of your choice to remove any traces of dirt, soap film, grease, etc. from the tile and the tub. Use white vinegar to remove hard water deposits. All surfaces that are going to receive caulk need to be clean and dry.

Here’s one of the secrets. In some situations, water can get behind the tile and tub and soak the substrate. If this happens, it will be virtually impossible to get the new caulk to dry and cure. The water behind the wall will keep the new caulk in a semi-liquid state and when you next use the shower or tub, the caulk will wash out. I’ve seen this happen.

You can use a fan, a hair dryer, or some other blower to get the crack between the tub and the tile to dry. If left to dry without these aids, it can take a week or more! This means you’ll need to have another location to bathe and shower.

The places that need caulk are the joints where the tub and tile meet up with one another, and where the tile abuts faucets, spigots, shower arm pipes, floor tile, etc. Think about where water splashes and where you might see it outside the tub after you use it.

All these places need to be sealed so water can’t flow or seep behind walls, under floor tile or migrate to where it can cause mold and wood rot.

I like to use water-based caulks that are labeled for tub and shower use. There are general-purpose caulks, but they don’t seem to be formulated for the high-moisture environment you have in a regular home shower and tub area.

The biggest mistakes you can make while caulking a tub are failure to have the surfaces clean and dry. Remember, caulk is basically just glue. It’s sticky. It adheres to things, but if the surface is not clean, it will not bond well.

Failure to tool the caulk so it’s feathered out well at the edges is another big mistake. The caulk joint needs to be smooth. Avoid smears on the surfaces. Caulk must needs to look professional. This end result comes with practice. I suggest you actually set up two scrap pieces of ceramic tile at a 90-degree angle and practice.

Watch the video I have at my website that shows you how to tool caulk. Type: Caulking Video into the search engine at www.AsktheBuilder.com to find it quickly.

It also helps to have a fantastic caulk gun. All too often, I see homeowners use cheap inexpensive caulk guns. They squeeze the handle and the caulk blasts out of the caulk tube making a huge mess.

I’ve used for years a professional caulk gun that has a 26:1 mechanical advantage lever. I just have to gently squeeze the handle and a precise amount of caulk flows evenly from the tube. You’ll be stunned how much difference it makes in the finished product when you use a great caulk gun.

Column 909

Gift Guide


Gift Guide

I've assembled a boat load of gift ideas for you. I discovered long ago that quality tools help ensure a great job and they can last for generations.

That's what you'll discover in this Gift Guide - quality tools, many I own and use on a regular basis. If one of my gift suggestions is of interest to you, simply CLICK the blue amazon word at each listing to be taken directly to that gift. You’ll be able to see re-views, get technical specs and much more!

The gift guide is broken down into the following web pages, or you can download it in PDF format by clicking here or on the image at the top of the page.

Smaller Tools Cordless Drills Cordless Circular Saws For the DIYer with Everything

The links in the Guide take you to Amazon.com where I do lots of shopping. I trust Amazon and so should you. If you do purchase from them, I get a very small commission. That helps me continue to offer to you all the free content and videos you see at AsktheBuilder.com.

Thanks for your support!

Tim Carter

AsktheBuilder Logo

November 8, 2011 AsktheBuilder Newsletter And Tips

What's in This Newsletter?

Latest News
Christmas Gift Guide
Quick Window Cleaning Tips
Smudgy Granite Countertops
FAQ About Floor Grout Sealers
Facebook News

We're experiencing some magnificent Indian Summer weather right now here in New Hampshire. I'm going outdoors in about an hour for the rest of the day. It's sunny and a crazy 61 F as I type this. It could get to 64 F possibly. It feels like a spring day.

About 90 minutes ago, I was up the street taping a video featuring a Tiny Titan compact electric water heater. These are great devices if you need just a small amount of hot water. I'll be editing that video in the next few days and hope to have it for you very soon. It's so easy to install, you can't believe it. I mean caveman simple.

Christmas Gift Guide!

AsktheBuilder Christmas Gift Guide

Thanks to my wonderful daughter Meghan, my Christmas Gift Guide is ready for you. It contains suggestions for tools of all sorts and all budgets.

Many, if not all, of the tools in the guide I own and use. I could have put in hundreds more, but that would just be too overwhelming.

Be sure to download and open it. You'll love some of the captions I wrote.

When you click to see more about each tool, I take you to Amazon.com. You can not only do comparison shopping there for similar tools, but everything under the sun is also at Amazon.com.

I'd appreciate it if you would do some/all of your shopping at the same time you go there after you click. I do get a very small commission if you buy, and that helps keep the content and videos at AsktheBuilder.com free for you!

You can also help me by forwarding the link to my Gift Guide to all you know. Relatives, friends, co-workers, etc. might appreciate the suggestions.

Thanks for your support, I really, really appreciate it.


Quick Window Cleaning Tip for Holidays

Are you having company over for the holidays? Are you TIRED of smeared and foggy glass windows and doors?

Would you like it if I showed you how EASY it is to get glass crystal clear like pros do? You're not going to believe how easy it is.

Watch this Window Cleaning video of mine.

Please read this Window Cleaning column at my website.

The simple tools you need to clean windows can be found at most hardware stores or on Amazon.com. If you open my Gift Guide and click to look at tools, search for the window cleaning tools while you're at it and put them in your shopping cart right away. Order now so the tools get to you in plenty of time.


Smudgy Granite Countertops

Alica from Farmington, Minnesota wrote to me:

"Hi Tim, We have black granite countertops in our home but they are always smudgy looking. I feel like I'm wiping them down constantly with dish soap and water to get rid of somebody's hand prints. I also use granite wipes to clean them off. But, they always seem to look plain messy to me. Am I doing something wrong? I've never had granite before so I'm not sure if the "smudginess" is normal. Thank you!"

Alica, your question is excellent, and I believe you gave me the needed clue to unravel your mystery. First, granite should not appear smudged unless there's a film on it or people in the house have greasy hands.

Most liquid dish soaps contain vegetable or animal fats. Isn't that crazy, as you use these products to get rid of oils from cooking and food preparation.

I believe the problem you're having is that there may be a slight film of soap left from when you clean.

Here's how to test if I'm right. Mix up some of the liquid soap and water as if you were going to wash dishes. Make sure the water is warm or hot.

Take a new dishrag and soak it in the solution. Wring it out and wipe down HALF of a smudged countertop. Really clean it.

Take a new dry dishrag and get it wet with clear water. Wipe down the part of the top you just cleaned. Rinse it three times. Rinse out the rag each time with clear water to ensure there is absolutely no soap residue on the granite.

Immediately take a clean bath towel or other soft cotton CLEAN rag and dry and buff the granite. It should look shiny, clean and be smudge free.

If not, there's some other product on the granite, perhaps too much sealer?

Please let me know how this works. I'm willing to bet the part you clean and dry will look spectacular.


FAQ About Floor Grout Sealers

Thanksgiving, Christmas and New Years are just around the corner. I'm sure there's going to be an accident at your home with some food or drink. Read this to be prepared and to lower the stress around your home.

If I had a quarter for every time I was asked, "Should I seal the floor tile grout that was just installed?", I'd be able to fill lots of those orange coin wrappers!

Grout sealers are a wonderful product, but as with most products, there's often an unintended consequence when you use it.

In the case of grout sealers, they interfere with cleaners that try to deep clean stains that get behind and under sealed grout.

But you say, "Tim, the sealer STOPS the red wine, cranberry juice or grape juice from getting to the grout!"

"But what about where the grout ends and the tile stops? You know, that interface where there is a very tiny crack," I retort.

When the red wine, grease, grape juice, chocolate sauce, kid's spilled juice box gets UNDER the sealer and into the grout, what then? Let me tell you, it can be VERY hard to clean the stain.

This is why I'll NEVER seal my floor grout. I want to be able to easily clean it. I don't want a sealer in my way when I try to clean.

Watch the video at this page in my shopping cart to see how easy it is to clean grout that's NOT been sealed. The same product works for carpet, heirloom table clothes, upholstery, etc.


Facebook News!

AsktheBuilder on FacebookDo you use Facebook? I've got a Facebook Fan Page that really sees some action during the week.

There's LOTS of tips there that never make it into this newsletter.

Please go there now and LIKE me so you can start to get FREE tips from me when you login to your Facebook page.

Drainage System Tips

DEAR TIM: I live on a slight grade and my yard is very wet when we get days of rain or after the snow melt in early spring. Do you think there’s a spring in my yard? Is there an affordable way to dry out my yard so it becomes something other than a mud pit?

Surely I’m not the only person with this dilemma. Can you explain why some yards are well drained and others are not? Susan E., Akron, OH

DEAR SUSAN: You’ve come to the right place for this advice. My college degree was in geology, and two of my favorite subjects were geomorphology and engineering geology. Suffice it to say, I know a little bit about land forms and what you can do to intercept and divert the flow of underground water. It’s absolutely possible you have a seasonal spring in your yard.

trench nearly 5 feet deep

This is a trench nearly 5 feet deep. The coarse gravel allows water flowing through the soil to fall rapidly to the bottom and flow into the drain pipe. PHOTO CREDIT: Tim Carter

Let’s first explore what’s happening in the ground. Think of soil as a giant sponge, and I mean giant. If you have a dry or slightly damp sponge sitting on a dry countertop and drip water into it, the water drop disappears into the sponge. If the sponge is really dry, the water would never make it to the countertop. It’s absorbed into the dry sponge matrix. The same thing happens in dry soil when it rains.

But when soil starts to get too much water, the weight of the water and gravity act to pull water through soil. Because this is happening below the surface, it’s invisible. Believe me, water is on the move through soil and it can happen for days or even months after a rain. This is what causes real springs to produce water 24 hours a day.

Some soils have a clay component or a dense hard clay deep in the soil sometimes called hardpan. Clay and hardpan block water from moving down deeper into soil. This is one reason it’s used to line pond bottoms and it’s a great raw material for pottery that holds liquids.

Add to this the fact that most soils have a vertical profile that changes the deeper you go into the soil. The very spongy top of the soil that you often call topsoil, is the part that really absorbs water. But below it, the soil becomes more dense and water can have a very hard time traveling through it if there’s lots of clay. In these cases, and those of hardpan, the water moving through the soil starts to travel sideways along the border between the topsoil and the denser zone. If the ground is sloped then the water moves sideways and downslope.

This is undoubtedly what’s happening in your yard. I happen to know the soil profile where you live as it was victimized by one or more continental glaciers that left layers of clay behind many feet thick.

To solve your problem, you need to use the same engineering technology that we’ve used for years to collect rainwater from roofs. You need a gutter and downspout solution, but inside your soil. You’re going to install a drainage trench in your yard that collects the subsurface water and transports it to the lowest part of your land where it would end up by default if you didn’t live there.

Think of it on a big scale. The slope of your land and that above your property is like a roof. Many thousands of gallons of water could be flowing downslope in the soil towards your property and you need to capture it just like a gutter collects rainwater. You do this with a simple trench that can be anywhere from 2 feet deep up to 8 feet or more.

The depth of the trench is a function of many things. The most important one is the elevation of the lowest spot on your property. Since you’ll rely on gravity to move the water, you need to make sure the water can flow by itself through the trench to the lowest part of your land.

This trench will have a perforated drain pipe in it and will be filled with clean washed stones or gravel that are the size of golf balls or slightly smaller, perhaps the size of a large glass marble.

The trench is dug so that it protects your yard, your basement, your crawlspace, etc. like a moat protects a castle. The trench may only need to be L or U-shaped so that one or both ends eventually daylight. This happens if you keep the bottom of the trench level or just with a slight slope and the ground falls away. Eventually, just like a cave or mine entrance on a hillside, the trench ends.

If you want to really make your yard dry, you should fill the trench up to nearly the top with the stone. This makes for a highly effective gutter in the ground.

The drainage system works because water finds it infinitely easier to flow down through the gravel than push its way through the soil. Water always wants to travel the path of least resistance.

The trench only needs to be a foot wide, and can often be just 6 inches wide to be wildly successful. If you need to use a digging machine, you may end up with a trench 16 or 24 inches wide. There is nothing wrong with this, it’s just that you’ll end up buying more gravel.

Column 908

Want a step-by-step procedure on installing a Linear French Drain? Tim's Linear French Drain Streaming Video shows you how to keep your basement and crawl spaces dry. CLICK HERE or on the image below to order Tim's Streaming Video.

Linear French Drain Streaming Video

Do your own DIY install of a Linear French Drain with Tim Carter's time-tested methods and materials! CLICK IMAGE TO ORDER NOW!